There used to be a tiny bakery tucked behind a used bookstore in Portland called The Gilded Pear that made an apple cider cake that changed how I thought about fall baking. When they closed their doors three years ago—a “retirement, not a failure,” the owner’s handwritten sign said—I honestly felt a little lost. That cake had gotten me through two moves, one breakup, and countless cozy Sundays. After seventeen tries—seventeen, let me tell you—I finally cracked the code. And you know what? This version might actually be better than the original.
The secret isn’t complicated, but it took me way too long to figure out. I kept trying to replicate that impossibly tender crumb and the way the brown butter glaze seeped into every nook and cranny. I’d stand in my kitchen, a fork in one hand and a notebook in the other, muttering to myself like a mad scientist. My neighbor, Dave, started knocking on my door every time he smelled brown butter heating up. “Is it ready yet?” he’d ask, and I’d have to shoo him away because, no, it was not ready. The cake was either too dense or too dry, and the glaze kept sliding right off like it had somewhere better to be.
Then, on a random Tuesday, it just clicked. I had reduced the cider a little longer than usual, I’d forgotten to set a timer for the brown butter (honestly, I was distracted by a phone call), and I let the cake cool in the pan for exactly twelve minutes instead of the ten I’d been doing. When I flipped it out and poured that glaze over the top, watching it pool and soak in like it was finally home—I knew. This was it. The texture was light but substantial, the apple flavor was concentrated and almost caramel-like, and that brown butter glaze? Pure magic.
Maybe you’ve been there—chasing a recipe from a place that no longer exists, trying to capture a taste that feels like a memory you can’t quite hold onto. That’s exactly why I’m sharing this today. This isn’t just another apple cake. It’s the one that made my dinner party guests go quiet for a full five seconds before someone said, “Okay, I need this recipe.” It’s the cake that gets requested for every fall gathering, the one I bring to Friendsgiving before anyone even asks. And now, it can be yours too.
Why You’ll Love This Recipe
Let’s be real for a second—there are a hundred apple cider cake recipes out there. But this one? This one is different. I’ve tested it for everything from casual Sunday brunches to full-blown holiday dinners, and it delivers every single time. Here’s why this recipe is the one you’ll come back to year after year:
- Made for a Crowd : This cake is built to impress. It’s sturdy enough to stack on a cake stand, moist enough to stay fresh for days, and impressive enough to be the centerpiece of your dessert table. Your guests will ask for seconds—and the recipe.
- Simple Ingredients, Complex Flavor : You don’t need a specialty grocery store for this one. Flour, sugar, eggs, butter, and apple cider—that’s it. But the way they come together? That’s the kind of alchemy that makes people think you spent hours in the kitchen.
- Perfect for Hosting : This cake is a host’s best friend. You can make it a day ahead (it actually gets better), it slices beautifully, and it pairs with almost anything—vanilla ice cream, whipped cream, a drizzle of extra glaze. It’s the kind of dessert that makes you look like a hero without the stress.
- Crowd-Pleaser Guaranteed : I’ve served this to kids, grandparents, picky eaters, and professional chefs. Every single person has loved it. The apple flavor is familiar but elevated, and the brown butter adds a nutty warmth that feels like a hug.
- Unbelievably Delicious : Honestly, the first time I made the final version, I stood at the counter and ate an entire slice with my hands. No fork, no plate, no shame. The texture is that good—tender, moist, with a slight crunch from the sugar on top. And the glaze? It’s the kind of thing you’ll want to put on everything.
What makes this recipe truly special is the technique. Most apple cider cakes use the cider as-is, but I reduce it first, concentrating the flavor into something almost syrupy. That little extra step is the difference between a good cake and a great one. Plus, the brown butter glaze isn’t just poured on—it’s brushed on while the cake is still warm, so every single bite gets that nutty, buttery goodness. It’s not complicated, but it’s intentional, and that makes all the difference.
This is the cake you make when you want to impress without the panic. The one that fills your kitchen with the smell of fall and your home with happy people. Trust me, you’re going to love it.
What Ingredients You Will Need
This recipe uses simple, wholesome ingredients that work together to create something truly special. Most of these are pantry staples, but a few key choices make all the difference. Here’s what you’ll need:
For the Cake
- 2 cups (240g) all-purpose flour — I prefer King Arthur Flour for consistent results, but any good brand works. Spoon and level your flour for the most accurate measurement.
- 1 teaspoon baking powder — Make sure it’s fresh. Old baking powder is the #1 reason cakes don’t rise properly.
- 1 teaspoon baking soda — This helps the cake stay tender and light.
- 1/2 teaspoon salt — Fine sea salt is best. It balances the sweetness and enhances the apple flavor.
- 2 teaspoons ground cinnamon — I use Saigon cinnamon for its warm, intense flavor. Regular cinnamon works too, but the Vietnamese variety is something special.
- 1/2 teaspoon ground nutmeg — Freshly grated if you have it. The difference is subtle but real.
- 1/4 teaspoon ground cloves — Just a pinch. Cloves are powerful, so don’t overdo it.
- 1 cup (2 sticks or 226g) unsalted butter, softened — Room temperature is crucial here. Cold butter won’t cream properly, and melted butter changes the texture entirely.
- 1 1/2 cups (300g) granulated sugar — Regular white sugar works best. I’ve tried brown sugar, and while it’s delicious, it makes the cake denser.
- 3 large eggs, room temperature — If you forget to take them out ahead of time, place them in a bowl of warm water for 5 minutes.
- 1 teaspoon vanilla extract — Pure vanilla, not imitation. It’s worth the splurge.
- 1 cup (240ml) apple cider, reduced to 1/2 cup (120ml) — This is the magic step. Use fresh, unfiltered apple cider if you can find it. The reduction concentrates the flavor into something almost caramel-like.
For the Brown Butter Glaze
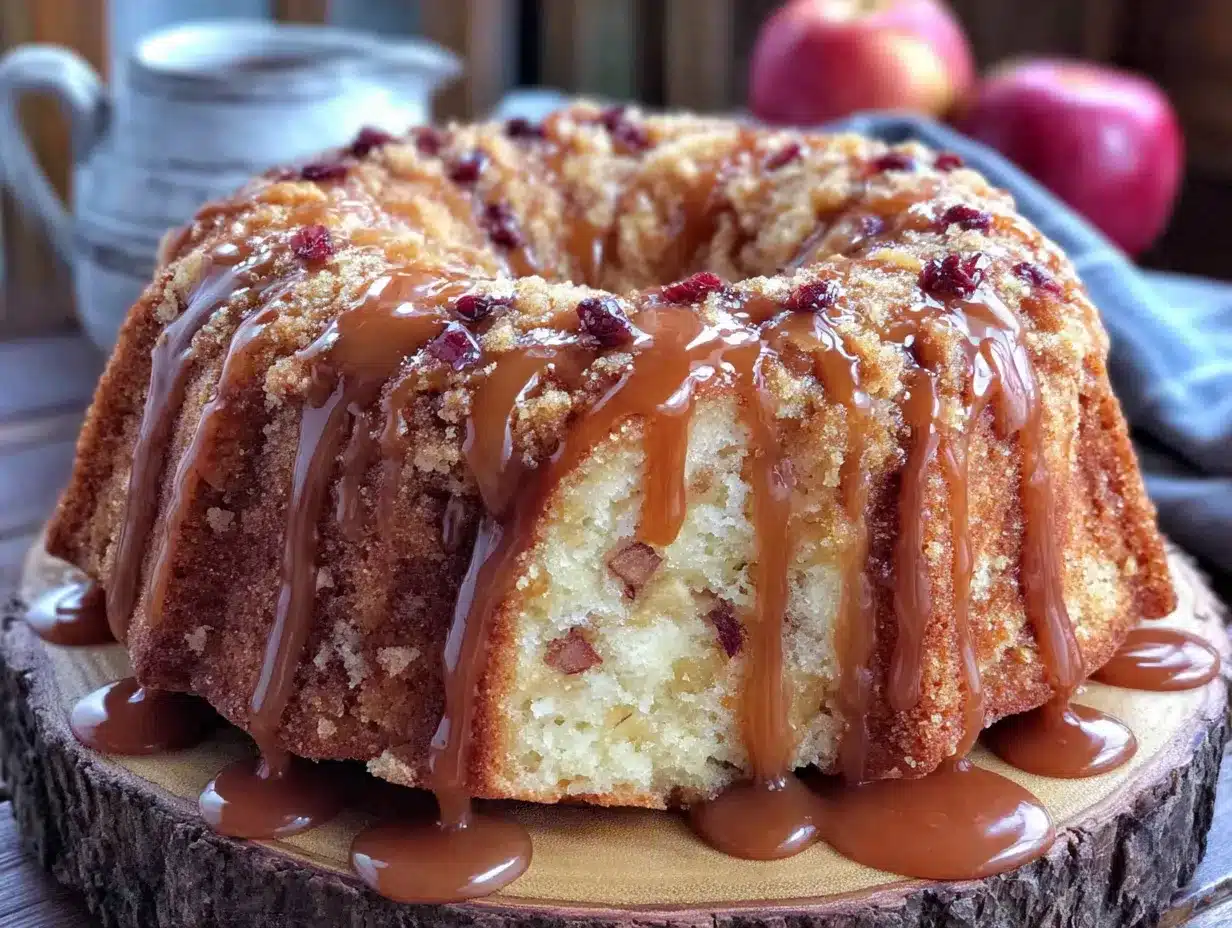
- 1/2 cup (1 stick or 113g) unsalted butter — Don’t use salted butter here. The salt content varies too much, and you want full control over the flavor.
- 2 cups (240g) powdered sugar, sifted — Sifting prevents lumps. Trust me, lumps in a glaze are not a good look.
- 3-4 tablespoons milk or heavy cream — Heavy cream makes a richer, thicker glaze. Milk works well if that’s what you have.
- 1 teaspoon vanilla extract — Again, pure vanilla is best.
- Pinch of salt — This balances the sweetness and brings out the nutty flavor of the brown butter.
Ingredient Selection Tips
When it comes to apple cider, look for the unfiltered, refrigerated kind—not the shelf-stable stuff. The flavor is brighter and more authentic. I usually buy mine from a local orchard or farmers’ market, but any good grocery store brand works. If you can’t find apple cider, you can substitute fresh apple juice, but the flavor will be milder. You might want to reduce it a little longer to concentrate the taste.
For the butter, I recommend using a high-quality European-style butter like Kerrygold. It has a higher fat content, which means richer flavor and a more tender crumb. But honestly, any unsalted butter will work—I’ve made this with store-brand butter and it was still fantastic.
Substitution Guidance
If you need a dairy-free option, you can substitute the butter with a high-quality vegan butter (like Miyoko’s) and use oat milk in the glaze. The texture will be slightly different, but still delicious. For a gluten-free version, use a 1:1 gluten-free flour blend. I’ve tested this with Bob’s Red Mill and it worked beautifully—just don’t overmix the batter.
Equipment Needed
You don’t need a fancy kitchen to make this cake, but a few key tools will make your life easier. Here’s what I recommend:
- 10-cup Bundt pan — This is my go-to for this recipe. The ridges create those beautiful, glaze-catching crevices that make every slice look stunning. If you don’t have a Bundt pan, a 9-inch tube pan works perfectly.
- Stand mixer or hand mixer — You can absolutely mix this by hand, but a mixer makes creaming the butter and sugar much easier. I use my KitchenAid for almost everything.
- Medium saucepan — You’ll need this for reducing the apple cider and browning the butter. A light-colored pan is ideal for browning butter so you can see the color change.
- Whisk — For combining the dry ingredients and smoothing out the glaze.
- Rubber spatula — For scraping down the sides of the bowl and folding in the dry ingredients.
- Cooling rack — Essential for even cooling. If you don’t have one, you can use the inverted pan, but a rack is better.
- Pastry brush — For brushing the glaze onto the warm cake. A silicone brush works best.
If you don’t have a Bundt pan, don’t worry. I’ve made this cake in a 9×13-inch baking dish, and it turned out great—just adjust the baking time to about 35-40 minutes. You can also use two 9-inch round pans for a layer cake. Just keep an eye on the doneness and test with a toothpick.
One tip I learned the hard way: always grease your Bundt pan thoroughly. I use a baking spray with flour (like Baker’s Joy), but you can also use butter and a dusting of flour. Make sure you get into every nook and cranny, or you’ll end up with half your cake stuck to the pan. Trust me, I’ve been there.
Preparation Method
Let’s get baking! This recipe has a few steps, but they’re all straightforward. Take your time, and you’ll be rewarded with the most incredible cake.
Step 1: Reduce the Apple Cider
Pour 1 cup of apple cider into a medium saucepan and bring it to a boil over medium-high heat. Once it’s boiling, reduce the heat to medium-low and let it simmer, stirring occasionally, until it’s reduced to 1/2 cup. This usually takes about 12-15 minutes. You’re looking for a syrupy consistency—it should coat the back of a spoon. Set it aside to cool while you prepare the rest.
Personal tip: Don’t walk away from the stove during this step. The cider can foam up and boil over if you’re not paying attention. I learned this the messy way.
Step 2: Preheat and Prepare the Pan
Preheat your oven to 350°F (175°C). Grease your Bundt pan thoroughly with baking spray or butter and flour. Make sure you get into all the ridges—this is the most important step for a clean release.
Step 3: Mix the Dry Ingredients
In a medium bowl, whisk together the flour, baking powder, baking soda, salt, cinnamon, nutmeg, and cloves. Set this aside. The spices should smell warm and inviting—if they don’t, your spices might be old.
Step 4: Cream the Butter and Sugar
In the bowl of your stand mixer fitted with the paddle attachment, beat the softened butter and granulated sugar together on medium speed until light and fluffy. This should take about 3-4 minutes. You’re looking for a pale, airy mixture that looks almost like frosting. Scrape down the sides of the bowl with a rubber spatula halfway through.
Sensory cue: The mixture should smell sweet and buttery, and it should feel light when you scrape it. If it looks dense or greasy, keep beating.
Step 5: Add the Eggs and Vanilla
Add the eggs one at a time, beating well after each addition. The mixture should look smooth and glossy. Add the vanilla extract and beat until combined. Don’t rush this step—each egg needs to be fully incorporated before you add the next one.
Step 6: Alternate Adding Dry Ingredients and Reduced Cider
With the mixer on low speed, add the dry ingredients in three additions, alternating with the reduced apple cider. Start and end with the dry ingredients. Mix just until combined—overmixing will make the cake tough. You should see a few streaks of flour remaining, which you can fold in gently with a spatula.
Warning: The batter will be thick and fragrant. Don’t be tempted to add more liquid. It’s supposed to be this way.
Step 7: Bake the Cake
Pour the batter into the prepared Bundt pan and spread it evenly. Bake for 45-55 minutes, or until a toothpick inserted into the center comes out clean or with a few moist crumbs. The top should be golden brown and the cake should pull away slightly from the edges of the pan.
Sensory cue: Your kitchen will smell like fall—cinnamon, apples, and warm butter. It’s the best smell in the world.
Step 8: Cool and Glaze
Let the cake cool in the pan for 10-12 minutes. Then, invert it onto a cooling rack and let it cool for another 10 minutes. While it’s still warm, use a pastry brush to apply the brown butter glaze. The warmth will help the glaze soak into the cake, creating that incredible, moist texture.
Let the cake cool completely before serving. If you can wait that long, that is.
Cooking Tips & Techniques
I’ve made this cake more times than I can count, and I’ve learned a few things along the way. Here are my best tips for success:
Mastering Brown Butter
Brown butter is the secret weapon of this recipe, but it can be tricky. Start with a light-colored pan so you can see the color change. Melt the butter over medium heat, stirring constantly. It will foam up, then subside, and you’ll see brown specks forming at the bottom. The moment it smells nutty and turns amber, remove it from the heat. If it turns dark brown, you’ve gone too far—start over. I’ve burned my fair share of butter, and it’s not a pleasant smell.
Don’t Skip the Cider Reduction
I know it’s an extra step, but it’s non-negotiable. Reducing the cider concentrates the apple flavor and removes excess water, which would make the cake soggy. If you’re short on time, you can use apple cider concentrate, but the flavor won’t be as bright.
Room Temperature Ingredients Matter
Cold eggs and cold butter don’t cream properly. They’ll leave you with a dense, uneven crumb. Take everything out of the fridge at least 30 minutes before you start baking. If you forget, place the eggs in warm water and cut the butter into small cubes to speed up the process.
The Toothpick Test
Don’t rely solely on time. Ovens vary, and a Bundt pan can be tricky. Start checking at 45 minutes. If the toothpick comes out clean, it’s done. If it’s wet, give it another 5 minutes. If the top is browning too quickly, tent it loosely with foil.
Glazing While Warm
This is the key to that amazing texture. The warm cake absorbs the glaze like a sponge, creating a moist, tender crumb. If you wait until the cake is completely cool, the glaze will just sit on top. Brush it on in layers, letting each one soak in before adding the next.
Variations & Adaptations
One of the best things about this cake is how adaptable it is. Here are a few of my favorite variations:
Apple Cider Cake with Caramel Drizzle
Skip the brown butter glaze and drizzle the cake with a simple caramel sauce instead. The combination of apple and caramel is a classic for a reason. I like to add a sprinkle of flaky sea salt on top to balance the sweetness.
Spiced Apple Cider Cake with Cream Cheese Frosting
For a richer, more decadent version, frost the cake with a cream cheese frosting. The tanginess of the cream cheese pairs beautifully with the sweet, spiced cake. Add a teaspoon of cinnamon to the frosting for extra warmth.
Gluten-Free Apple Cider Cake
Use a 1:1 gluten-free flour blend. I’ve tested this with Bob’s Red Mill and it works perfectly. Just be careful not to overmix the batter, as gluten-free flours can be more delicate.
Dairy-Free Apple Cider Cake
Substitute the butter with a high-quality vegan butter and use oat milk in the glaze. The texture will be slightly different, but the flavor is still incredible. I’ve served this to dairy-free guests and they couldn’t tell the difference.
Mini Bundt Cakes
For individual servings, use a mini Bundt pan. Reduce the baking time to 20-25 minutes. These are perfect for parties or gifting. Just make sure you grease the pans thoroughly.
Serving & Storage Suggestions
This cake is incredibly versatile when it comes to serving. Here’s how I like to do it:
Serving
Serve the cake at room temperature for the best texture and flavor. A slice with a dollop of lightly sweetened whipped cream or a scoop of vanilla ice cream is pure heaven. For a more decadent presentation, drizzle extra glaze over each slice and add a sprinkle of cinnamon.
This cake is perfect for fall gatherings—Thanksgiving, Friendsgiving, Halloween parties, or just a cozy Sunday dinner. It pairs beautifully with a cup of hot apple cider or a spiced chai latte. If you’re serving it at a dinner party, it’s lovely alongside a cheese board with sharp cheddar and dried apples.
Storage
Store the cake in an airtight container at room temperature for up to 3 days. The glaze will soften slightly, but the flavor actually improves over time. If you’re making it ahead, wait to glaze it until the day you’re serving it.
For longer storage, you can freeze the unglazed cake for up to 3 months. Wrap it tightly in plastic wrap, then in foil. When you’re ready to serve, thaw it overnight in the refrigerator, bring it to room temperature, and then glaze it. The cake freezes beautifully—I always make an extra one for the freezer.
Reheating
If you want that just-baked warmth, microwave individual slices for 10-15 seconds. For a whole cake, warm it in a 300°F oven for 10 minutes. The glaze will get slightly melty, which is honestly the best way to eat it.
Nutritional Information & Benefits
While this is definitely a treat, it’s made with real, wholesome ingredients. Here’s a rough estimate of the nutritional values per slice (based on 12 servings):
- Calories: 420
- Fat: 22g
- Carbohydrates: 54g
- Protein: 5g
- Fiber: 1g
- Sugar: 36g
The apple cider provides a small amount of vitamin C and antioxidants, while the cinnamon and nutmeg offer anti-inflammatory properties. The brown butter adds healthy fats, and the eggs provide protein. It’s not health food, but it’s made with love and real ingredients—and that counts for something.
If you’re watching your sugar intake, you can reduce the sugar in the cake to 1 cup without compromising the texture too much. The glaze is harder to adjust, but you can use a sugar-free powdered sweetener if needed.
Conclusion
This apple cider cake with brown butter glaze is more than just a recipe—it’s a memory in the making. It’s the cake that fills your home with the smell of fall, the one that makes your guests close their eyes and sigh with happiness. It’s the recipe you’ll turn to year after year, the one that becomes a tradition.
I hope you make this cake and love it as much as I do. Don’t be afraid to make it your own—add a little extra cinnamon, swap in a different glaze, or serve it with your favorite ice cream. The best recipes are the ones that evolve with you.
When you make it, I’d love to hear how it turns out. Leave a comment below, tag me in your photos, or share your own variations. This recipe is meant to be shared, just like the best meals always are. Happy baking, friend!
Frequently Asked Questions
Can I use apple juice instead of apple cider?
Yes, you can, but the flavor will be milder. Apple cider has a richer, more complex taste that really shines in this cake. If you use apple juice, consider reducing it a little longer to concentrate the flavor.
How do I know when the brown butter is done?
Watch for the butter to turn a golden-amber color and smell nutty. You’ll see brown specks forming at the bottom of the pan. As soon as it reaches this stage, remove it from the heat immediately to prevent burning.
Can I make this cake ahead of time?
Absolutely! The cake actually tastes better the next day as the flavors meld together. Bake the cake, let it cool completely, and store it in an airtight container. Glaze it just before serving for the best presentation.
Why did my cake stick to the pan?
This usually happens when the pan isn’t greased thoroughly. Make sure you get into every ridge and crevice with baking spray or butter and flour. Let the cake cool in the pan for exactly 10-12 minutes before inverting—too long, and it will steam and stick.
Can I freeze this cake?
Yes! Freeze the unglazed cake for up to 3 months. Wrap it tightly in plastic wrap and then foil. Thaw overnight in the refrigerator, bring to room temperature, and glaze before serving. It’s perfect for holiday prep.
Pin This Recipe!
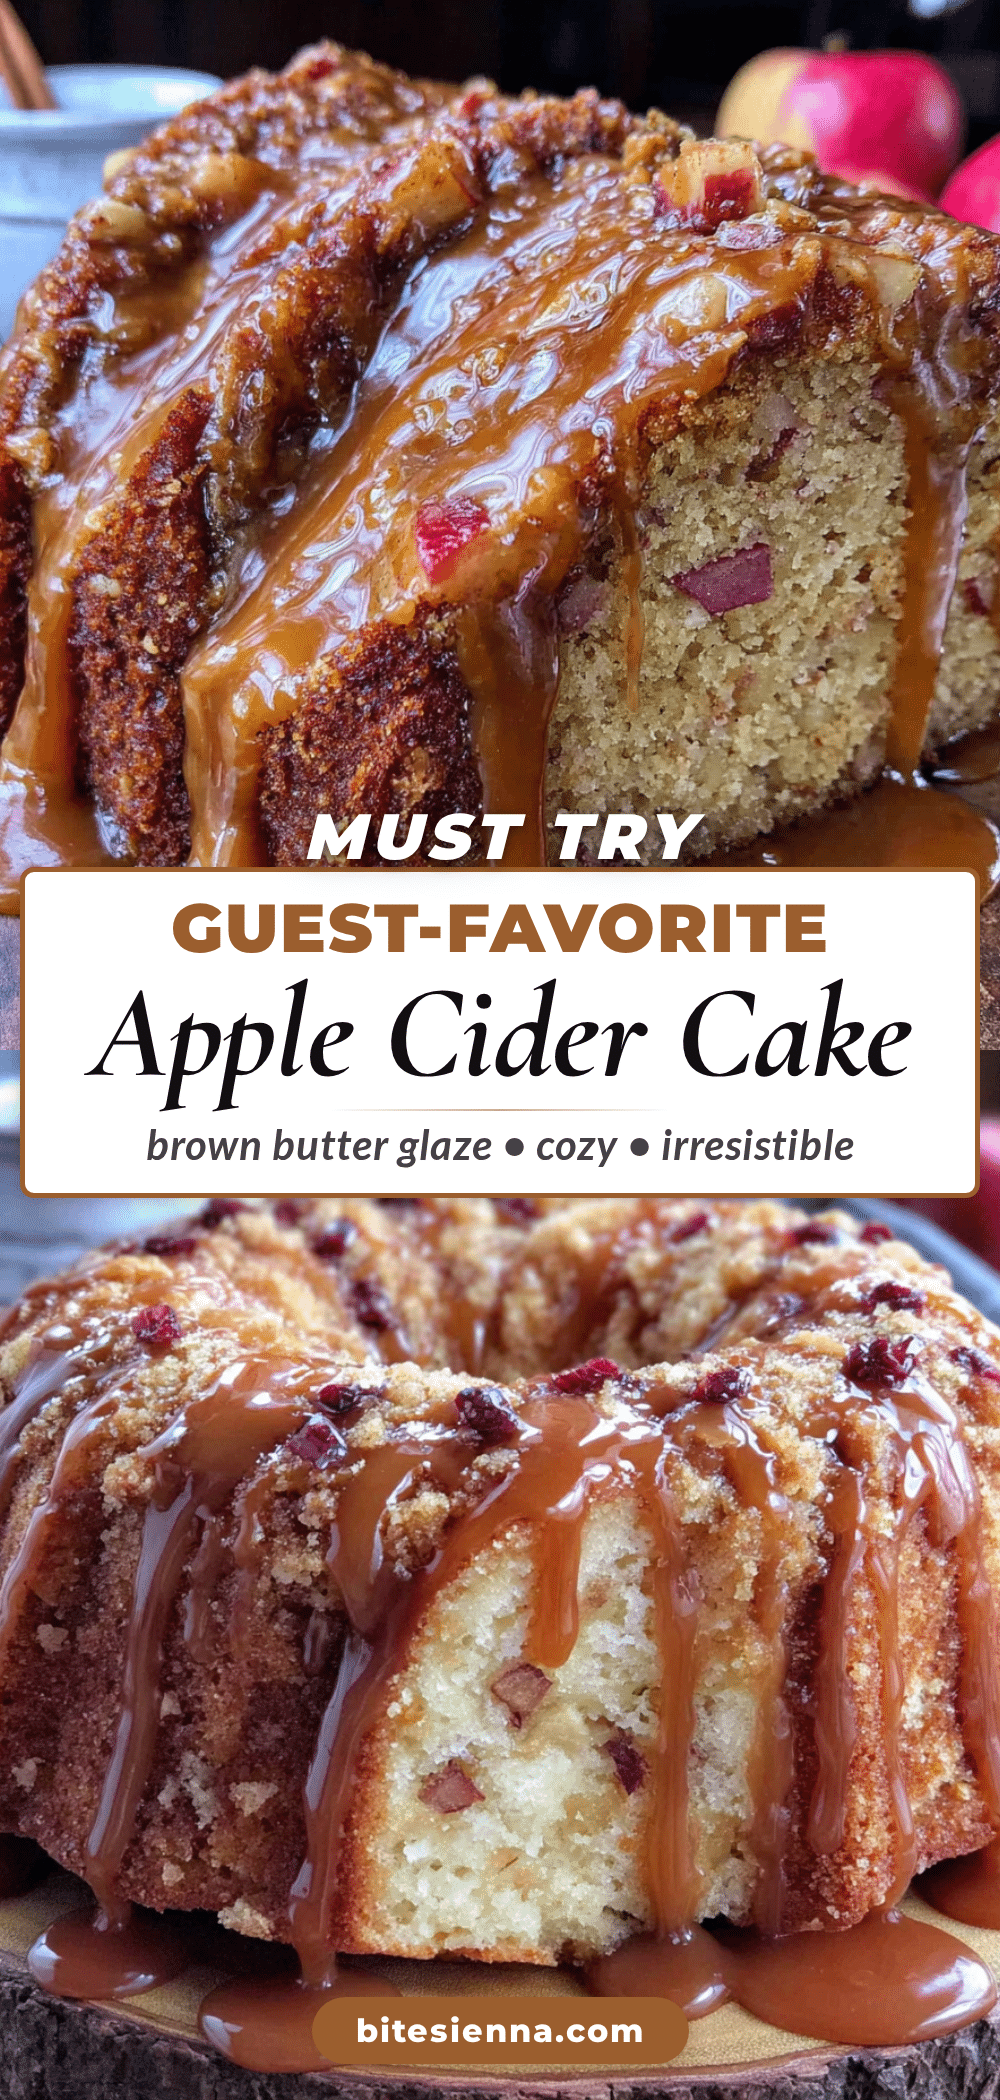
Best Homemade Apple Cider Cake with Brown Butter Glaze
A moist, tender apple cider cake with a nutty brown butter glaze that captures the essence of fall. This recipe, perfected after seventeen tries, delivers a concentrated apple flavor and a texture that’s light yet substantial.
- Prep Time: 30 minutes
- Cook Time: 50 minutes
- Total Time: 1 hour 20 minutes
- Yield: 12 servings 1x
- Category: Dessert
- Cuisine: American
Ingredients
- 2 cups (240g) all-purpose flour
- 1 teaspoon baking powder
- 1 teaspoon baking soda
- 1/2 teaspoon salt
- 2 teaspoons ground cinnamon
- 1/2 teaspoon ground nutmeg
- 1/4 teaspoon ground cloves
- 1 cup (2 sticks or 226g) unsalted butter, softened
- 1 1/2 cups (300g) granulated sugar
- 3 large eggs, room temperature
- 1 teaspoon vanilla extract
- 1 cup (240ml) apple cider, reduced to 1/2 cup (120ml)
- 1/2 cup (1 stick or 113g) unsalted butter (for glaze)
- 2 cups (240g) powdered sugar, sifted
- 3–4 tablespoons milk or heavy cream
- 1 teaspoon vanilla extract (for glaze)
- Pinch of salt
Instructions
- Reduce the apple cider: Pour 1 cup of apple cider into a medium saucepan and bring to a boil over medium-high heat. Reduce heat to medium-low and simmer, stirring occasionally, until reduced to 1/2 cup (about 12-15 minutes). Set aside to cool.
- Preheat oven to 350°F (175°C). Grease a 10-cup Bundt pan thoroughly with baking spray or butter and flour.
- In a medium bowl, whisk together flour, baking powder, baking soda, salt, cinnamon, nutmeg, and cloves. Set aside.
- In the bowl of a stand mixer fitted with the paddle attachment, beat softened butter and granulated sugar on medium speed until light and fluffy (about 3-4 minutes). Scrape down sides as needed.
- Add eggs one at a time, beating well after each addition. Add vanilla extract and beat until combined.
- With mixer on low speed, add dry ingredients in three additions, alternating with reduced apple cider, starting and ending with dry ingredients. Mix just until combined; do not overmix.
- Pour batter into prepared Bundt pan and spread evenly. Bake for 45-55 minutes, or until a toothpick inserted into the center comes out clean or with a few moist crumbs.
- Let cake cool in pan for 10-12 minutes. Invert onto a cooling rack and let cool for another 10 minutes.
- While cake is still warm, prepare brown butter glaze: In a light-colored saucepan, melt 1/2 cup butter over medium heat, stirring constantly. Cook until butter turns golden-amber and smells nutty, with brown specks forming. Remove from heat immediately.
- Whisk in sifted powdered sugar, 3-4 tablespoons milk or heavy cream, 1 teaspoon vanilla extract, and a pinch of salt until smooth. Adjust consistency with more milk if needed.
- Using a pastry brush, apply glaze to warm cake, letting each layer soak in before adding the next. Let cake cool completely before serving.
Notes
Don’t skip reducing the apple cider—it concentrates flavor and prevents sogginess. Room temperature ingredients are crucial for proper creaming. Glaze the cake while still warm for best absorption. The cake can be made a day ahead and actually tastes better the next day. For a dairy-free version, use vegan butter and oat milk. For gluten-free, use a 1:1 gluten-free flour blend.
Nutrition
- Serving Size: 1 slice
- Calories: 420
- Sugar: 36
- Sodium: 280
- Fat: 22
- Saturated Fat: 13
- Carbohydrates: 54
- Fiber: 1
- Protein: 5
Keywords: apple cider cake, brown butter glaze, fall dessert, bundt cake, apple cake, homemade cake


