The neighborhood block party was in three hours and I’d completely forgotten. Everyone else would be bringing elaborate layered dips, homemade bread from fancy Dutch ovens, and those Pinterest-perfect charcuterie boards that look like they belong in a magazine. I had a half-empty jar of peanut butter, some sad-looking oats I’d bought on sale, and a bag of chocolate chips I’d been sneaking from for late-night snacking. Honestly, I almost just grabbed a bag of chips from the gas station and called it a day. But then I remembered this no-bake granola bar bites recipe I’d thrown together for a camping trip last summer. The one where you just mash everything together, chill it, and somehow it works. Let me tell you, walking up to that picnic table with a platter of these little chocolate-studded bites while my neighbor Karen was still fussing over her twice-baked potatoes? It felt like winning the lottery without buying a ticket. Someone asked me last week why I always make these for gatherings, and the answer is simple—they’re the thing I bring when I have nothing else to give, and they always end up being the thing everyone asks for.
Why You’ll Love This Recipe
These no-bake granola bar bites are my secret weapon for hosting, and after dozens of trials (and a few crumbly disasters), I’ve perfected them. Here’s why they belong at your next gathering:
- No Oven Required: Seriously, if you can stir and press, you can make these. Perfect for those hot summer days when turning on the oven is a crime.
- Pantry Staples Only: You probably have everything already. No special trips to the fancy grocery store.
- Perfect for Parties: They’re bite-sized, so guests can grab one and keep mingling. No plates or forks needed.
- Crowd-Pleaser: Kids love them, adults love them, and that one friend who’s “not really into sweets” will eat three.
- Make-Ahead Magic: You can prep these days before your event and just pull them out when guests arrive.
What makes these different from every other granola bar recipe? It’s the texture. I spent months testing ratios until I found the sweet spot—firm enough to hold together when you pick them up, but soft enough that they don’t crack your teeth. The secret is letting the mixture rest for a few minutes before pressing it into the pan. That little pause lets the oats soak up the sticky goodness, and honestly, it changes everything.
I’ve brought these to potlucks where people asked for the recipe before they even finished eating. I’ve packed them for road trips where they survived being squished under a suitcase. I’ve even hidden a stash in my desk drawer for those 3 PM slumps. They’re the kind of snack that makes you close your eyes after the first bite, even if you’re standing in your kitchen in sweatpants.
What Ingredients You Will Need
This recipe uses simple, honest ingredients to create something that tastes way more complicated than it is. Most of these are probably in your pantry right now.
- Rolled Oats (2 cups / 180g): Not the quick-cooking kind—they get too mushy. Old-fashioned rolled oats give the best texture. I’ve tried steel-cut oats once and let’s just say that was a mistake (too crunchy).
- Creamy Peanut Butter (1 cup / 240g): Natural peanut butter works, but make sure you stir it well first. The kind with added sugar and stabilizers actually holds together better. I’m partial to Skippy for this, but use what you like.
- Honey (½ cup / 120ml): This is what binds everything together. Maple syrup works too, but it makes the bites a bit softer. For the best texture, stick with honey.
- Chocolate Chips (¾ cup / 130g): Semi-sweet is my go-to, but dark chocolate chips add a nice grown-up bitterness. If you’re using milk chocolate, reduce the honey a tad—it can get too sweet.
- Coconut Oil (2 tablespoons / 30ml): This is the secret ingredient that keeps everything from being too sticky. It also helps the bites set up firm in the fridge. Melt it first if it’s solid.
- Vanilla Extract (1 teaspoon / 5ml): Pure vanilla is worth it here. Imitation works, but the flavor won’t pop the same way.
- Salt (¼ teaspoon): Don’t skip this. It balances the sweetness and makes the chocolate taste more chocolatey. I use fine sea salt.
- Optional Mix-Ins: Shredded coconut, mini M&Ms, dried cranberries, chia seeds, or crushed pretzels. I once added crushed potato chips and it was weirdly amazing.
For the chocolate drizzle on top (totally optional but highly recommended for impressing guests):
- Dark Chocolate Chips (¼ cup / 45g)
- Coconut Oil (1 teaspoon / 5ml)
A quick note on ingredient sourcing—I’ve found that store-brand oats work just as well as fancy ones, but splurge on good chocolate chips. Ghirardelli or Guittard melt more smoothly and taste richer. Your guests will notice the difference, even if they can’t name it.
Equipment Needed
You don’t need much for this, which is part of the beauty. Here’s what you’ll need:
- Large Mixing Bowl: Big enough to get your hands in there. I use my grandmother’s old ceramic one, but any bowl works.
- 8×8 Inch Baking Pan: Glass or metal, doesn’t matter. Line it with parchment paper so the bars lift out cleanly. Trust me on this—I learned the hard way.
- Spatula or Wooden Spoon: For the initial mixing. You’ll end up using your hands anyway, but start with a spoon to save your fingernails.
- Parchment Paper: Non-negotiable. Without it, you’ll be chiseling granola bar bits out of your pan for days.
- Measuring Cups and Spoons: For accuracy. Eyeballing the honey can lead to sticky disasters.
- Small Microwave-Safe Bowl: For melting the chocolate drizzle. A double boiler works too if you’re feeling fancy.
If you don’t have an 8×8 pan, a loaf pan works in a pinch—the bars will just be thicker. I’ve also used a pie plate when my good pan was in the dishwasher. It looked a mess but tasted fine. For budget-friendly options, dollar store mixing bowls and measuring cups work perfectly. You don’t need fancy equipment here.
Preparation Method
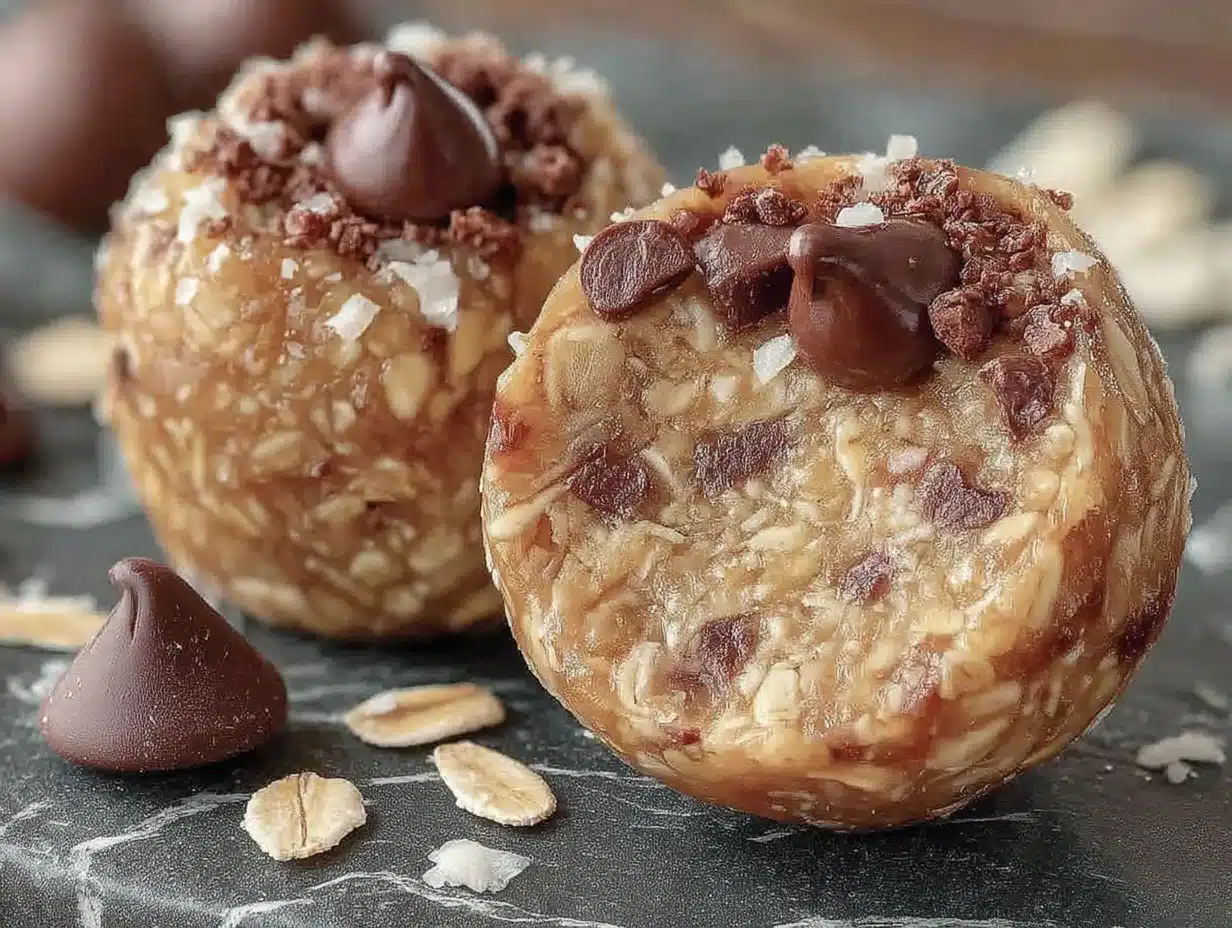
Let’s get to the fun part. This takes about 15 minutes of active time, plus 1-2 hours to chill.
- Line your pan. Cut a piece of parchment paper to fit your 8×8 pan, leaving some overhang on two sides. This creates handles for lifting the bars out later. Press it down so it sits flat. If it curls up, use a tiny dab of coconut oil to hold it in place.
- Mix the wet ingredients. In your large bowl, combine the peanut butter, honey, melted coconut oil, and vanilla extract. Stir until smooth. It should look glossy and smell amazing. If your peanut butter is cold from the fridge, microwave it for 15 seconds first to make mixing easier.
- Add the dry ingredients. Pour in the rolled oats, chocolate chips, and salt. Stir with your spatula until everything is evenly coated. The mixture will look shaggy at first—keep going. When it starts clumping together, you’re on the right track.
- Get your hands in there. This is the messy part and honestly my favorite part. Squeeze a handful of the mixture. If it holds together, you’re good. If it falls apart, add another tablespoon of honey and mix again. The texture should feel like damp sand that sticks when pressed.
- Let it rest. Here’s the trick I discovered by accident—let the mixture sit for 5 minutes before pressing it into the pan. This gives the oats time to absorb the moisture. The difference is night and day. I was rushing once and skipped this step, and my bars crumbled everywhere.
- Press into the pan. Transfer the mixture to your lined pan. Use your hands or the bottom of a flat glass to press it down firmly. Really pack it in there. The tighter you press, the better your bars will hold together. Focus on the corners—they always want to be loose.
- Make the chocolate drizzle. In a small microwave-safe bowl, combine the dark chocolate chips and coconut oil. Microwave in 20-second bursts, stirring between each, until smooth. Be careful not to overheat—burnt chocolate is heartbreaking.
- Drizzle and chill. Use a fork or a small spoon to drizzle the melted chocolate over the pressed mixture. I like to make zigzag patterns, but any design works. Pop the pan in the fridge for at least 1 hour, or 2 hours if you want really firm bars.
- Cut and serve. Once firm, lift the whole block out using the parchment paper handles. Place on a cutting board and cut into squares or rectangles. A sharp knife works best—run it under hot water and wipe dry between cuts for clean edges.
One more thing—if your mixture feels too dry, add a splash of warm water or extra honey. If it feels too wet, toss in a tablespoon more oats. Cooking is about adjusting, not following rules exactly.
Cooking Tips & Techniques
After making these no-bake granola bar bites more times than I can count (and messing up plenty along the way), here are the things I wish someone had told me:
Temperature matters. If your kitchen is hot and humid, the mixture will be stickier and harder to press. Pop the bowl in the fridge for 10 minutes before pressing. If it’s cold, you might need to warm the honey slightly to get it to mix properly.
Press with purpose. I cannot stress this enough—press the mixture down like you mean it. I used to be gentle, thinking I’d ruin the texture. Nope. Hard pressure creates bars that don’t fall apart. Use the bottom of a measuring cup or a glass to really compact it.
Chill time isn’t optional. I once tried to cut these after 30 minutes because I was impatient. Big mistake. They fell into a crumbly mess that I ate straight from the bowl with a spoon (no regrets, but not ideal for guests). Give them the full hour, minimum.
Storage is key. Keep these in the fridge until you’re ready to serve. If you’re taking them to a party, transport them on a flat plate in a single layer. Stacking them while warm is a recipe for a granola bar pancake situation.
Double the batch. Seriously, make two pans. One for the party and one for yourself. I learned this after bringing a single batch to a game night and watching them disappear in 10 minutes while I didn’t get a single one.
Variations & Adaptations
One of the best things about this recipe is how flexible it is. Here are some variations I’ve tried and loved:
Vegan Version: Swap the honey for maple syrup or agave nectar. Use vegan chocolate chips. The texture will be slightly softer, so add an extra ¼ cup of oats to compensate.
Nut-Free Option: Substitute the peanut butter with sunflower seed butter or WowButter. The flavor changes but it’s still delicious. Tahini works too, though it gives a more savory note that pairs surprisingly well with chocolate.
Protein Boost: Add 2 tablespoons of your favorite protein powder and reduce the oats by 2 tablespoons. Chocolate or vanilla protein powder works best. I’ve used unflavored collagen peptides too, and you can’t taste them at all.
Festive Holiday Version: Swap the chocolate chips for white chocolate chips and add dried cranberries and orange zest. Or use red and green M&Ms for Christmas. For Halloween, add crushed candy corn (don’t judge until you try it).
Crunchy Texture: Add ½ cup of crushed pretzels or crispy rice cereal. This is my personal favorite variation—the salty crunch against the chewy oats is chef’s kiss.
Low-Sugar Option: Use sugar-free chocolate chips and reduce the honey to ⅓ cup. Add a few drops of stevia if you need more sweetness. The texture will be a bit drier, so add an extra tablespoon of coconut oil.
I once made a batch with chai spices—cinnamon, cardamom, ginger, and cloves—and served them at a fall potluck. They were gone before the apple pie. Don’t be afraid to experiment.
Serving & Storage Suggestions
These no-bake granola bar bites are best served cold or at room temperature. If you’re hosting, I recommend taking them out of the fridge about 15 minutes before guests arrive. This takes the chill off without making them soft.
For presentation, arrange them on a wooden board or a white platter. The contrast makes the chocolate drizzle pop. I like to sprinkle a little flaky sea salt on top right before serving—it looks fancy and adds a nice salty hit.
What to serve alongside? These pair beautifully with fresh fruit (strawberries or apple slices), a cheese board, or coffee. For brunch, set them out next to a fruit salad and some yogurt. For dessert, they’re perfect alongside a scoop of vanilla ice cream.
Storage: Keep these in an airtight container in the fridge for up to 2 weeks. They actually get better after a day or two as the flavors meld together. I’ve also frozen them successfully—layer them between parchment paper in a freezer-safe container and they’ll keep for 3 months. Thaw in the fridge overnight before serving.
Reheating: You don’t need to reheat these, but if you want a softer texture, let them sit at room temperature for 10 minutes. For a warm treat, microwave one for 10 seconds. The chocolate gets slightly melty and it’s divine.
One note on travel—if you’re bringing these to a gathering, pack them in a single layer with parchment paper between layers if you must stack. I learned this the hard way after a car ride turned my beautiful bars into granola bar rubble. Still tasted good, but looked like a disaster.
Nutritional Information & Benefits
Per serving (1 bar, based on 16 servings):
- Calories: 185
- Protein: 6g
- Carbohydrates: 22g
- Fiber: 3g
- Sugar: 11g
- Fat: 10g
- Saturated Fat: 4g
- Sodium: 95mg
These numbers are estimates and will vary based on your specific ingredients. The peanut butter provides protein and healthy fats that keep you full, while the oats offer fiber for steady energy. The chocolate chips? Well, they’re good for the soul, and that counts for something.
If you’re watching your sugar intake, you can reduce the honey and use dark chocolate chips with higher cocoa content. For a gluten-free option, make sure your oats are certified gluten-free (oats are naturally gluten-free but often processed with wheat).
Potential allergens to note: peanuts, tree nuts (coconut), and dairy (chocolate chips). For nut-free, dairy-free, or vegan options, check the variations section above.
I personally love that these give me energy without the crash you get from processed snacks. They’re my go-to for hiking trips, long car rides, and those afternoons when I need something to get me through to dinner without reaching for candy.
Conclusion
Look, I’m not saying these no-bake granola bar bites will change your life. But they might change your next potluck. They’re the recipe I keep coming back to because they work every single time, even when I’m rushing, even when I’m out of ingredients, even when I’m convinced I’ve forgotten something. They’re forgiving, they’re delicious, and they make you look like you planned ahead when you absolutely did not.
I’d love to hear how yours turn out. Did you add something weird that worked? Did you forget the chocolate chips and have to improvise? (I did that once and used crushed Oreos instead—highly recommend.) Drop a comment below and let me know. And if you bring these to a party and someone asks for the recipe, send them my way.
Happy snacking, friends. You’ve got this.
Frequently Asked Questions
Can I use quick oats instead of rolled oats?
You can, but the texture will be different. Quick oats absorb more moisture and create a denser, softer bar. Rolled oats give that chewy, satisfying bite. If you only have quick oats, reduce the honey by 2 tablespoons to compensate for the extra absorption.
Why did my bars fall apart?
This usually happens for one of three reasons: you didn’t press them firmly enough, you didn’t chill them long enough, or your mixture was too dry. Next time, squeeze a handful before pressing—if it holds together, you’re good. If it crumbles, add more honey or peanut butter.
Can I make these without peanut butter?
Absolutely. Sunflower seed butter, almond butter, cashew butter, or tahini all work. Keep in mind that different nut butters have different fat contents, so you might need to adjust the oats. If the mixture seems too oily, add an extra tablespoon of oats.
How long do these last at room temperature?
They’re fine for a few hours at room temperature, making them perfect for parties. If you’re serving them outdoors on a hot day, keep the platter in the shade or on ice. For longer storage, keep them in the fridge—they’ll last up to 2 weeks.
Can I double this recipe?
Yes! Double everything and use a 9×13 pan instead of an 8×8. Press firmly and chill for an extra 30 minutes since the block will be thicker. I do this all the time for big gatherings—it saves time and means I don’t have to make two separate batches.
Pin This Recipe!
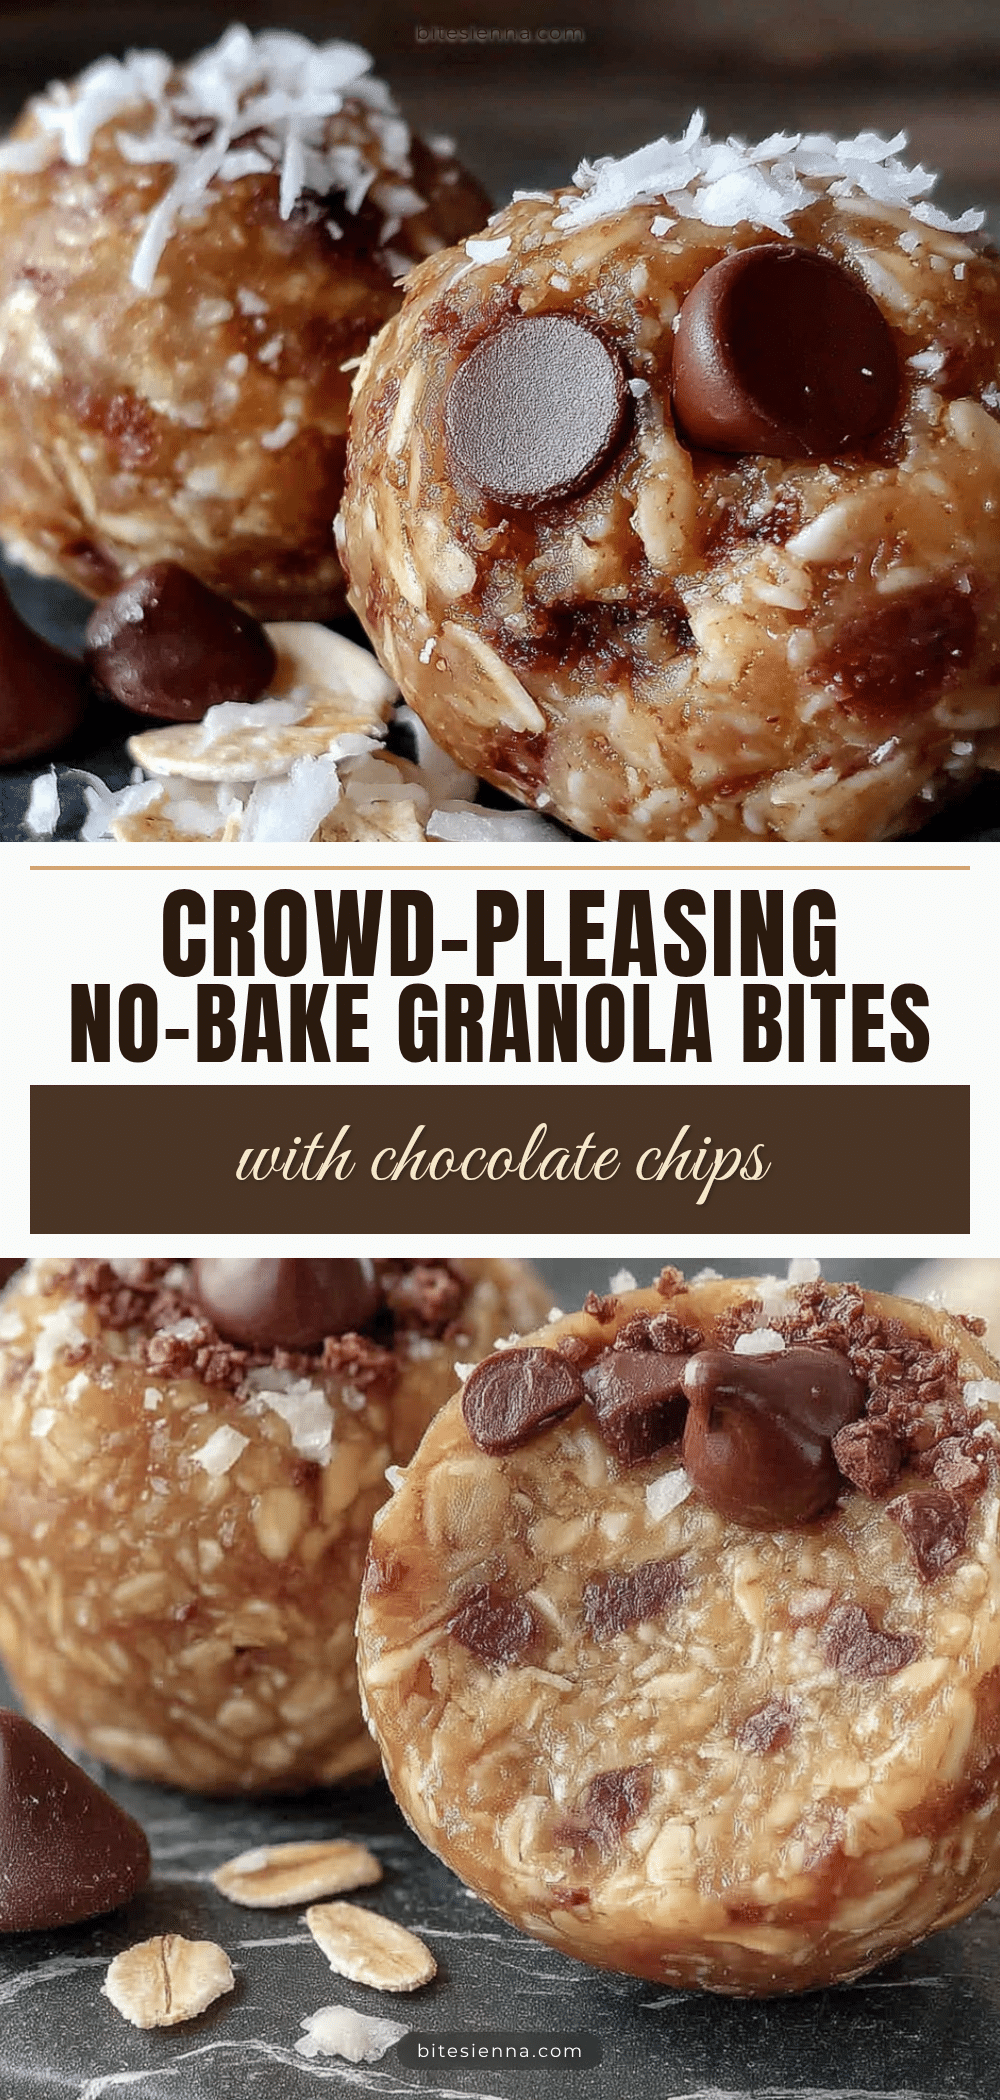
Best No-Bake Granola Bar Bites with Chocolate Chips

These no-bake granola bar bites are the perfect party snack—easy to make with pantry staples, no oven required, and always a crowd-pleaser. They’re firm enough to hold together but soft enough to enjoy, with a chocolate drizzle that makes them look fancy.
- Prep Time: 15 minutes
- Cook Time: 0 minutes
- Total Time: 1 hour 15 minutes (includes chilling)
- Yield: 16 servings 1x
- Category: Snack
- Cuisine: American
Ingredients
- 2 cups (180g) rolled oats
- 1 cup (240g) creamy peanut butter
- ½ cup (120ml) honey
- ¾ cup (130g) semi-sweet chocolate chips
- 2 tablespoons (30ml) coconut oil, melted
- 1 teaspoon (5ml) vanilla extract
- ¼ teaspoon fine sea salt
- Optional mix-ins: shredded coconut, mini M&Ms, dried cranberries, chia seeds, crushed pretzels
- For the chocolate drizzle: ¼ cup (45g) dark chocolate chips, 1 teaspoon (5ml) coconut oil
Instructions
- Line an 8×8 inch baking pan with parchment paper, leaving overhang on two sides.
- In a large bowl, combine peanut butter, honey, melted coconut oil, and vanilla extract. Stir until smooth.
- Add rolled oats, chocolate chips, and salt. Stir until evenly coated. The mixture will look shaggy at first; keep stirring until it starts clumping.
- Squeeze a handful of the mixture. If it holds together, it’s ready. If it falls apart, add another tablespoon of honey and mix again.
- Let the mixture rest for 5 minutes to allow oats to absorb moisture.
- Transfer the mixture to the lined pan. Press down firmly using your hands or the bottom of a flat glass, especially in the corners.
- In a small microwave-safe bowl, combine dark chocolate chips and 1 teaspoon coconut oil. Microwave in 20-second bursts, stirring between each, until smooth.
- Drizzle the melted chocolate over the pressed mixture in a zigzag pattern.
- Refrigerate for at least 1 hour (2 hours for firmer bars).
- Once firm, lift the block out using the parchment paper handles. Cut into squares or rectangles with a sharp knife.
Notes
For best texture, let the mixture rest for 5 minutes before pressing. Press firmly to prevent crumbling. Chill for at least 1 hour. Store in an airtight container in the fridge for up to 2 weeks or freeze for 3 months. For vegan version, use maple syrup instead of honey and vegan chocolate chips. For nut-free, use sunflower seed butter.
Nutrition
- Serving Size: 1 bar
- Calories: 185
- Sugar: 11
- Sodium: 95
- Fat: 10
- Saturated Fat: 4
- Carbohydrates: 22
- Fiber: 3
- Protein: 6
Keywords: no-bake granola bars, chocolate chip granola bites, easy snack, party food, peanut butter granola bars


