My friend Jenna swore she didn’t “do” charcuterie boards. For years. Every time someone brought one to a gathering, she’d pick at the cheese but make a point of saying how overrated the whole thing was. “It’s just cold meat on a plank,” she’d shrug. “I don’t get the hype.”
Then last November, I caught her standing alone in my kitchen, hovering over a Friendsgiving board I’d put together for a small gathering. She had a slice of apple in one hand, a smear of brie on a cracker in the other, and this look on her face like she’d been caught doing something slightly scandalous. “This is actually really good,” she mumbled, not quite meeting my eyes. I pretended not to notice and handed her a napkin.
Here’s the thing about a good charcuterie board — it’s not just a pile of ingredients thrown together. It’s a little landscape of flavors and textures, a way to slow down and share something beautiful with people you love. And when you add fall fruit to the mix? Honestly, it changes everything. The sweetness of the apples and pears, the tart pop of pomegranate seeds, the cozy warmth of cinnamon and honey — suddenly a charcuterie board feels like a hug on a cold November evening.
I started making this particular board a few years ago when I realized that my usual grazing spread was missing something. It was good, sure, but it didn’t feel like fall. So I swapped out the summer berries for sliced Honeycrisp apples and juicy Bosc pears. I added a little bowl of candied pecans and a drizzle of honey over the goat cheese. The first time I served it, someone actually said “this tastes like autumn.” And honestly, that’s the best compliment a fall recipe can get.
You know that feeling when you’re hosting and you want something that looks impressive but doesn’t have you stuck in the kitchen all afternoon? That’s this board. It’s the kind of thing you can put together in twenty minutes, set out on the table, and let people gather around. And yeah, maybe it’ll even convert a few skeptics along the way.
Why You’ll Love This Recipe
This isn’t just another charcuterie board — it’s a fall celebration on a platter. After testing this combination at multiple Friendsgiving gatherings (and a few solo snack sessions, let’s be honest), I can tell you exactly why this one works so well.
- Quick & Easy : Comes together in under 20 minutes with zero cooking required. Just arrange and serve — perfect for when you’re juggling a dozen other dishes.
- Simple Ingredients : Everything is available at your regular grocery store. No specialty shops or fancy imports needed. You might already have the honey and nuts in your pantry.
- Perfect for Friendsgiving : This board sets the tone for the whole meal. It’s what people gather around while they’re waiting for the turkey, and it gets everyone in a cozy, conversational mood.
- Crowd-Pleaser : Between the cheese, the fruit, the meats, and the crunchy elements, there’s genuinely something for everyone. Even picky eaters find their corner of this board.
- Unbelievably Delicious : The combination of creamy brie with tart apple slices and a drizzle of honey? That’s the kind of bite that makes people close their eyes. It’s simple but perfect.
What makes this board different from the standard charcuterie spread is the intentional focus on fall fruit. Most boards treat fruit as an afterthought — a few grapes tossed on the side. Here, the apples, pears, and pomegranate are the stars, balanced by savory meats and rich cheeses. The result is a board that feels seasonal, thoughtful, and genuinely satisfying without being heavy.
This is the board that makes people linger at the table. It’s comfort food in grazing form — warm, welcoming, and impossible to stop picking at.
What Ingredients You Will Need
This recipe uses a handful of simple, seasonal ingredients to create a board that’s both beautiful and delicious. The key is choosing ingredients that complement each other — sweet with salty, creamy with crunchy, mild with bold. Here’s what you’ll need.
For the Cheese
- Brie (8 oz wheel) — go for a double or triple cream brie for maximum creaminess. I like the one from Trader Joe’s or Président brand. Let it come to room temperature before serving.
- Aged Cheddar (6 oz) — choose a sharp, crumbly cheddar. The sharpness cuts through the sweetness of the fruit beautifully. Look for one that’s been aged at least 12 months.
- Goat Cheese (4 oz log) — a soft, tangy chèvre works perfectly here. It adds a creamy, slightly tart element that pairs wonderfully with honey and figs.
- Manchego (4 oz) — this Spanish sheep’s milk cheese has a nutty, slightly salty flavor that’s fantastic with pears. If you can’t find it, try a good aged gouda instead.
For the Meats
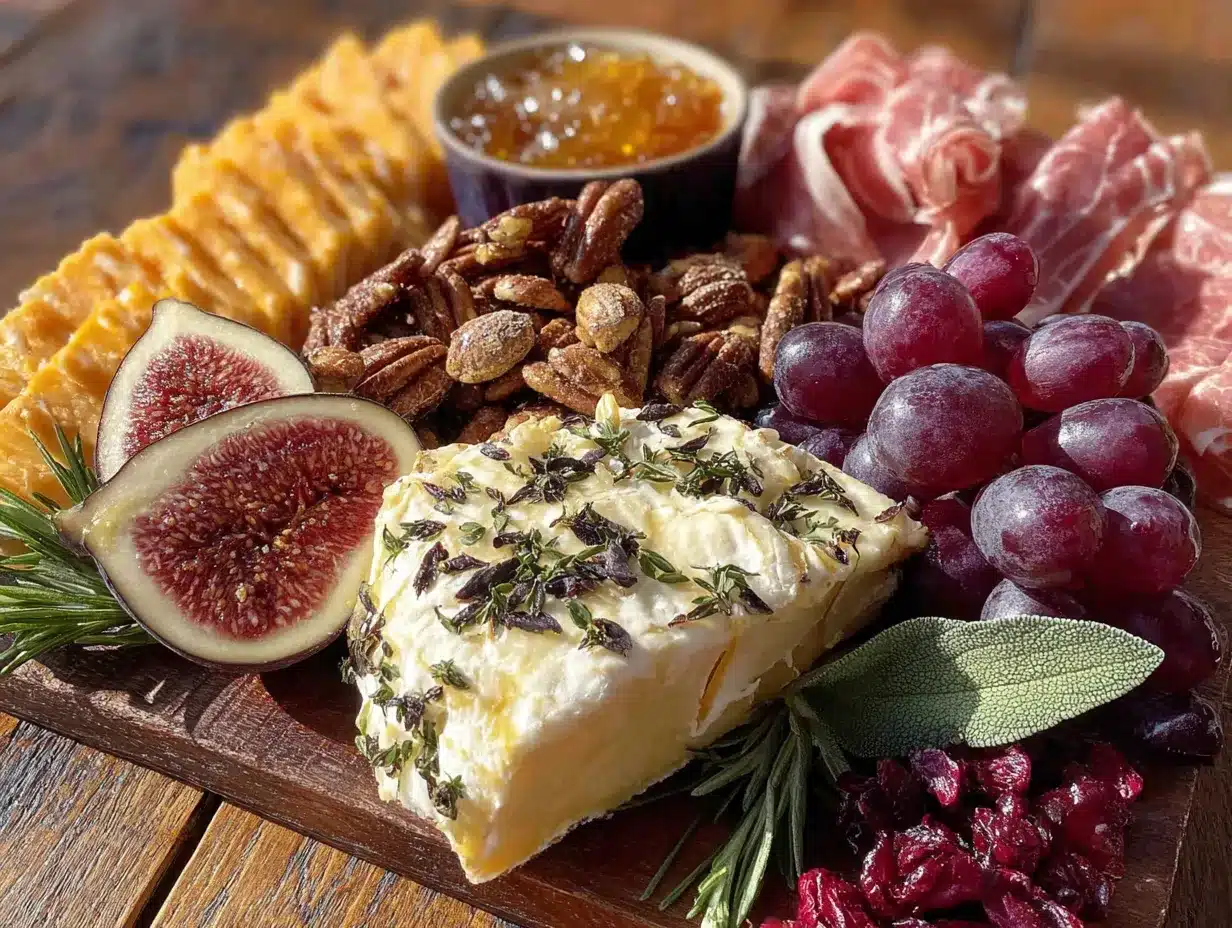
- Prosciutto (4 oz, thinly sliced) — look for prosciutto di Parma if you can. It’s salty, silky, and wraps beautifully around slices of pear or apple.
- Genoa Salami (4 oz) — choose a good quality salami with visible fat specks. Slice it into thin rounds or buy pre-sliced. Applegate makes a reliable option.
- Soppressata (4 oz) — this dry Italian salami has a coarser texture and bolder flavor. It adds variety to the meat selection. Substitute with capicola if needed.
For the Fall Fruit
- Honeycrisp Apples (2 medium) — these stay crisp and don’t brown too quickly. Slice them just before serving and rub with a little lemon juice if you’re worried about discoloration.
- Bosc Pears (2 medium) — their firm texture holds up well on a board. They’re less juicy than other pears, which means they won’t make everything soggy.
- Pomegranate Seeds (½ cup) — these little jewels add pops of tart sweetness and gorgeous color. Buy them pre-seeded to save time, or seed a fresh pomegranate yourself.
- Dried Figs (½ cup) — look for soft, plump dried figs. They add a chewy sweetness that’s perfect with cheese. Mission figs work well here.
- Red Grapes (1 cup, small clusters) — they add visual height and a burst of juice. Keep them in small clusters for easy grabbing.
For the Crunchy Elements
- Candied Pecans (½ cup) — you can buy these or make them yourself. The sweet and salty crunch is addictive. I recommend the ones from the bulk section at Whole Foods.
- Crackers (assorted, about 6 oz total) — use a mix of plain water crackers, rosemary crackers, and a seedy whole wheat option. Texture variety matters here.
- Baguette Slices (½ baguette, sliced thin and toasted) — lightly brush with olive oil and toast until golden. They hold up better than soft bread.
For the Accompaniments
- Honey (3 tablespoons) — a good quality local honey adds sweetness and pairs beautifully with brie and goat cheese. Orange blossom honey is lovely here.
- Fig Jam or Apple Butter (¼ cup) — this adds a spreadable sweet element. Fig jam is classic, but apple butter feels extra cozy for fall.
- Whole Grain Mustard (2 tablespoons) — a small bowl of this gives a tangy, savory option that cuts through the richness of the meats and cheese.
- Fresh Rosemary Sprigs (for garnish) — they’re not just pretty; the piney aroma complements the fruit and cheese beautifully.
Equipment Needed
You don’t need much to pull this board together, which is part of its charm. Here’s what I use.
- Large Wooden Board or Slate Platter (at least 12×18 inches) — this gives you enough room to spread everything out. I use a reclaimed wood board I found at a flea market, but a large cutting board works just fine. If you don’t have a big board, use a baking sheet lined with parchment paper — honestly, nobody will care.
- Small Bowls (3 to 4, about 4 oz each) — for the honey, fig jam, mustard, and pomegranate seeds. Little ramekins or even small mason jars work perfectly.
- Cheese Knives (at least 2) — one for soft cheese like brie, one for hard cheese like cheddar. If you only have one, just wipe it between uses.
- Small Spoons (2 to 3) — for the honey, jam, and mustard. Tiny spoons from a thrift store are perfect here.
- Paring Knife — for slicing apples and pears just before serving. A sharp knife makes clean slices and prevents bruising.
- Cutting Board (small) — for prepping fruit. Keep it separate from the serving board to avoid cross-contamination.
I bought my wooden board for $12 at a garage sale, and it’s held up better than any expensive board I’ve owned. Just oil it every few months and it’ll last forever.
Preparation Method
This board comes together in about 20 minutes of active time. The key is to think about layout before you start placing things — you want a balanced, beautiful spread that’s easy for people to reach.
- Start with the bowls. Place your small bowls of honey, fig jam, whole grain mustard, and pomegranate seeds on the board first. Space them out evenly — they act as anchors for the rest of the arrangement. I usually put one near each corner or in a loose triangle pattern. This gives structure to the board before you add anything else.
- Add the cheeses. Place the brie wheel whole on the board — don’t slice it yet. Let guests cut their own pieces. Slice the aged cheddar into thin triangles or rectangles and fan them out in a small cluster. Slice the goat cheese log into rounds about ½ inch thick and arrange them in a line or small stack. Cut the manchego into thin wedges and arrange them near the cheddar. Leave space between each cheese type so they don’t blend together visually. (Pro tip: place the brie near the honey — they’re destined to meet.)
- Layer in the meats. Fold the prosciutto slices into loose ribbons or waves — don’t lay them flat. This adds height and texture. Arrange them in a small pile near one edge of the board. Fan the salami slices in an overlapping row, and do the same with the soppressata. Keep the meats grouped by type so people can find what they want. Place them near the cheddar and manchego, since those cheeses pair well with cured meats.
- Add the fruit. Slice the apples and pears just before arranging — this prevents browning. Cut them into thin wedges (about 8 slices per apple or pear). Fan them out in small clusters around the board, alternating apple and pear sections. Scatter the dried figs in small groups near the cheeses. Place the grape clusters in gaps — they add nice pops of color and texture. The fruit should feel abundant, not hidden. This is a fall fruit board, so let the apples and pears shine.
- Fill in with crunch. Arrange the crackers and baguette slices in small groups around the board. Don’t spread them out evenly — cluster them near the cheeses they pair best with. Put water crackers near the brie, rosemary crackers near the cheddar, and baguette slices near the goat cheese. Scatter the candied pecans in small piles in any remaining gaps. They add texture and visual interest.
- Garnish and finish. Tuck small sprigs of fresh rosemary into gaps around the board — they add a beautiful green contrast to all the warm fall colors. Drizzle a little extra honey over the brie if you’re feeling fancy. Step back and look at your board — fill any obvious empty spots with extra crackers or fruit. The board should look abundant but not crowded. You want people to be able to reach everything without knocking things over.
- Serve immediately. Place the board at room temperature — this is important for the cheese. Brie and goat cheese need to be at room temp to reach their full creamy potential. If you’ve made the board ahead of time, cover it loosely with plastic wrap and refrigerate, but take it out 30 minutes before serving to let the cheese warm up.
Cooking Tips & Techniques
After making this board for about a dozen Friendsgiving gatherings (and a few solo dinners where I pretended I was hosting), I’ve picked up some tricks that make a real difference.
Prevent fruit browning. This was a hard lesson learned. The first time I made this board, I sliced the apples an hour ahead and they looked sad and brown by the time guests arrived. Now I slice them right before arranging, and I toss them in a little lemon juice (about 1 tablespoon for 2 apples). It keeps them bright and fresh-looking without making them taste sour. Same goes for the pears — they brown even faster than apples, so don’t slice them until the very end.
Layer for visual interest. The biggest mistake people make with charcuterie boards is laying everything flat. You want height and texture. Fold the prosciutto into loose ribbons instead of laying it flat. Stack some crackers in a small pile. Leave the brie whole so it has presence. The eye needs variation to find the board interesting. I learned this the hard way when my first board looked like a flat, sad landscape of ingredients.
Think about flow. Arrange the board so that people can move around it easily. Don’t put all the cheese in one corner and all the meat in another — spread things out so there’s something to discover in every section. Place salty meats near sweet fruit, creamy cheese near crunchy crackers. The whole point is creating little flavor combinations that people can build themselves.
Don’t overthink it. Honestly, the best boards I’ve made were the ones where I stopped stressing and just arranged things intuitively. If something looks weird, move it. If a gap appears, fill it with grapes or nuts. There’s no wrong way to do this. The board is supposed to feel relaxed and abundant, not like a museum exhibit.
Keep backups handy. I always keep extra crackers and fruit in the kitchen. Once people start grazing, the board disappears fast. Having a backup stash means you can refresh the board halfway through the party without running to the store. Trust me on this — I learned the hard way when my board was picked clean within 30 minutes.
Variations & Adaptations
This board is endlessly adaptable, which is one of the reasons I love it. Here are some variations I’ve tried and loved.
Dairy-Free Version: Swap the brie for a cashew-based soft cheese (Miyoko’s makes a great one), use a plant-based cheddar alternative, and replace the goat cheese with a tangy almond feta. The fruit, nuts, and crackers are naturally dairy-free, so this version comes together easily. I made this for a friend with a dairy allergy and she said it was the first charcuterie board she’d been able to fully enjoy in years.
Gluten-Free Adaptation: Replace the crackers and baguette slices with gluten-free crackers (I like the ones from Simple Mills) and rice crackers. Add extra nuts and dried fruit to fill in the texture gap. Most cured meats are naturally gluten-free, but double-check the labels on salami and soppressata just to be safe.
Warm Fall Twist: For a cozier version, warm the brie in the oven for 10 minutes at 350°F until it’s soft and slightly melted. Top it with a drizzle of honey and a sprinkle of fresh thyme before serving. The warm, gooey brie with cold apple slices is absolutely incredible. I did this for a chilly November gathering and it was the first thing to disappear.
Seasonal Fruit Swaps: In early fall, use fresh figs instead of dried ones. In late fall, add sliced Fuyu persimmons for a honey-sweet crunch. You can also swap the pomegranate seeds for fresh cranberries (just make sure to warn people they’re tart). The beauty of this board is that it follows what’s available at the farmers market.
Spiced Nuts Variation: Instead of candied pecans, try making your own spiced nuts. Toss pecans or walnuts with a little melted butter, cinnamon, cayenne, and a pinch of brown sugar. Roast at 350°F for 8-10 minutes. They add a warm, spicy kick that’s perfect with the fruit and cheese.
Serving & Storage Suggestions
This board is best served at room temperature, so plan to take it out of the fridge about 30 minutes before guests arrive. The cheese needs time to soften and develop its full flavor — cold brie is sad brie. Set the board on a central table where people can gather around it. I like to put it on the coffee table in the living room before dinner, so guests can graze while they chat.
For presentation, I like to add a few small serving spoons and cheese knives so people can serve themselves easily. Place napkins nearby — things get sticky with honey and fruit juice. A small stack of small plates is also helpful, though honestly, most people will just eat directly off the board. That’s the charm of a grazing spread.
Storage: If you have leftovers (unlikely, but possible), separate the components before storing. Cheese should be wrapped in wax paper or cheese paper and stored in the fridge. Meats should be wrapped tightly in plastic wrap. Fruit will keep in an airtight container for a day or two, though apples and pears will continue to brown. Crackers should be stored in a sealed bag or container to keep them crisp. The honey and jam don’t need refrigeration.
Reheating: There’s nothing to reheat here, but if you warmed the brie, you can pop it back in the oven at 350°F for 5 minutes to soften it again. Leftover candied pecans can be refreshed in a dry skillet over medium heat for a minute or two.
Flavor Development: The cheese actually gets better after a day in the fridge — the flavors meld and deepen. The fruit, unfortunately, does not improve. So plan to eat the fruit within 24 hours and repurpose the cheese and meats for sandwiches or snacks later in the week.
Nutritional Information & Benefits
This board is meant for sharing, so nutritional values will vary depending on what you eat. But here’s a rough estimate per serving (about ¼ of the board):
| Nutrient | Amount per Serving |
|---|---|
| Calories | 380-450 |
| Protein | 18-22g |
| Fat | 25-30g |
| Carbohydrates | 30-35g |
| Fiber | 5-7g |
| Sugar | 18-22g |
The health benefits here come from the whole food ingredients. Apples and pears are packed with fiber and vitamin C. Pomegranate seeds are loaded with antioxidants. Nuts provide healthy fats and protein. Cheese offers calcium and protein. Even the cured meats, in moderation, provide iron and B vitamins.
This board is naturally gluten-free if you skip the crackers and baguette. It’s also easy to make dairy-free with simple substitutions. The main allergens to watch for are dairy (cheese), gluten (crackers), and tree nuts (pecans).
I love that this board feels indulgent but is actually built on pretty wholesome ingredients. It’s the kind of food that satisfies without weighing you down — perfect for a long evening of conversation and laughter.
Conclusion
This Cozy Friendsgiving Charcuterie Board with Fall Fruit has become my go-to for every fall gathering. It’s the thing I set out when I want people to feel welcomed and cared for without spending hours in the kitchen. There’s something about a beautiful board of food that makes people slow down, gather close, and actually talk to each other.
I love that this recipe is flexible — you can swap in your favorite cheeses, use whatever fruit looks best at the market, and adjust the quantities based on how many people you’re feeding. It’s forgiving and friendly, just like the best Friendsgiving celebrations.
If you make this board, I’d love to hear about it. What cheeses did you choose? Did anyone get caught sneaking extra bites? (It’s okay, we’ve all been there.) Leave a comment below and let me know how your Friendsgiving turned out. And if you’re looking for more cozy fall recipes, you might enjoy my maple roasted brussels sprouts or this slow cooker apple cider — they pair perfectly with this board for a full Friendsgiving spread.
Now go make that board. Your friends will thank you. And honestly, you’ll thank yourself when you’re sitting there with a glass of wine, a slice of brie, and a good conversation. That’s what this season is all about.
Frequently Asked Questions
How far in advance can I assemble this charcuterie board?
You can prep all the components up to 24 hours ahead, but I recommend assembling the board no more than 2 hours before serving. Slice the apples and pears right before arranging to prevent browning. If you need to assemble it earlier, toss the sliced fruit in a little lemon juice and cover the board tightly with plastic wrap.
What if I can’t find certain fruits or cheeses?
No problem at all. This board is meant to be flexible. Swap Honeycrisp apples for Fuji or Gala. Use Bartlett pears instead of Bosc. If you can’t find manchego, try aged gouda or even a good parmesan. The key is balancing flavors — sweet with salty, creamy with crunchy. Trust your taste buds.
How many people does this board serve?
This board serves 6 to 8 people as an appetizer or snack. If you’re serving it as a main course for a light meal, it will feed about 4 people. For a large Friendsgiving gathering, I recommend doubling the quantities and using two boards or one very large platter.
Can I make this board vegetarian or vegan?
Absolutely. For a vegetarian version, simply omit the meats and add more cheese, nuts, and fruit. For a vegan version, use plant-based cheeses (cashew brie and almond feta work beautifully), skip the honey (use maple syrup instead), and load up on fruit, nuts, and vegetables like sliced cucumber and bell pepper strips.
How do I keep the fruit from turning brown?
The best trick is to slice the apples and pears right before serving. If you need to slice them ahead of time, toss them in a bowl with a tablespoon of lemon juice or lime juice. The citric acid prevents oxidation without affecting the flavor much. You can also use a commercial product like Fruit-Fresh, but lemon juice works just as well and costs less.
PrintCozy Friendsgiving Charcuterie Board with Fall Fruit
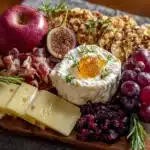
A beautiful and easy charcuterie board featuring fall fruits like apples, pears, and pomegranate, paired with creamy cheeses, savory meats, and crunchy elements. Perfect for Friendsgiving gatherings, this board comes together in under 20 minutes and is sure to impress.
- Prep Time: 20 minutes
- Cook Time: 0 minutes
- Total Time: 20 minutes
- Yield: 6 to 8 servings 1x
- Category: Appetizer
- Cuisine: American
Ingredients
- 8 oz Brie (double or triple cream)
- 6 oz Aged Cheddar (sharp, crumbly, aged at least 12 months)
- 4 oz Goat Cheese (soft chèvre log)
- 4 oz Manchego (or aged Gouda)
- 4 oz Prosciutto (thinly sliced, preferably Prosciutto di Parma)
- 4 oz Genoa Salami (sliced into thin rounds)
- 4 oz Soppressata (or capicola)
- 2 medium Honeycrisp Apples
- 2 medium Bosc Pears
- ½ cup Pomegranate Seeds
- ½ cup Dried Figs (soft and plump, such as Mission figs)
- 1 cup Red Grapes (small clusters)
- ½ cup Candied Pecans
- 6 oz Assorted Crackers (water crackers, rosemary crackers, seedy whole wheat)
- ½ Baguette (sliced thin and toasted)
- 3 tablespoons Honey (preferably orange blossom or local)
- ¼ cup Fig Jam or Apple Butter
- 2 tablespoons Whole Grain Mustard
- Fresh Rosemary Sprigs (for garnish)
Instructions
- Start with the bowls. Place small bowls of honey, fig jam, whole grain mustard, and pomegranate seeds on the board, spacing them evenly to act as anchors.
- Add the cheeses. Place the brie wheel whole on the board. Slice the aged cheddar into thin triangles or rectangles and fan them out. Slice the goat cheese log into ½-inch rounds and arrange in a line or stack. Cut the manchego into thin wedges and arrange near the cheddar. Leave space between each cheese type.
- Layer in the meats. Fold prosciutto slices into loose ribbons or waves and arrange in a small pile. Fan salami slices in an overlapping row, and do the same with soppressata. Keep meats grouped by type near the cheddar and manchego.
- Add the fruit. Slice apples and pears into thin wedges (about 8 slices per fruit) just before arranging. Fan them out in small clusters around the board, alternating apple and pear sections. Scatter dried figs in small groups near the cheeses. Place grape clusters in gaps.
- Fill in with crunch. Arrange crackers and baguette slices in small groups near the cheeses they pair best with. Scatter candied pecans in small piles in remaining gaps.
- Garnish and finish. Tuck small sprigs of fresh rosemary into gaps. Drizzle extra honey over the brie if desired. Fill any empty spots with extra crackers or fruit.
- Serve immediately at room temperature. If made ahead, cover loosely with plastic wrap and refrigerate, but take out 30 minutes before serving to let cheese warm up.
Notes
Slice apples and pears just before serving to prevent browning; toss with a little lemon juice if slicing ahead. Let brie and goat cheese come to room temperature for best flavor. Keep extra crackers and fruit on hand to refresh the board.
Nutrition
- Serving Size: ¼ of the board
- Calories: 380450
- Sugar: 1822
- Fat: 2530
- Carbohydrates: 3035
- Fiber: 57
- Protein: 1822
Keywords: charcuterie board, Friendsgiving, fall fruit, appetizer, cheese board, easy entertaining


