The power went out halfway through the third snowstorm that January. There I was, standing in a dark kitchen on a Tuesday night, holding a raw chicken thigh in one hand and my phone in the other, trying to remember if I’d charged it that morning. The wind was howling outside, and honestly? I was this close to just ordering pizza. But then I remembered the little cast iron skillet I’d picked up at a garage sale last summer, the one with the slightly wobbly handle that I kept meaning to fix. That skillet, a bag of rice, and some chicken became the accidental heroes of that long, cold night.
I’d been chasing a specific memory for months before that. There used to be this tiny diner off Route 9, the kind with cracked vinyl booths and a jukebox that only played songs from the 80s. They made this chicken and rice dish that was pure magic – the rice was always perfectly tender, the chicken had this golden, crispy skin, and everything came together in one pan. When the diner closed down in 2021, I was genuinely heartbroken. I mean, I tried other versions at other places, but nothing came close. After 17 tries – some burnt, some soggy, one that my neighbor’s dog actually refused to eat – I finally got it. This is that recipe.
Maybe you’ve been there too, you know? That feeling when a dish from your past becomes this unshakeable craving, and no amount of takeout can fix it. This cozy one-pan chicken & rice skillet dinner is the answer to that craving. It’s the kind of meal that makes you slow down, breathe deep, and remember why simple food made with intention is the best kind of comfort. Let me show you how to make it.
Why You’ll Love This Recipe
Let me tell you why this one-pan chicken & rice skillet has become my most-requested recipe among friends and family. It’s not just another dinner – it’s the dinner that saves your sanity on busy nights and warms your soul on cold ones.
- Quick & Easy: From start to finish, this meal comes together in about 45 minutes. Most of that time is hands-off, letting you relax while dinner practically makes itself.
- Simple Ingredients: You probably have most of these in your pantry right now. Chicken, rice, broth, a few veggies, and some basic seasonings – no fancy grocery store trips required.
- Perfect for Cozy Nights: This is the meal you want when the weather turns chilly, when you’ve had a rough day, or when you just need something that feels like a hug in a bowl.
- Crowd-Pleaser: I’ve served this to picky kids, foodie friends, and my grandma who’s been cooking for 70 years. Everyone asks for seconds.
- Unbelievably Delicious: The secret is in the layering – seared chicken creates a flavorful base, the rice absorbs all that goodness, and the final result is pure comfort food magic.
What makes this version different from the rest? It’s the technique. Most one-pan chicken and rice recipes end up with mushy rice or dry chicken. I spent months perfecting the ratios and timing so that every grain of rice is perfectly cooked and the chicken stays juicy and tender. Plus, I’ve included a little trick with the pan that creates this incredible golden crust on the bottom of the rice – trust me, it’s worth every minute.
This recipe isn’t just good – it’s the kind that makes you close your eyes after the first bite. It’s comfort food at its finest, made with love and a little bit of patience, and it’s exactly what you need tonight.
What Ingredients You Will Need
This recipe uses simple, wholesome ingredients to create something truly special. Most of these are pantry staples, which makes this dish perfect for those nights when you need dinner without the drama.
For the Chicken
- 4 bone-in, skin-on chicken thighs (about 1.5 lbs total) – The bone keeps the meat juicy, and the skin gets beautifully crispy. You can use boneless thighs if you prefer, just reduce cooking time by about 5 minutes.
- 1 teaspoon salt – I use kosher salt for better control.
- ½ teaspoon black pepper – Freshly ground is always better.
- 1 teaspoon paprika – Adds color and a subtle smoky flavor.
- ½ teaspoon garlic powder – Don’t skip this; it adds depth.
- 2 tablespoons olive oil – For searing. Avocado oil works too.
For the Rice and Vegetables
- 1 cup long-grain white rice – Basmati or jasmine work beautifully. Avoid short-grain rice as it gets too sticky.
- 1 medium yellow onion, diced – About 1 cup. Sweet onions work too.
- 2 carrots, peeled and diced – Adds sweetness and color.
- 2 celery stalks, diced – For that classic aromatic base.
- 3 cloves garlic, minced – Fresh is non-negotiable here.
- 1 cup frozen peas – No need to thaw them first.
For the Broth and Seasoning
- 2 cups chicken broth – Low-sodium is best so you can control the salt. I recommend Swanson or Pacific Foods for consistent flavor.
- 1 tablespoon butter – Adds richness at the end.
- 1 teaspoon dried thyme – Or 1 tablespoon fresh thyme leaves.
- ½ teaspoon dried rosemary – Crush it between your fingers to release the oils.
- Optional: ¼ cup fresh parsley, chopped – For garnish and a fresh finish.
Ingredient Selection Tips: Look for chicken thighs with the skin still attached – it protects the meat during cooking and gets wonderfully crispy. For the rice, don’t use instant rice or brown rice without adjusting the liquid and cooking time. Trust me on this one – I learned the hard way after a particularly sad, crunchy dinner.
Substitution Guidance: Need a dairy-free option? Use coconut oil instead of butter. Gluten-free? This recipe is naturally gluten-free as long as your broth is certified gluten-free. Want to swap the chicken? Try turkey thighs or even a firm white fish like cod, though cooking times will vary.
Equipment Needed
The beauty of this recipe is that you don’t need much. Here’s what you’ll want to have on hand:
- A large skillet or Dutch oven – 12-inch with a tight-fitting lid is ideal. Cast iron is my favorite for even heat distribution, but a heavy-bottomed stainless steel pan works great too. I’ve used my grandmother’s old cast iron for this recipe for years, and it just gets better with age.
- A sharp chef’s knife – For dicing onions, carrots, and celery with ease. A dull knife is more dangerous than a sharp one, honestly.
- A wooden spoon or spatula – For stirring without scratching your pan.
- Measuring cups and spoons – Accuracy matters for the rice-to-liquid ratio.
- A cutting board – Preferably one with a groove to catch juices.
- Tongs – For flipping the chicken without piercing the skin.
If you don’t have a lid that fits your skillet, aluminum foil works in a pinch – just crimp it tightly around the edges. And if you’re using a non-stick pan, be extra careful with high heat; cast iron or stainless steel will give you better browning anyway.
Preparation Method
Let’s get cooking! This method might look like a lot of steps, but I promise it flows naturally once you get started. Take your time with the first few steps – they build the foundation for everything else.
- Prep your ingredients first. Dice the onion, carrots, and celery into roughly equal-sized pieces – about ¼-inch dice. Mince the garlic. Measure out your rice and broth. Having everything ready before you start cooking makes the whole process smoother and less stressful. I learned this the hard way after burning garlic while frantically chopping an onion.
- Season the chicken. Pat the chicken thighs dry with paper towels – this is crucial for crispy skin. In a small bowl, mix the salt, pepper, paprika, and garlic powder. Sprinkle this mixture evenly over both sides of the chicken. Let it sit at room temperature for 10 minutes while you heat the pan.
- Heat the skillet over medium-high heat. Add the olive oil and swirl to coat the bottom. When the oil shimmers – you’ll see tiny ripples – carefully place the chicken thighs skin-side down. Don’t crowd them; if your pan is smaller, work in batches. Let them cook undisturbed for 5-7 minutes until the skin is deep golden brown and crispy. The chicken should release easily from the pan when it’s ready; if it sticks, give it another minute.
- Flip the chicken and cook for 3 more minutes on the other side. Transfer the chicken to a plate – it won’t be cooked through yet, and that’s perfectly fine. The residual heat will keep it warm while you build the rice.
- Pour off all but 1 tablespoon of the rendered fat from the skillet. Leave the browned bits (fond) in the pan – that’s pure flavor. Add the butter and let it melt over medium heat.
- Sauté the aromatics. Add the diced onion, carrots, and celery. Cook for 5-6 minutes, stirring occasionally, until the vegetables have softened and the onion is translucent. The fond on the bottom of the pan will start to loosen as the vegetables release their moisture – scrape it up with your wooden spoon. Add the minced garlic and cook for 30 seconds until fragrant. Your kitchen should smell amazing at this point.
- Add the rice and toast it. Pour in the rice and stir to coat every grain with the buttery vegetable mixture. Cook for 2 minutes, stirring constantly. You’ll notice the rice turning slightly translucent at the edges and maybe hear a faint crackling sound – that’s the toasting process, and it’s key to preventing mushy rice later.
- Pour in the broth and seasonings. Add the chicken broth, dried thyme, and dried rosemary. Stir everything together, scraping up any remaining browned bits from the bottom of the pan. Bring the liquid to a gentle boil – you should see small bubbles breaking the surface, not a raging boil.
- Nestle the chicken back in. Place the chicken thighs skin-side up on top of the rice mixture. They should be sitting partially submerged in the liquid. Bring the liquid back to a gentle simmer, then reduce the heat to low.
- Cover and cook. Put the lid on your skillet and let it cook undisturbed for 20 minutes. I know it’s tempting to peek – don’t. Every time you lift that lid, steam escapes, and that steam is what cooks the rice perfectly. Set a timer and walk away. Maybe pour yourself a glass of wine or just stand there and enjoy the smell filling your kitchen.
- Check for doneness. After 20 minutes, remove the lid carefully – steam burns are no joke. The rice should be tender and have absorbed most of the liquid. The chicken should register 165°F (74°C) on an instant-read thermometer inserted into the thickest part without touching bone. If the rice is still a bit firm, add 2 tablespoons of broth, replace the lid, and cook for 5 more minutes.
- Add the peas and let it rest. Sprinkle the frozen peas over the top of the dish. Don’t stir them in – just let them sit on top. Replace the lid and let everything rest off the heat for 5 minutes. This allows the peas to warm through and the rice to finish absorbing any remaining moisture.
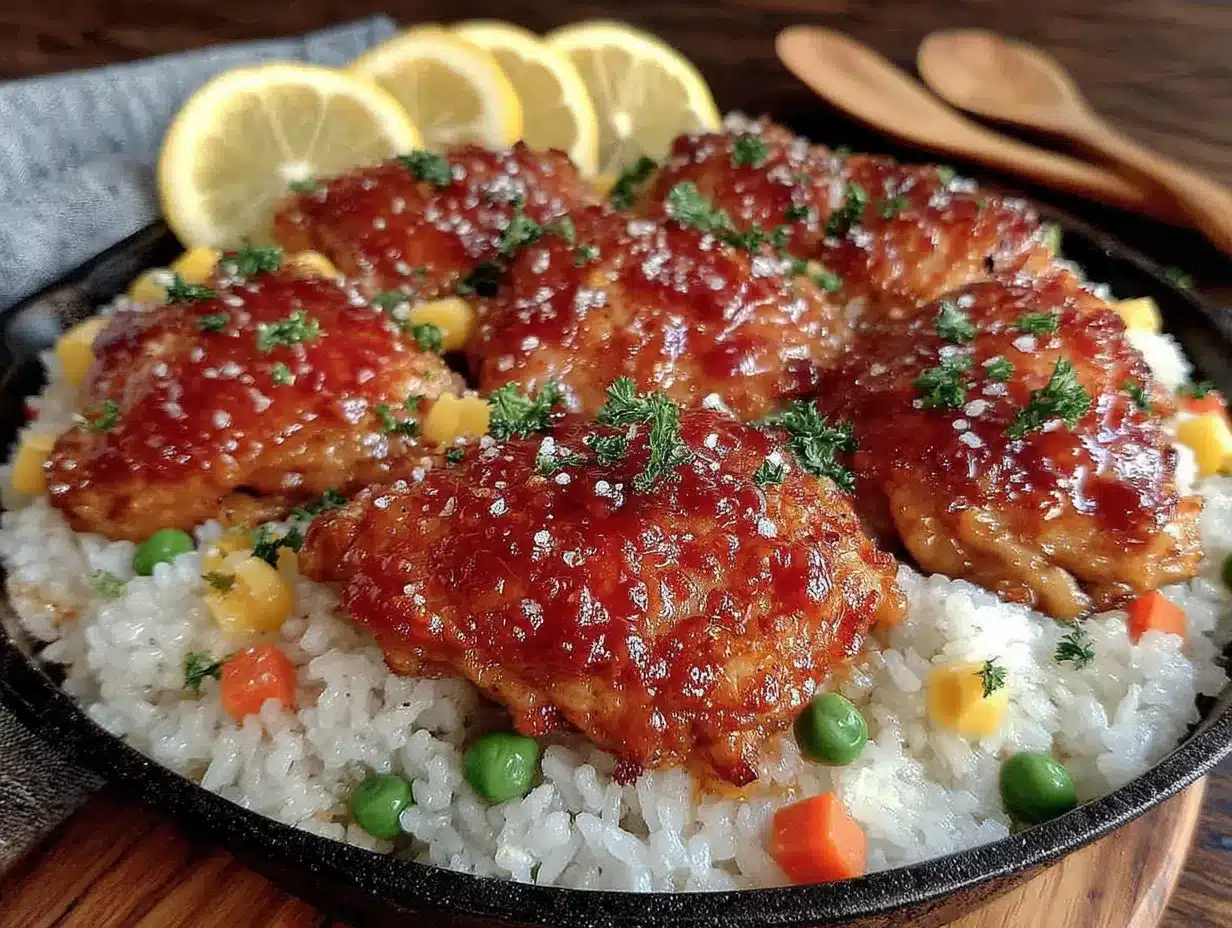
- Fluff and serve. Remove the chicken to a clean plate. Fluff the rice with a fork – you’ll see the peas distributed throughout. Taste and adjust seasoning if needed. Serve the rice topped with a chicken thigh and a sprinkle of fresh parsley if you’re using it.
Sensory cues to watch for: When the chicken is searing, listen for a steady sizzle – if it’s too quiet, your pan isn’t hot enough. When you add the broth, you should hear a brief hiss as it hits the hot pan. And when you finally lift that lid after 20 minutes, the steam should smell deeply savory and slightly herbal.
Cooking Tips & Techniques
After making this dish more times than I can count, I’ve picked up a few tricks that make a real difference. Let me share them so you can skip the trial-and-error phase.
The biggest mistake people make is using the wrong rice-to-liquid ratio. For long-grain white rice in a one-pan dish, you want exactly 2 cups of liquid for every 1 cup of rice. That includes the broth and any moisture released by the vegetables. I learned this after making a batch that was more like risotto than fluffy rice – tasty, but not what I was going for.
Don’t skip the toasting step. Toasting the rice in the fat and vegetables before adding liquid changes everything. It adds a nutty flavor and helps each grain stay separate instead of turning into a sticky mess. Two minutes of stirring is all it takes.
Temperature control is everything. After you add the broth and bring it to a boil, you must reduce the heat to low – the lowest setting your stove has. If you cook it on medium or even medium-low, the liquid will evaporate too quickly and you’ll end up with undercooked rice. I ruined three batches before I figured this out. Set it and forget it.
Multitasking strategy: While the chicken is searing, dice your vegetables if you haven’t already. While the rice is cooking, clean up your workspace and set the table. This way, when dinner is ready, all you have to do is sit down and enjoy.
For consistent results every time, use the same skillet and the same brand of rice. I know that sounds obsessive, but different pans conduct heat differently, and different rice brands absorb liquid at slightly different rates. Once you find a combination that works, stick with it.
Variations & Adaptations
One of the best things about this recipe is how adaptable it is. Here are some variations I’ve tried and loved:
1. Mushroom & Herb Version: Swap the carrots and celery for 8 ounces of sliced cremini mushrooms and 1 leek (white and light green parts only, cleaned and sliced). Add the mushrooms with the onion and cook until they release their liquid and start to brown. Use fresh thyme and rosemary instead of dried. This version is earthy and deeply satisfying – perfect for fall evenings.
2. Spicy Cajun Twist: Replace the paprika with 1 tablespoon of Cajun seasoning. Add ½ cup of diced bell pepper (any color) along with the onion. For extra heat, toss in a minced jalapeño with the garlic. This version pairs beautifully with a side of cornbread.
3. Lemon & Herb Light Version: Use boneless, skinless chicken breasts (reduce initial searing time to 3 minutes per side). Add the zest of 1 lemon and 2 tablespoons of lemon juice along with the broth. Replace the peas with 1 cup of chopped green beans. This version feels brighter and lighter – great for spring or summer evenings.
4. Dietary Adaptations: For a dairy-free version, use olive oil instead of butter. For a lower-carb option, replace the rice with cauliflower rice – but reduce the broth to 1 cup and cook for only 10 minutes covered. For a gluten-free option, ensure your broth is certified gluten-free and you’re good to go.
My personal favorite variation? The mushroom version with a splash of white wine added after sautéing the vegetables. I let it cook down for a minute before adding the rice, and it adds this incredible depth that makes the dish feel fancy enough for company.
Serving & Storage Suggestions
This dish is best served warm, straight from the skillet. The contrast between the crispy chicken skin and the tender, flavorful rice is pure magic. I like to serve it with a simple side salad dressed with lemon vinaigrette – the acidity cuts through the richness beautifully.
For presentation, bring the whole skillet to the table. There’s something so welcoming about a one-pan meal sitting in the center of the table, steam still rising. Garnish with fresh parsley and maybe a few lemon wedges for squeezing over the top.
Complementary sides: A crusty baguette for sopping up any extra juices, roasted asparagus or green beans, or a simple cucumber and tomato salad. For beverages, a crisp white wine like Sauvignon Blanc or a light beer like a pilsner works wonderfully. If you’re serving this on a cold night, a cup of hot apple cider on the side is a lovely touch.
Storage instructions: Let any leftovers cool completely before transferring to an airtight container. Store in the refrigerator for up to 4 days. The flavors actually meld and deepen overnight – I often think this dish is even better the next day.
Reheating methods: The best way to reheat is in a skillet over medium-low heat with a splash of broth or water. Cover and cook for 5-7 minutes, stirring occasionally, until heated through. You can also use the microwave, but the rice won’t be as fluffy. For the chicken, reheat it separately in a 350°F oven for about 10 minutes to re-crisp the skin.
Freezer instructions: This dish freezes well for up to 3 months. Transfer the cooled mixture to a freezer-safe container, leaving some headroom for expansion. To thaw, move it to the refrigerator overnight. Reheat as directed above. The peas might lose a bit of their bright color, but the flavor will still be fantastic.
One note: the flavors definitely develop over time. The second-day version has a deeper, more cohesive taste as the rice continues to absorb the broth and seasonings. If you can resist eating it all the first night, you’re in for a treat.
Nutritional Information & Benefits
Here’s the approximate nutritional breakdown for one serving (one chicken thigh with about 1 cup of rice mixture):
| Nutrient | Amount per Serving |
|---|---|
| Calories | 485 |
| Protein | 32g |
| Carbohydrates | 42g |
| Fat | 18g |
| Saturated Fat | 5g |
| Fiber | 3g |
| Sodium | 720mg |
| Vitamin A | 70% DV |
| Vitamin C | 15% DV |
| Iron | 15% DV |
Health benefits of key ingredients: Chicken thighs provide high-quality protein and essential B vitamins. Carrots are packed with beta-carotene for eye health. Celery offers antioxidants and hydration. Peas add fiber and plant-based protein. Garlic has immune-boosting properties. This dish is naturally gluten-free and can be made dairy-free with a simple swap.
Dietary considerations: This recipe contains dairy (butter) but can be easily adapted. It’s not suitable for low-carb or keto diets due to the rice, but the cauliflower rice variation works well. For those watching sodium, use low-sodium broth and reduce the added salt.
From my perspective, this dish is about balance. It’s hearty and satisfying without being overly heavy. The vegetables add nutrition and color, and the portion sizes are reasonable for a filling dinner. Food should nourish both body and soul, and this recipe does exactly that.
Conclusion
This cozy one-pan chicken & rice skillet dinner is more than just a recipe – it’s a reminder that the best meals often come from simple ingredients and a little bit of patience. It’s the dish I turn to when I need comfort, when I want to impress without stress, and when I just want to enjoy the process of cooking something beautiful.
I hope you’ll make this your own. Maybe you’ll add extra garlic like I always do, or throw in whatever vegetables you have in the fridge. Maybe you’ll serve it with hot sauce or a squeeze of lemon. However you make it, I promise it will become a staple in your kitchen.
I’d love to hear how yours turns out! Drop a comment below and let me know if you tried any variations, or tag me in your photos on social media. There’s nothing that makes me happier than seeing this recipe bring a little warmth to someone else’s table. Happy cooking, friends – and remember, the best meals are the ones made with love.
Frequently Asked Questions
Can I use boneless, skinless chicken breasts instead?
Absolutely! Just reduce the initial searing time to 3 minutes per side, and check the internal temperature after 15 minutes of covered cooking. Chicken breasts cook faster than thighs, so keep an eye on them to avoid drying out. You’ll miss the crispy skin, but it’s still delicious.
Why is my rice still crunchy after 20 minutes?
This usually happens for one of three reasons: the heat was too high and the liquid evaporated too quickly, you lifted the lid during cooking and let steam escape, or your rice-to-liquid ratio was off. Next time, make sure you’re using exactly 2 cups of liquid per 1 cup of rice, keep the heat on low, and resist the urge to peek.
Can I make this in a slow cooker or Instant Pot?
You can adapt this for an Instant Pot by using the sauté function for the chicken and vegetables, then pressure cooking on high for 5 minutes with a natural release. For a slow cooker, sear the chicken and sauté the vegetables on the stovetop first, then transfer everything to the slow cooker and cook on low for 4-5 hours. The texture will be different – softer and more porridge-like – but still tasty.
How do I get the chicken skin extra crispy?
The key is starting with dry chicken skin – pat it thoroughly with paper towels before seasoning. Use a hot pan with enough oil, and don’t move the chicken for the first 5 minutes. Let it develop a deep golden crust before flipping. If the skin isn’t crispy enough after cooking, you can pop the chicken under the broiler for 2-3 minutes at the end.
Can I add other vegetables to this dish?
Definitely! This recipe is very forgiving. Try adding diced zucchini, bell peppers, mushrooms, or even chopped kale. Just keep the total vegetable volume similar to what’s listed, and add any quick-cooking vegetables like spinach or zucchini in the last 5 minutes of cooking so they don’t get mushy.
Pin This Recipe!

Cozy One-Pan Chicken & Rice Skillet – Easy Dinner

This cozy one-pan chicken and rice skillet dinner is the answer to that craving for simple, comforting food. It’s the kind of meal that makes you slow down, breathe deep, and remember why simple food made with intention is the best kind of comfort.
- Prep Time: 15 minutes
- Cook Time: 30 minutes
- Total Time: 45 minutes
- Yield: 4 servings 1x
- Category: Main Course
- Cuisine: American
Ingredients
- 4 bone-in, skin-on chicken thighs (about 1.5 lbs total)
- 1 teaspoon salt
- ½ teaspoon black pepper
- 1 teaspoon paprika
- ½ teaspoon garlic powder
- 2 tablespoons olive oil
- 1 cup long-grain white rice
- 1 medium yellow onion, diced
- 2 carrots, peeled and diced
- 2 celery stalks, diced
- 3 cloves garlic, minced
- 1 cup frozen peas
- 2 cups chicken broth
- 1 tablespoon butter
- 1 teaspoon dried thyme
- ½ teaspoon dried rosemary
- Optional: ¼ cup fresh parsley, chopped
Instructions
- Prep your ingredients first. Dice the onion, carrots, and celery into roughly equal-sized pieces – about ¼-inch dice. Mince the garlic. Measure out your rice and broth.
- Season the chicken. Pat the chicken thighs dry with paper towels. In a small bowl, mix the salt, pepper, paprika, and garlic powder. Sprinkle this mixture evenly over both sides of the chicken. Let it sit at room temperature for 10 minutes while you heat the pan.
- Heat the skillet over medium-high heat. Add the olive oil and swirl to coat the bottom. When the oil shimmers, carefully place the chicken thighs skin-side down. Cook undisturbed for 5-7 minutes until the skin is deep golden brown and crispy.
- Flip the chicken and cook for 3 more minutes on the other side. Transfer the chicken to a plate.
- Pour off all but 1 tablespoon of the rendered fat from the skillet. Add the butter and let it melt over medium heat.
- Sauté the aromatics. Add the diced onion, carrots, and celery. Cook for 5-6 minutes, stirring occasionally, until the vegetables have softened and the onion is translucent. Add the minced garlic and cook for 30 seconds until fragrant.
- Add the rice and toast it. Pour in the rice and stir to coat every grain. Cook for 2 minutes, stirring constantly.
- Pour in the broth and seasonings. Add the chicken broth, dried thyme, and dried rosemary. Stir everything together, scraping up any remaining browned bits from the bottom of the pan. Bring the liquid to a gentle boil.
- Nestle the chicken back in. Place the chicken thighs skin-side up on top of the rice mixture. Bring the liquid back to a gentle simmer, then reduce the heat to low.
- Cover and cook. Put the lid on your skillet and let it cook undisturbed for 20 minutes.
- Check for doneness. After 20 minutes, remove the lid carefully. The rice should be tender and have absorbed most of the liquid. The chicken should register 165°F (74°C) on an instant-read thermometer. If the rice is still a bit firm, add 2 tablespoons of broth, replace the lid, and cook for 5 more minutes.
- Add the peas and let it rest. Sprinkle the frozen peas over the top of the dish. Replace the lid and let everything rest off the heat for 5 minutes.
- Fluff and serve. Remove the chicken to a clean plate. Fluff the rice with a fork. Serve the rice topped with a chicken thigh and a sprinkle of fresh parsley if using.
Notes
Don’t skip the toasting step for the rice. Temperature control is crucial: after adding broth, reduce heat to low. Use the same skillet and rice brand for consistent results. For extra crispy chicken skin, pat dry thoroughly before seasoning and don’t move the chicken during the first 5 minutes of searing.
Nutrition
- Serving Size: 1 chicken thigh with
- Calories: 485
- Sodium: 720
- Fat: 18
- Saturated Fat: 5
- Carbohydrates: 42
- Fiber: 3
- Protein: 32
Keywords: one-pan chicken and rice, chicken skillet dinner, easy chicken recipe, comfort food, one pot meal, cozy dinner