The woman at the community garden plot next to mine saw me eyeing her pumpkin patch last October. She didn’t say anything at first, just kept pulling weeds while I fumbled with my own sad little squash vines. Then she straightened up, wiped her hands on her jeans, and said, “You’re overwatering them, honey. They like it rough.” I laughed, embarrassed, but she just smiled and told me to come by when they were ripe. She’d show me what to do with them.
A few weeks later, I showed up at her door with two misshapen pumpkins I’d managed to coax out of my own garden. She took them without a word, and an hour later handed me a warm dish of these creamy pumpkin cheesecake bars. Honestly, I almost cried. They were that good. The filling was silky and spiced just right, the crust was buttery and crisp, and there was this tang from the cream cheese that cut through the sweetness perfectly. I asked her for the recipe, and she scribbled it on the back of a grocery receipt. I still have that crumpled piece of paper tucked into my favorite cookbook.
I’ve made these bars every fall since then, tweaking things here and there. I swapped the canned pumpkin for fresh puree when I have it, added a pinch more cinnamon, and figured out the trick to getting that perfect crack-free top. Maybe you’ve been there too, staring at a pumpkin dessert recipe and wondering if it’s actually going to deliver on that creamy promise. Let me tell you, this one does. It’s the kind of dessert that makes people close their eyes on the first bite. And honestly, that’s why I keep making it.
Why You’ll Love This Recipe
I’ve tested this recipe more times than I care to count, and each batch taught me something new. One time I overbaked it and the edges got too firm. Another time I didn’t let the cream cheese soften enough and ended up with lumpy filling. But now? This version is foolproof, and here is why I think you will love it as much as I do.
- Quick & Easy: These bars come together in about 20 minutes of active prep time. The oven does the rest. Perfect for busy weeknights when you need a dessert that looks impressive without the stress.
- Simple Ingredients: You probably have most of these in your kitchen already. No weird specialty items or expensive extracts. Just honest, real ingredients that work together beautifully.
- Perfect for Fall Gatherings: Whether it is Thanksgiving, a potluck, or just a cozy Sunday afternoon, these bars travel well and slice cleanly. They are the dessert equivalent of a warm sweater.
- Crowd-Pleaser: I have brought these to holiday dinners, office parties, and casual get-togethers. Every single time, someone asks for the recipe. Kids love them, adults devour them, and even the pickiest eaters go back for seconds.
- Unbelievably Delicious: The texture is what gets me every time. The filling is dense but creamy, the pumpkin flavor is warm and cozy, and the graham cracker crust adds just the right crunch. It is comfort food at its finest.
What makes this recipe different from the dozens of other pumpkin cheesecake bars out there? It is the technique. I blend the cream cheese and sugar until completely smooth before adding the pumpkin, which prevents that weird graininess you sometimes get. I also use a water bath method that ensures the filling bakes evenly without cracking. This isn’t just another version of pumpkin bars. It is the best version I have found, and I am pretty sure you will agree after that first bite.
This recipe is the kind that makes you forget about the calories for a minute. It is rich, it is indulgent, and it is exactly the kind of thing you want to serve when the leaves start changing and the air gets crisp. Trust me on this one.
What Ingredients You Will Need
This recipe uses simple, wholesome ingredients that come together to create something truly special. Most of these are pantry staples, especially during the fall season. Here is what you will need and why each one matters.
For the Graham Cracker Crust
- Graham cracker crumbs (1 ½ cups / about 12 full sheets): You can buy pre-crushed crumbs or crush your own in a food processor or zip-top bag. I prefer crushing my own because the texture is more consistent. Honey grahams work best, but cinnamon grahams add a nice extra layer of flavor.
- Granulated sugar (¼ cup / 50g): Just enough to sweeten the crust without making it candy-like.
- Unsalted butter (6 tablespoons / 85g, melted): Use real butter here, not margarine. It makes a huge difference in flavor and texture. I use Land O Lakes or Kerrygold for the best results.
- Pinch of salt (⅛ teaspoon): Balances the sweetness and enhances the buttery flavor.
For the Pumpkin Cheesecake Filling
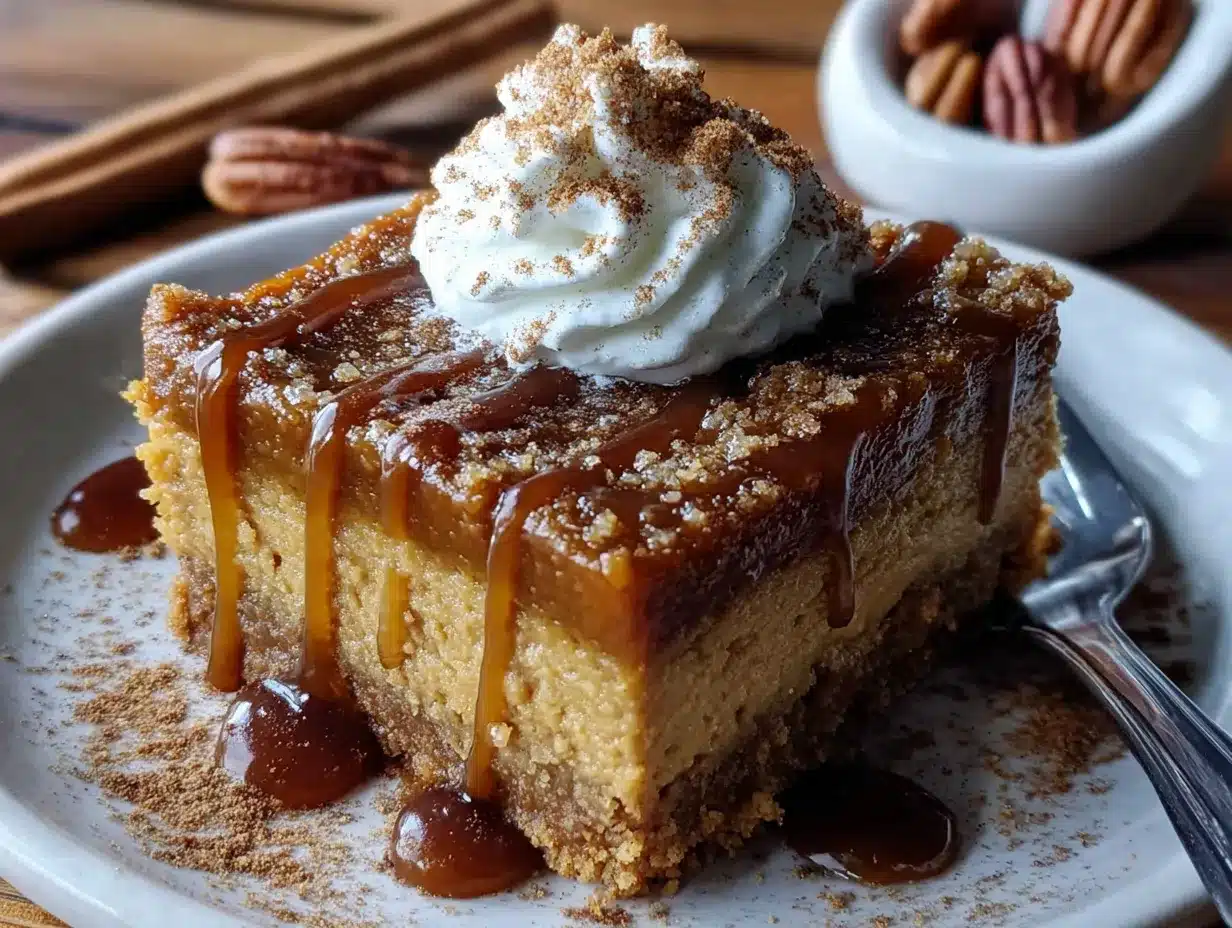
- Cream cheese (16 ounces / 450g, softened): Full-fat cream cheese is non-negotiable here. Low-fat versions contain too much water and will make the filling runny. Let it sit at room temperature for at least 30 minutes before starting. Philadelphia brand is my go-to for consistent results.
- Granulated sugar (¾ cup / 150g): Standard white sugar works perfectly. You can reduce it to ½ cup if you prefer a less sweet dessert.
- Brown sugar (¼ cup / 50g, packed): Adds depth and a hint of molasses that complements the pumpkin beautifully. Light or dark brown sugar both work, but dark gives a richer flavor.
- Pumpkin puree (1 cup / 245g): Canned pumpkin puree is perfectly fine here. Make sure it is 100% pure pumpkin, not pumpkin pie filling. Libby’s is my preferred brand. If using fresh pumpkin puree, make sure to drain it well in a cheesecloth-lined strainer for a few hours to remove excess moisture.
- Large eggs (3, room temperature): Room temperature eggs incorporate more smoothly into the batter. If you forget to take them out ahead of time, place them in a bowl of warm water for 5 minutes.
- Vanilla extract (2 teaspoons / 10ml): Pure vanilla extract, not imitation. It makes a subtle but noticeable difference in the final flavor.
- Pumpkin pie spice (2 teaspoons): You can use store-bought or make your own by mixing 1 teaspoon cinnamon, ½ teaspoon ginger, ¼ teaspoon nutmeg, ¼ teaspoon allspice, and a pinch of cloves. I prefer making my own because I can adjust the ratios to my taste.
- Cinnamon (½ teaspoon): Extra cinnamon because I am a little obsessive about it. Feel free to skip this if you want a milder pumpkin flavor.
- Salt (¼ teaspoon): Essential for balancing the sweetness and bringing out the warm spices.
For the Sour Cream Topping (Optional but Recommended)
- Sour cream (1 cup / 240g): Full-fat sour cream. This topping adds a tangy contrast that cuts through the richness of the cheesecake. You can skip it, but I think it takes the bars to another level.
- Powdered sugar (2 tablespoons / 15g): Just enough to sweeten the topping without making it cloying.
- Vanilla extract (½ teaspoon): A little extra flavor for the topping.
Substitution Guidance
If you are gluten-sensitive, use gluten-free graham crackers or crushed gluten-free cookies for the crust. For a dairy-free version, try using dairy-free cream cheese and butter substitutes, though the texture will be slightly different. I have tested this with Kite Hill cream cheese and Miyoko’s butter, and while the bars were still delicious, they were a bit softer than the original. If you want to reduce the sugar, you can cut the granulated sugar to ½ cup without affecting the structure too much, but I would not recommend reducing it further.
Equipment Needed
You do not need a fancy kitchen to make these bars. Here is what you will need and a few tips I have picked up along the way.
- 9×9-inch baking pan: This is the perfect size for these bars. An 8×8 pan will work too, but the bars will be slightly thicker and may need a few extra minutes of baking time. I use a metal pan because it conducts heat more evenly than glass.
- Parchment paper: Line the pan with parchment paper, leaving some overhang on two sides. This creates handles that make it easy to lift the entire block of bars out after they have cooled. Trust me, this little trick saves so much frustration.
- Electric mixer (hand or stand): You can mix the filling by hand, but an electric mixer makes it much easier to get that silky smooth texture. I have used both a hand mixer and a stand mixer with the paddle attachment, and both work great.
- Large mixing bowls: One for the crust ingredients and one for the filling. Stainless steel or glass both work fine.
- Measuring cups and spoons: Accurate measurements matter in baking, so use proper measuring tools rather than eyeballing it.
- Spatula: A rubber spatula is essential for scraping down the sides of the bowl and spreading the filling evenly.
- Small saucepan or microwave-safe bowl: For melting the butter. I usually do it in the microwave in 15-second bursts to avoid splattering.
- Sharp knife: For cutting clean slices. A chef’s knife works well, but a long serrated knife is even better for getting through the crust without crumbling it.
If you do not have a 9×9 pan, you can use a 9-inch round springform pan instead. The bars will be slightly different in shape, but they will taste just as good. I have also made these in a mini cheesecake pan for individual servings, which is adorable and perfect for parties. Just reduce the baking time to about 20-25 minutes.
Preparation Method
Let me walk you through this step by step. I have made this recipe dozens of times, so I will point out the little things that make a big difference.
Step 1: Preheat and Prep
Preheat your oven to 350°F (175°C). Line your 9×9 baking pan with parchment paper, leaving about 2 inches of overhang on two opposite sides. This will be your lifeline later when you need to lift the bars out. Lightly grease the parchment with a little butter or non-stick spray.
Step 2: Make the Crust
In a medium bowl, combine 1 ½ cups graham cracker crumbs, ¼ cup granulated sugar, and a pinch of salt. Pour in 6 tablespoons of melted butter and stir with a fork until the mixture looks like wet sand. Every crumb should be coated. Press this mixture firmly into the bottom of your prepared pan. I use the bottom of a measuring cup to really pack it down flat. Bake the crust for 10 minutes, then set it aside to cool slightly. Do not skip this pre-baking step. It keeps the crust crisp and prevents it from getting soggy when you add the filling.
Step 3: Beat the Cream Cheese
In a large mixing bowl, beat 16 ounces of softened cream cheese with an electric mixer on medium speed until it is completely smooth and fluffy. This takes about 2 minutes. Scrape down the sides of the bowl with a spatula halfway through. This step is crucial. If your cream cheese is not fully softened or you do not beat it enough, you will end up with lumps in your filling. I learned this the hard way during a particularly frustrating Thanksgiving.
Step 4: Add the Sugars
Add ¾ cup granulated sugar and ¼ cup packed brown sugar to the cream cheese. Beat on medium speed until the mixture is light and fluffy, about 2 more minutes. Scrape the bowl again. The mixture should look pale and feel smooth when you rub a bit between your fingers.
Step 5: Incorporate the Pumpkin and Eggs
Add 1 cup pumpkin puree and beat on low speed until just combined. Then add the 3 room-temperature eggs, one at a time, beating on low after each addition. Do not overmix at this stage. Overmixing incorporates too much air, which can cause the cheesecake to puff up and then crack as it cools. Add 2 teaspoons vanilla extract, 2 teaspoons pumpkin pie spice, ½ teaspoon cinnamon, and ¼ teaspoon salt. Mix on low until everything is just combined. Give the bowl one final scrape to make sure there are no streaks of unmixed cream cheese hiding at the bottom.
Step 6: Assemble and Bake
Pour the filling over the pre-baked crust and spread it evenly with a spatula. Tap the pan gently on the counter a few times to release any air bubbles. Place the pan in the oven and bake at 350°F (175°C) for 35-40 minutes. The edges should be set and slightly puffed, but the center should still jiggle slightly when you gently shake the pan. It will continue to set as it cools. If the top starts to brown too quickly, tent the pan loosely with aluminum foil for the last 10 minutes of baking.
Step 7: Add the Sour Cream Topping (Optional)
While the bars are baking, whisk together 1 cup sour cream, 2 tablespoons powdered sugar, and ½ teaspoon vanilla extract in a small bowl. When the bars come out of the oven, let them cool for 10 minutes on a wire rack. Then carefully spread the sour cream mixture over the top. Return the pan to the oven and bake for another 5 minutes. This step is optional, but it adds a beautiful tangy layer that I absolutely love.
Step 8: Cool and Chill
Let the bars cool completely on a wire rack, about 1 hour. Then transfer the pan to the refrigerator and chill for at least 4 hours, preferably overnight. This is the hardest part because the kitchen will smell amazing, but do not skip this step. The bars need time to fully set so you can cut clean slices. I have made the mistake of cutting them too early, and they turned into a delicious but messy pumpkin pudding situation.
Step 9: Slice and Serve
Once the bars are fully chilled, use the parchment paper handles to lift the entire block out of the pan. Place it on a cutting board and use a sharp knife to cut into 16 squares (4 rows by 4 rows). For the cleanest cuts, wipe the knife clean between each slice. Serve cold or at room temperature. I personally love them straight from the fridge on a warm fall afternoon.
Cooking Tips & Techniques
Over the years, I have made just about every mistake you can make with these bars. Here is what I have learned so you do not have to repeat my failures.
Room temperature ingredients are non-negotiable. I cannot stress this enough. Cold cream cheese creates lumps that no amount of beating will fully fix. Cold eggs can cause the batter to curdle. Set everything out on the counter at least 30 minutes before you start. If you are in a hurry, cut the cream cheese into small cubes and microwave it in 10-second bursts until it is soft to the touch but not warm.
Do not overbeat the filling after adding the eggs. This was my biggest mistake for a long time. I thought more mixing meant a smoother texture, but it actually incorporates too much air. That trapped air expands in the oven, causing the cheesecake to puff up dramatically and then collapse, which leads to cracks. Mix on low speed and stop as soon as the eggs are incorporated.
The water bath trick. Traditional cheesecakes are baked in a water bath to ensure even cooking and prevent cracking. For these bars, I have found that a water bath is not strictly necessary because the bars are thin enough to bake evenly. However, if you are worried about cracks, you can place the pan inside a larger roasting pan and pour hot water halfway up the sides of the baking pan. Just make sure your pan is tightly wrapped in foil to prevent water from seeping in.
Timing is everything. The bars are done when the edges are set but the center still jiggles like Jell-O when you gently shake the pan. If the center looks liquid and sloshy, bake for another 5 minutes. If the entire top is firm and does not jiggle at all, you have overbaked them and they will likely crack as they cool. I usually start checking at the 30-minute mark because every oven runs a little differently.
Patience with chilling. I know it is tempting to cut into these bars while they are still slightly warm, but the texture will be much better if you wait. The chilling process allows the fats to solidify and the flavors to meld together. Overnight chilling is ideal, but if you are short on time, 4 hours is the absolute minimum.
Variations & Adaptations
One of the things I love about this recipe is how versatile it is. Here are a few ways I have adapted it over the years.
Gluten-Free Version: Swap the graham cracker crust for crushed gluten-free cookies or gluten-free graham crackers. I have used Schar brand graham crackers with great success. The rest of the ingredients are naturally gluten-free, so this is an easy adaptation.
Dairy-Free Version: Use dairy-free cream cheese and butter. I have tested this with Kite Hill cream cheese and Miyoko’s butter, and while the texture is slightly softer, the flavor is still excellent. For the sour cream topping, use a dairy-free sour cream or simply skip it.
Pumpkin Spice Latte Twist: Add 2 tablespoons of strong brewed coffee or espresso powder to the filling along with the pumpkin puree. This gives the bars a subtle coffee flavor that pairs beautifully with the pumpkin and spices. I made this version for a coffee-loving friend, and she said it was the best thing I have ever baked.
Nutty Crust: Replace half of the graham cracker crumbs with finely chopped pecans or walnuts. Toast the nuts first for extra flavor. This adds a wonderful crunch and a deeper, nuttier flavor that complements the pumpkin.
Chocolate Drizzle: Melt ½ cup of semi-sweet chocolate chips with 1 tablespoon of coconut oil and drizzle it over the chilled bars. The chocolate adds a rich contrast to the creamy pumpkin filling. I did this for a Halloween party once, and the bars disappeared in minutes.
Mini Cheesecake Bites: Press the crust mixture into a mini muffin tin (lined with paper liners) and fill with the cheesecake mixture. Bake for about 15-18 minutes. These are perfect for parties or portion control. Just be careful not to overfill the liners.
Serving & Storage Suggestions
These bars are incredibly versatile when it comes to serving. Here is how I like to enjoy them and how to keep them fresh.
Serving Temperature: I prefer these bars cold, straight from the refrigerator. The texture is firm and creamy, and the flavors are bright and distinct. However, they are also delicious at room temperature, especially if you want the crust to soften slightly. If serving at a party, I usually take them out of the fridge about 15 minutes before serving to take the chill off.
Presentation Ideas: Cut the bars into clean squares and arrange them on a nice platter. Dust the tops with a little cinnamon or pumpkin pie spice for a pretty finish. A dollop of whipped cream and a sprinkle of chopped pecans on each bar makes them look extra special. For Thanksgiving, I sometimes drizzle a little caramel sauce over the top.
Complementary Dishes: These bars pair beautifully with a cup of hot coffee, spiced chai, or apple cider. They also go well with a scoop of vanilla ice cream or a drizzle of warm caramel sauce. If you are serving them as part of a dessert spread, they work wonderfully alongside apple crisp, pecan pie, or chocolate chip cookies.
Storage Instructions: Store the bars in an airtight container in the refrigerator for up to 5 days. Place a sheet of parchment paper between layers to prevent them from sticking together. I have found that the flavors actually improve after a day or two as the spices meld with the cream cheese.
Freezing Instructions: These bars freeze beautifully. Wrap individual bars tightly in plastic wrap, then place them in a freezer-safe bag or container. They will keep for up to 3 months. To thaw, transfer a bar to the refrigerator overnight or let it sit at room temperature for about 30 minutes. I often make a double batch and freeze half for later. It is like having a secret stash of fall happiness waiting for you.
Reheating: I do not recommend reheating these bars. They are meant to be served cold or at room temperature. If you want a warm dessert, serve them with a scoop of warm apple compote or a drizzle of warm caramel sauce instead.
Nutritional Information & Benefits
While these bars are definitely a treat, they do have some redeeming qualities. Here is a rough breakdown of the nutritional information per bar (based on 16 servings).
| Nutrient | Amount Per Bar |
|---|---|
| Calories | 285 |
| Total Fat | 18g |
| Saturated Fat | 10g |
| Cholesterol | 75mg |
| Sodium | 220mg |
| Total Carbohydrates | 28g |
| Dietary Fiber | 1g |
| Sugars | 20g |
| Protein | 5g |
| Vitamin A | 45% DV |
| Calcium | 6% DV |
| Iron | 4% DV |
Health Benefits of Key Ingredients: Pumpkin is packed with vitamin A, which supports eye health and immune function. It is also a good source of fiber and antioxidants. Cream cheese provides calcium and protein, though it is high in saturated fat, so moderation is key. The spices in pumpkin pie spice, particularly cinnamon, have anti-inflammatory properties and may help regulate blood sugar.
Dietary Considerations: This recipe contains gluten (from the graham crackers), dairy (from the cream cheese and butter), and eggs. It can be adapted for gluten-free and dairy-free diets as mentioned in the variations section. It is not suitable for vegan diets without significant modifications.
Personal Wellness Perspective: I believe in balance. These bars are not health food, and I am not pretending they are. But a small square after a long week or as part of a holiday celebration is a beautiful thing. I make these bars with love and enjoy them without guilt. Life is too short to skip dessert.
Conclusion
These creamy pumpkin cheesecake bars have become my signature fall dessert, and for good reason. They are simple to make, incredibly delicious, and they always bring a smile to people’s faces. The buttery graham cracker crust, the silky pumpkin filling, and the tangy sour cream topping come together in a way that feels both familiar and special. It is comfort food with a little bit of elegance.
I hope you give these bars a try and make them your own. Maybe you will add a little extra cinnamon like I do, or maybe you will try the chocolate drizzle version. That is the beauty of a good recipe. It gives you a solid foundation and then invites you to play. Do not be afraid to experiment and find the version that makes you happy.
If you make these bars, I would love to hear about it. Leave a comment below and let me know how they turned out. Did you try a variation? Did your family love them? Share a photo on social media and tag me so I can see your beautiful creation. And if you have any questions, do not hesitate to ask. I am here to help.
Thank you for stopping by and spending a little time in my kitchen. Now go make some pumpkin cheesecake bars and enjoy every single bite. You deserve it.
Frequently Asked Questions
Can I use fresh pumpkin instead of canned?
Yes, you can use fresh pumpkin puree. Just make sure you drain it well in a cheesecloth-lined strainer for a few hours to remove excess moisture. Fresh pumpkin has more water than canned, so skipping this step can make the filling too loose.
Why did my cheesecake bars crack on top?
Cracks usually happen from overbaking or overmixing the filling. Make sure you take the bars out when the center still jiggles slightly. Also, avoid overbeating the batter after adding the eggs, as too much air can cause the filling to puff up and crack as it cools.
Can I make these bars ahead of time?
Absolutely. In fact, they taste even better the next day. You can make them up to 3 days in advance and store them in the refrigerator. They also freeze well for up to 3 months if you want to get a head start on holiday baking.
Can I use a different crust?
Yes, you can substitute the graham cracker crust with crushed ginger snaps, shortbread cookies, or even vanilla wafers. Each will give the bars a slightly different flavor. Ginger snaps add a lovely spicy kick that pairs wonderfully with the pumpkin.
How do I get clean slices?
Use a sharp knife and wipe it clean between each cut. For the cleanest slices, chill the bars for at least 4 hours or overnight. You can also run the knife under hot water and dry it before cutting, which helps the blade glide through the cheesecake without dragging.
Pin This Recipe!
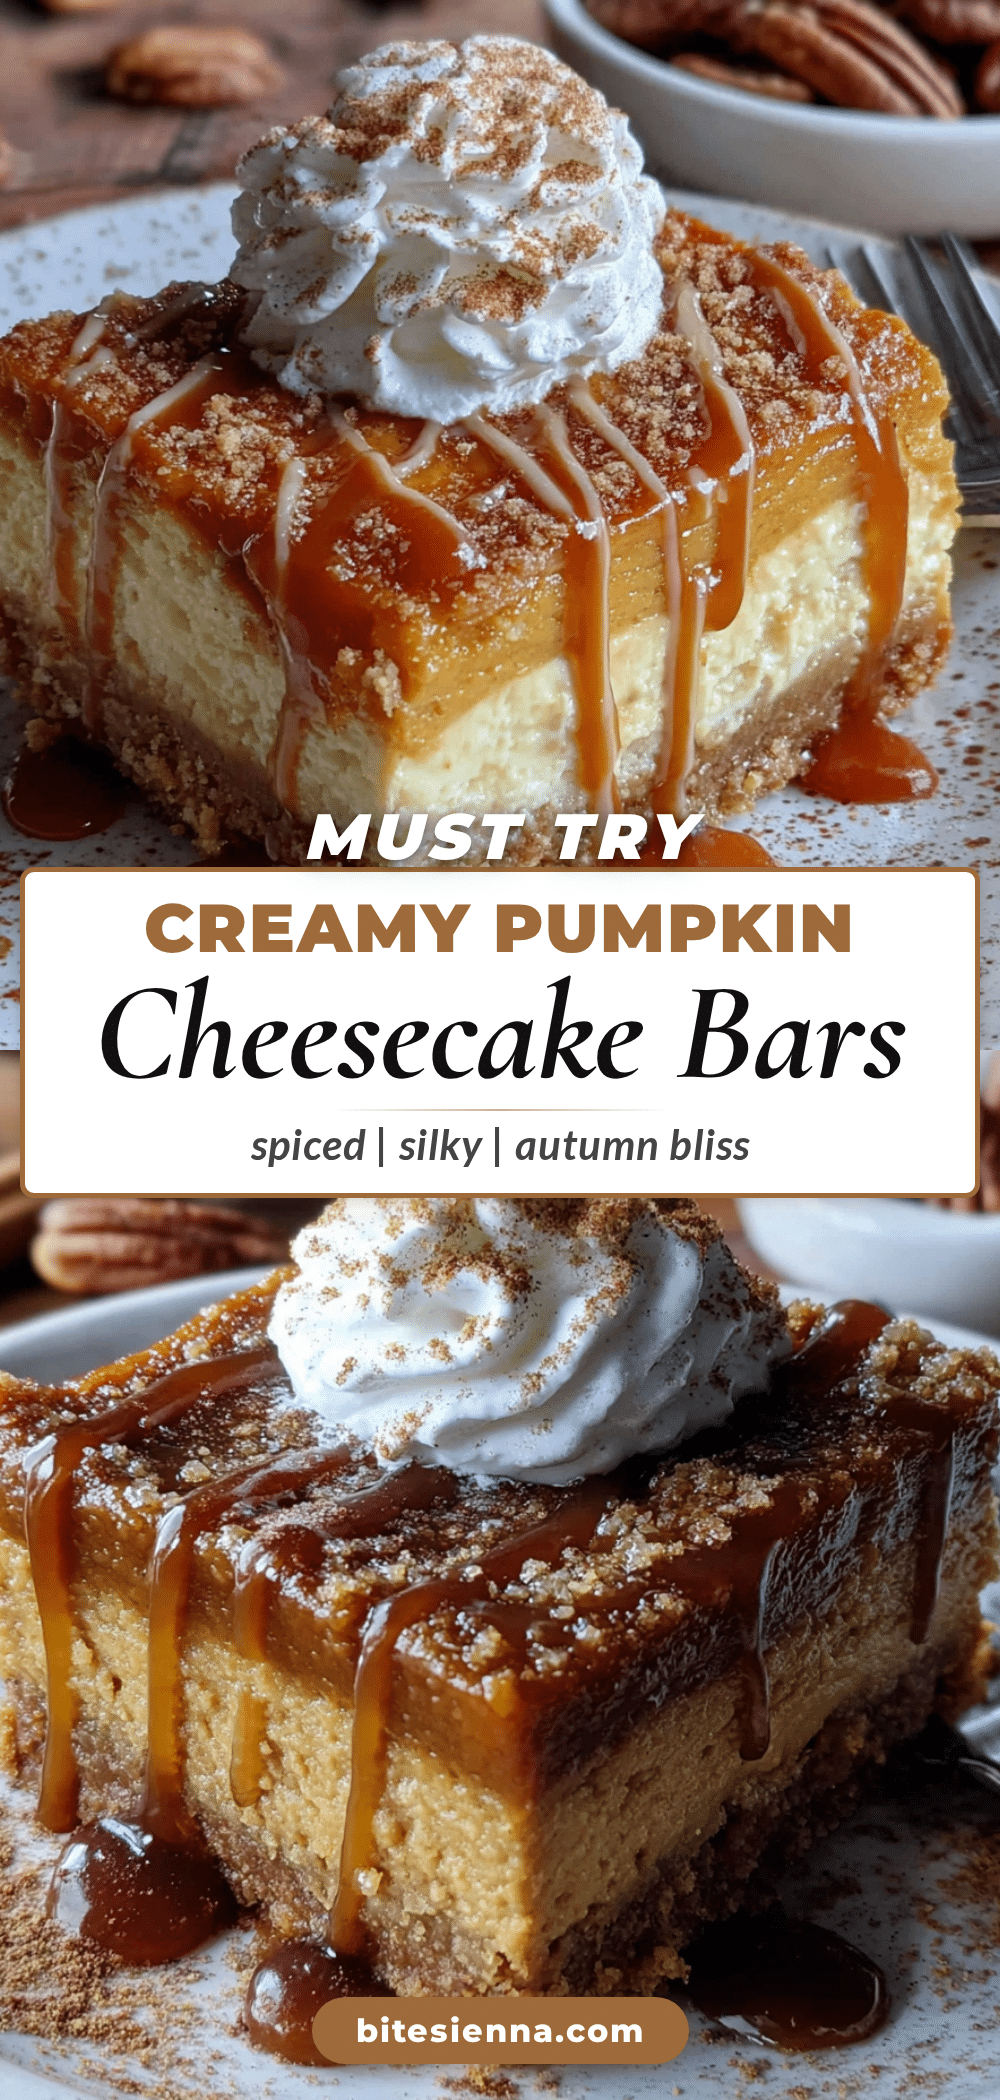
Creamy Pumpkin Cheesecake Bars
These creamy pumpkin cheesecake bars feature a buttery graham cracker crust, a silky pumpkin filling, and an optional tangy sour cream topping. They are the perfect easy fall dessert for gatherings or cozy nights in.
- Prep Time: 20 minutes
- Cook Time: 40 minutes
- Total Time: 5 hours (including chilling)
- Yield: 16 bars 1x
- Category: Dessert
- Cuisine: American
Ingredients
- 1 ½ cups graham cracker crumbs (about 12 full sheets)
- ¼ cup granulated sugar (50g)
- 6 tablespoons unsalted butter, melted (85g)
- ⅛ teaspoon salt
- 16 ounces cream cheese, softened (450g)
- ¾ cup granulated sugar (150g)
- ¼ cup brown sugar, packed (50g)
- 1 cup pumpkin puree (245g)
- 3 large eggs, room temperature
- 2 teaspoons vanilla extract (10ml)
- 2 teaspoons pumpkin pie spice
- ½ teaspoon cinnamon
- ¼ teaspoon salt
- 1 cup sour cream (240g) (optional topping)
- 2 tablespoons powdered sugar (15g) (optional topping)
- ½ teaspoon vanilla extract (optional topping)
Instructions
- Preheat oven to 350°F (175°C). Line a 9×9-inch baking pan with parchment paper, leaving overhang on two sides. Lightly grease the parchment.
- In a medium bowl, combine graham cracker crumbs, ¼ cup granulated sugar, and a pinch of salt. Pour in melted butter and stir until mixture resembles wet sand. Press firmly into the bottom of the prepared pan. Bake for 10 minutes, then set aside to cool slightly.
- In a large bowl, beat softened cream cheese with an electric mixer on medium speed until smooth and fluffy, about 2 minutes. Scrape down the sides.
- Add ¾ cup granulated sugar and ¼ cup packed brown sugar. Beat on medium speed until light and fluffy, about 2 more minutes. Scrape the bowl again.
- Add pumpkin puree and beat on low until just combined. Add eggs one at a time, beating on low after each addition. Do not overmix. Add vanilla, pumpkin pie spice, cinnamon, and salt. Mix on low until just combined.
- Pour filling over pre-baked crust and spread evenly. Tap pan gently on counter to release air bubbles. Bake for 35-40 minutes, until edges are set but center still jiggles slightly. If top browns too quickly, tent with foil for last 10 minutes.
- Optional: While bars bake, whisk together sour cream, powdered sugar, and vanilla. When bars come out of oven, let cool 10 minutes, then spread sour cream mixture over top. Return to oven and bake 5 more minutes.
- Let bars cool completely on a wire rack, about 1 hour. Then refrigerate for at least 4 hours, preferably overnight.
- Use parchment handles to lift bars out of pan. Cut into 16 squares with a sharp knife, wiping clean between cuts. Serve cold or at room temperature.
Notes
Room temperature ingredients are crucial for a smooth filling. Do not overbeat after adding eggs to prevent cracks. The bars need at least 4 hours of chilling to set properly. For a water bath, wrap pan in foil and place in a larger pan with hot water halfway up the sides.
Nutrition
- Serving Size: 1 bar
- Calories: 285
- Sugar: 20
- Sodium: 220
- Fat: 18
- Saturated Fat: 10
- Carbohydrates: 28
- Fiber: 1
- Protein: 5
Keywords: pumpkin cheesecake bars, fall dessert, pumpkin dessert, cheesecake bars, easy pumpkin recipe


