My brother-in-law Mark had claimed to hate squash for as long as I’d known him. Twenty-three years. Every Thanksgiving, he’d push the roasted butternut to the side of his plate like it was a personal insult. Every summer, he’d groan when zucchini showed up at the barbecue. “It’s the texture,” he’d say, shaking his head. “Too mushy. Too sweet. I don’t get the hype.” I stopped trying to convince him somewhere around year five.
Then last October, I made these Crispy Parmesan Delicata Squash Rings for a football-watching party at my house. I didn’t announce what they were. I just put the platter on the coffee table between the wings and the dip, and walked away. Twenty minutes later, I caught Mark standing by the kitchen island—not with a beer in his hand, but with a napkin full of squash rings. He was on his third one. Maybe his fourth. I didn’t say a word. I just watched him take another bite, the crunch audible from across the room, and let the moment sit there.
Honestly, I think that was more satisfying than the recipe itself. And the recipe is pretty darn satisfying.
These aren’t your typical roasted squash wedges. We’re talking thin rings of delicata squash—no peeling required, because the skin is tender and edible—dredged in a seasoned Parmesan-panko coating and baked until they’re golden, crispy, and absolutely irresistible. They come out of the oven looking like fancy onion rings, but they taste like autumn on a plate. Sweet, savory, salty, with that nutty Parmesan crust that shatters when you bite into it. I mean, let me tell you—I’ve brought these to four different gatherings this season, and every single time, someone asks for the recipe before the plate is empty.
Maybe you’ve been there. You’re hosting a dinner party or a game day get-together, and you want something that feels impressive without chaining you to the stove. Something that looks like you tried really hard but actually came together with minimal fuss. Something that even the squash skeptics in your life will devour before they ask what it is. That’s exactly what these rings deliver. They’re the kind of appetizer that makes you look like a hero while you’re actually just standing there, sipping your drink, watching everyone crowd around the platter.
Why You’ll Love This Recipe
Let me be real with you—I’ve tested this recipe six times to get it exactly right. The first batch was too greasy. The second batch, the coating fell off. The third? Perfect. And then I made it three more times just to be sure I could replicate it consistently for you. So when I say these Crispy Parmesan Delicata Squash Rings are foolproof, I mean it. Here’s why they’ll become your new go-to appetizer:
- Quick & Easy: From start to finish, you’re looking at about 35 minutes. That’s 10 minutes of prep and 25 minutes in the oven. Perfect for those moments when guests are on their way and you realize you need one more thing on the table.
- Simple Ingredients: You probably already have most of this stuff in your kitchen—Parmesan, panko breadcrumbs, eggs, garlic powder, salt, pepper. The only specialty item is the delicata squash, and these days, I find them at my regular grocery store from September through December.
- Perfect for Hosting: These rings are made for gatherings. They hold up well on a buffet table, they’re easy to eat with your hands, and they look stunning arranged on a platter with a little dipping sauce in the center. Your guests will think you spent an hour on them.
- Crowd-Pleaser: I’ve served these to kids, to adults, to picky eaters, to people who “don’t like vegetables.” The plate always comes back empty. Always.
- Unbelievably Delicious: The combination of sweet, tender squash with that salty, crispy Parmesan crust is honestly addictive. The edges get extra crunchy where the cheese browns, and the inside stays just tender enough to give you that perfect contrast.
What makes this recipe different from all the other squash recipes out there? Two things. First, we’re using delicata squash specifically because you don’t have to peel it. The skin is thin and completely edible, which means less prep work and more of that beautiful striped presentation. Second, we’re using a two-step breading method—egg wash first, then the Parmesan-panko mixture—that creates a crust that actually sticks. No sad, bald spots on your squash rings. Every single one comes out coated and crispy.
This isn’t just another roasted vegetable recipe. This is the kind of appetizer that makes people close their eyes after the first bite. It’s comfort food that happens to be pretty good for you, and it’s impressive enough for a holiday party but simple enough for a Tuesday night snack. Honestly, I’ve made these just for myself on a quiet evening more times than I care to admit.
What Ingredients You Will Need
This recipe uses simple, wholesome ingredients that work together to create something genuinely special. The beauty of it is that nothing here is complicated or hard to find—you just need the right combination of textures and flavors to make those rings sing.
For the Squash Rings
- 2 medium delicata squash (about 1.5 pounds total) — Look for squash that feel heavy for their size and have firm, unblemished skin. The yellow-orange ones with green stripes are perfectly ripe. You want them firm but not rock-hard.
- 1 cup panko breadcrumbs — I prefer panko over regular breadcrumbs here because they give you that extra-crunchy texture. Regular breadcrumbs will work in a pinch, but the coating won’t be as shattery. I like Ian’s brand for gluten-free options or Kikkoman for regular.
- 1/2 cup finely grated Parmesan cheese — Freshly grated is non-negotiable here, friends. The pre-shredded stuff in the green can has anti-caking agents that prevent it from melting and browning properly. Get a block of real Parmigiano-Reggiano and grate it yourself. Trust me on this one.
- 2 large eggs — These act as the glue that holds the coating to the squash. Room temperature eggs work best, but cold ones will do in a pinch.
- 1 teaspoon garlic powder — Not garlic salt. We’re controlling the salt separately.
- 1/2 teaspoon smoked paprika — This adds a subtle smokiness that complements the sweet squash beautifully. Regular paprika works too, but smoked is worth seeking out.
- 1/2 teaspoon salt — I use fine sea salt here. If you’re using kosher salt, you might need a bit more.
- 1/4 teaspoon black pepper — Freshly ground, always.
- 2 tablespoons olive oil — For drizzling over the rings before baking. This helps the coating get golden and crispy without deep frying.
For Serving (Optional but Recommended)
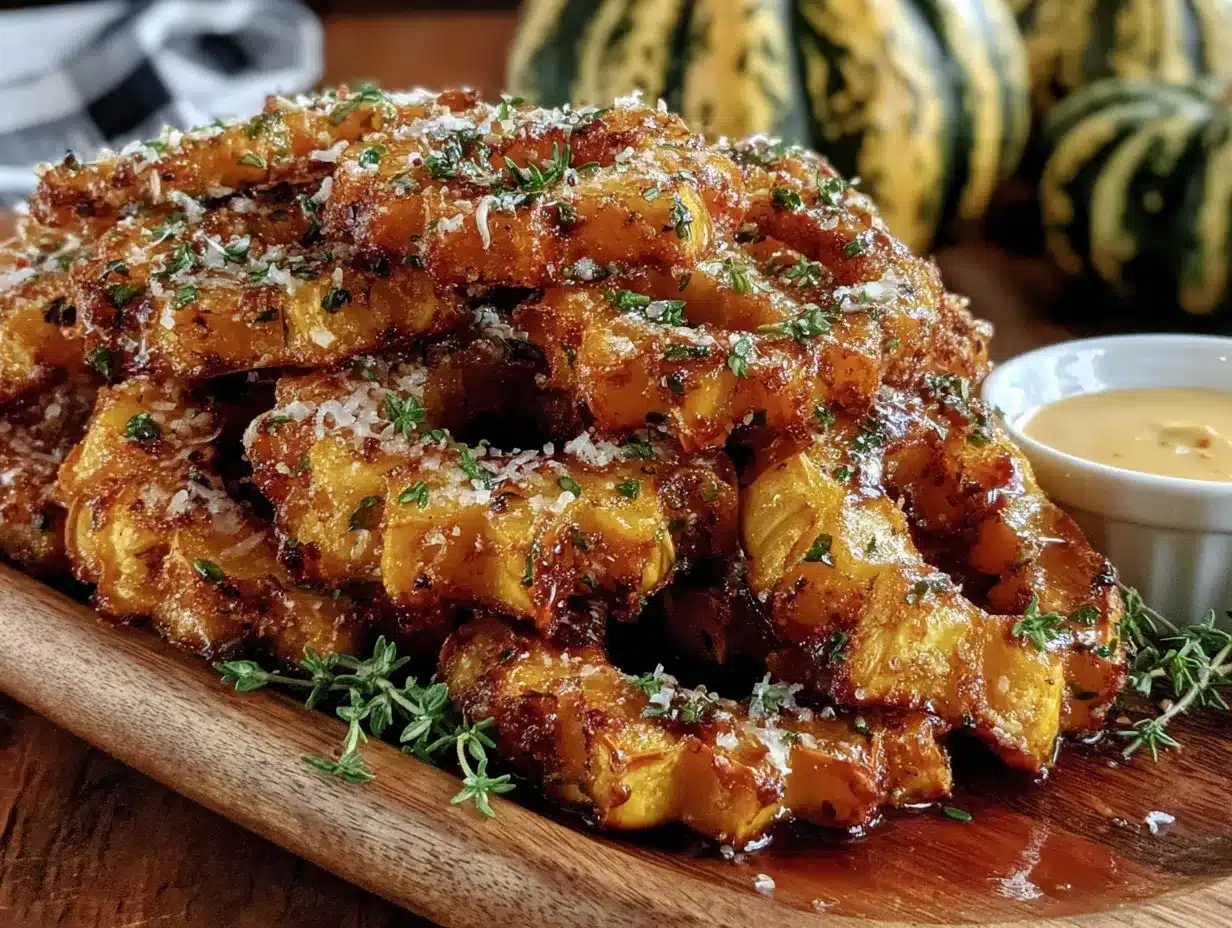
- Dipping sauce of your choice — I love these with a simple garlic aioli or a spicy sriracha mayo. My sister swears by ranch dressing. Honestly, they’re great with just about anything, including nothing at all. (For the garlic aioli: mix 1/2 cup mayonnaise, 1 clove minced garlic, 1 teaspoon lemon juice, and a pinch of salt.)
- Fresh parsley or chives — A sprinkle of green makes them look extra fancy on the platter.
- Lemon wedges — A squeeze of fresh lemon juice right before serving brightens everything up.
Ingredient Selection Tips: When you’re at the store picking out delicata squash, look for ones that are relatively uniform in shape—the more cylindrical, the easier they are to cut into even rings. Avoid squash with soft spots or wrinkled skin. And here’s a pro tip: delicata squash is a winter squash, but it’s on the smaller side. One medium squash should give you about 12-15 rings, depending on how thick you cut them.
Substitution Guidance: If you can’t find delicata squash, you can use acorn squash instead—just know that you’ll need to peel it first, which adds a step. Butternut squash works too, but it’s harder to cut into rings because of the bulbous shape. For a dairy-free version, use nutritional yeast in place of the Parmesan—it won’t get quite as crispy, but it’ll still be delicious. Gluten-free? Use gluten-free panko and you’re good to go.
Equipment Needed
You don’t need a fancy kitchen to make these rings. Here’s what you’ll actually use:
- Baking sheet — A standard half-sheet pan works perfectly. Line it with parchment paper for easy cleanup. I’ve ruined a few batches by skipping the parchment—the cheese sticks to the pan and you end up with a mess.
- Wire rack — This is optional but highly recommended. Placing a wire rack on your baking sheet lets air circulate around the rings, making them crispy on all sides instead of soggy on the bottom. If you don’t have one, just flip the rings halfway through baking.
- Sharp knife and cutting board — You need a good chef’s knife to cut through the squash cleanly. A dull knife will slip, and squash is surprisingly tough. I learned that one the hard way.
- Two shallow bowls — One for the egg wash, one for the breadcrumb mixture. Pie plates work great for this.
- Measuring spoons — For the seasonings.
- Kitchen tongs — For transferring the rings from the egg wash to the breadcrumbs and then to the baking sheet. Your fingers will get sticky otherwise.
- Small spoon or melon baller — For scooping out the seeds from the center of each ring. A regular spoon works fine too.
If you don’t have a wire rack, don’t stress. I’ve made these without one plenty of times. Just flip the rings carefully at the 12-minute mark and they’ll still come out great. And if you don’t have parchment paper, aluminum foil works—just give it a light spray of cooking oil so nothing sticks.
Preparation Method
Alright, let’s get cooking. Here’s exactly how to make these Crispy Parmesan Delicata Squash Rings, step by step.
- Preheat your oven to 425°F (220°C). Get it nice and hot while you prep everything. Position your oven rack in the middle position—too close to the top and the cheese burns before the squash cooks through.
- Prepare your baking sheet. Line it with parchment paper and place a wire rack on top if you’re using one. Set it aside for now.
- Wash and dry the delicata squash. Give them a good scrub under running water since we’re eating the skin. Pat them completely dry with a clean kitchen towel. Wet squash makes the coating slide off—I learned this after my first soggy batch.
- Cut the ends off the squash. Slice about 1/4 inch off each end and discard. This gives you a flat, stable surface to work with.
- Slice the squash into rings. Cut crosswise into 1/2-inch thick rings. Not thinner—they’ll get too soft. Not thicker—they won’t cook through. Aim for even slices. You should get about 12-15 rings per squash, depending on the size. If you hit a section that’s mostly seeds, don’t worry—we’ll deal with that in the next step.
- Remove the seeds. Use your small spoon or melon baller to gently scoop out the seeds and stringy bits from the center of each ring. Don’t force it—the seeds come out pretty easily. Work over a bowl or the trash. Some rings will have more seeds than others, and that’s totally normal.
- Set up your breading station. In one shallow bowl, crack the two eggs and beat them with a fork until they’re uniform in color and slightly frothy. In the second shallow bowl, combine the panko breadcrumbs, grated Parmesan, garlic powder, smoked paprika, salt, and pepper. Stir everything together with your fingers or a fork until the seasonings are evenly distributed.
- Bread the squash rings. Take one squash ring and dip it into the egg wash, turning to coat both sides. Let the excess drip off for a second—you don’t want it dripping everywhere. Then transfer it to the breadcrumb mixture and press down gently, turning to coat both sides evenly. Make sure the edges get coated too. Place the breaded ring on your prepared baking sheet. Repeat with all the rings. This is the most time-consuming part, but it goes faster than you’d think. I usually do about 5 rings at a time to keep things moving.
- Drizzle with olive oil. Once all the rings are breaded and on the baking sheet, drizzle the olive oil evenly over the tops. Don’t skip this—the oil is what helps the coating get golden and crispy instead of pale and sad. Use your fingers or a pastry brush to gently spread it if needed.
- Bake for 20-25 minutes. Place the baking sheet in the preheated oven and bake for 10 minutes. Then, carefully flip each ring using your tongs and bake for another 10-15 minutes. You’re looking for deep golden brown color and a crispy exterior. The cheese should be bubbly and browned in spots. If your rings are on the smaller side, start checking at 18 minutes total.
- Optional broil for extra crunch. If you want that extra-crispy, almost fried texture, switch your oven to broil for the last 1-2 minutes. Watch them like a hawk—broilers are aggressive, and you don’t want to burn all your hard work. I’ve nearly ruined a batch by walking away for “just a second.” Don’t be like me.
- Let them rest for 2 minutes. When they come out of the oven, let the rings sit on the baking sheet for a couple of minutes. This helps the coating set so it doesn’t slide off when you pick them up. I know it’s hard to wait, but trust me.
- Serve immediately. Transfer the rings to a serving platter, sprinkle with fresh parsley or chives if you’re feeling fancy, and serve with your dipping sauce of choice. These are best enjoyed warm and fresh from the oven. They’ll stay crispy for about 20 minutes, but after that, they start to soften.
Sensory Cues: When you flip the rings at the 10-minute mark, the bottom should be golden and the coating should feel set, not wet. The kitchen should smell like toasted Parmesan and roasted squash—that nutty, savory aroma that makes everyone wander into the kitchen asking what you’re making. When they’re done, the rings should look deeply golden with darker brown spots where the cheese has caramelized. The edges should feel firm and crispy to the touch.
Cooking Tips & Techniques
After making these rings more times than I can count, I’ve picked up a few tricks that make a real difference. Here’s what I wish someone had told me before my first attempt:
Don’t skip the egg wash drying step. I know it seems fussy, but letting the excess egg drip off before hitting the breadcrumbs is crucial. Too much egg makes the coating soggy and heavy instead of light and crispy. Give each ring a good shake over the bowl before transferring it.
Press the coating on firmly. When you’re breading the rings, really press the panko-Parmesan mixture into the squash. I use my fingertips and kind of pat it in. This helps the coating adhere and gives you that satisfying crunch. Lazy breading leads to bald spots.
Work in batches if needed. If you’re making a double batch (and you should, because these go fast), don’t crowd the baking sheet. The rings need space between them for hot air to circulate. If they’re touching, they’ll steam instead of crisp. Use two baking sheets if you have them, and rotate them halfway through.
Watch your oven temperature. Every oven runs a little differently. My friend’s oven runs hot, and her rings were done in 18 minutes. Mine takes the full 25. Start checking at the 18-minute mark and go from there. You can always bake longer, but you can’t unbake burnt cheese.
The flip is important. I know it’s tempting to skip flipping, but don’t. The bottom of the rings sits on the baking sheet and doesn’t get the same direct heat as the top. Flipping ensures both sides get equally crispy. Use a thin spatula or tongs and be gentle—the coating is delicate when it’s hot.
My biggest failure: The first time I made these, I used pre-shredded Parmesan. Big mistake. It didn’t melt properly, the coating was clumpy, and half of it fell off during baking. I was so annoyed. The second batch, I used freshly grated Parmigiano-Reggiano, and the difference was night and day. The cheese melted into the panko, creating this cohesive, crispy crust that actually stayed on the squash. So yeah—grate your own cheese. It matters.
Timing strategy for hosting: If you’re making these for a party, here’s your game plan. You can slice the squash and make the breadcrumb mixture up to a day ahead. Store the squash rings in the fridge in an airtight container, and keep the breadcrumb mixture at room temperature. Then, about 40 minutes before guests arrive, bread and bake them. They’ll come out of the oven right when people start showing up, and your kitchen will smell amazing.
Variations & Adaptations
One of the things I love about this recipe is how flexible it is. Here are some ways to switch it up depending on your mood, your guests, or what you have in the pantry.
Spicy Version: Add 1/2 teaspoon cayenne pepper or red pepper flakes to the breadcrumb mixture. I made this version for a game day party and my brother-in-law (yes, the same Mark from earlier) ate half the batch before anyone else got any. The heat pairs surprisingly well with the sweet squash.
Herb-Infused: Mix in 2 tablespoons of finely chopped fresh herbs like rosemary, thyme, or sage with the breadcrumbs. This is my go-to for fall gatherings and Thanksgiving appetizers. The sage especially gives it that classic autumn flavor. I tried this combination last November and it was honestly the best version yet.
Gluten-Free Adaptation: Use gluten-free panko breadcrumbs—they’re widely available these days and work beautifully. I’ve tested this with both Ian’s and Aleia’s brands, and both gave excellent results. The texture is slightly different but still delightfully crispy.
Dairy-Free Version: Swap the Parmesan for nutritional yeast. Use about 1/3 cup nutritional yeast in place of the 1/2 cup Parmesan. It won’t get quite as crispy, but it adds that savory, cheesy flavor without any dairy. I’ve served this version to dairy-free friends and they raved about it.
Air Fryer Method: If you have an air fryer, these rings are incredible in it. Preheat to 400°F (200°C), arrange the rings in a single layer (you’ll need to work in batches), and cook for 8-10 minutes, flipping halfway through. They come out even crispier than the oven version. I actually prefer this method when I’m making a small batch for myself.
Different Squash: As I mentioned earlier, acorn squash works if you peel it first. Butternut squash is trickier to cut into rings but can be cut into half-moons instead. Kabocha squash is another good option with edible skin. Each squash will give you a slightly different flavor and texture, but the basic method stays the same.
Serving & Storage Suggestions
These rings are at their absolute best straight from the oven, but let’s talk about how to serve them like a pro and what to do with leftovers.
Serving Temperature: Serve these warm, ideally within 10 minutes of coming out of the oven. The coating is at its crispiest when fresh. If you’re serving them at a party, arrange them on a platter in a single layer—don’t stack them, or the ones on the bottom will steam and get soft. I like to put a small bowl of dipping sauce in the center and arrange the rings around it in a sunburst pattern. It looks impressive with almost no effort.
What to Serve Alongside: These rings are incredibly versatile. They pair beautifully with roasted chicken or grilled fish for a main course. For a party spread, serve them alongside other finger foods like meatballs, stuffed mushrooms, or a cheese board. They’re also fantastic with a simple green salad dressed with lemon vinaigrette—the brightness cuts through the richness of the Parmesan.
Dipping Sauce Ideas: Garlic aioli is my personal favorite, but here are some other options: spicy sriracha mayo, honey mustard, ranch dressing, balsamic glaze, or even a simple marinara sauce. I once served them with a chipotle-lime crema and people lost their minds.
Storage: If you somehow have leftovers (it’s rare in my house), store them in an airtight container in the refrigerator for up to 3 days. The coating will soften, but don’t despair—they’re still delicious.
Reheating: The best way to revive leftover rings is in the oven or air fryer. Preheat to 400°F (200°C) and reheat for 5-7 minutes until hot and crispy again. The microwave will make them soggy, so avoid it if you can. I’ve reheated them in a toaster oven with good results too.
How Flavors Develop: Honestly, these are best fresh. Unlike soups or stews that improve overnight, crispy things lose their magic. That said, if you have leftovers, chop them up and toss them into a salad or grain bowl the next day. The flavors are still wonderful, even if the texture isn’t as perfect.
Nutritional Information & Benefits
Let’s be real—these rings are an appetizer, not a health food. But they’re made with real, whole ingredients, and they’re baked instead of fried, which makes them a lighter option than most party snacks.
Estimated Nutrition Per Serving (about 4-5 rings):
- Calories: 185
- Total Fat: 9g
- Saturated Fat: 3g
- Cholesterol: 55mg
- Sodium: 320mg
- Total Carbohydrates: 20g
- Dietary Fiber: 3g
- Sugars: 4g
- Protein: 8g
Health Benefits: Delicata squash is packed with vitamin A (great for eye health and immune function) and vitamin C (hello, antioxidant support). It’s also a good source of fiber, which helps with digestion and keeps you feeling full. The skin contains additional nutrients and fiber, which is why I love that you don’t have to peel it. Plus, the Parmesan adds calcium and protein, and the olive oil provides healthy monounsaturated fats.
Dietary Considerations: This recipe is naturally vegetarian and can be made gluten-free and dairy-free with the substitutions I mentioned earlier. It’s not suitable for vegan diets as written, but you could try using a flax egg (1 tablespoon ground flaxseed mixed with 3 tablespoons water) and nutritional yeast in place of the egg and cheese—I haven’t tested this version myself, but I’ve heard good things from readers who have.
Potential Allergens: This recipe contains dairy (Parmesan) and eggs. The panko breadcrumbs typically contain gluten, though gluten-free versions are available. If you’re serving these to a crowd, I recommend labeling them clearly or asking about allergies ahead of time.
Conclusion
Look, I’m not going to tell you these Crispy Parmesan Delicata Squash Rings will change your life. But I will tell you they’ve changed a few minds in my family. Mark, the squash-hater-turned-squash-enthusiast, now asks me to bring these to every family gathering. He even tried to get the recipe out of me, but I told him he’d have to wait for this blog post like everyone else.
What I love most about this recipe is how it takes something humble—a winter squash that most people walk right past at the grocery store—and turns it into the star of the party. It’s proof that you don’t need complicated techniques or exotic ingredients to make something genuinely impressive. You just need a good method, quality ingredients, and a little bit of patience.
I hope you try these for your next gathering. Whether it’s a casual game day, a fancy dinner party, or just a Tuesday night when you want something special, these rings deliver. And please, don’t be shy about making them your own. Add different spices, try new dipping sauces, experiment with the variations I suggested. Cooking is supposed to be fun, and this recipe is a great place to play.
If you make these, I’d love to hear about it. Drop a comment below and tell me how they turned out—did anyone in your life have a squash conversion moment? Did you find a new favorite dipping sauce? I read every comment, and your stories honestly make my day. Happy cooking, friends.
Frequently Asked Questions
Can I make these ahead of time for a party?
You can prep the squash rings up to a day ahead by slicing them and storing them in the fridge. You can also mix the breadcrumb coating ahead of time. But I recommend breading and baking them fresh—they’re significantly better straight from the oven. If you absolutely must make them ahead, reheat them in a 400°F oven for 5-7 minutes to restore some crispiness.
Why is my coating falling off the squash rings?
This usually happens for one of three reasons: your squash was too wet when you breaded it (dry it thoroughly after washing), you didn’t press the coating on firmly enough, or you skipped the egg wash step. Make sure each ring is fully coated in egg, let the excess drip off, and really press that breadcrumb mixture into the squash. Also, letting them rest for 2 minutes after baking helps the coating set.
Can I use a different type of squash?
Absolutely. Acorn squash works well but needs to be peeled first. Butternut squash is harder to cut into rings but can be cut into half-moons. Kabocha squash has edible skin like delicata and works beautifully. Just keep in mind that different squash have different water content and cooking times, so start checking for doneness a few minutes early.
How do I get the rings extra crispy?
Three tips: First, use a wire rack on your baking sheet so air circulates all around the rings. Second, don’t skip the olive oil drizzle—it helps the coating brown and crisp. Third, if you want that extra-crunchy texture, switch to broil for the last 1-2 minutes of baking. Just watch them carefully so they don’t burn.
Can I freeze these squash rings?
I don’t recommend freezing them after baking—the coating will get soggy when you thaw and reheat them. However, you can freeze the breaded, unbaked rings on a baking sheet until solid, then transfer them to a freezer bag. When you’re ready to bake, add 5-7 minutes to the cooking time and bake straight from frozen. I’ve done this with good results for last-minute appetizers.
Pin This Recipe!
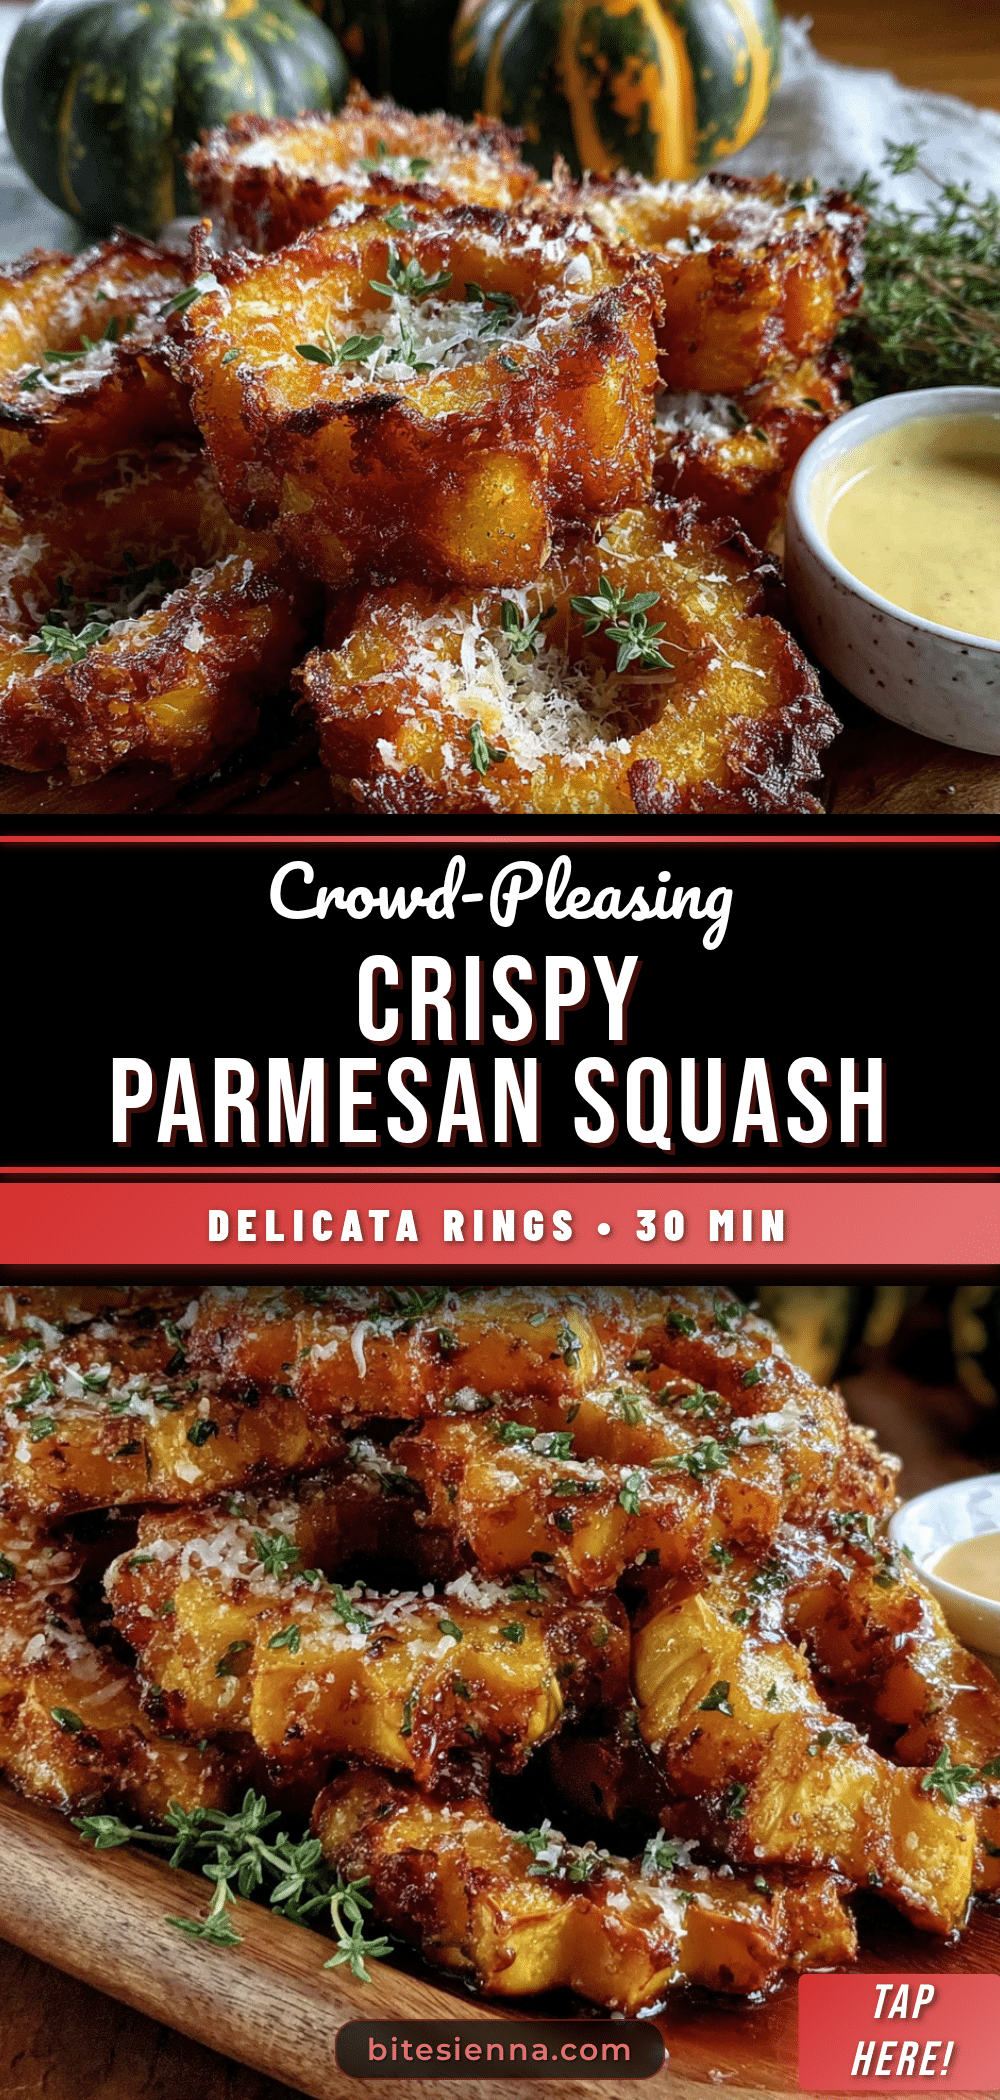
Crispy Parmesan Delicata Squash Rings: Best Easy Appetizer

Thin rings of delicata squash, no peeling required, dredged in a seasoned Parmesan-panko coating and baked until golden and crispy. Perfect for gatherings, even squash skeptics will devour them.
- Prep Time: 10 minutes
- Cook Time: 25 minutes
- Total Time: 35 minutes
- Yield: 4 servings 1x
- Category: Appetizer
- Cuisine: American
Ingredients
- 2 medium delicata squash (about 1.5 pounds total)
- 1 cup panko breadcrumbs
- 1/2 cup finely grated Parmesan cheese
- 2 large eggs
- 1 teaspoon garlic powder
- 1/2 teaspoon smoked paprika
- 1/2 teaspoon salt
- 1/4 teaspoon black pepper
- 2 tablespoons olive oil
- Dipping sauce of your choice (optional)
- Fresh parsley or chives (optional)
- Lemon wedges (optional)
Instructions
- Preheat your oven to 425°F (220°C). Position the oven rack in the middle.
- Line a baking sheet with parchment paper and place a wire rack on top if using. Set aside.
- Wash and dry the delicata squash thoroughly. Pat completely dry.
- Cut about 1/4 inch off each end of the squash and discard.
- Slice the squash crosswise into 1/2-inch thick rings. You should get about 12-15 rings per squash.
- Use a small spoon or melon baller to gently scoop out the seeds and stringy bits from the center of each ring.
- In one shallow bowl, beat the two eggs until uniform and slightly frothy.
- In a second shallow bowl, combine panko breadcrumbs, grated Parmesan, garlic powder, smoked paprika, salt, and pepper. Stir until evenly distributed.
- Dip each squash ring into the egg wash, turning to coat both sides. Let excess drip off.
- Transfer to the breadcrumb mixture and press down gently, turning to coat both sides evenly. Place on the prepared baking sheet. Repeat with all rings.
- Drizzle the olive oil evenly over the tops of the breaded rings.
- Bake for 10 minutes. Carefully flip each ring using tongs, then bake for another 10-15 minutes until deep golden brown and crispy.
- Optional: For extra crunch, switch to broil for the last 1-2 minutes, watching carefully to avoid burning.
- Let the rings rest on the baking sheet for 2 minutes before serving.
- Serve immediately, optionally garnished with fresh herbs and with dipping sauce on the side.
Notes
For best results, use freshly grated Parmesan. Dry the squash thoroughly after washing to help the coating stick. Let rings rest for 2 minutes after baking to set the coating. Can be made gluten-free with gluten-free panko and dairy-free with nutritional yeast.
Nutrition
- Serving Size: 4-5 rings
- Calories: 185
- Sugar: 4
- Sodium: 320
- Fat: 9
- Saturated Fat: 3
- Carbohydrates: 20
- Fiber: 3
- Protein: 8
Keywords: delicata squash rings, crispy parmesan squash, baked squash appetizer, easy appetizer, game day snack, vegetarian appetizer, fall recipe


