Last October, I was wandering through the grocery store’s seasonal aisle when the unmistakable crunch of crushed Oreos caught my attention — and suddenly I was 12 years old, crouched in my neighbor’s dimly lit basement, watching a Halloween movie while sneaking spoonfuls of a spooky dessert she called “graveyard dirt.” The air was thick with the scent of chocolate and something faintly minty, and her dog, a clumsy golden retriever named Max, kept nudging my elbow as if to say, “Don’t eat it all.” I had no idea then that I’d spend years trying to recreate that perfect mix of creamy, crumbly, and eerie textures. This Delicious Graveyard Brownie Trifle with Oreo Dirt and Cookie Tombstones comes closest to that memory — maybe even better because it layers brownie chunks with creamy pudding and makes those cookie tombstones you can actually stand up. Honestly, it’s not just a dessert; it’s a little bit of Halloween magic you can scoop out any time you want. I’ll admit, the first time I made it, I forgot the whipped cream—so I improvised with marshmallow fluff, which actually gave it a fun, sticky twist. Maybe you’ve been there, trying to capture a childhood feeling that’s just out of reach. This recipe stays with me because it’s that perfect mix of nostalgic fun and rich chocolatey goodness, and it’s easy enough to throw together even if you get interrupted mid-bake.
Why You’ll Love This Recipe
This Delicious Graveyard Brownie Trifle isn’t your average Halloween treat. I’ve tested this recipe through many seasons, and here’s why it keeps getting rave reviews:
- Quick & Easy: Comes together in under 30 minutes, perfect for last-minute Halloween parties or spooky family dinners.
- Simple Ingredients: You probably already have most of these in your pantry—Oreos, brownie mix, pudding, and some cookie dough.
- Perfect for Halloween: The eerie presentation with Oreo dirt and cookie tombstones makes it a showstopper for any fall gathering.
- Crowd-Pleaser: Kids and adults alike love how the creamy layers mix with the crunchy cookie bits — it’s like a party for your taste buds.
- Unbelievably Delicious: The fudgy brownie chunks combined with the creamy pudding and crunchy Oreos create a texture combo that feels luxurious yet fun.
What sets this recipe apart is the way the cookie tombstones stand tall as a playful decoration, and the Oreo dirt isn’t just crushed cookies — it’s a blend that keeps its crunch and chocolate punch. I’ve experimented with different brownie textures, and using a fudgy homemade brownie recipe really brings that moist, rich depth to the trifle. It’s not just dessert; it’s a conversation starter at any table. You’ll close your eyes after the first bite — I promise.
What Ingredients You Will Need
This recipe uses straightforward, pantry-friendly ingredients that come together to create bold flavors and fun textures. You can find almost everything at your local grocery store, and substitutions are easy if you need them.
- For the Brownie Layer:
- 1 batch of fudgy brownies (store-bought or homemade, about 9×9-inch pan) – I recommend Ghirardelli brownie mix for best texture if you’re short on time
- For the Oreo Dirt:
- 20 Oreo cookies, finely crushed (about 1 ½ cups) – make sure to include the cream filling for that perfect sweet balance
- For the Creamy Pudding Layer:
- 2 cups whole milk (or almond milk for dairy-free option)
- 1 box instant chocolate pudding mix (3.9 oz / 110 g)
- For the Whipped Cream Layer:
- 1 cup heavy whipping cream, chilled
- 2 tablespoons powdered sugar
- 1 teaspoon vanilla extract
- For the Cookie Tombstones:
- 1 package refrigerated sugar cookie dough or homemade sugar cookie dough
- Black edible marker or melted chocolate for writing “RIP”
Optional add-ins include candy eyes or gummy worms to make the graveyard scene even more playful. If it’s summer, swapping in fresh berries for the Oreo dirt layer makes a fun twist, but honestly, nothing beats that classic chocolate crunch. For a gluten-free version, try using gluten-free brownie mix and gluten-free Oreos.
Equipment Needed
- Large mixing bowls for pudding and whipped cream
- Electric mixer or whisk (hand or stand) for whipping cream
- 9×9-inch baking pan (if making homemade brownies)
- Large trifle bowl or clear glass serving dish to show off the layers
- Rolling pin and cookie cutters (tombstone-shaped or oval) for cookie tombstones
- Baking sheet lined with parchment paper for cookie baking
- Fine mesh sieve (optional) to crush Oreos evenly
If you don’t have an electric mixer, a sturdy whisk and some elbow grease work just fine for whipping cream — it just takes a bit longer. For cookie cutters, I once used a small oval cup to shape tombstones when I was in a pinch. Budget-friendly tip: baking sheets can be doubled as a flat surface for crushing Oreos with a rolling pin if you don’t have a food processor.
Preparation Method
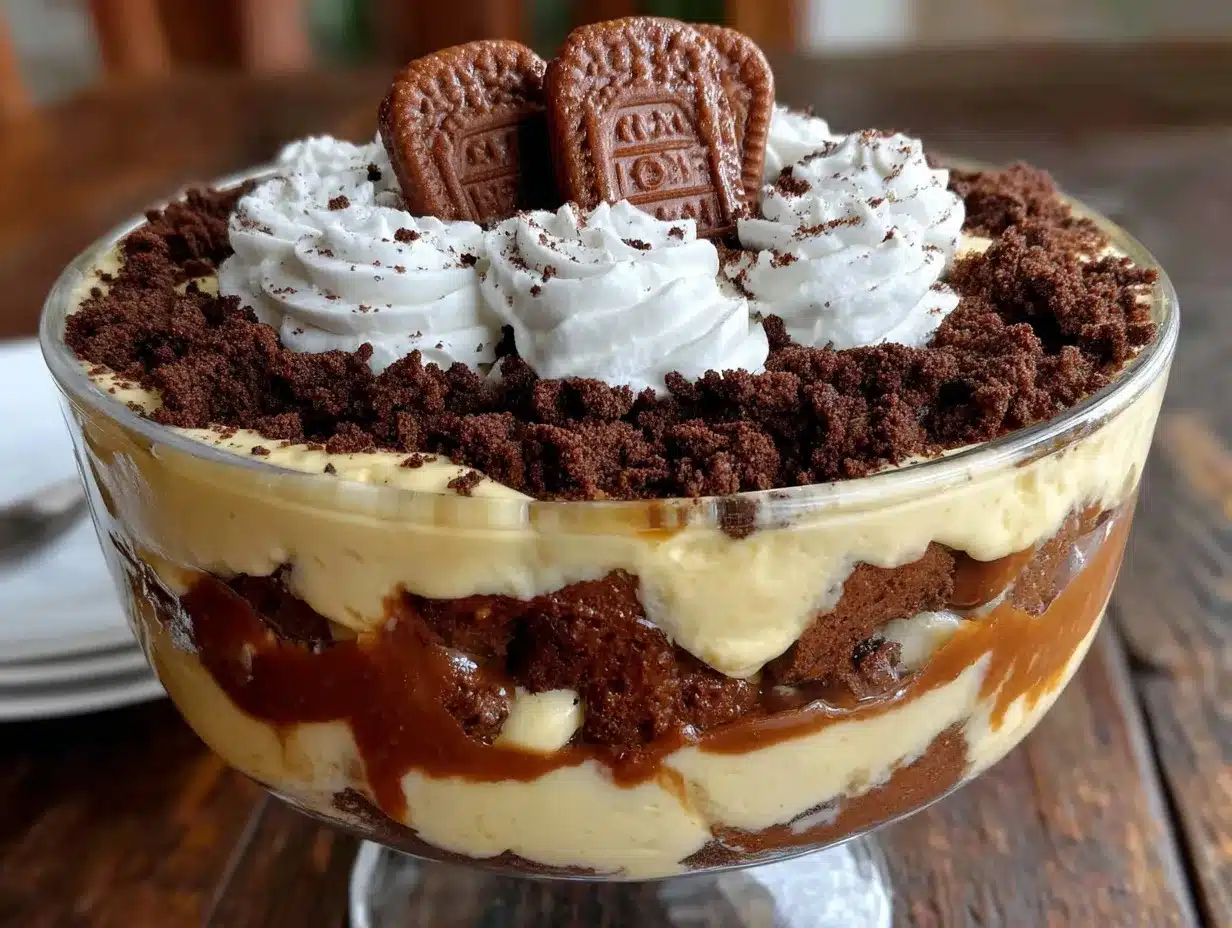
- Make the Brownies: Prepare your brownies according to package instructions or your favorite recipe (about 25-30 minutes baking time). Let them cool completely, then cut into 1-inch (2.5 cm) chunks. If you’re using store-bought brownies, simply chop them up. Pro tip: cooling brownies fully avoids melting the pudding later.
- Prepare Oreo Dirt: Place the Oreos in a large zip-top bag and crush with a rolling pin until fine crumbs form (about 1 ½ cups). You want a mix of very fine crumbs with a few small chunks for texture.
- Make the Pudding: In a bowl, whisk together the instant chocolate pudding mix and 2 cups (480 ml) of cold milk. Let it sit for 5 minutes until thickened.
- Whip the Cream: Using an electric mixer, whip 1 cup (240 ml) of heavy cream with 2 tablespoons powdered sugar and 1 teaspoon vanilla extract until soft peaks form. If you accidentally overwhip, just fold in a little extra cream to smooth it out.
- Bake Cookie Tombstones: Roll out sugar cookie dough to about 1/4-inch (6 mm) thickness. Cut into tombstone shapes using cookie cutters or a small oval cutter. Bake at 350°F (175°C) for 8-10 minutes until edges are lightly golden. Let cool completely on a wire rack. Once cooled, use an edible black marker or melted chocolate to write “RIP” on each tombstone.
- Assemble the Trifle: In a clear trifle bowl, start with a layer of brownie chunks (about 1 ½ cups). Spoon half the pudding over the brownies. Sprinkle half the Oreo dirt on top. Add a layer of whipped cream (about 1/2 cup). Repeat layers once more: brownies, pudding, Oreo dirt, and finish with whipped cream.
- Decorate: Stick the cookie tombstones upright into the top layer of whipped cream, spacing them out to look like a spooky graveyard. Add optional candy eyes or gummy worms for extra creepiness.
- Chill and Serve: Refrigerate the trifle for at least 1 hour before serving. This helps the layers meld but keeps the Oreo dirt crunchy. Scoop into bowls and enjoy that eerie, delicious mix of textures and flavors.
Cooking Tips & Techniques
One secret to nailing this graveyard trifle is picking the right brownie texture — fudgy, dense brownies hold up well against pudding without turning soggy. I once tried cakey brownies and ended up with a trifle that felt dry in spots. Also, crushing Oreos just right is key; too fine and it turns into powder, too chunky and it loses that dirt effect.
When whipping cream, chill your bowl and beaters in the fridge for 10 minutes beforehand if you can — it whips faster and fluffier. Watch closely so you don’t overwhip; soft peaks are what you want.
Timing matters for layering. If you assemble too early, the Oreo dirt can absorb moisture and lose its crunch. So, I recommend adding the Oreo dirt right before serving or chilling just an hour max. Trust me, the texture difference is worth it.
Don’t stress if your cookie tombstones crack — I’ve had plenty that broke in the oven. Just fix them with a little melted chocolate “glue” or lean them against each other for support. It adds character!
Variations & Adaptations
- Dietary: Use gluten-free brownie mix and gluten-free Oreos for a gluten-free treat. Swap dairy milk and cream for coconut or almond-based alternatives.
- Seasonal: In summer, swap Oreo dirt with crushed graham crackers and add fresh berries between layers for a lighter twist.
- Flavor: Mix a tablespoon of instant espresso powder into the pudding for a mocha version that adults will love.
- Cooking Method: If you want a no-bake brownie option, use store-bought brownie bites or even brownie-flavored granola as a layer substitute.
- Personal Variation: I once tried adding a layer of peanut butter mousse below the pudding — it was surprisingly delicious and added a rich, nutty depth to the graveyard theme.
Serving & Storage Suggestions
This trifle tastes best chilled, straight from the refrigerator. Serve it in clear bowls or glasses so the spooky layers show through — it’s half the fun. You can pair it with a cold glass of milk, hot cocoa, or even a sharp espresso to cut through the sweetness.
Store leftovers covered tightly in the refrigerator for up to 3 days. Because of the Oreos, the top layer’s crunch may soften slightly over time, but the flavors deepen. Reheat is not recommended, but letting it sit at room temperature for 10 minutes before serving helps soften the pudding layers.
Nutritional Information & Benefits
Per serving (about 1 cup / 240 g), this graveyard trifle contains approximately 350 calories, 18 grams of fat, 45 grams of carbohydrates, and 5 grams of protein. It’s a treat, for sure, but the use of whole milk and real cream adds calcium and vitamin D.
The brownies provide antioxidants from cocoa, and Oreos contribute fiber from the chocolate cookie. For those with dietary restrictions, swapping ingredients can help reduce sugar or fat content. Honestly, this dessert is more about indulgence and fun — perfect for special occasions.
Conclusion
This Delicious Graveyard Brownie Trifle with Oreo Dirt and Cookie Tombstones is a perfect blend of nostalgia, texture, and spooky charm. Whether you’re making it for a Halloween party, a family get-together, or just because you want a fun dessert, it’s a recipe that invites creativity and joy. I love how it brings back memories and creates new ones around the table.
Feel free to tweak the layers, add your favorite candies, or try one of the variations — make it your own little graveyard of deliciousness. I’d love to hear how you customize it, so please leave a comment or share your photos. Let’s keep the fun (and the crumbs) going!
FAQs
Can I make the brownie trifle ahead of time?
Yes, you can assemble it up to 4 hours ahead and keep it refrigerated. Just add the Oreo dirt and cookie tombstones right before serving to keep them crunchy.
What can I use instead of Oreos for the dirt layer?
Crushed chocolate graham crackers or chocolate wafer cookies work great as alternatives and give a slightly different texture and flavor.
How do I keep the cookie tombstones from breaking?
Roll the dough to an even thickness and chill the cut cookies before baking. Bake just until edges turn light golden to avoid overbaking and brittleness.
Can I use homemade pudding instead of instant mix?
Absolutely! A homemade chocolate pudding will add a richer flavor but may require more chilling time before assembling.
Is this recipe kid-friendly?
Yes! Kids love the fun presentation and sweet flavors. Just be sure to supervise if using edible markers or melted chocolate for decorating.
For a fun twist, you might also appreciate the texture and flavor contrasts in my crispy garlic chicken recipe, which is surprisingly comforting in a different way. Or, if you enjoy desserts with bold chocolate flavors, the ultimate chocolate fudge cake might be your next favorite!
Pin This Recipe!
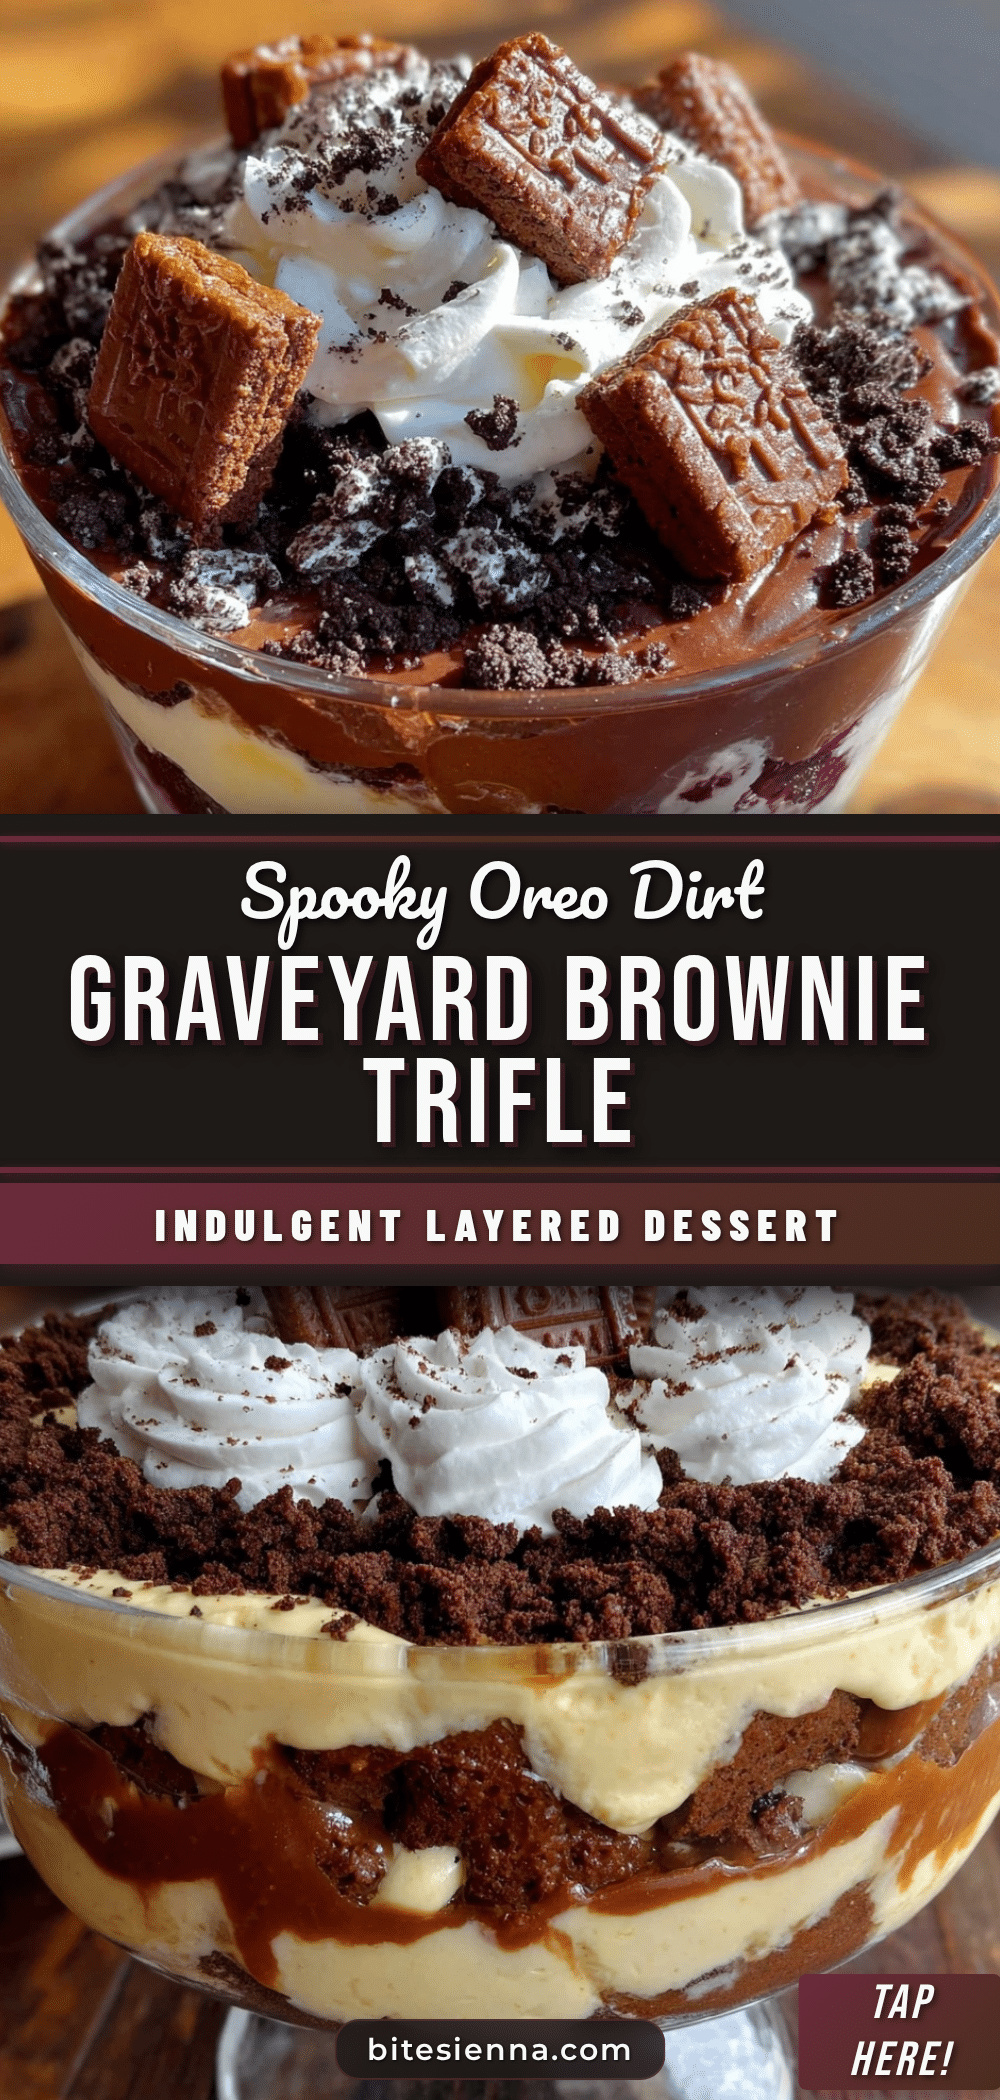
Delicious Graveyard Brownie Trifle with Oreo Dirt and Cookie Tombstones

A nostalgic and spooky Halloween dessert layering fudgy brownies, creamy chocolate pudding, crunchy Oreo dirt, and decorated cookie tombstones. Easy to assemble and perfect for parties.
- Prep Time: 15 minutes
- Cook Time: 30 minutes
- Total Time: 45 minutes
- Yield: 8 servings 1x
- Category: Dessert
- Cuisine: American
Ingredients
- 1 batch of fudgy brownies (store-bought or homemade, about 9×9-inch pan)
- 20 Oreo cookies, finely crushed (about 1 ½ cups), including cream filling
- 2 cups whole milk (or almond milk for dairy-free option)
- 1 box instant chocolate pudding mix (3.9 oz / 110 g)
- 1 cup heavy whipping cream, chilled
- 2 tablespoons powdered sugar
- 1 teaspoon vanilla extract
- 1 package refrigerated sugar cookie dough or homemade sugar cookie dough
- Black edible marker or melted chocolate for writing “RIP”
Instructions
- Make the Brownies: Prepare brownies according to package instructions or your favorite recipe (about 25-30 minutes baking time). Let cool completely, then cut into 1-inch chunks. If using store-bought brownies, chop them up.
- Prepare Oreo Dirt: Place Oreos in a large zip-top bag and crush with a rolling pin until fine crumbs form (about 1 ½ cups), mixing fine crumbs with some small chunks for texture.
- Make the Pudding: Whisk instant chocolate pudding mix with 2 cups (480 ml) cold milk in a bowl. Let sit for 5 minutes until thickened.
- Whip the Cream: Using an electric mixer, whip 1 cup (240 ml) heavy cream with 2 tablespoons powdered sugar and 1 teaspoon vanilla extract until soft peaks form. If overwhipped, fold in a little extra cream to smooth.
- Bake Cookie Tombstones: Roll out sugar cookie dough to 1/4-inch thickness. Cut into tombstone shapes using cookie cutters or a small oval cutter. Bake at 350°F (175°C) for 8-10 minutes until edges are lightly golden. Cool completely on a wire rack. Decorate with edible black marker or melted chocolate writing “RIP.”
- Assemble the Trifle: In a clear trifle bowl, layer 1 ½ cups brownie chunks, half the pudding, half the Oreo dirt, and about 1/2 cup whipped cream. Repeat layers once more and finish with whipped cream.
- Decorate: Stick cookie tombstones upright into the top whipped cream layer. Add optional candy eyes or gummy worms for extra effect.
- Chill and Serve: Refrigerate for at least 1 hour before serving to meld layers and keep Oreo dirt crunchy. Scoop into bowls and enjoy.
Notes
Use fudgy brownies for best texture to avoid sogginess. Crush Oreos to a mix of fine crumbs and small chunks for texture. Chill bowl and beaters before whipping cream for fluffier peaks. Add Oreo dirt just before serving to keep crunch. Cookie tombstones can be fixed with melted chocolate if cracked.
Nutrition
- Serving Size: About 1 cup (240 g)
- Calories: 350
- Fat: 18
- Carbohydrates: 45
- Protein: 5
Keywords: Halloween dessert, brownie trifle, Oreo dirt, cookie tombstones, spooky dessert, easy Halloween recipe, layered dessert


