There used to be a little diner on Route 9, the kind with cracked vinyl booths and a jukebox that only played 80s rock. They made these chicken tenders that were pure magic — impossibly crunchy, juicy inside, and seasoned just right. When they closed suddenly three years ago, I won’t lie, I actually mourned them. I mean, I tried to replicate that crunch at home for months. I baked them. I pan-fried them. I even attempted deep-frying once, which, honestly, left my kitchen looking like a grease bomb went off. After twelve tries — including one batch that was so dry my dog turned his nose up at it — I finally got it. And the secret weapon? My air fryer. This recipe for Easy Crispy Air Fryer Chicken Tenders for Kids is the result of that obsession. It’s the diner version, recreated, but without the deep fryer and the mess. The first time I pulled these out, golden and shatteringly crisp, I actually texted my sister a photo with the caption, “We’re back.” Maybe you’ve been chasing a similar food memory? That feeling when you take a bite and it takes you right back to a specific booth, a specific napkin dispenser, a specific perfect fry. That’s what this recipe does. It’s not just dinner. It’s a time machine.
Why You’ll Love This Recipe
Let me tell you why these Easy Crispy Air Fryer Chicken Tenders for Kids have become a non-negotiable in my weekly meal prep. They are, without exaggeration, the best weeknight dinner hack I’ve ever stumbled upon.
- Quick & Easy: These come together in under 20 minutes. Seriously. From start to plate, you’re looking at about 15 minutes of active work and 10 minutes of air frying. Perfect for those evenings when you’re staring at the clock and wondering how it’s already 5:30 PM.
- Simple Ingredients: No fancy grocery trips needed. You likely already have everything in your kitchen right now. Chicken, breadcrumbs, a few spices, an egg. That’s it. No buttermilk baths, no complicated brines.
- Perfect for Weeknights: This is the ultimate solution for busy weeknights or last-minute cravings. It’s faster than takeout and way healthier.
- Crowd-Pleaser: These always get rave reviews from kids and adults alike. I’ve served them to my picky nephew and my food-snob neighbor, and both asked for seconds.
- Unbelievably Delicious: The texture is what gets me every time. The air fryer creates this incredibly crispy, golden-brown crust without any of the greasy heaviness of deep-frying. The inside stays juicy and tender. It’s next-level comfort food that doesn’t leave you feeling weighed down.
What makes this recipe different from the rest? It’s the technique. I use a simple trick of combining panko breadcrumbs with a little olive oil spray before air frying. This creates a crust that’s shatteringly crisp — not just golden, but actually crunchy. It’s the kind of recipe that makes you close your eyes after the first bite. It’s comfort food reimagined — healthier, faster, but with the same soul-soothing satisfaction. Perfect for impressing guests without stress, or turning a simple Tuesday into something memorable.
What Ingredients You Will Need
This recipe uses simple, wholesome ingredients to deliver bold flavor and satisfying texture without the fuss. Most of these are pantry staples you probably already have on hand.
- Chicken Tenders: 1 lb (450g) fresh chicken tenders. If you can’t find tenders, you can easily slice chicken breasts into strips. Look for uniform sizes so they cook evenly. I prefer buying a pack of pre-cut tenders for convenience.
- Panko Breadcrumbs: 1 cup (100g). Panko is key here. They are flakier and lighter than regular breadcrumbs, which means they get way crispier in the air fryer. I’ve tried regular breadcrumbs, and honestly, they just don’t give you that same crunch. You can find panko in the Asian food aisle or near the regular breadcrumbs at most grocery stores. I recommend the Kikkoman brand for the best texture.
- Grated Parmesan Cheese: 1/4 cup (25g). This adds a savory, salty depth and helps the crust get extra golden. Don’t skip it. The pre-shredded stuff in a can works fine, but freshly grated Parm melts better and adds more flavor.
- Egg: 1 large egg, beaten. This acts as the glue to hold the breading on the chicken. Make sure it’s well-beaten so it coats evenly.
- Garlic Powder: 1 teaspoon. Adds a gentle savory note that kids love. It’s not overpowering, just a nice background flavor.
- Paprika: 1 teaspoon. This is for color and a mild, sweet smokiness. I use sweet paprika, but smoked paprika works too if you want a deeper flavor (though kids might prefer the sweet version).
- Salt: 1/2 teaspoon. Don’t skip this. It brings out all the other flavors.
- Black Pepper: 1/4 teaspoon. Just a pinch for a tiny bit of warmth.
- Olive Oil Spray: Essential for that golden, crispy finish. You can use avocado oil spray if you prefer. Don’t use non-stick cooking spray with flour in it — it can leave a weird residue on your air fryer basket.
Substitution Guidance: For a gluten-free option, use gluten-free panko breadcrumbs. They work perfectly. You can also swap the Parmesan for nutritional yeast if you’re dairy-free, though the flavor will be a bit different. If you don’t have chicken tenders, boneless, skinless chicken thighs cut into strips work beautifully too — they’re even more forgiving and stay juicy.
Equipment Needed
You don’t need much for this recipe, which is part of its beauty. Here’s what you’ll need:
- Air Fryer: Any model will work. I use a 5.8-quart Cosori, and it’s been a workhorse. For smaller air fryers, you may need to cook in batches to avoid overcrowding.
- Mixing Bowls: You’ll need two shallow bowls — one for the beaten egg and one for the breadcrumb mixture. I like using wide, shallow bowls because they make dredging easier and less messy.
- Tongs: A good pair of tongs makes transferring the chicken from bowl to bowl and then to the air fryer basket so much easier. I have a silicone-tipped pair that doesn’t scratch my non-stick basket.
- Cutting Board & Sharp Knife: If you’re slicing your own chicken breasts into tenders, a sharp knife is essential for clean cuts.
- Paper Towels: For patting the chicken dry. This step is crucial for helping the breading stick.
- Meat Thermometer (optional but recommended): To ensure your chicken reaches an internal temperature of 165°F (74°C). I use a simple instant-read thermometer, and it gives me total peace of mind.
Budget-Friendly Options: Don’t have an air fryer? You can bake these in a conventional oven at 400°F (200°C) on a wire rack set over a baking sheet for about 15-18 minutes, flipping halfway. They won’t be quite as crispy, but they’ll still be delicious. A toaster oven with a convection setting works great too.
Preparation Method
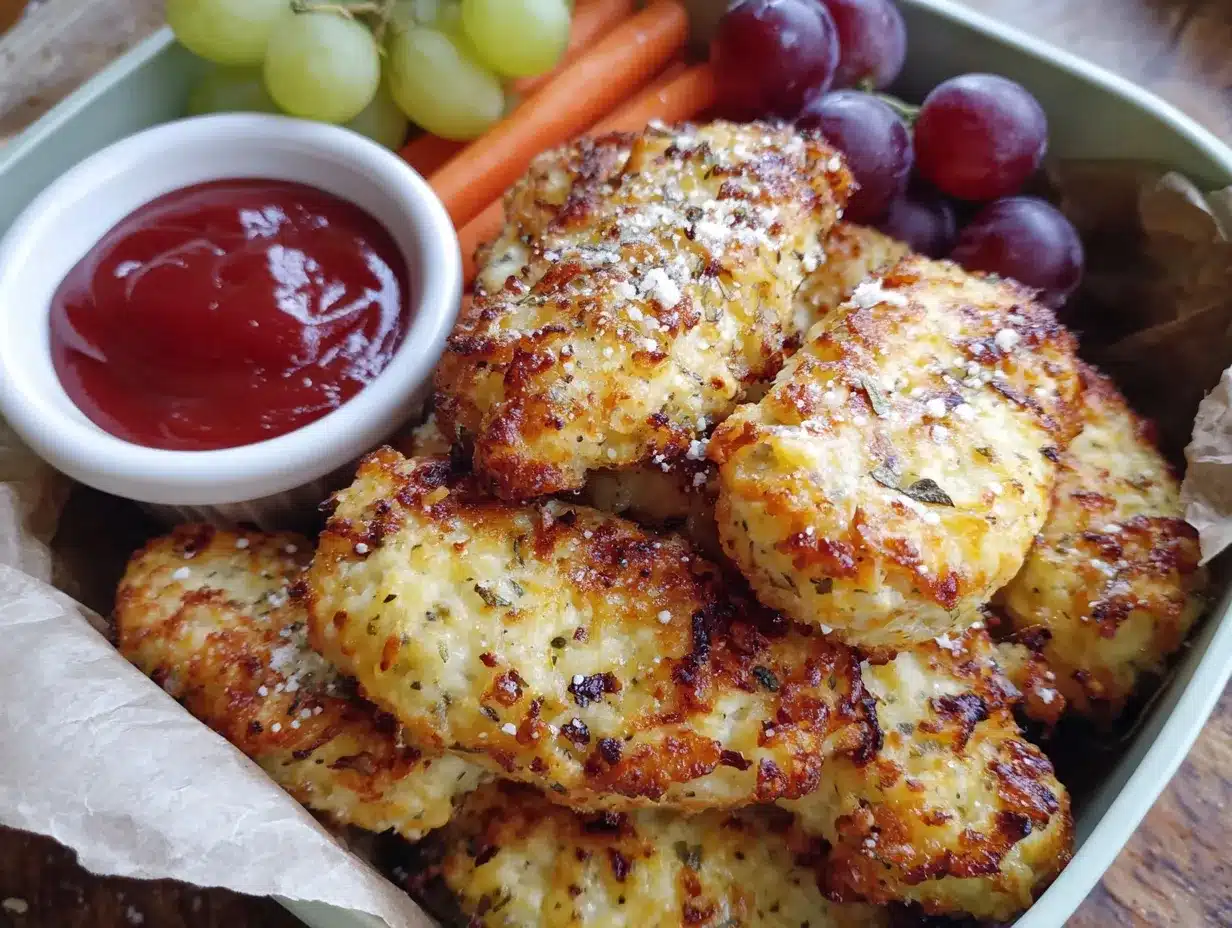
Ready to make the best Easy Crispy Air Fryer Chicken Tenders for Kids? Let’s do this. The process is simple, but I’ve included all my little tricks for perfect results every time.
- Prep the Chicken: Start by patting your chicken tenders dry with paper towels. This is a non-negotiable step. If the chicken is wet, the breading won’t stick, and you’ll end up with a sad, bare piece of chicken. If using chicken breasts, slice them into strips about 1-inch (2.5 cm) thick. Try to make them uniform in size so they cook at the same rate.
- Set Up Your Dredging Station: In one shallow bowl, beat the egg until it’s smooth and consistent. In a second shallow bowl, combine the panko breadcrumbs, grated Parmesan, garlic powder, paprika, salt, and pepper. Mix them together with a fork until everything is evenly distributed. I like to use my fingers to break up any clumps of Parmesan.
- Coat the Chicken: Take one chicken tender and dip it into the beaten egg, making sure it’s fully coated. Let any excess egg drip off back into the bowl. Then, transfer the chicken to the breadcrumb mixture. Press the breadcrumbs firmly onto both sides of the chicken. Don’t be shy here — really pack them on. This is what gives you that thick, crunchy crust. Place the coated tender on a clean plate. Repeat with all the chicken tenders. I usually do this assembly-line style: coat all the tenders in egg first, then bread them all at once. It’s faster and less messy.
- Preheat Your Air Fryer: Most air fryers benefit from a quick preheat. Set yours to 400°F (200°C) and let it run for 3-5 minutes while you finish breading the chicken. This ensures the basket is hot when the chicken hits it, which helps the crust start crisping immediately.
- Arrange in the Basket: Lightly spray the air fryer basket with olive oil spray. Place the breaded chicken tenders in a single layer in the basket. Make sure they aren’t touching or overlapping. Overcrowding is the enemy of crispiness — the hot air needs to circulate around each piece. Depending on the size of your air fryer, you may need to cook in two batches. I can fit about 6-8 tenders in my 5.8-quart model.
- Spray and Air Fry: Lightly spray the tops of the chicken tenders with olive oil spray. This is what gives them that beautiful golden color and shatteringly crisp texture. Air fry at 400°F (200°C) for 8-10 minutes, flipping halfway through. At the 5-minute mark, open the basket, flip each tender with tongs, and spray the other side lightly with oil. Close the basket and continue cooking. The tenders are done when they are golden brown and crispy, and the internal temperature reaches 165°F (74°C) on an instant-read thermometer.
- Rest and Serve: Let the chicken tenders rest in the basket for 1-2 minutes after cooking. This allows the crust to set even more. Then transfer them to a plate. Serve immediately while they are hot and at their crispiest. I promise you, the first bite will be worth every second of the 20 minutes it took to make them.
Cooking Tips & Techniques
I’ve made this recipe more times than I can count, and I’ve learned a few things along the way. Here are my best tips for getting perfect results every single time.
- Don’t Skip the Dry Pat: I know I said it before, but it’s worth repeating. Patting the chicken dry with paper towels is the single most important step for getting the breading to stick. Wet chicken creates steam, which pushes the breading off. No one wants a naked chicken tender.
- Use a Light Hand with the Spray: You want a light, even mist of oil — not a soaking. Too much oil can make the breading soggy instead of crispy. I use a pump-style oil sprayer for better control. Aerosol sprays can sometimes be uneven.
- Don’t Overcrowd the Basket: This is the most common mistake people make with air fryers. If the tenders are touching, they will steam instead of fry. You want each piece to have its own space. It’s better to cook in two batches than to crowd them all in. The extra 10 minutes is worth the superior crunch.
- Flip Halfway Through: Flipping ensures even browning on both sides. Don’t skip this step. I set a timer on my phone so I don’t forget. It’s a small thing that makes a big difference.
- Check for Doneness: Chicken tenders are thin, so they cook quickly. But don’t rely on time alone. Use a meat thermometer to check the internal temperature. It should read 165°F (74°C). This is the only way to guarantee perfectly cooked, juicy chicken without any guesswork.
I once forgot to flip my tenders halfway through. The bottoms were pale and soft, while the tops were perfectly golden. I learned my lesson that day. Now, I always set a timer for 5 minutes and make the flip a non-negotiable part of the process.
Variations & Adaptations
One of the best things about this recipe is how easily it adapts to different tastes and dietary needs. Here are some of my favorite variations.
- Spicy Buffalo Tenders: For the adults or adventurous kids, add 1/2 teaspoon of cayenne pepper and 1/2 teaspoon of chili powder to the breadcrumb mixture. After air frying, toss the cooked tenders in a mixture of 2 tablespoons of melted butter and 3 tablespoons of buffalo sauce. Serve with ranch or blue cheese dressing.
- Gluten-Free Version: This is incredibly easy. Simply swap the regular panko for gluten-free panko breadcrumbs. Everything else remains the same. I’ve tested this with my gluten-sensitive friend, and she couldn’t tell the difference. The texture is just as crispy.
- Parmesan-Herb Tenders: Add 1 tablespoon of dried Italian seasoning or a mix of dried oregano, basil, and thyme to the breadcrumb mixture. The herbs add a lovely fragrant note that pairs beautifully with the Parmesan. This version is especially good served with marinara sauce for dipping.
- Honey Mustard Glazed Tenders: After air frying, brush the tenders with a mixture of 2 tablespoons of honey and 1 tablespoon of Dijon mustard. Return them to the air fryer for 1-2 minutes to set the glaze. The sweet and tangy combo is a huge hit with kids.
- Air Fryer Chicken Nuggets: If you have younger kids who prefer nuggets to tenders, simply cut the chicken into bite-sized pieces before breading. Reduce the cooking time to 6-8 minutes, flipping halfway. They cook even faster, so keep an eye on them.
I personally love the Spicy Buffalo variation. It’s my go-to for game day or when I want a little kick. The kids get the plain version, and I get the spicy one. It’s a win-win.
Serving & Storage Suggestions
These Easy Crispy Air Fryer Chicken Tenders for Kids are incredibly versatile when it comes to serving. Here’s how I like to enjoy them.
Serving: Serve these tenders hot and fresh from the air fryer for the best texture. They are fantastic on their own, but dipping sauces take them to the next level. My kids love them with ketchup, honey mustard, or ranch dressing. I personally love them with a side of barbecue sauce or buffalo sauce. For a complete meal, pair them with air fryer french fries, a simple green salad, coleslaw, or roasted vegetables. They also make amazing chicken tender wraps or sandwiches. Just stuff them into a warm tortilla or bun with lettuce, tomato, and your favorite sauce.
Storage: If you have leftovers (which is rare in my house!), store them in an airtight container in the refrigerator for up to 3 days. The key to reheating is to bring back that crispy texture. The microwave will make them soggy, so avoid it if you can. Instead, reheat them in the air fryer at 375°F (190°C) for 3-5 minutes, or until heated through and crispy again. You can also reheat them in a conventional oven at 375°F (190°C) on a wire rack for about 5-7 minutes. They won’t be quite as good as fresh, but they’ll still be delicious.
Freezing: These tenders freeze beautifully. To freeze, arrange the breaded, uncooked tenders on a baking sheet lined with parchment paper and freeze until solid (about 2 hours). Then transfer them to a freezer-safe bag or container. They will keep for up to 3 months. To cook from frozen, add 2-3 minutes to the air frying time. No need to thaw. This is a lifesaver for busy weeknights.
Nutritional Information & Benefits
These Easy Crispy Air Fryer Chicken Tenders for Kids are a healthier alternative to deep-fried versions, but they don’t sacrifice any of the flavor or crunch. Here’s a rough estimate of the nutritional information per serving (based on 4 servings).
| Nutrient | Amount Per Serving |
|---|---|
| Calories | 320 |
| Total Fat | 12g |
| Saturated Fat | 3g |
| Cholesterol | 120mg |
| Sodium | 580mg |
| Total Carbohydrates | 18g |
| Dietary Fiber | 1g |
| Sugars | 1g |
| Protein | 35g |
Health Benefits: Chicken tenders are an excellent source of lean protein, which is essential for muscle growth and repair. By using an air fryer instead of deep-frying, you significantly reduce the amount of oil and fat in the final dish. The panko breadcrumbs provide a satisfying crunch without the heavy grease. This recipe is also lower in calories and fat compared to traditional fried chicken tenders, making it a great option for families looking to eat healthier without sacrificing taste. Just be mindful of the sodium content if you are watching your salt intake.
Conclusion
So there you have it. My quest to recreate those legendary diner chicken tenders is finally over, and I couldn’t be happier with the result. These Easy Crispy Air Fryer Chicken Tenders for Kids are everything I wanted them to be — impossibly crunchy, juicy, flavorful, and done in under 20 minutes. They’ve become a staple in my kitchen, and I have a feeling they’ll become one in yours too. I honestly love how versatile this recipe is. You can keep it simple for the kids, or spice it up for yourself. It’s a recipe that works for everyone. I’d love to hear how they turn out for you. Did you try any of the variations? What dipping sauce did you go with? Drop a comment below and let me know. And if you share a photo on Pinterest or Instagram, tag me — I love seeing your creations. Now go make some memories in your kitchen. You’ve got this!
Frequently Asked Questions
Can I use frozen chicken tenders for this recipe?
Yes, you can use frozen chicken tenders, but you’ll need to adjust the cooking time. Do not thaw them first. Add about 3-5 minutes to the air frying time, and make sure they reach an internal temperature of 165°F (74°C). The breading might not stick as well as with fresh chicken, but they will still be delicious.
How do I keep the breading from falling off?
The most common reason breading falls off is that the chicken is too wet. Make sure to pat the chicken tenders dry with paper towels before dipping them in the egg. Also, press the breadcrumb mixture firmly onto the chicken. Don’t be gentle — really pack it on. A light spray of oil before air frying also helps the crust set and stay in place.
Can I make these ahead of time for a party?
Absolutely! You can bread the chicken tenders up to 24 hours in advance and keep them covered in the refrigerator. When you’re ready to serve, just air fry them as directed. You’ll need to add 1-2 minutes to the cooking time since they’ll be cold from the fridge. They’re perfect for game day or a kids’ birthday party.
Why are my chicken tenders not crispy?
Several things could be at play. First, make sure you aren’t overcrowding the air fryer basket. The tenders need space for hot air to circulate. Second, don’t skip the olive oil spray — it’s essential for that golden, crispy crust. Third, make sure your air fryer is fully preheated before adding the chicken. A cold basket will steam the tenders instead of crisping them.
Can I use this recipe for chicken nuggets?
Yes! This recipe works perfectly for chicken nuggets. Simply cut the chicken into bite-sized pieces instead of strips. Reduce the air frying time to 6-8 minutes, flipping halfway. Keep an eye on them as they cook faster than tenders. They are a huge hit with toddlers and picky eaters.
Pin This Recipe!

Easy Crispy Air Fryer Chicken Tenders Kids Will Love

These Easy Crispy Air Fryer Chicken Tenders are impossibly crunchy, juicy inside, and seasoned just right. They come together in under 20 minutes and are a healthier alternative to deep-fried versions.
- Prep Time: 15 minutes
- Cook Time: 10 minutes
- Total Time: 25 minutes
- Yield: 4 servings 1x
- Category: Main Course
- Cuisine: American
Ingredients
- 1 lb (450g) fresh chicken tenders
- 1 cup (100g) panko breadcrumbs
- 1/4 cup (25g) grated Parmesan cheese
- 1 large egg, beaten
- 1 teaspoon garlic powder
- 1 teaspoon paprika
- 1/2 teaspoon salt
- 1/4 teaspoon black pepper
- Olive oil spray
Instructions
- Pat the chicken tenders dry with paper towels. If using chicken breasts, slice them into strips about 1-inch thick.
- In one shallow bowl, beat the egg until smooth. In a second shallow bowl, combine panko breadcrumbs, Parmesan, garlic powder, paprika, salt, and pepper.
- Dip each chicken tender into the beaten egg, letting excess drip off, then press into the breadcrumb mixture, coating both sides firmly.
- Preheat the air fryer to 400°F (200°C) for 3-5 minutes.
- Lightly spray the air fryer basket with olive oil spray. Arrange the breaded chicken tenders in a single layer, ensuring they are not touching.
- Lightly spray the tops of the chicken tenders with olive oil spray. Air fry at 400°F (200°C) for 8-10 minutes, flipping halfway through and spraying the other side with oil.
- Check that the internal temperature reaches 165°F (74°C). Let rest in the basket for 1-2 minutes before serving.
Notes
For gluten-free, use gluten-free panko. For dairy-free, swap Parmesan for nutritional yeast. To freeze, bread uncooked tenders and freeze on a baking sheet, then transfer to a freezer bag. Cook from frozen, adding 2-3 minutes to air frying time.
Nutrition
- Serving Size: 4 servings
- Calories: 320
- Sugar: 1
- Sodium: 580
- Fat: 12
- Saturated Fat: 3
- Carbohydrates: 18
- Fiber: 1
- Protein: 35
Keywords: air fryer chicken tenders, crispy chicken tenders, easy chicken tenders, kid-friendly chicken tenders, healthy chicken tenders


