There used to be a tiny sports bar on the corner of 7th and Main that made the most incredible honey garlic chicken wings. When they closed—suddenly, with a handwritten sign taped to the door one Tuesday—I actually felt a little lost. I mean, honestly, I’d been going there for years, and those wings were my go-to comfort food after a long week. After twelve tries—some burnt, some soggy, one that my roommate politely called “aggressively salty”—I finally got it. These crispy honey garlic baked chicken wings are the real deal, and honestly, they’re even better than the original.
The first time I nailed the texture, I actually texted my friend Sarah a photo with the caption “WE’RE BACK.” She knew exactly what I meant. These wings have that perfect crackly skin that shatters when you bite into it, all coated in a sticky-sweet garlic glaze that’s not too heavy. The trick, I discovered after ruining a few batches, is all in the method—not the fryer. Baking them low and slow first, then cranking the heat at the end, gives you that restaurant-quality crunch without the mess of hot oil splattering everywhere.
Maybe you’ve been there—chasing a dish from a place that no longer exists, trying to recreate a memory in your own kitchen. Let me tell you, it’s worth the trial and error. These honey garlic chicken wings have become my go-to for game days, casual dinners, and honestly, random Tuesdays when I just need something satisfying. They’re the kind of recipe that sticks with you, and once you make them, you’ll understand why I spent twelve attempts getting it right.
Why You’ll Love This Recipe
These crispy honey garlic baked chicken wings aren’t just another wing recipe—they’re the one I’ve tested and retested until every single detail worked. Here’s why they’ll become your new favorite:
- Perfectly Crispy Without Frying : The baking powder trick creates an incredibly crunchy skin that rivals any deep-fried version, without the mess or extra calories.
- Simple Pantry Ingredients : You probably already have everything you need—chicken wings, honey, garlic, soy sauce, and a few basic spices. No fancy grocery store trips required.
- Weeknight-Friendly : While they take a bit over an hour total, the active prep time is only about 15 minutes. Perfect for busy evenings when you want something special.
- Crowd-Pleasing Flavor : The sweet and savory combo appeals to everyone—kids love the honey glaze, adults appreciate the garlic kick, and nobody can resist that crunch.
- Foolproof Method : I’ve included all the little tricks I learned the hard way, so you get perfect results on your very first try. No more soggy wings or burnt glaze.
What makes these wings different from the countless other recipes out there is the two-step baking process. Most recipes either bake them at one temperature (resulting in sad, flabby skin) or fry them (messy and intimidating). My method starts low to render the fat and dry out the skin, then finishes hot to create that shatteringly crisp exterior. The honey garlic sauce gets brushed on at the very end, so it stays sticky and glossy instead of burning in the oven.
These honey garlic chicken wings are the kind of dish that makes you close your eyes after the first bite. They’re comfort food reimagined—healthier than frying, faster than you’d expect, but with the same soul-soothing satisfaction. Perfect for impressing guests at a party, or just treating yourself on a random Wednesday night.
What Ingredients You Will Need
This recipe uses simple, everyday ingredients to create something truly special. Most of these are pantry staples, which means you can whip up a batch whenever the craving hits.
For the Wings
- 3 pounds chicken wings , separated into drumettes and flats (about 24-30 pieces total). I recommend buying party wings that are already cut—it saves time and effort.
- 2 teaspoons baking powder (not baking soda—this is crucial for crispiness). Aluminum-free baking powder works best to avoid any metallic aftertaste.
- 1 teaspoon salt . I prefer fine sea salt for even distribution.
- 1/2 teaspoon black pepper , freshly ground.
- 1/2 teaspoon garlic powder . Don’t skip this—it adds a subtle savory base that complements the glaze.
- 1/4 teaspoon smoked paprika (optional, but adds a lovely color and subtle smokiness).
For the Honey Garlic Glaze
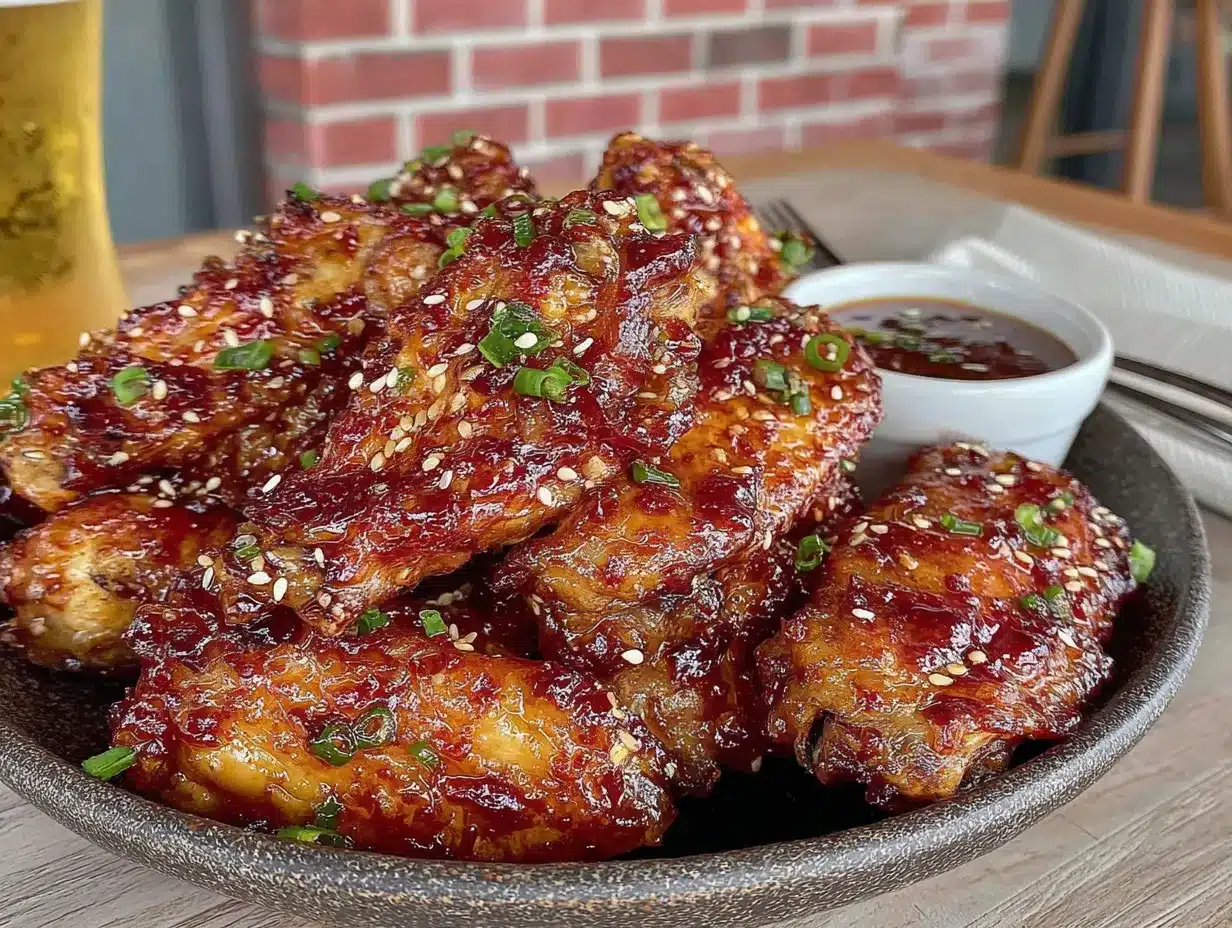
- 1/3 cup honey . Use a good-quality honey for the best flavor—I like local wildflower honey when I can find it.
- 4 cloves garlic , minced finely. Fresh garlic is non-negotiable here; the pre-minced stuff in jars just doesn’t have the same punch.
- 3 tablespoons soy sauce (low sodium recommended). This provides the savory balance to the sweet honey.
- 1 tablespoon rice vinegar . Adds a touch of acidity that brightens the whole dish.
- 1 tablespoon unsalted butter . This gives the glaze a silky, luxurious finish.
- 1 teaspoon sesame oil (optional, but highly recommended for that authentic Asian-inspired flavor).
- 1/2 teaspoon red pepper flakes (optional, for a little heat).
For Garnish (Optional but Recommended)
- Sesame seeds , toasted.
- Thinly sliced green onions .
- Fresh cilantro , roughly chopped (if you’re a cilantro person).
A quick note on ingredient selection: Look for chicken wings that are fresh, not frozen, if possible. Frozen wings tend to release more water as they thaw, which can interfere with getting that crispy skin. If you only have frozen wings, thaw them completely in the refrigerator overnight and pat them very dry with paper towels before starting.
For the honey, avoid anything labeled “honey flavored syrup”—it won’t caramelize the same way and the flavor will be off. Real honey is worth the splurge here. And please, use fresh garlic. I know it’s tempting to grab the jar, but the difference in flavor is night and day.
Equipment Needed
You don’t need a deep fryer or any fancy gadgets for these crispy honey garlic baked chicken wings. Here’s what you’ll actually use:
- Large baking sheet (half-sheet pan works perfectly). I prefer one with a rim to catch any drips.
- Wire rack that fits inside your baking sheet. This is the secret to getting crispy wings all around—the air circulates underneath instead of the wings sitting in their own fat.
- Paper towels for drying the wings thoroughly.
- Large mixing bowl for tossing the wings with the dry ingredients.
- Small saucepan for making the glaze.
- Pastry brush or silicone brush for applying the glaze.
- Tongs for handling the hot wings.
- Instant-read thermometer (optional but helpful to ensure the wings reach 165°F internally).
If you don’t have a wire rack, you can use a baking sheet lined with aluminum foil and greased with a little cooking spray. The wings won’t get quite as crispy on the bottom, but they’ll still be delicious. I’ve made them this way when traveling, and honestly, they’re still better than most restaurant wings I’ve had.
For the glaze, any small saucepan will do. I use a cheap one I’ve had for years—it’s got a few scratches, but it works perfectly. No need to invest in expensive cookware for this recipe.
Preparation Method
Let me walk you through this step by step. I’ve included all the little details that make the difference between good wings and unforgettable ones.
-
Preheat and prep your pan. Preheat your oven to 250°F (120°C). Place a wire rack on a baking sheet and spray it lightly with cooking spray. This prevents the wings from sticking.
-
Dry the wings thoroughly. Pat the chicken wings completely dry with paper towels. This is the most important step—I cannot stress this enough. Any moisture on the skin will steam instead of crisp. I usually go through about 6-8 paper towels for 3 pounds of wings. Let them sit on a clean towel for a minute to air-dry any remaining moisture.
-
Season the wings. In a large mixing bowl, combine the baking powder, salt, pepper, garlic powder, and smoked paprika. Add the dried wings and toss well to coat every piece evenly. The mixture should look like a dry rub coating each wing.
-
Arrange on the rack. Place the wings on the wire rack in a single layer, making sure they’re not touching each other. This allows hot air to circulate and crisp every surface. If they’re crowded, they’ll steam.
-
First bake (low and slow). Bake at 250°F for 30 minutes. This low temperature renders the fat under the skin and dries out the surface, setting the stage for maximum crispiness. You won’t see much browning at this stage—that’s normal.
-
Increase the heat. After 30 minutes, increase the oven temperature to 425°F (220°C). Don’t remove the wings from the oven—just turn up the dial. Bake for another 40-45 minutes, rotating the pan halfway through. The wings should be deep golden brown and the skin should look crackly and blistered in places.
-
Make the glaze while the wings bake. In a small saucepan, combine the honey, minced garlic, soy sauce, rice vinegar, and red pepper flakes (if using). Bring to a gentle simmer over medium heat, stirring occasionally. Let it bubble gently for 3-4 minutes until it thickens slightly. Remove from heat and stir in the butter and sesame oil until the butter is melted and the glaze is glossy. Set aside.
-
Check for doneness. The wings are done when they reach an internal temperature of 165°F (74°C) and the skin is crispy and golden. If you don’t have a thermometer, cut into the thickest part of a drumette—the meat should be opaque and the juices should run clear.
-
Glaze and serve. Remove the wings from the oven and let them cool for 2-3 minutes. Transfer them to a large bowl, pour the warm glaze over the top, and toss gently to coat each wing. Be careful—the wings are hot and the glaze is sticky. Sprinkle with sesame seeds and green onions if desired. Serve immediately while they’re still hot and crispy.
A few things I learned the hard way: Don’t skip the cooling time before glazing. If you put the glaze on piping-hot wings straight from the oven, it can slide right off. And toss them gently—you want the glaze to coat, not make the skin soggy from over-handling.
Cooking Tips & Techniques
After twelve batches of trial and error, I’ve picked up a few tricks that make these honey garlic chicken wings absolutely foolproof.
The baking powder is non-negotiable. I know it sounds weird, but it’s the secret to crispy baked wings. It raises the pH of the skin, which helps it brown faster and become more brittle. Just make sure you’re using baking powder, not baking soda—they’re completely different, and baking soda will make your wings taste metallic and bitter. Trust me, I made that mistake once.
Patience with the low-temperature step. The first 30 minutes at 250°F might feel like a waste of time, but it’s where the magic happens. This step renders out the fat slowly, so the skin dries out without burning. If you skip it and go straight to high heat, the fat doesn’t have time to render, and you’ll end up with greasy, flabby skin. I’ve tried both methods, and the two-step process is absolutely worth the extra time.
Don’t overcrowd the pan. This is probably the most common mistake people make. If the wings are touching each other, they’ll steam instead of crisp. Use two baking sheets if you need to—it’s better than cramming them all onto one. I learned this lesson when I tried to make a double batch for a party and ended up with soggy wings. Not my finest moment.
Make the glaze at the right time. The glaze should be made while the wings are baking, not ahead of time. If you make it too early, it will thicken and become difficult to work with. If you make it too late, the wings will cool down while you’re waiting. Time it so the glaze is ready about 5 minutes before the wings come out of the oven.
Double-glaze for extra flavor. If you want an even more intense honey garlic flavor, brush a thin layer of glaze on the wings about 5 minutes before they’re done baking, then toss them with the remaining glaze after they come out. This creates a caramelized layer underneath the fresh glaze. It’s a little extra work, but the flavor payoff is huge.
Variations & Adaptations
One of the best things about this recipe is how easily it adapts to different tastes and dietary needs. Here are some variations I’ve tried and loved:
Spicy Honey Garlic Wings : Add 1-2 tablespoons of sriracha or gochujang to the glaze along with the honey. The heat cuts through the sweetness beautifully. I made these for a Super Bowl party and they disappeared in minutes.
Gluten-Free Version : The recipe is naturally gluten-free as written, but double-check your soy sauce. Use tamari or coconut aminos instead of regular soy sauce to ensure it’s gluten-free. Everything else in the recipe is naturally gluten-free.
Air Fryer Method : If you have an air fryer, you can use it for the second half of the cooking process. After the initial 30-minute bake at 250°F, transfer the wings to the air fryer basket and cook at 400°F for 12-15 minutes, shaking halfway through. The air fryer gives an even crispier texture, but you’ll need to work in batches to avoid overcrowding.
Lemon Garlic Variation : Replace the honey with maple syrup and add the zest of one lemon to the glaze. The citrus brightens everything up and makes the wings feel lighter. This is my go-to for summer gatherings.
Keto-Friendly Option : Skip the honey glaze altogether and toss the baked wings in a mixture of melted butter, garlic, and parmesan cheese. You’ll lose the sweetness, but you’ll gain a rich, savory coating that’s totally keto-compliant.
Smoky Chipotle Twist : Add 1-2 teaspoons of adobo sauce from a can of chipotle peppers to the glaze. The smoky heat pairs amazingly with the honey and garlic. I tried this on a whim one night and it’s now my second-favorite version.
Serving & Storage Suggestions
These honey garlic chicken wings are best served hot and fresh, right after glazing. The contrast between the crispy skin and the sticky-sweet coating is at its peak within the first 15 minutes.
Serving ideas: Arrange the wings on a platter and garnish with sesame seeds, sliced green onions, and a few lime wedges for squeezing over the top. They pair beautifully with celery and carrot sticks, ranch or blue cheese dressing, and cold beer or a crisp white wine. For a complete meal, serve them alongside steamed rice and a simple cucumber salad.
Storage: If you have leftovers (unlikely, but possible), store them in an airtight container in the refrigerator for up to 3 days. The glaze will soften the skin over time, so they won’t be as crispy as fresh ones, but they’ll still taste great.
Reheating: The best way to reheat these wings is in the oven or air fryer. Preheat your oven to 375°F (190°C) and spread the wings on a baking sheet. Bake for 8-10 minutes until heated through and the skin crisps up again. You can also use an air fryer at 375°F for 4-5 minutes. Avoid the microwave at all costs—it will turn your crispy wings into sad, rubbery messes. I learned this the hard way after a late-night snack attempt.
Freezing: You can freeze the baked (but unglazed) wings for up to 2 months. Let them cool completely, then place them in a single layer on a baking sheet and freeze until solid. Transfer to a freezer bag or container. When you’re ready to eat, reheat them directly from frozen at 375°F for 15-20 minutes, then toss with fresh glaze.
The flavors actually deepen a bit overnight, so leftover wings make an excellent next-day lunch—just cold, straight from the fridge. Don’t judge me, but I’ve been known to eat them cold over a salad for a quick, protein-packed meal.
Nutritional Information & Benefits
Here’s the approximate nutritional breakdown for a serving of 4-5 wings (about 1/4 of the recipe):
| Nutrient | Amount |
|---|---|
| Calories | 380 |
| Protein | 28g |
| Fat | 22g |
| Saturated Fat | 7g |
| Carbohydrates | 18g |
| Sugar | 16g |
| Sodium | 720mg |
| Fiber | 0g |
These numbers are estimates and will vary based on the specific ingredients you use. The baking method significantly reduces the fat content compared to deep-fried wings—you’re saving about 100-150 calories per serving by baking instead of frying.
Chicken wings are a good source of protein, which helps keep you full and supports muscle maintenance. The honey provides quick energy, while the garlic offers immune-boosting properties and may help reduce inflammation. If you’re watching your sodium intake, use low-sodium soy sauce and reduce the added salt in the dry rub.
This recipe is naturally gluten-free (with tamari instead of soy sauce) and contains no dairy besides the small amount of butter in the glaze, which can be easily substituted with a plant-based alternative. It’s not suitable for low-carb or keto diets due to the honey, but as I mentioned earlier, you can modify the glaze to fit those needs.
Conclusion
These crispy honey garlic baked chicken wings are the result of twelve attempts, countless paper towels, and a deep love for a dish from a little bar that no longer exists. They’re proof that you can recreate restaurant-quality food at home without a deep fryer or fancy equipment. The combination of shatteringly crispy skin and sticky-sweet garlic glaze is honestly addictive—in the best possible way.
I hope you give these wings a try and make them your own. Maybe you’ll add extra garlic like I do, or throw in some extra red pepper flakes for heat. That’s the beauty of cooking at home—you get to tweak things until they’re perfect for you. And if you nail it on your first try (unlike me), even better.
I’d love to hear how these turn out for you! Drop a comment below and let me know if you tried any variations, or tag me in your photos if you share them online. These honey garlic chicken wings have become a staple in my kitchen, and I have a feeling they’ll become one in yours too. Happy cooking!
Frequently Asked Questions
Can I use frozen chicken wings for this recipe?
Yes, but you need to thaw them completely in the refrigerator first. Pat them very dry with paper towels before seasoning—frozen wings release more moisture as they thaw, so drying is extra important. I recommend fresh wings for the crispiest results, but frozen work in a pinch.
Why did my wings turn out soggy?
Soggy wings usually happen for one of three reasons: they weren’t dried thoroughly before seasoning, the baking sheet was overcrowded, or you skipped the low-temperature first bake. Make sure each wing is dry, give them space on the rack, and don’t rush the 250°F step. Also, toss them gently in the glaze right before serving—don’t let them sit in it.
Can I make the glaze ahead of time?
You can make the glaze up to 3 days in advance and store it in an airtight container in the refrigerator. When you’re ready to use it, gently reheat it on the stovetop or in the microwave, stirring until smooth. You might need to add a teaspoon of water if it’s too thick.
How do I get the wings extra crispy?
For maximum crispiness, let the seasoned wings sit uncovered in the refrigerator for 1-2 hours before baking. This dries out the skin even further. You can also increase the final bake time by 5-10 minutes if your oven runs cool. Just watch them closely so the glaze doesn’t burn.
Can I use chicken thighs or drumsticks instead of wings?
Absolutely! The same method works for chicken drumsticks, thighs, or even whole chicken legs. Adjust the cooking time based on the size of the pieces—drumsticks may need an extra 10-15 minutes at the high temperature. Always check that the internal temperature reaches 165°F before serving.
Pin This Recipe!
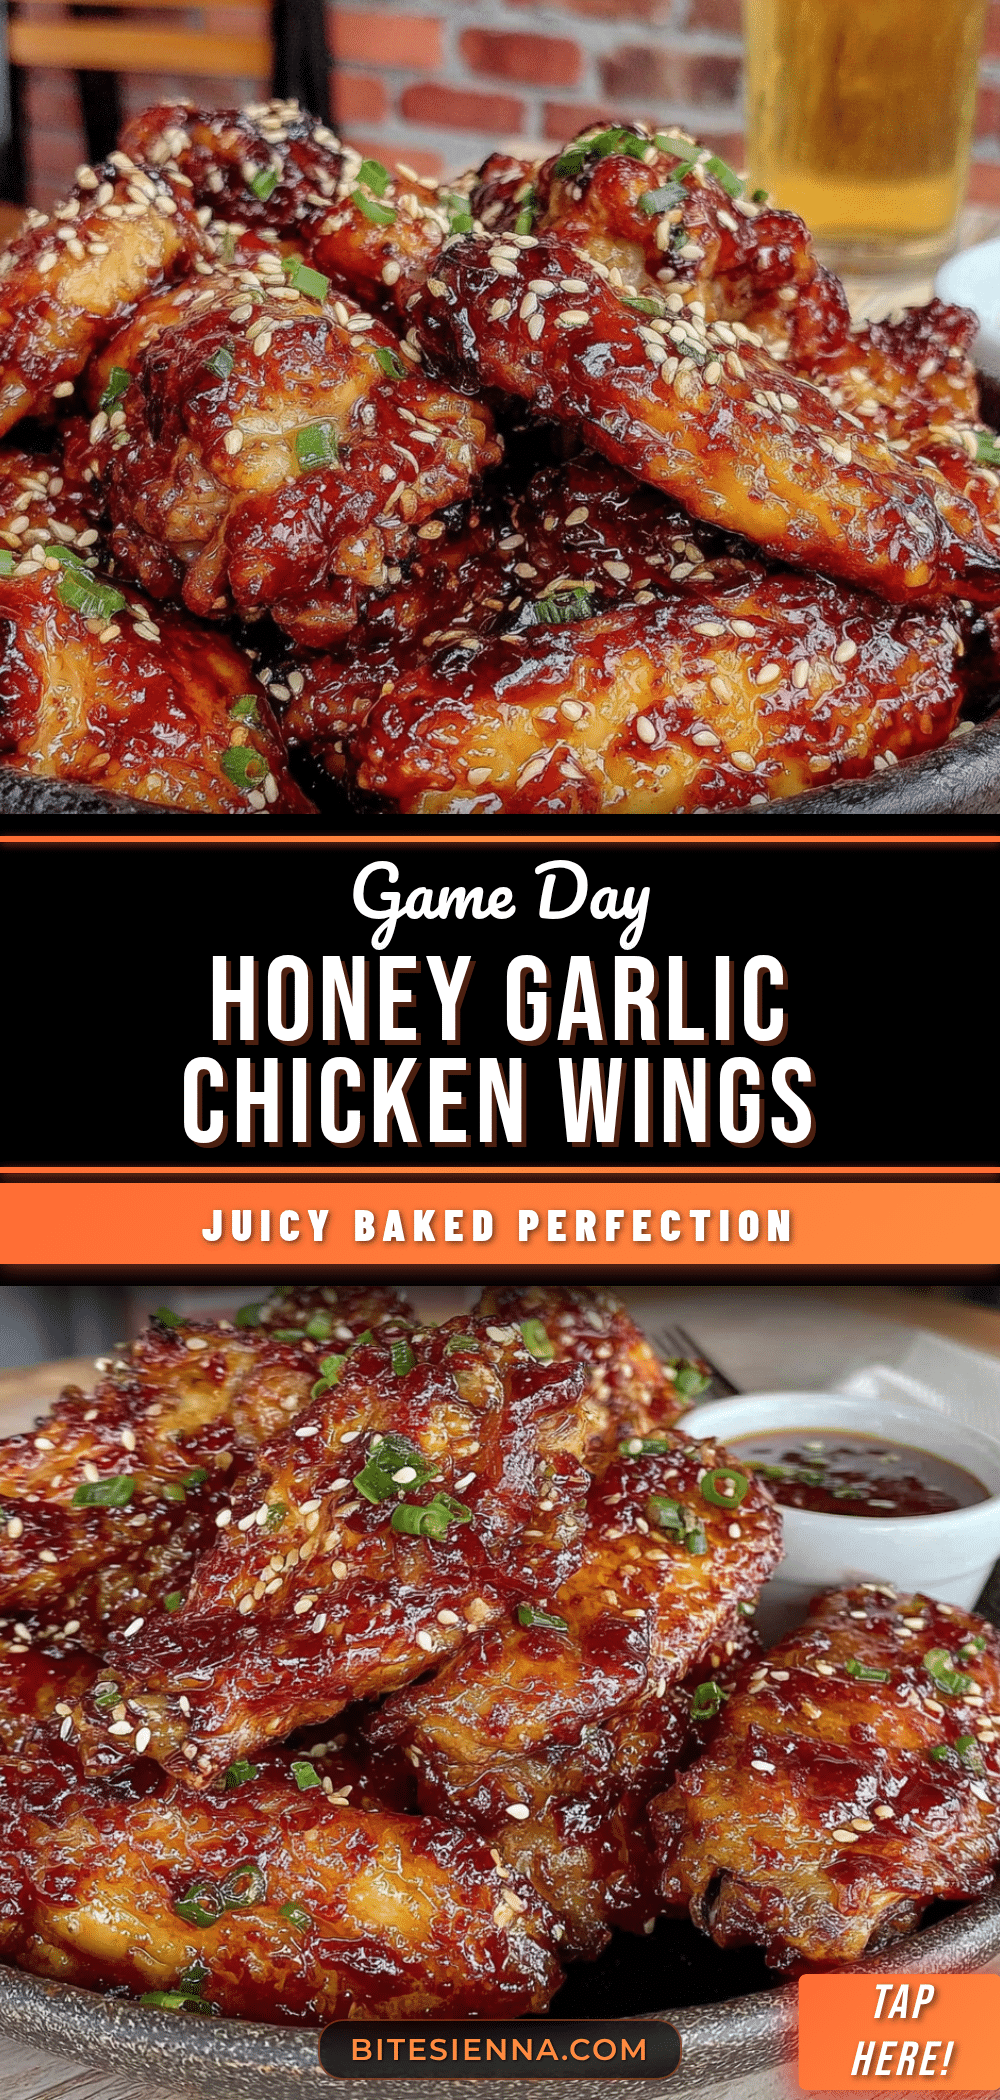
Easy Crispy Honey Garlic Baked Chicken Wings Recipe

These crispy honey garlic baked chicken wings have a perfect crackly skin that shatters when you bite into it, all coated in a sticky-sweet garlic glaze. The two-step baking process ensures restaurant-quality crunch without the mess of deep frying.
- Prep Time: 15 minutes
- Cook Time: 1 hour 10 minutes
- Total Time: 1 hour 25 minutes
- Yield: 4 servings 1x
- Category: Appetizer
- Cuisine: Asian
Ingredients
- 3 pounds chicken wings, separated into drumettes and flats (about 24–30 pieces total)
- 2 teaspoons baking powder (aluminum-free)
- 1 teaspoon fine sea salt
- 1/2 teaspoon freshly ground black pepper
- 1/2 teaspoon garlic powder
- 1/4 teaspoon smoked paprika (optional)
- 1/3 cup honey
- 4 cloves garlic, minced
- 3 tablespoons low-sodium soy sauce
- 1 tablespoon rice vinegar
- 1 tablespoon unsalted butter
- 1 teaspoon sesame oil (optional)
- 1/2 teaspoon red pepper flakes (optional)
- Sesame seeds, toasted (for garnish)
- Thinly sliced green onions (for garnish)
- Fresh cilantro, roughly chopped (for garnish)
Instructions
- Preheat oven to 250°F (120°C). Place a wire rack on a baking sheet and spray lightly with cooking spray.
- Pat chicken wings completely dry with paper towels. Let them sit on a clean towel for a minute to air-dry any remaining moisture.
- In a large mixing bowl, combine baking powder, salt, pepper, garlic powder, and smoked paprika. Add dried wings and toss well to coat evenly.
- Arrange wings on the wire rack in a single layer, making sure they are not touching each other.
- Bake at 250°F for 30 minutes. This low temperature renders the fat and dries out the skin.
- After 30 minutes, increase oven temperature to 425°F (220°C). Do not remove wings from oven. Bake for another 40-45 minutes, rotating the pan halfway through, until wings are deep golden brown and skin is crackly.
- While wings bake, make the glaze: In a small saucepan, combine honey, minced garlic, soy sauce, rice vinegar, and red pepper flakes (if using). Bring to a gentle simmer over medium heat, stirring occasionally. Let bubble gently for 3-4 minutes until slightly thickened. Remove from heat and stir in butter and sesame oil until melted and glossy. Set aside.
- Check wings for doneness: internal temperature should reach 165°F (74°C). If no thermometer, cut into thickest part of a drumette—meat should be opaque and juices clear.
- Remove wings from oven and let cool for 2-3 minutes. Transfer to a large bowl, pour warm glaze over top, and toss gently to coat. Sprinkle with sesame seeds and green onions if desired. Serve immediately.
Notes
Don’t skip the low-temperature first bake—it renders fat and ensures crispiness. Use baking powder, not baking soda. Pat wings very dry before seasoning. Do not overcrowd the pan. Make glaze while wings bake. For extra flavor, brush a thin layer of glaze on wings 5 minutes before they are done, then toss with remaining glaze after baking.
Nutrition
- Serving Size: 4-5 wings
- Calories: 380
- Sugar: 16
- Sodium: 720
- Fat: 22
- Saturated Fat: 7
- Carbohydrates: 18
- Protein: 28
Keywords: honey garlic chicken wings, crispy baked wings, chicken wings, honey garlic, baked wings, game day appetizer


