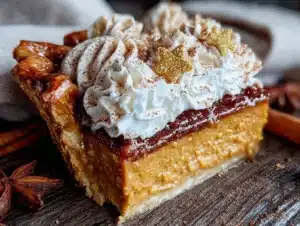
I was at the hardware store last November, of all places, waiting for my number to be called so I could complain about a leaky faucet. The guy behind the counter—a grizzled older man named Jerry who I’d only ever seen selling pipe fittings—started talking to me about Thanksgiving. Not the turkey or the football, but the pie. Specifically, he wanted to know if I made my pumpkin pie with a buttery crust that didn’t fall apart. I blinked at him, holding a wrench, and said I usually bought the frozen kind. He looked at me like I’d just insulted his mother. “You gotta make it yourself,” he said, already scribbling on a scrap of receipt paper. “And it has to be quick. Nobody’s got time for a three-hour crust on a Tuesday night.”
Honestly, I almost laughed. Here was this guy, covered in sawdust, giving me a pie lecture. But I took the paper home, and let me tell you—his quick homemade pumpkin pie with buttery crust changed my whole approach to fall baking. It’s not fussy. It doesn’t require a pastry blender or a chilled marble slab. It just works. Maybe you’ve been there, staring at a complicated recipe that asks for “ice-cold vodka” and “overnight chilling” and thinking, I just want pie tonight. That’s the energy Jerry captured on that receipt. I’ve made this pie four times since that day, and each time, I think about how the best cooking advice often comes from the most unexpected places.
This pie is the kind of recipe that makes you look like a hero with minimal effort. The crust is genuinely buttery and flaky, but it comes together in a food processor in under five minutes. The filling is spiced just right—not too sweet, not too heavy—and it sets beautifully without cracking. I keep making it because it delivers that deep, comforting pumpkin flavor we all crave, but without the stress. And honestly, who doesn’t need a little less stress around the holidays?
Why You’ll Love This Easy Homemade Pumpkin Pie
This isn’t just another pumpkin pie recipe. I’ve tested dozens over the years, and this one stands out for a few key reasons. First, it respects your time. We’re talking about a pie that goes from pantry to oven in about 20 minutes of active work. That’s it. The rest is just the oven doing its thing while you handle the rest of your dinner.
- Quick & Easy: From start to oven in under 30 minutes. Perfect for a weeknight dessert or a last-minute holiday contribution.
- Simple Ingredients: You probably have most of these in your pantry right now. No weird extracts or hard-to-find spices.
- Perfect for Weeknights & Holidays: It’s fancy enough for Thanksgiving but simple enough for a random Tuesday in October when you just want pie.
- Crowd-Pleaser: I’ve served this to my kids, my in-laws, and my skeptical neighbor who “doesn’t like pumpkin.” Everyone goes back for seconds.
- Unbelievably Delicious: The buttery crust is the real star here. It’s flaky, tender, and holds up perfectly to the creamy filling without getting soggy.
What makes this recipe different from the rest? It’s the technique. Instead of cutting cold butter into flour by hand (which always leaves me with a mess), we pulse everything in a food processor. It’s foolproof. The filling uses a simple trick of pre-heating the milk and spices to bloom the flavors. It sounds fancy, but it takes two minutes. The result is a pie that tastes like it took hours of effort, when really, you just followed a few smart shortcuts.
This is the kind of pie that makes you close your eyes after the first bite. It’s comfort food at its finest—familiar, warm, and deeply satisfying. Whether you’re impressing guests or just treating yourself on a quiet evening, this pie delivers every single time.
What Ingredients You Will Need
This recipe uses simple, wholesome ingredients to deliver that classic pumpkin pie flavor without any fuss. Most of these are pantry staples, but I’ve included a few notes on what to look for to get the best results.
For the Buttery Crust
- All-purpose flour – 1 ¼ cups (150g). Spoon and level it for accuracy. Too much flour makes the crust tough.
- Unsalted butter – ½ cup (1 stick or 113g), cold and cut into small cubes. I prefer using a good European-style butter like Plugrà for extra richness, but any unsalted butter works.
- Salt – ½ teaspoon. Don’t skip this—it balances the sweetness of the filling.
- Granulated sugar – 1 teaspoon. Just a tiny bit adds a subtle sweetness to the crust.
- Ice water – 3 to 4 tablespoons. The key is to use water that’s actually ice-cold. I keep a cup of water with ice cubes in the fridge while I measure the other ingredients.
For the Pumpkin Filling
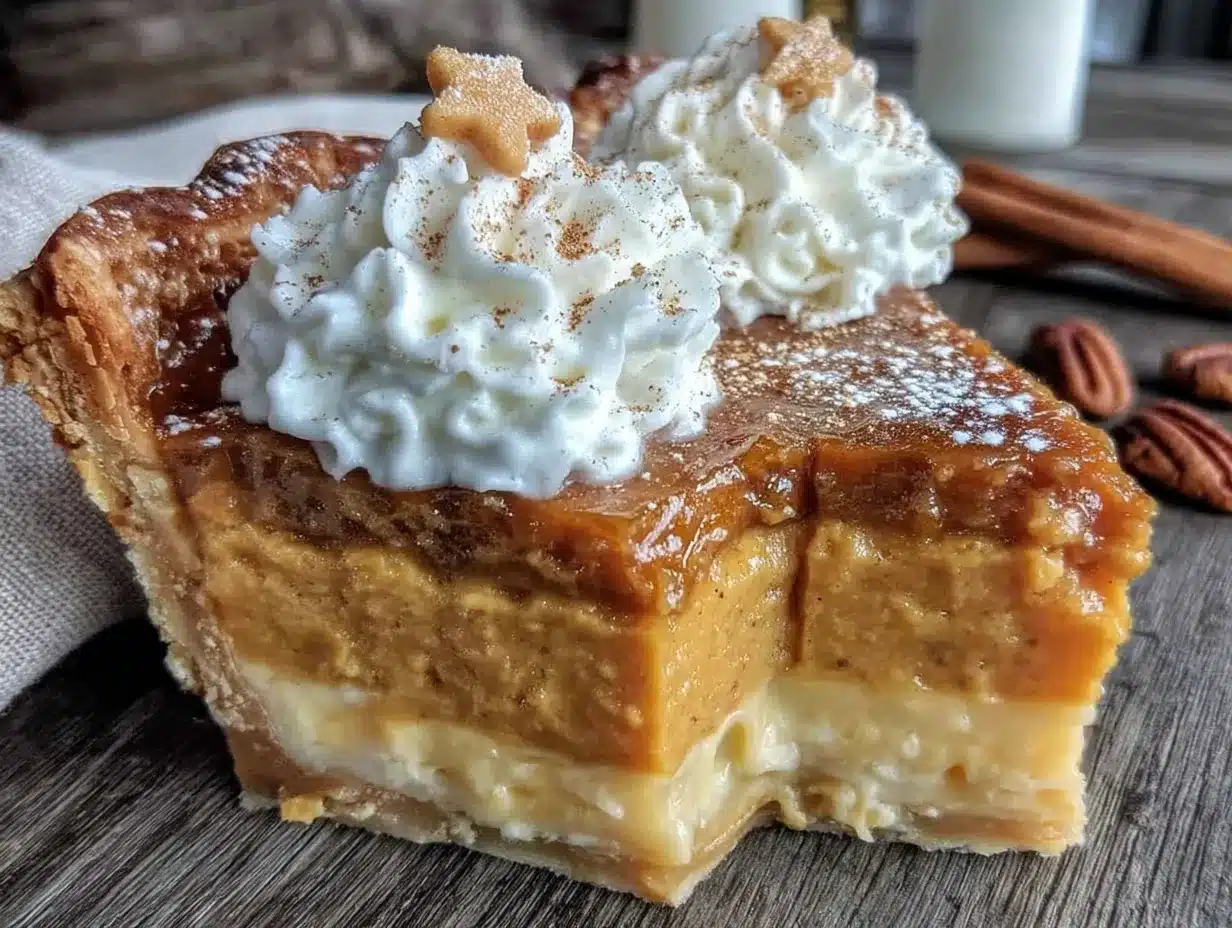
- Pumpkin purée – 1 can (15 oz or 425g). Make sure it’s 100% pumpkin purée, not pumpkin pie filling. Libby’s is my go-to brand for consistent texture.
- Sweetened condensed milk – 1 can (14 oz or 396g). This is what gives the filling its creamy sweetness without needing to add extra sugar. I’ve tried making this with evaporated milk and sugar, and it’s just not the same.
- Large eggs – 2, at room temperature. Cold eggs can seize the filling. If you forgot to take them out, place them in a bowl of warm water for 5 minutes.
- Pumpkin pie spice – 1 ½ teaspoons. You can use store-bought or make your own with ½ teaspoon cinnamon, ¼ teaspoon ginger, ¼ teaspoon nutmeg, ¼ teaspoon cloves, and a pinch of allspice.
- Vanilla extract – 1 teaspoon. Pure vanilla is best, but imitation works in a pinch.
- Salt – ¼ teaspoon. Just a pinch to brighten all the flavors.
Substitution guidance: If you’re dairy-free, use a high-quality vegan butter stick (like Miyoko’s) for the crust. For the filling, you can substitute the sweetened condensed milk with a can of full-fat coconut milk mixed with ½ cup of brown sugar, but the texture will be slightly less creamy. For a gluten-free crust, swap the all-purpose flour with a 1:1 gluten-free baking flour blend that contains xanthan gum.
Equipment Needed
You don’t need a fancy kitchen to pull off this easy homemade pumpkin pie. Here’s what you’ll need:
- Food processor – This is my preferred tool for the crust. It makes the process lightning-fast and ensures the butter stays cold. If you don’t have one, a pastry blender or two forks work, but work quickly so the butter doesn’t warm up.
- 9-inch pie dish – A standard glass or ceramic pie dish works best. I use a deep-dish Pyrex one, and it’s perfect. Avoid dark metal pans, as they can cause the crust to brown too quickly.
- Rolling pin – Any rolling pin will do. If you don’t have one, a clean wine bottle works in a pinch—just dust it with flour first.
- Large mixing bowls – One for the crust and one for the filling.
- Whisk – For smoothing out the filling.
- Measuring cups and spoons – Accuracy matters in baking.
- Plastic wrap – For chilling the dough.
- Parchment paper – Optional, but it makes rolling out the dough easier and cleanup a breeze.
Budget-friendly tip: If you don’t own a food processor, you can make the crust by hand. Just freeze your butter and grate it into the flour using a box grater. It’s a little more work, but the result is just as flaky.
Preparation Method
Let’s get baking. I’ll walk you through every step so you can make this quick homemade pumpkin pie with confidence.
Step 1: Make the Buttery Crust (5 minutes)
In your food processor, combine the 1 ¼ cups of all-purpose flour, ½ teaspoon of salt, and 1 teaspoon of sugar. Pulse a few times to mix everything together. Scatter the cold butter cubes over the flour mixture. Pulse about 8 to 10 times, until the butter is broken down into pea-sized pieces. Don’t overdo it—you want visible chunks of butter. Those little pockets of butter are what create the flaky layers.
Sprinkle 3 tablespoons of ice water over the mixture. Pulse again until the dough just starts to clump together. It should look shaggy, not like a smooth ball. If it’s too dry, add the remaining tablespoon of water, one teaspoon at a time. I’ve had times where I added too much water and ended up with a tough crust—so go slow. The dough is ready when you can pinch a piece and it holds together without crumbling.
Step 2: Chill the Dough (15 minutes minimum)
Turn the dough out onto a lightly floured surface. Gently shape it into a flat disk about 1 inch thick. Don’t knead it—just bring it together. Wrap the disk tightly in plastic wrap and refrigerate for at least 15 minutes. This step is non-negotiable. Chilling relaxes the gluten and firms up the butter, which prevents the crust from shrinking when it bakes. While it chills, you can start on the filling.
Step 3: Prepare the Pumpkin Filling (5 minutes)
Preheat your oven to 425°F (220°C). In a large mixing bowl, whisk together the pumpkin purée and sweetened condensed milk until smooth. Add the eggs, pumpkin pie spice, vanilla extract, and salt. Whisk until everything is fully combined and the mixture is silky. It should smell warm and spicy. If you see any lumps, keep whisking—a smooth filling is key to a beautiful pie.
Here’s a little trick I learned from Jerry: Warm the sweetened condensed milk slightly before adding it to the pumpkin. Just microwave it for 15 seconds. It helps the filling come together faster and prevents cold spots. Not essential, but it makes a difference.
Step 4: Roll Out the Crust (5 minutes)
Lightly flour your work surface and rolling pin. Unwrap the chilled dough and place it in the center. Roll from the center outward, rotating the dough a quarter turn every few rolls to keep it round. Aim for a circle about 12 inches in diameter, roughly ⅛-inch thick. If the edges crack, just pinch them back together—it’s rustic, and that’s fine.
Gently roll the dough around your rolling pin to transfer it to the pie dish. Unroll it over the dish and press it into the bottom and up the sides. Don’t stretch the dough—if you pull it, it will shrink back during baking. Trim the overhang to about ½ inch, then fold it under and crimp the edges with your fingers or a fork. Pop the lined pie dish back in the fridge for 10 minutes while the oven finishes preheating.
Step 5: Blind Bake the Crust (15 minutes)
This is the step that guarantees a crisp, not-soggy bottom. Line the chilled crust with a piece of parchment paper and fill it with pie weights, dried beans, or even uncooked rice. Bake at 425°F (220°C) for 12 minutes. Remove the parchment and weights, then bake for another 3 minutes. The crust should look dry and just barely golden. Set it aside to cool for 5 minutes.
Step 6: Bake the Pie (45-50 minutes)
Reduce the oven temperature to 375°F (190°C). Pour the pumpkin filling into the pre-baked crust. It will fill the dish almost to the top—that’s normal. Carefully transfer the pie to the oven. Bake for 45 to 50 minutes, or until the edges are set and the center is just slightly jiggly, like firm Jell-O. A knife inserted an inch from the center should come out clean.
If the edges of the crust start browning too quickly, loosely cover them with strips of aluminum foil or a pie shield ring. I learned this the hard way after burning the edges on my first attempt.
Step 7: Cool and Serve
Let the pie cool completely on a wire rack. This takes about 2 hours. The filling will continue to set as it cools. For the cleanest slices, refrigerate the pie for at least 4 hours or overnight. Serve cold or at room temperature, with a generous dollop of whipped cream.
Cooking Tips & Techniques
Over the years, I’ve made every mistake you can imagine with pumpkin pie. Here’s what I’ve learned so you don’t have to repeat my disasters.
Keep everything cold for the crust. The number one reason pie crusts turn out tough is warm butter. If your kitchen is warm, pop the flour and butter in the freezer for 10 minutes before you start. I once made a crust on a hot August day, and it was a greasy, sad mess. Never again.
Don’t overmix the filling. Whisk just until combined. Over-whisking incorporates too much air, which can cause the filling to puff up and then crack as it cools. A few tiny bubbles on the surface are fine, but if it looks frothy, you’ve gone too far.
Use a kitchen scale. I know it’s an extra tool, but measuring flour by weight (150g for this recipe) is the most reliable way to get a tender crust. Cup measurements can vary wildly depending on how you scoop.
Watch the oven temperature. Every oven runs a little differently. If your pie is browning too fast on top but the center is still liquid, tent the whole pie with foil and continue baking. If it’s taking longer than 55 minutes, check your oven’s actual temperature with an oven thermometer.
Let it rest. I know it’s hard to wait, but cutting into a warm pumpkin pie will give you a runny mess. Patience pays off. I usually make this pie the night before I plan to serve it, so it has all night to set up perfectly.
Variations & Adaptations
This easy homemade pumpkin pie is wonderfully adaptable. Here are a few ways to make it your own.
Spiced-Up Version: Add ¼ teaspoon of black pepper and a pinch of cardamom to the filling. The pepper adds a subtle warmth that pairs beautifully with the pumpkin. My husband thought I was crazy until he tried it.
Gingerbread Crust: Replace ¼ cup of the all-purpose flour with finely ground ginger snaps (about 10 cookies). The crust will have a darker color and a spicy kick that complements the creamy filling perfectly.
Dairy-Free Adaptation: Use a high-quality vegan butter stick for the crust. For the filling, substitute the sweetened condensed milk with a can of full-fat coconut cream mixed with ½ cup of packed brown sugar and 1 tablespoon of cornstarch. The texture is slightly less dense but still delicious.
Mini Pie Version: Press the crust dough into a standard 12-cup muffin tin instead of a pie dish. Fill each cup with about ¼ cup of filling. Bake at 375°F (190°C) for 18-22 minutes. These are perfect for parties or portion control.
Pumpkin Maple Pie: Replace ¼ cup of the sweetened condensed milk with pure maple syrup. The maple flavor adds a lovely autumn depth. Just note that the filling will be a bit softer, so chill it thoroughly before slicing.
Serving & Storage Suggestions
This pie is best served cold or at room temperature. I prefer it straight from the fridge, because the filling is firm and slices cleanly. A generous dollop of lightly sweetened whipped cream is non-negotiable in my house. For a fancier presentation, add a sprinkle of cinnamon or a few candied pecans on top.
It pairs beautifully with a cup of black coffee or a glass of cold milk. If you’re serving it as part of a holiday meal, it’s the perfect light finish after a heavy dinner. I’ve also been known to eat a slice for breakfast the next day—don’t judge me.
Storage: Cover the pie loosely with plastic wrap or foil and store it in the refrigerator for up to 5 days. The crust will stay crisp for the first 2 days, then soften slightly as it absorbs moisture from the filling. It’s still delicious, just not as flaky.
Freezing: This pie freezes beautifully. Cool it completely, then wrap it tightly in a layer of plastic wrap and a layer of foil. Freeze for up to 3 months. To serve, thaw it overnight in the refrigerator. Do not thaw at room temperature, or the crust may become soggy.
Reheating: I don’t recommend reheating the whole pie. If you want a warm slice, microwave individual pieces for 15-20 seconds. The crust will soften, but the filling will be wonderfully warm and cozy.
Nutritional Information & Benefits
Here’s an estimated nutritional breakdown per slice (based on 8 servings):
- Calories: 380
- Total Fat: 18g
- Saturated Fat: 11g
- Cholesterol: 85mg
- Sodium: 320mg
- Total Carbohydrates: 48g
- Dietary Fiber: 2g
- Sugars: 33g
- Protein: 7g
This pie isn’t health food, but it does have some redeeming qualities. Pumpkin is packed with vitamin A (over 200% of your daily needs per serving), which is great for eye health and immune function. It’s also a good source of fiber and potassium. The eggs provide high-quality protein, and the butter, well, makes life worth living.
Dietary considerations: This recipe contains gluten, dairy, and eggs. For a gluten-free version, use a 1:1 gluten-free flour blend. For a dairy-free version, see the variations section above. It is naturally vegetarian.
Conclusion
This quick homemade pumpkin pie with buttery crust is the recipe I turn to again and again. It’s proof that you don’t need hours of effort or a pastry chef’s training to make something genuinely impressive. The crust is flaky and tender, the filling is creamy and perfectly spiced, and the whole thing comes together with a minimum of fuss. It’s the kind of pie that makes you look like a hero, whether you’re serving it at a holiday table or just because it’s Tuesday and you wanted pie.
I love this recipe because it feels like a secret I’m sharing. It came from a hardware store counter, scribbled on a receipt, and it turned into one of my most cherished fall traditions. I hope you’ll give it a try, and I hope you’ll make it your own. Add a little extra cinnamon, swap in a different crust, or serve it with a scoop of ice cream. The best recipes are the ones that adapt to the cook.
I’d love to hear how yours turns out. Drop a comment below and let me know if you tried any variations, or tag me in your photos on social media. Happy baking!
Frequently Asked Questions
Can I use a store-bought crust instead of making my own?
Absolutely. If you’re short on time, a high-quality refrigerated pie crust works well. Just blind bake it first, as instructed, to prevent a soggy bottom. The filling is the star, so even with a shortcut crust, you’ll still have a delicious pie.
Why did my pumpkin pie crack on top?
Cracks usually happen from overbaking or a sudden temperature change. Bake the pie just until the center is slightly jiggly. Also, let it cool gradually on a wire rack away from drafts. Rapid cooling can cause the filling to contract and crack.
Can I use fresh pumpkin instead of canned?
Yes, but it requires extra work. You’ll need to roast a sugar pumpkin, scoop out the flesh, and purée it until smooth. Then, you’ll need to drain the purée in a cheesecloth-lined sieve for a few hours to remove excess water. Canned pumpkin is more consistent and easier, but fresh works if you have the time.
How do I prevent the crust from getting soggy?
Blind baking the crust is the most important step. Baking it for 12 minutes with weights and 3 minutes without creates a barrier that prevents the wet filling from soaking in. Also, make sure your filling isn’t too thin—it should be thick and creamy when you pour it.
Can I make this pie ahead of time?
Yes! This pie is actually better when made a day in advance. Cool it completely, then cover and refrigerate. The flavors meld together overnight, and the texture becomes perfectly firm. It’s a great make-ahead dessert for busy holidays.
Pin This Recipe!
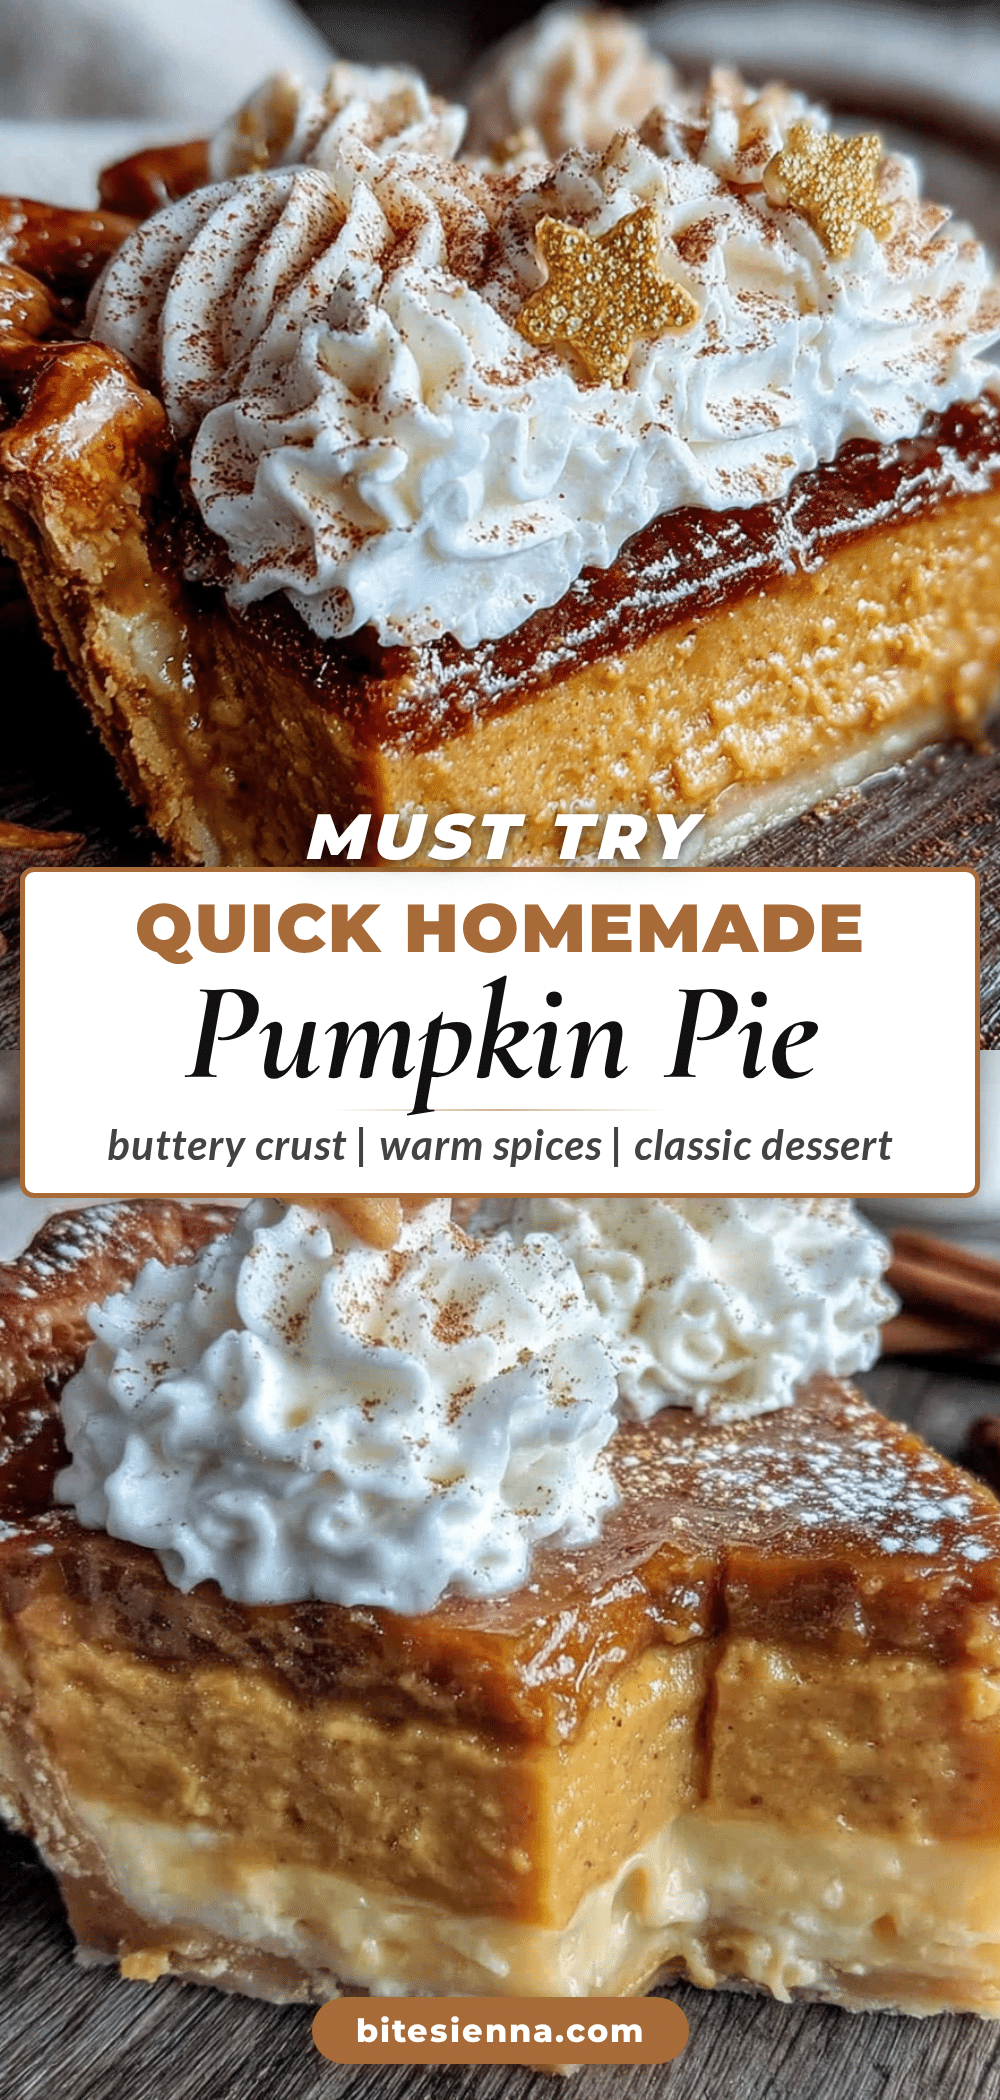
Easy Homemade Pumpkin Pie with Perfect Buttery Crust
A quick and easy homemade pumpkin pie with a flaky, buttery crust that comes together in under 30 minutes of active work. Perfect for weeknights or holidays, this foolproof recipe delivers deep, comforting pumpkin flavor without the stress.
- Prep Time: 20 minutes
- Cook Time: 50 minutes
- Total Time: 1 hour 10 minutes (plus cooling and chilling time)
- Yield: 8 servings 1x
- Category: Dessert
- Cuisine: American
Ingredients
- 1 ¼ cups (150g) all-purpose flour
- ½ cup (1 stick or 113g) unsalted butter, cold and cut into small cubes
- ½ teaspoon salt
- 1 teaspoon granulated sugar
- 3 to 4 tablespoons ice water
- 1 can (15 oz or 425g) pumpkin purée (100% pumpkin, not pie filling)
- 1 can (14 oz or 396g) sweetened condensed milk
- 2 large eggs, at room temperature
- 1 ½ teaspoons pumpkin pie spice
- 1 teaspoon vanilla extract
- ¼ teaspoon salt
Instructions
- Make the buttery crust: In a food processor, combine flour, ½ teaspoon salt, and sugar. Pulse to mix. Add cold butter cubes and pulse 8-10 times until pea-sized pieces form. Sprinkle 3 tablespoons ice water over mixture and pulse until dough just starts to clump. Add more water if needed, 1 teaspoon at a time. Dough should hold together when pinched.
- Chill the dough: Turn dough onto a lightly floured surface, shape into a 1-inch thick disk, wrap in plastic wrap, and refrigerate for at least 15 minutes.
- Prepare the pumpkin filling: Preheat oven to 425°F (220°C). In a large bowl, whisk together pumpkin purée and sweetened condensed milk until smooth. Add eggs, pumpkin pie spice, vanilla extract, and ¼ teaspoon salt. Whisk until fully combined and silky.
- Roll out the crust: On a lightly floured surface, roll chilled dough into a 12-inch circle, about ⅛-inch thick. Transfer to a 9-inch pie dish, press into bottom and sides, trim overhang to ½ inch, fold under, and crimp edges. Refrigerate for 10 minutes.
- Blind bake the crust: Line chilled crust with parchment paper and fill with pie weights or dried beans. Bake at 425°F (220°C) for 12 minutes. Remove parchment and weights, bake for another 3 minutes until dry and barely golden. Cool for 5 minutes.
- Bake the pie: Reduce oven temperature to 375°F (190°C). Pour filling into pre-baked crust. Bake for 45-50 minutes until edges are set and center is slightly jiggly. If crust edges brown too quickly, cover with foil strips.
- Cool and serve: Let pie cool completely on a wire rack (about 2 hours). For cleanest slices, refrigerate for at least 4 hours or overnight. Serve cold or at room temperature with whipped cream.
Notes
Keep all ingredients cold for the crust. Don’t overmix the filling. Use a kitchen scale for accurate flour measurement. Let the pie rest completely before slicing for best results. Can be made a day ahead and refrigerated.
Nutrition
- Serving Size: 1 slice
- Calories: 380
- Sugar: 33
- Sodium: 320
- Fat: 18
- Saturated Fat: 11
- Carbohydrates: 48
- Fiber: 2
- Protein: 7
Keywords: pumpkin pie, easy pumpkin pie, homemade pumpkin pie, buttery crust, quick pumpkin pie, Thanksgiving dessert, fall baking