My sister-in-law, Jenna, swore she didn’t do Halloween. Not the costumes, not the decorations, and certainly not the themed food. For five years, she’d sit on my couch with a glass of wine while I went full Martha Stewart on a pumpkin-shaped platter. Then last October, I found her standing over my stove, tongs in hand, fishing a tray of these little guys out of the oven. “I was just checking if they were done,” she mumbled, mouth full of crescent dough. I didn’t say a word. I just handed her a plate.
That’s the thing about this recipe. It sneaks up on you. I mean, honestly, who gets excited about hot dogs wrapped in dough? It sounds like something you’d throw together at 5 PM when you realize you forgot to plan for the school party. And yeah, that’s exactly how I ended up making them the first time. I was out of time, out of ideas, and staring at a package of crescent rolls like they might magically turn into something impressive. Spoiler: they did.
These mummy hot dog bites are the kind of recipe that makes you look like you tried way harder than you actually did. The kids go wild for them, the adults pretend they’re just for the kids, and somehow the whole tray disappears before the punch bowl gets touched. Maybe you’ve been there—staring down a Halloween party menu and realizing you need something that’s not another bag of chips. Let me tell you, this is it.
I keep making them because they work. No fuss, no fancy ingredients, and zero stress. Plus, watching someone who “doesn’t do Halloween” eat four of them in one sitting? That’s a win I’ll never get tired of.
Why You’ll Love This Recipe
Let’s be real here. Halloween party food can be a total disaster. You spend hours making something cute, and the kids take one look at it and reach for the candy bowl instead. These mummy hot dog bites are different. They’re the perfect balance of fun and functional, and here’s why they work:
- Ready in under 25 minutes – From fridge to table in the time it takes to set out the punch. No all-day prep, no stress.
- Just 3 main ingredients – Hot dogs, crescent dough, and candy eyes. You probably already have the first two in your kitchen right now.
- Perfect for Halloween parties – They look like little mummies, which is adorable, but they’re basically hand-held snacks. No plates, no forks, no mess.
- Crowd-pleaser guaranteed – I’ve served these at three different parties now, and they disappear every single time. Kids love the eyes. Adults love that they’re not just another cupcake.
- Unbelievably easy to customize – You can switch up the dipping sauces, add cheese, or even make them spicy. The base recipe is foolproof.
What makes this version different from every other hot dog recipe out there? It’s the technique. Most people just wrap the dough and hope for the best. I’ve figured out the exact spacing for the wrappings, the perfect oven temperature, and the trick to keeping those tiny candy eyes from sliding off. I tested this recipe four times before I got it right. The first batch looked like sad snakes. The second batch had eyes that melted into puddles. By the fourth batch, I had it down, and I’m sharing every detail so you don’t have to learn the hard way.
This isn’t just another party snack. It’s the kind of food that makes people smile before they even take a bite. And when they do take that bite? The flaky, buttery dough, the salty snap of the hot dog, the little thrill of finding the eyes. It’s comfort food dressed up for a costume party, and honestly, it works every single time.
What Ingredients You Will Need
This recipe uses simple, everyday ingredients that you can grab at any grocery store. No specialty items, no weird substitutions. Just the basics, done right.
For the Mummy Hot Dog Bites
- 1 package (8-count) refrigerated crescent roll dough – I prefer Pillsbury for consistent results, but any brand works. Just make sure it’s the sheet-style dough, not the perforated triangles, if you can find it. If you only have the triangle version, just pinch the seams together.
- 8 standard-sized hot dogs – Use your favorite brand. I like all-beef hot dogs for better flavor, but turkey or chicken hot dogs work just as well. Avoid jumbo or bun-length hot dogs unless you want giant mummies.
- 24 candy eyes (or 32, if you want extra spooky mummies) – Wilton makes great ones that hold up during baking. You can find them in the baking aisle or online. Pro tip: buy extra because you will eat some while you’re working.
For the Dipping Sauces (Optional but Recommended)
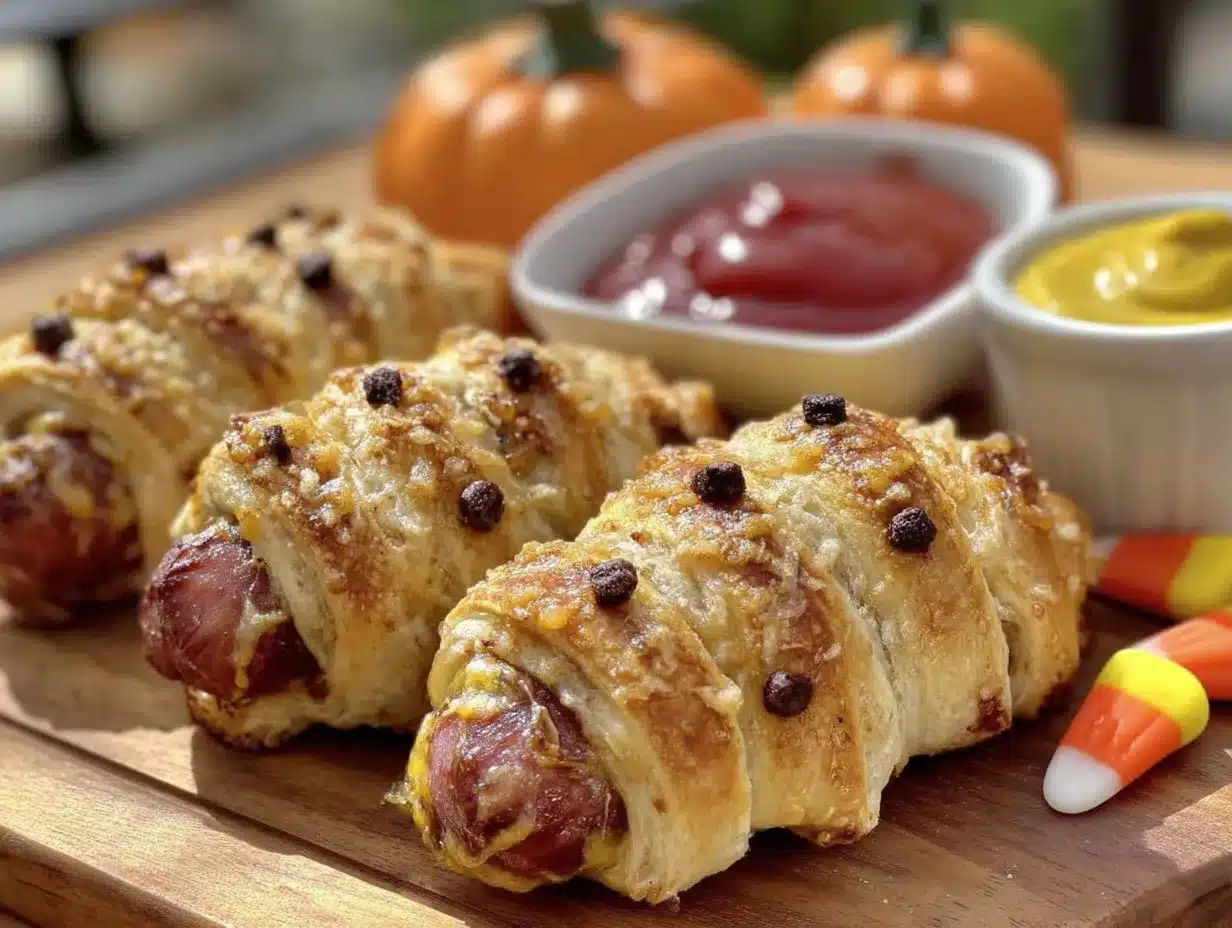
- Ketchup – Classic choice, always a hit with kids.
- Mustard – Yellow or Dijon, depending on your crowd.
- Ranch dressing – Surprisingly good with the buttery dough.
- Spicy sriracha mayo – For the adults who want a kick (mix 2 tablespoons mayo with 1 teaspoon sriracha).
If you’re feeling extra festive, you can add a thin strip of red bell pepper or a drizzle of hot sauce to look like blood. Totally optional, but it gets a laugh every time.
Ingredient Notes & Substitutions
For a gluten-free version, use gluten-free crescent dough. It’s available at most major grocery stores now, and it works almost exactly the same. Just check the baking time because gluten-free dough sometimes browns faster.
Want to make these vegetarian? Swap the hot dogs for plant-based sausages. I’ve tried this with MorningStar Farms and Beyond Meat options, and both work great. The cooking time stays the same.
If you don’t have candy eyes, you can make your own with a dab of cream cheese and a tiny piece of black olive. It sounds weird, but it actually looks more realistic. I did this one year when I ran out of candy eyes at 11 PM, and honestly, they looked better than the store-bought version.
Equipment Needed
You don’t need a professional kitchen for this recipe. Here’s what you’ll need:
- Baking sheet – A standard half-sheet pan works perfectly. Line it with parchment paper for easy cleanup.
- Sharp knife or pizza cutter – For cutting the crescent dough into thin strips. A pizza cutter is faster, but a knife works just fine.
- Small bowl – For whisking the egg wash (if you’re using one).
- Pastry brush – Optional but helpful for applying the egg wash. You can also use a paper towel in a pinch.
- Cooling rack – Helps the mummies stay crispy on the bottom instead of getting soggy.
- Tongs – For handling the hot mummies right out of the oven.
Don’t have a pastry brush? I’ve used a clean paintbrush from my kids’ art supplies before. Just make sure it’s never been used for paint. Or just drizzle the egg wash on with a spoon. It’s not pretty, but it works.
If you’re making a big batch for a party, I recommend using two baking sheets so you can bake them all at once. Rotate the pans halfway through baking for even browning.
Preparation Method
Let’s get to the good part. Here’s how to make these little guys step by step.
Step 1: Preheat and Prep
Preheat your oven to 375°F (190°C). Line a baking sheet with parchment paper. Trust me on the parchment paper – it makes cleanup so much easier, and it prevents the bottoms from burning.
Step 2: Prepare the Dough
Unroll the crescent dough onto a clean cutting board. If you’re using the perforated triangle version, pinch all the seams together to form one solid sheet. Use a rolling pin to gently smooth out the seams if needed. Cut the dough into thin strips, about 1/4 inch wide. I usually get about 8 to 10 strips per hot dog. Don’t worry if they’re not perfectly uniform – the unevenness makes the mummies look more authentic, like actual bandages.
Step 3: Wrap the Mummies
Take one hot dog and start wrapping a strip of dough around it, leaving a small gap near the top for the eyes. The key here is to overlap the strips slightly so they look like wrapped bandages. Leave about 1/2 inch of the hot dog exposed at the top and bottom. Press the ends of the dough gently against the hot dog to secure them. Repeat with the remaining hot dogs.
Here’s a tip I learned the hard way: don’t wrap the dough too tightly. If you stretch it, the dough will shrink during baking and leave big gaps. You want it snug but relaxed, like a cozy blanket, not a straitjacket.
Step 4: Add the Eyes
Place two candy eyes on the exposed section of each hot dog. Press them gently into the dough so they stick. If the eyes aren’t staying put, dab a tiny bit of water or egg wash underneath them. This is the step where kids love to help. Just be prepared for some mummies with three eyes or eyes on the side of their head. It adds character.
Step 5: Bake
Place the wrapped hot dogs on the prepared baking sheet, spacing them about 2 inches apart. Bake for 10 to 12 minutes, or until the dough is golden brown and puffed. The hot dogs should be heated through. If you want extra crispy dough, leave them in for an extra minute or two, but watch closely so the eyes don’t burn.
Your kitchen is going to smell amazing right about now. Buttery, salty, and just a little bit nostalgic.
Step 6: Cool and Serve
Let the mummy hot dog bites cool on the baking sheet for 2 minutes, then transfer them to a cooling rack. This keeps the bottoms from getting soggy. Let them cool for another 3 to 5 minutes before serving. The dough will be very hot right out of the oven, and nobody wants a burned tongue at a party.
Arrange them on a platter with small bowls of dipping sauces. I like to put the ketchup in a small pumpkin-shaped bowl and the mustard in a cauldron. It’s the little touches that make a party feel special.
Cooking Tips & Techniques
I’ve made these mummy hot dog bites more times than I care to admit, and I’ve picked up a few tricks along the way. Here’s what I wish someone had told me the first time.
Don’t overwork the dough. Crescent dough is delicate, and if you handle it too much, it gets tough and won’t puff up properly. Work quickly and gently. If the dough starts to feel sticky or warm, pop it in the fridge for 5 minutes.
The egg wash makes a difference. I know it’s an extra step, but brushing the dough with a beaten egg mixed with 1 tablespoon of water gives you that gorgeous golden-brown finish. If you skip it, the dough will still be tasty, but it’ll look pale and sad. I forgot the egg wash once, and my mummies looked more like ghosts, which, honestly, wasn’t the worst mistake.
Watch the eyes. Candy eyes can burn if they’re too close to the heat. If you notice them starting to brown or melt, tent a piece of aluminum foil loosely over the baking sheet for the last 2 minutes of baking. I had one batch where the eyes completely melted into the dough, and the mummies looked like they were crying. It was hilarious but not what I was going for.
Make ahead tip: You can assemble these up to 4 hours ahead of time. Just wrap the hot dogs, place them on the baking sheet, cover with plastic wrap, and refrigerate. Add the eyes right before baking, or they’ll absorb moisture and get weird. Bake straight from the fridge, adding 2 minutes to the cooking time.
Batch cooking strategy: If you’re making a huge batch for a party, work in assembly line fashion. Wrap all the hot dogs first, then add all the eyes, then bake them in batches. It’s faster than doing one at a time.
Variations & Adaptations
One of the best things about this recipe is how easy it is to change up. Here are some variations I’ve tried and loved.
Spicy Mummy Bites
Spread a thin layer of sriracha or chipotle mayo on the hot dog before wrapping. The heat cuts through the buttery dough perfectly. I made these for a grown-up Halloween party, and they were gone before the regular ones.
Cheesy Mummy Bites
Cut a slit lengthwise in each hot dog and stuff it with a strip of cheddar or pepper jack cheese before wrapping. The cheese oozes out during baking and looks like mummy goo. It’s messy but incredible. Just make sure to let them cool a bit before serving, because molten cheese is no joke.
Breakfast Mummy Bites
Swap the hot dogs for breakfast sausages and use pancake batter instead of crescent dough. Cook them on a griddle like silver dollar pancakes, wrapping the batter around the sausages. Serve with maple syrup for dipping. I made these for a Halloween morning breakfast, and my kids still talk about it.
Vegetarian Version
Use plant-based hot dogs or even carrot dogs (marinated roasted carrots) for a lighter option. The carrot version tastes completely different but is surprisingly good. Just make sure the carrots are fully cooked before wrapping.
Gluten-Free Version
Use gluten-free crescent dough or even gluten-free pizza dough cut into thin strips. The texture will be slightly different, but the flavor is still there. I’ve tested this with both, and the pizza dough version is actually crispier.
Serving & Storage Suggestions
These mummy hot dog bites are best served warm, right out of the oven. The dough is flaky, the hot dog is juicy, and the eyes are still perfectly intact. Arrange them on a large platter with dipping sauces in small bowls. I like to scatter a few fake spider webs around the platter for that extra Halloween vibe.
For a full Halloween spread, serve them alongside:
- Pumpkin-shaped cheese and crackers
- Spiderweb dip (spinach artichoke dip with sour cream drizzled in a web pattern)
- Witches’ brew punch (lime sherbet and ginger ale)
- Ghost-shaped sugar cookies for dessert
Storage: Leftover mummy bites can be stored in an airtight container in the refrigerator for up to 3 days. The dough will soften slightly, but they’re still tasty. I wouldn’t recommend freezing them because the texture of the hot dog changes.
Reheating: The best way to reheat these is in the oven or air fryer. Pop them in a 350°F (175°C) oven for 5 to 7 minutes, or until the dough crisps back up. The microwave works in a pinch, but the dough will be soft and chewy instead of flaky. If you’re serving them at a party, just make them fresh. They’re so quick that there’s no reason to make them ahead.
Fun fact: the flavors actually get better after a few hours in the fridge. Something about the dough absorbing the savory juices from the hot dog makes the second-day leftovers even more delicious. Not that I’ve ever had leftovers. They disappear too fast.
Nutritional Information & Benefits
Let’s be honest: these are party food, not health food. But here’s the breakdown if you’re curious.
Per serving (2 mummy bites):
- Calories: 290
- Total Fat: 18g
- Saturated Fat: 6g
- Cholesterol: 35mg
- Sodium: 720mg
- Total Carbohydrates: 22g
- Dietary Fiber: 0g
- Sugars: 5g
- Protein: 9g
These numbers will vary depending on the brand of hot dogs and dough you use. If you’re looking for a lighter option, use turkey hot dogs and reduced-fat crescent dough. That cuts the calories by about 80 per serving and drops the fat significantly.
The hot dogs provide a decent amount of protein, which helps balance out the carbs from the dough. And honestly, for a Halloween party snack, these are pretty reasonable. You could do a lot worse than a hot dog wrapped in a thin layer of dough. At least you’re getting some protein, right?
If you have dietary restrictions, check your labels carefully. Some crescent doughs contain milk and soy. Hot dogs often contain nitrates and preservatives, so look for uncured options if that’s a concern for you.
Conclusion
Look, I know Halloween party food can feel like a lot of pressure. You want something cute, but you also want something that people will actually eat. These mummy hot dog bites check every box. They’re fun without being fussy, delicious without being complicated, and they come together in less time than it takes to carve a pumpkin.
I love this recipe because it reminds me that you don’t need to be a professional chef to throw a great party. You just need a few good ideas and the willingness to have fun with your food. These little mummies have saved me more times than I can count, and they always, always get compliments.
So go ahead and make them your own. Add cheese, go spicy, or keep it classic. Add three eyes instead of two. Serve them with ketchup, ranch, or something totally unexpected. The recipe is just a starting point. The real magic happens when you put your own spin on it.
If you try these, come back and let me know how they turned out. Did your kids help wrap the mummies? Did the adults sneak extra ones when nobody was looking? I want to hear all about it. And if you have a variation I haven’t tried, please share it. I’m always looking for new ideas.
Happy Halloween, friends. Go make some mummies.
Frequently Asked Questions
Can I make these mummy hot dog bites ahead of time?
Yes, you can assemble them up to 4 hours ahead. Just keep them covered in the fridge and add the candy eyes right before baking so they don’t get soggy.
Can I use puff pastry instead of crescent dough?
Absolutely. Puff pastry will give you a flakier, more buttery result. Just cut it into strips and bake at 400°F (200°C) for about 12 to 15 minutes, or until golden brown.
What if I can’t find candy eyes?
You can make your own with a dab of cream cheese and a tiny piece of black olive. Or just skip the eyes altogether and call them ghost hot dogs. No one will complain.
Can I cook these in an air fryer?
Yes! Air fry at 350°F (175°C) for 6 to 8 minutes, flipping halfway through. They come out extra crispy. Just watch the eyes carefully because air fryers run hot.
How do I keep the dough from unraveling during baking?
Press the ends of the dough strips firmly against the hot dog. If they still pop up, use a tiny dab of water or egg wash as glue. Also, make sure you’re not stretching the dough too tight when wrapping.
Pin This Recipe!
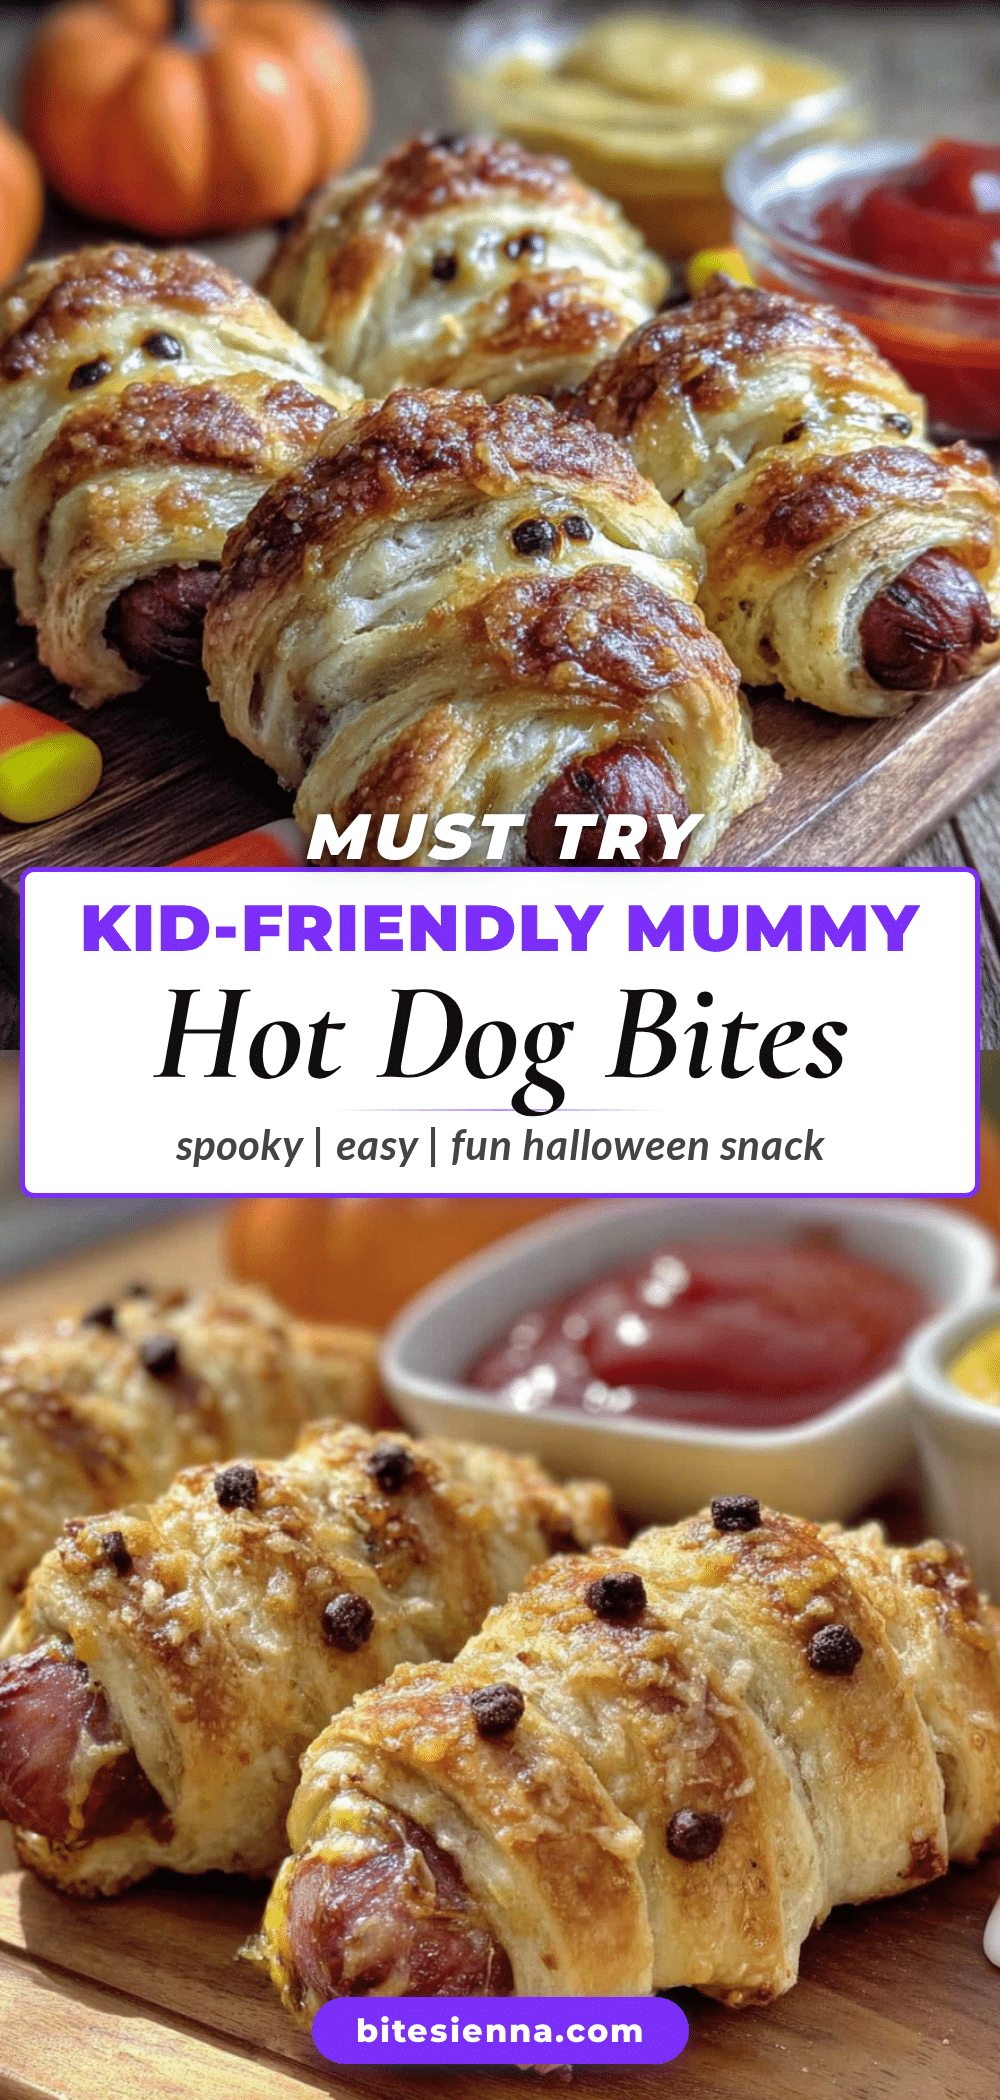
Easy Mummy Hot Dog Bites: Best Halloween Party Snack

These mummy hot dog bites are a fun and easy Halloween party snack made with just 3 main ingredients: hot dogs, crescent dough, and candy eyes. Ready in under 25 minutes, they’re a crowd-pleaser that kids and adults love.
- Prep Time: 10 minutes
- Cook Time: 12 minutes
- Total Time: 22 minutes
- Yield: 8 servings 1x
- Category: Appetizer
- Cuisine: American
Ingredients
- 1 package (8-count) refrigerated crescent roll dough
- 8 standard-sized hot dogs
- 24 to 32 candy eyes
- Ketchup (for dipping, optional)
- Mustard (for dipping, optional)
- Ranch dressing (for dipping, optional)
- Spicy sriracha mayo (for dipping, optional; mix 2 tablespoons mayo with 1 teaspoon sriracha)
Instructions
- Preheat your oven to 375°F (190°C). Line a baking sheet with parchment paper.
- Unroll the crescent dough onto a clean cutting board. If using perforated triangle dough, pinch all seams together to form one solid sheet. Use a rolling pin to gently smooth out the seams if needed.
- Cut the dough into thin strips, about 1/4 inch wide. You should get about 8 to 10 strips per hot dog.
- Take one hot dog and start wrapping a strip of dough around it, leaving a small gap near the top for the eyes. Overlap the strips slightly to look like wrapped bandages. Leave about 1/2 inch of the hot dog exposed at the top and bottom. Press the ends of the dough gently against the hot dog to secure. Repeat with remaining hot dogs.
- Place two candy eyes on the exposed section of each hot dog. Press them gently into the dough so they stick. If needed, dab a tiny bit of water or egg wash underneath to help them adhere.
- Place the wrapped hot dogs on the prepared baking sheet, spacing them about 2 inches apart. Bake for 10 to 12 minutes, or until the dough is golden brown and puffed. For extra crispy dough, leave in for an additional 1-2 minutes, watching closely so the eyes don’t burn.
- Let the mummy hot dog bites cool on the baking sheet for 2 minutes, then transfer to a cooling rack. Let cool for another 3 to 5 minutes before serving.
- Arrange on a platter with small bowls of dipping sauces.
Notes
For a gluten-free version, use gluten-free crescent dough. For vegetarian, swap hot dogs for plant-based sausages. To make ahead, assemble up to 4 hours ahead, refrigerate, and add eyes just before baking. For extra crispy dough, use an air fryer at 350°F (175°C) for 6-8 minutes, flipping halfway.
Nutrition
- Serving Size: 2 mummy bites
- Calories: 290
- Sugar: 5
- Sodium: 720
- Fat: 18
- Saturated Fat: 6
- Carbohydrates: 22
- Protein: 9
Keywords: Halloween, mummy hot dog bites, party snack, crescent dough, hot dogs, easy appetizer


