The Halloween party was in three hours and I’d completely forgotten. Everyone else would be bringing those elaborate themed cakes—you know, the ones that look like graveyards with crumbled Oreo dirt and little ghost marzipans. I had a bag of pretzel twists, a block of white almond bark I’d bought on clearance last spring, and a sudden, panicked realization that my kids would be the ones showing up with store-bought candy. Again. Honestly, the pressure was real. I stood there staring at my pantry like it was a puzzle I had to solve. The pretzels looked back at me, all salty and unassuming. The white chocolate looked back at me, all creamy and hopeful. And then it hit me—mummies! I mean, how hard could it be to drizzle some white chocolate over a pretzel and call it a mummy? Turns out, not hard at all. But here’s the thing—they won. These little guys stole the show. The elaborate cakes got a polite nod. My spooky mummy white chocolate pretzel bites got devoured. Kids were grabbing handfuls. Adults were sneaking them into napkins. I stood there, sheepish and a little stunned, with chocolate on my own sleeve. That’s when I knew this wasn’t just a last-minute save—it was a new Halloween tradition. Maybe you’ve been there, staring at the clock and wondering how you’ll pull off something festive with nothing but pantry scraps. Let me tell you, these mummy pretzel bites are your answer.
Why You’ll Love This Recipe
Let’s be real—Halloween treats can be a whole production. Between the fondant and the food coloring and the three-day cooling times, who has the energy? These spooky mummy white chocolate pretzel bites are the opposite of all that. They’re the underdog that wins every time.
- Quick & Easy: From start to finish, you’re looking at about 20 minutes of active work. Seriously. Melt, dip, drizzle, chill, and done. Perfect for that moment you realize the school party is tomorrow.
- Simple Ingredients: You need exactly three things—pretzel twists, white chocolate or almond bark, and candy eyes. That’s it. No weird extracts, no specialty flours, no trip to three different stores.
- Perfect for Halloween: These are the ultimate Halloween party food. They’re cute, they’re spooky (in a cute way), and they disappear faster than a ghost at dawn. Great for classroom treats, office parties, or just a fun night in with the kids.
- Crowd-Pleaser: I’ve brought these to three different gatherings now, and every single time, someone asks for the recipe. Kids love the eyes. Adults love the salty-sweet combo. It’s a universal win.
- Unbelievably Delicious: The crunch of the pretzel, the creamy sweetness of the white chocolate, and that little pop of whimsy from the candy eyes—it’s a texture and flavor combo that just works. You’ll eat five before you realize it.
What makes these different from every other Halloween pretzel bite out there? It’s the method. I don’t fully coat the pretzel. I drizzle it so the pretzel stays visible, like bandages wrapped around a mummy. That little detail makes them look way more professional than the effort suggests. Plus, using almond bark instead of pure white chocolate chips gives you a smoother melt and a snappier set—no tempering required. This isn’t just another version. It’s the best version.
There’s something about these bites that feels like pure comfort. Maybe it’s the nostalgia of pretzels and chocolate. Maybe it’s the silly little eyes staring up at you. Honestly, I think it’s the fact that they’re so easy to make that you actually enjoy the process instead of stressing over it. That’s the kind of Halloween energy I can get behind.
What Ingredients You Will Need
This recipe uses simple, pantry-friendly ingredients to deliver big flavor and maximum Halloween fun without the fuss. Most of these are probably already in your kitchen, or easy to grab on a quick store run.
- Pretzel Twists (1 bag, about 40-50 pieces) – I use the classic Snyder’s of Hanover pretzel twists. The shape is perfect for mummies—the twisted body looks like a wrapped torso. Avoid pretzel sticks here; they’re too thin. You want that chunky, twisted shape.
- White Almond Bark (12 oz block or 2 cups melting wafers) – This is my secret weapon. Almond bark melts smoother than white chocolate chips and sets with a nice, hard snap. It doesn’t seize up as easily, which is a lifesaver when you’re working with kids or under time pressure. If you prefer white chocolate chips, add a teaspoon of coconut oil to help them melt smoothly.
- Candy Eyes (1 small bag, about 50-100 pieces) – You can find these at any craft store or in the baking aisle during Halloween season. I like the ones that are a mix of sizes—small eyes for mini mummies, larger ones for a goofier look. Wilton brand works great.
- Optional: Sprinkles or Edible Glitter (for extra sparkle) – Not necessary, but a little orange or black sprinkle action never hurt anyone. I sometimes add a tiny pinch of black sanding sugar for a graveyard vibe.
- Optional: Shortening or Coconut Oil (1 teaspoon) – Only needed if you’re using white chocolate chips instead of almond bark. It helps thin the chocolate for smooth drizzling.
That’s it. Three core ingredients, two optional extras. The beauty of this recipe is its simplicity. You don’t need to hunt down weird seasonal items or spend a fortune. The pretzels give you that satisfying crunch, the white chocolate brings the sweetness, and the candy eyes add the personality. It’s a match made in Halloween heaven.
One ingredient selection tip: look for almond bark that’s labeled “vanilla flavored” or “white” rather than “chocolate flavored.” The vanilla note pairs beautifully with the saltiness of the pretzel. If you’re using white chocolate chips, check the ingredients—real white chocolate contains cocoa butter, which melts differently. For this recipe, a coating product like almond bark is actually more forgiving.
Equipment Needed
You don’t need a fancy kitchen setup for these. Here’s what I use, and what you can swap in if you’re improvising.
- Baking Sheet (1 large) – Lined with parchment paper or a silicone baking mat. The parchment makes cleanup a breeze and prevents the melted chocolate from sticking.
- Microwave-Safe Bowl (medium size) – For melting the white chocolate. Glass or ceramic works best. Avoid plastic bowls, as they can hold onto odors and affect the chocolate’s flavor.
- Spoon or Offset Spatula – For drizzling the chocolate. I actually prefer a small spoon for more control. A piping bag works too, but honestly, a spoon is faster and gives you that rustic, bandaged look.
- Small Scissors or Tweezers (optional) – For placing the candy eyes. Tweezers give you precision, but your fingers work just fine. Just make sure they’re clean and dry.
- Refrigerator Space – You’ll need a flat spot in the fridge to set the chocolate. About 15 minutes does the trick.
If you don’t have a microwave, you can melt the chocolate in a double boiler on the stovetop. Just be careful not to let any water get into the bowl—chocolate seizes up if it touches water. I learned that the hard way during a particularly stressful cookie decorating session. A cheap pair of kitchen tweezers from the dollar store has saved me from many sticky-finger moments when placing those tiny eyes.
Preparation Method

Alright, let’s get into the actual making part. This is where the magic happens. Follow these steps, and you’ll have a tray of adorable mummies in no time.
- Prep Your Workspace (5 minutes): Line a large baking sheet with parchment paper. Arrange your pretzel twists in a single layer, leaving a little space between each one. You want them to be easy to grab and drizzle without knocking into each other. I usually fit about 20 per sheet.
- Melt the White Chocolate (5 minutes): Break the almond bark into pieces and place them in a microwave-safe bowl. Microwave in 30-second intervals, stirring well after each interval. It usually takes about 1.5 to 2 minutes total. Stop when the chocolate is mostly melted with a few small lumps—stir until smooth. Do not overheat, or it will get thick and grainy. Trust me, I’ve had to start over twice because I got impatient and blasted it for a full minute.
- Dip the Pretzels (10 minutes): Here’s the technique. Take a pretzel twist and dip just the top half into the melted white chocolate. Let the excess drip off back into the bowl. Place it on the parchment paper. Repeat for all pretzels. You’re not fully coating them—you want the bottom and sides of the pretzel to show through. That’s what makes them look like mummies with bandages.
- Add the Eyes (10 minutes): While the chocolate is still wet, press two candy eyes onto the top half of each pretzel. The eyes should be above the chocolate line, peeking out like a mummy’s face. If the chocolate starts to set before you get the eyes on, just dab a tiny bit of melted chocolate on the back of the eye to glue it in place.
- Drizzle the Bandages (15 minutes): This is the fun part. Using a spoon, drizzle more melted white chocolate back and forth over each pretzel to create the mummy bandages. Go for a crisscross pattern. Don’t overdo it—you want to see gaps of pretzel between the chocolate lines. Leave the eyes exposed. If the chocolate in the bowl starts to thicken, pop it back in the microwave for 10 seconds.
- Chill to Set (15 minutes): Place the baking sheet in the refrigerator for about 15 minutes, or until the chocolate is firm and no longer sticky to the touch. If you’re in a hurry, the freezer works too—just check after 5 minutes to avoid cracking.
- Serve or Store (5 minutes): Once set, gently peel the mummies off the parchment paper. They should release easily. Arrange them on a serving platter or store them in an airtight container.
A few notes from my own trials: If your chocolate drizzle is too thick, add a teaspoon of coconut oil and stir. If it’s too thin, let it cool for a minute before drizzling. And if you accidentally cover the eyes with chocolate, just scrape it off gently with a toothpick before it sets. We’ve all been there.
Cooking Tips & Techniques
I’ve made these spooky mummy white chocolate pretzel bites about a dozen times now, and I’ve picked up a few tricks along the way. Here’s what I wish I’d known from the start.
The Chocolate Melting Mistake: My first batch was a disaster because I overheated the chocolate. It turned into a thick, clumpy mess that wouldn’t drizzle. The fix? Low and slow. 30-second intervals, stir like you mean it, and stop while there are still a few small lumps. The residual heat will finish the job. If you do overheat it, stir in a teaspoon of coconut oil—it won’t fix seized chocolate, but it can save slightly thick chocolate.
The Drizzle Technique: Don’t try to be too perfect with the drizzle. The charm of these mummies is that they look a little messy, like actual bandages. Hold the spoon about 6 inches above the pretzel and let the chocolate fall in a thin stream. Move your hand back and forth quickly. If you get a big blob, just spread it with the back of the spoon.
Timing the Eyes: The candy eyes will slide off if the chocolate is too wet. Wait about 30 seconds after dipping before placing them. If the chocolate is already setting, dip the back of the eye in melted chocolate first—it acts like glue. I learned this after finding eyes all over my parchment paper like a tiny eyeball escape.
Multitasking Strategy: While the first batch is chilling in the fridge, start melting more chocolate for the second batch. This cuts your total time in half. I usually do two baking sheets at a time, rotating them in and out of the fridge.
Consistency is Key: If you’re making these for a party, try to keep the pretzels uniform in size. Pick out the biggest twists from the bag and save the broken ones for snacking. This ensures they all set at the same rate and look consistent on the platter.
Variations & Adaptations
One of the best things about this recipe is how easy it is to tweak. Here are some variations I’ve tried and loved.
Dark Chocolate Mummies: Swap the white chocolate for dark or milk chocolate. The result is a spookier, more gothic-looking mummy. The salty-sweet balance shifts toward the savory side, which some people prefer. I use Ghirardelli 60% cacao dark chocolate chips for this version. Just add a teaspoon of coconut oil to help them melt smoothly.
Gluten-Free Option: Use gluten-free pretzels. Most major brands now offer a gluten-free version that tastes nearly identical. The rest of the ingredients are naturally gluten-free, so this is an easy swap for anyone with dietary restrictions.
Spiced Mummies: Add a pinch of cinnamon or pumpkin pie spice to the melted white chocolate before drizzling. This gives the mummies a subtle fall flavor that pairs beautifully with the saltiness of the pretzel. I tried this last year and it was a hit at a Halloween brunch.
Peanut Butter Mummies: Before dipping, spread a thin layer of peanut butter on the pretzel. Then dip and drizzle as usual. The peanut butter adds a creamy, savory element that cuts through the sweetness. Just make sure the peanut butter is at room temperature so it doesn’t tear the pretzel.
Vegan Mummies: Use vegan white chocolate (made with rice milk or coconut milk) and dairy-free pretzels. Most candy eyes are vegan, but check the label. This version works great for school parties where dietary restrictions vary.
My personal favorite variation is the spiced version with a tiny pinch of cayenne pepper added to the chocolate. It gives the mummies a little heat that sneaks up on you—like a mummy that bites back. I brought those to a friend’s Halloween party and people kept coming back for “just one more” to figure out what the secret ingredient was.
Serving & Storage Suggestions
These mummies are best served at room temperature. The chocolate snaps when you bite into it, and the pretzel stays crunchy. If they’ve been in the fridge, let them sit out for about 5 minutes before serving.
For presentation, I arrange them on a black platter or a wooden cutting board to contrast with the white chocolate. A few scattered candy corn or mini pumpkins around the edges adds to the Halloween vibe. I once served them on a tray lined with orange tissue paper—looked great, but the static electricity made the eyes stick to the paper. Lesson learned.
Storage is simple. Keep them in an airtight container at room temperature for up to 5 days. Do not refrigerate them long-term, as the pretzels can absorb moisture and go stale. If you need to store them longer, freeze them in a single layer on a baking sheet, then transfer to a freezer bag. They’ll keep for up to 3 months. Thaw at room temperature for 10 minutes before serving.
A note on flavor development: these are best within the first 2 days. The pretzel is at its crunchiest, and the chocolate has that fresh snap. After day 3, the pretzel starts to soften slightly from the chocolate’s moisture. They’re still delicious, just less crunchy. If you’re making them for an event, aim to make them the day before or the morning of.
These pair beautifully with hot apple cider, pumpkin spice lattes, or even a glass of cold milk. For a party, I like to set them out next to a bowl of popcorn drizzled with caramel and a sprinkle of sea salt. The sweet, salty, and crunchy combo is irresistible.
Nutritional Information & Benefits
Let’s be honest—these are a treat, not a health food. But here’s the breakdown so you know what you’re working with. Per serving (about 3 mummy bites):
| Nutrient | Amount |
|---|---|
| Calories | 180 |
| Total Fat | 8g |
| Saturated Fat | 5g |
| Carbohydrates | 24g |
| Sugar | 14g |
| Protein | 2g |
| Sodium | 180mg |
The pretzels provide a small amount of iron and B vitamins from the enriched flour. White chocolate contains calcium and a bit of magnesium, though it’s mostly sugar and fat. The candy eyes are purely decorative—negligible nutritional value.
For those with dietary concerns: this recipe contains dairy (white chocolate) and gluten (pretzels). It may also contain traces of soy, depending on the brand. The variations listed above offer dairy-free and gluten-free options. If you’re watching your sugar intake, consider using dark chocolate instead, which has less sugar and more antioxidants.
From my perspective, these are a Halloween indulgence. I don’t make them every week—they’re a seasonal treat that makes the holiday feel special. And honestly, sometimes you just need a little joy in the form of a salty-sweet mummy with googly eyes. Balance is everything.
Conclusion
These spooky mummy white chocolate pretzel bites are proof that you don’t need hours in the kitchen or a pantry full of specialty ingredients to create something memorable. They’re quick, they’re cute, and they taste amazing. Whether you’re scrambling for a last-minute classroom treat or planning a full Halloween spread, these little guys deliver every time.
I love that this recipe lets you be creative. You can keep them classic or play with flavors and decorations. Add sprinkles, swap the chocolate, make them gluten-free—there’s no wrong way to mummy. And honestly, the best part is watching people’s faces when they realize how simple the ingredients are. “Wait, that’s it?” they ask, reaching for another one. Yep. That’s it.
So go ahead—give these a try. Get the kids involved, or make them solo while watching a scary movie. Either way, you’re in for a treat. And if you come up with a fun variation, drop it in the comments. I’m always looking for new ideas, and I’d love to hear how yours turned out. Happy Halloween, and happy snacking!
Frequently Asked Questions
Can I use white chocolate chips instead of almond bark?
Yes, but add a teaspoon of coconut oil or shortening to help them melt smoothly. White chocolate chips have less cocoa butter and can seize up more easily. Almond bark is more forgiving for this recipe.
How far in advance can I make these?
You can make them up to 5 days ahead if stored in an airtight container at room temperature. For longer storage, freeze them for up to 3 months. Just thaw at room temperature before serving.
My chocolate seized up and turned grainy. What went wrong?
This usually happens when the chocolate gets too hot or comes into contact with water. Always microwave in 30-second intervals and stir well. Make sure your bowl and spoon are completely dry. If it seizes, you can try stirring in a teaspoon of warm cream or coconut oil, but sometimes it’s best to start fresh.
Can I use pretzel sticks instead of twists?
You can, but they won’t look as much like mummies. The twisted shape of the pretzel mimics the wrapped bandages. Pretzel sticks are thinner and harder to drizzle without covering the entire surface. If that’s all you have, they’ll still taste great—just don’t expect the same visual effect.
How do I keep the candy eyes from falling off?
Wait about 30 seconds after dipping the pretzel before placing the eyes. The chocolate should be slightly tacky but not wet. If the chocolate has already set, dip the back of the eye in melted chocolate and press it onto the pretzel. This acts like edible glue.
Pin This Recipe!
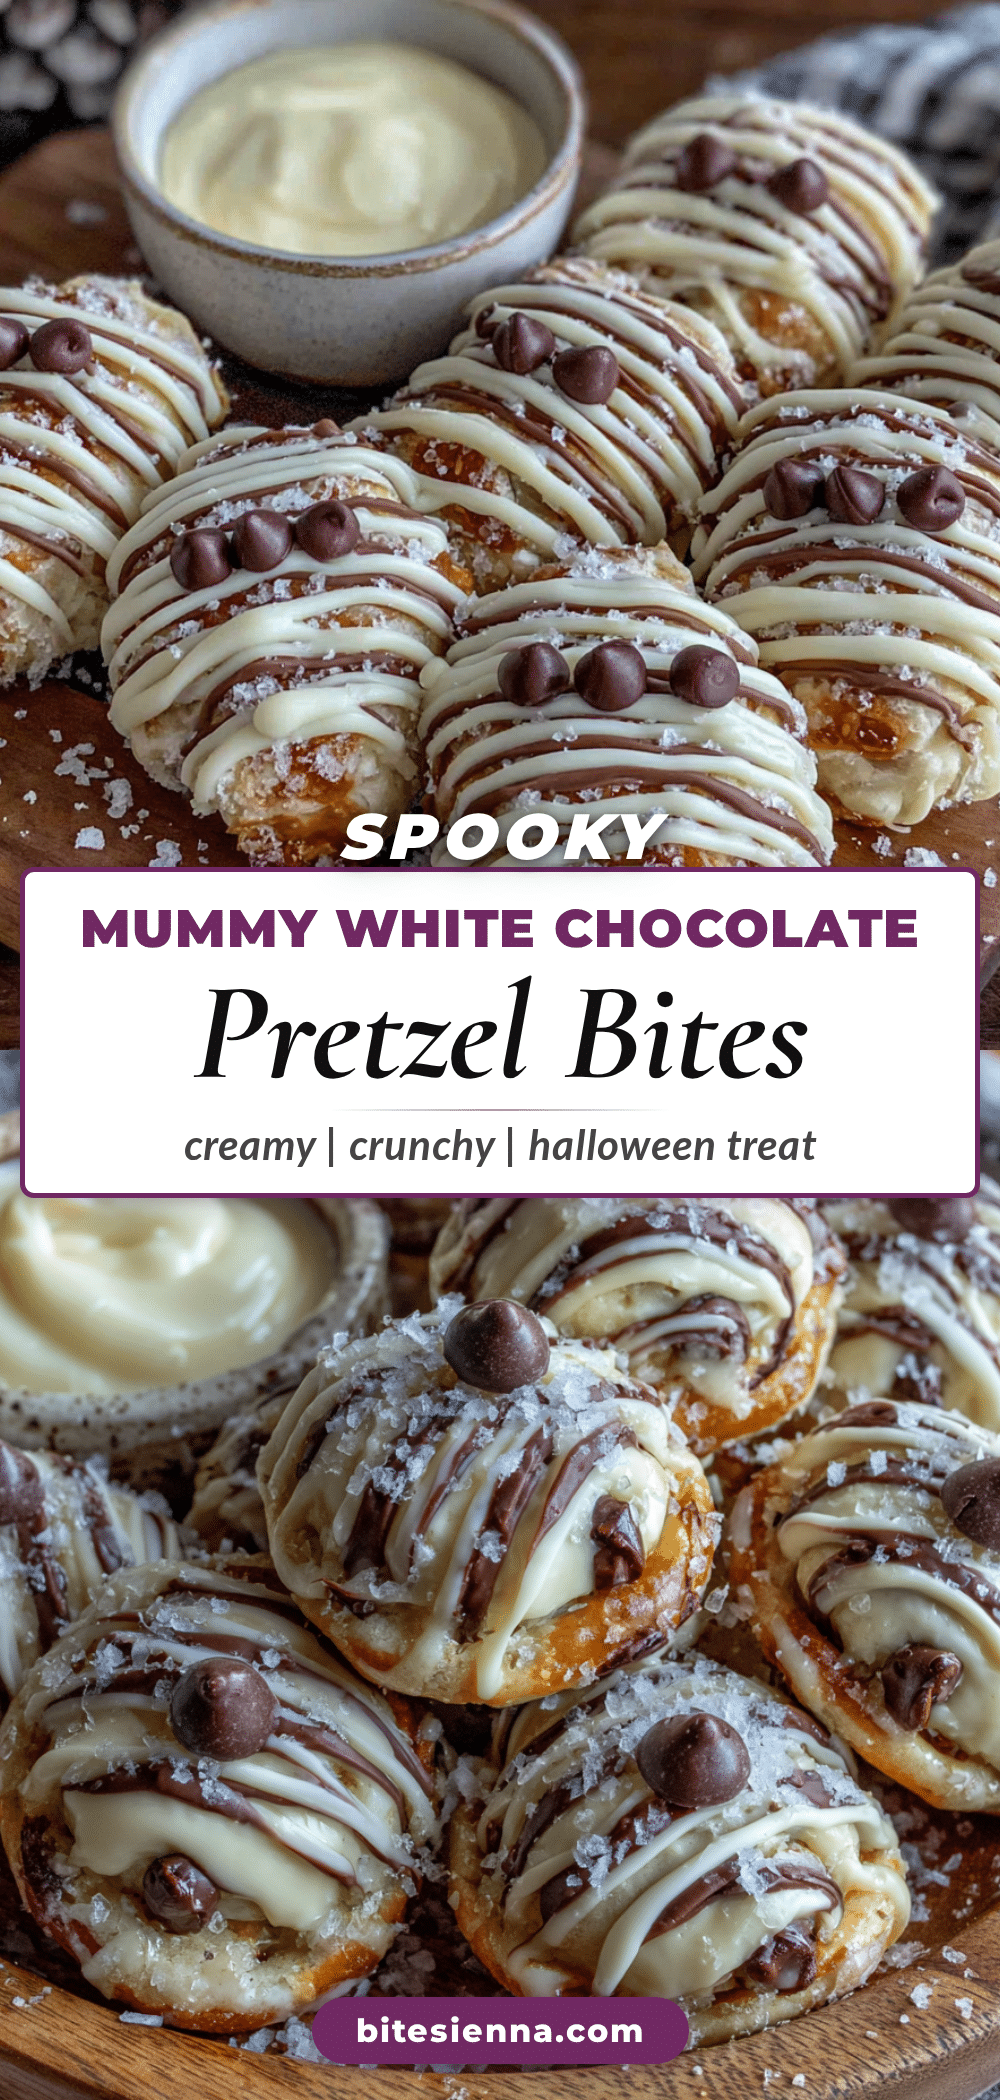
Easy Mummy Pretzel Bites Recipe: Best Halloween Treats

These spooky mummy white chocolate pretzel bites are quick, easy, and made with just three ingredients. Perfect for last-minute Halloween parties, they combine salty pretzels, creamy white chocolate, and candy eyes for a fun, crowd-pleasing treat.
- Prep Time: 20 minutes
- Cook Time: 0 minutes
- Total Time: 35 minutes
- Yield: 40-50 servings 1x
- Category: Dessert
- Cuisine: American
Ingredients
- 1 bag (about 40–50 pieces) pretzel twists
- 12 oz white almond bark (or 2 cups melting wafers)
- 1 small bag (about 50–100 pieces) candy eyes
- Optional: sprinkles or edible glitter
- Optional: 1 teaspoon shortening or coconut oil (if using white chocolate chips)
Instructions
- Prep Your Workspace: Line a large baking sheet with parchment paper. Arrange pretzel twists in a single layer, leaving space between each.
- Melt the White Chocolate: Break almond bark into pieces and place in a microwave-safe bowl. Microwave in 30-second intervals, stirring well after each, until mostly melted (about 1.5-2 minutes). Stir until smooth.
- Dip the Pretzels: Dip just the top half of each pretzel into the melted white chocolate. Let excess drip off, then place on parchment paper. Repeat for all pretzels.
- Add the Eyes: While chocolate is still wet, press two candy eyes onto the top half of each pretzel, above the chocolate line. If chocolate sets, dab a bit of melted chocolate on the back of the eye to glue it.
- Drizzle the Bandages: Using a spoon, drizzle more melted white chocolate back and forth over each pretzel to create mummy bandages. Leave eyes exposed. Reheat chocolate if it thickens.
- Chill to Set: Place baking sheet in the refrigerator for about 15 minutes, or until chocolate is firm. For quicker set, use freezer for 5 minutes.
- Serve or Store: Gently peel mummies off parchment paper. Serve at room temperature or store in an airtight container.
Notes
For best results, use almond bark instead of white chocolate chips for a smoother melt and snappier set. If using white chocolate chips, add 1 teaspoon coconut oil. Do not overheat chocolate; microwave in 30-second intervals. Wait about 30 seconds after dipping before placing eyes to prevent sliding. Store in an airtight container at room temperature for up to 5 days, or freeze for up to 3 months.
Nutrition
- Serving Size: 3 mummy bites
- Calories: 180
- Sugar: 14
- Sodium: 180
- Fat: 8
- Saturated Fat: 5
- Carbohydrates: 24
- Protein: 2
Keywords: Halloween treats, mummy pretzel bites, white chocolate pretzels, easy Halloween recipe, spooky snacks, no-bake dessert


