My neighbor Gina watched me staring at my sad, half-empty can of pumpkin puree in the parking lot of our building. She didn’t say anything at first. Then she just shook her head, laughed, and said, “You’re overthinking it. Small batch. Always.” She was hauling groceries herself, a baguette sticking out of one bag, and she didn’t stop to explain. She just waved her hand like the answer was obvious. And honestly, it was. I had been trying to scale down my favorite pumpkin cookie recipe for weeks, ending up with either a mountain of dough I couldn’t finish or a dry, sad little disc that tasted like nothing. Gina’s comment broke the spell. I went upstairs, opened my pantry, and decided to stop forcing a full recipe into a tiny life.
This is how the small-batch pumpkin snickerdoodle cookies were born. Not in a test kitchen with fancy equipment, but on a Tuesday afternoon with a slightly dented cookie sheet and the lingering smell of my neighbor’s garlic cooking wafting through the wall. I wanted something that tasted like fall but didn’t require me to feed a crowd or store a dozen cookies I’d inevitably eat in one sitting. You know that feeling when you just want two or three perfect cookies with your afternoon coffee, not a whole production? That’s exactly what this is.
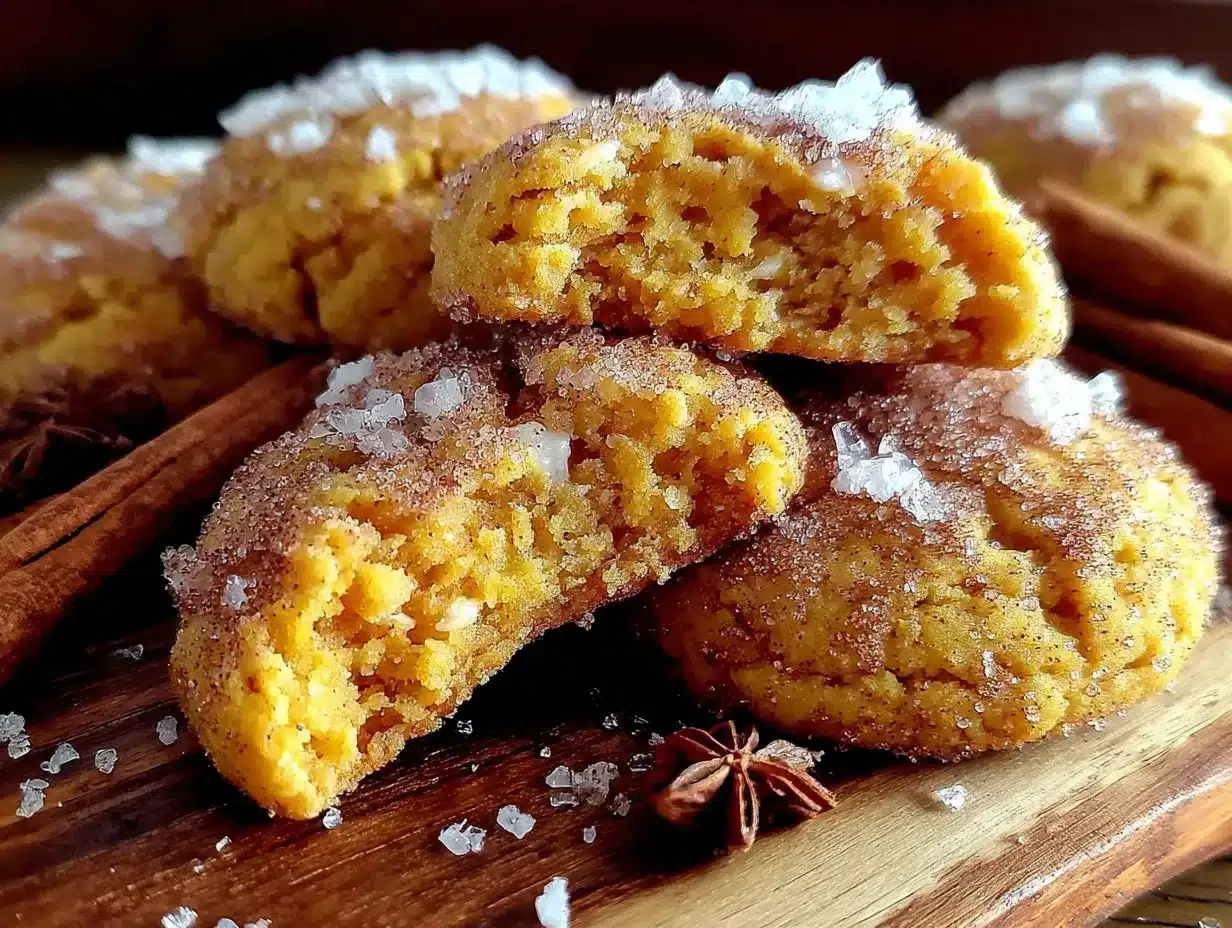
The first batch came out a little lopsided. I forgot to chill the dough and they spread into weird, flat discs. But the flavor was there. That warm, spicy, pumpkin-y goodness mixed with the classic cinnamon-sugar coating. I tweaked it, chilled it, and the next batch was pure magic. These cookies are soft, slightly puffy, and have that irresistible crackly top that snickerdoodles are famous for. They taste like a hug from your favorite sweater. I keep making them because they solve a very real problem: how to get that cozy, homemade cookie feeling without the commitment of a full batch. It’s just me, a small bowl, and the perfect amount of cookie.
Why You’ll Love This Recipe
Let me be straight with you. There are a lot of pumpkin cookie recipes out there, but this one is different. I’ve tested this small-batch pumpkin snickerdoodle cookies recipe about six times to get the texture just right. Not too cakey, not too flat. Just a soft, tender cookie with a slight chew and that signature cinnamon-sugar crunch on the outside. Here is why this one wins:
- Quick & Easy: From start to finish, you’re looking at about 25 minutes. No stand mixer needed, no complicated techniques. Just a bowl, a whisk, and your hands.
- Simple Ingredients: You probably have most of these in your pantry right now. The pumpkin puree is the star, but everything else is a baking staple. No trips to a specialty store.
- Perfect for a Cozy Night In: This is the ideal recipe for a quiet evening, a rainy afternoon, or when you just want a little taste of fall without the fuss. It’s portioned for one or two people.
- Crowd-Pleaser (for a Small Crowd): Even though it’s a small batch, these cookies disappear fast. They have that classic snickerdoodle texture everyone loves, with a subtle pumpkin twist that surprises people.
- Unbelievably Delicious: The combination of pumpkin, cinnamon, nutmeg, and that sugary coating is next-level comfort. The edges are slightly crisp, the center is soft, and the flavor is perfectly balanced.
What makes this recipe different from the rest? It’s the technique. I use a slightly higher ratio of butter to pumpkin to avoid that gummy texture that plagues so many pumpkin cookies. Chilling the dough is non-negotiable here. It firms up the butter and lets the flavors meld, resulting in a cookie that holds its shape and has a beautiful, crackly top. This isn’t just another pumpkin cookie. It’s the one you’ll come back to when you want a single, perfect moment of fall in cookie form. It’s comfort food scaled down to exactly what you need.
What Ingredients You Will Need
This recipe uses simple, wholesome ingredients to deliver that classic snickerdoodle chew with a warm pumpkin twist. The magic is in how these everyday staples work together. Here is what you’ll need:
For the Cookie Dough
- Unsalted butter, softened: 2 tablespoons (28g). Use good quality butter here, like Kerrygold or Plugrà. It makes a difference in flavor and texture. Make sure it’s truly softened to room temperature, not melted.
- Granulated sugar: ¼ cup (50g). This provides the sweetness and helps create that slightly crisp edge.
- Pumpkin puree: 3 tablespoons (45g). Not pumpkin pie filling! Make sure it’s 100% pure pumpkin puree. Libby’s is my go-to for consistent results. Leftover puree freezes beautifully in an ice cube tray.
- Large egg yolk: 1 yolk. The yolk adds richness and tenderness. Save the white for an omelet or scramble the next morning.
- Vanilla extract: ½ teaspoon. Pure vanilla extract is best for that deep, warm flavor.
- All-purpose flour: ½ cup (60g). Spoon and level your flour. Scooping directly from the bag packs it down and leads to dry cookies.
- Cream of tartar: ½ teaspoon. This is the secret to the classic snickerdoodle tang and chewy texture. Don’t skip it.
- Baking soda: ¼ teaspoon. Helps the cookies spread just the right amount.
- Ground cinnamon: ½ teaspoon. Use a fresh, fragrant cinnamon like Saigon cinnamon for the best flavor.
- Ground nutmeg: ¼ teaspoon. Freshly grated nutmeg is incredible here, but pre-ground works perfectly.
- Ground ginger: ⅛ teaspoon. Adds a subtle warmth that complements the pumpkin.
- Salt: ¼ teaspoon. Balances the sweetness and enhances all the spices.
For the Cinnamon-Sugar Coating
- Granulated sugar: 2 tablespoons (25g).
- Ground cinnamon: 1 teaspoon. This creates that iconic crackly, sparkly exterior.
Ingredient Substitution Tips: If you don’t have cream of tartar, you can substitute with ¼ teaspoon of lemon juice or white vinegar added to the wet ingredients, but the texture will be slightly different. For a dairy-free version, use a high-quality vegan butter stick (not margarine) that has a high fat content. I’ve had good luck with Miyoko’s. You can also use a flax egg (1 tablespoon ground flaxseed + 2.5 tablespoons water) instead of the egg yolk, but the cookies will be a bit less tender.
Equipment Needed
You don’t need a fancy bakery setup for this recipe. I’ve made these small-batch pumpkin snickerdoodle cookies in a tiny apartment kitchen with the bare minimum. Here is what you’ll actually need:
- Mixing bowls: One medium bowl for the dry ingredients and one small bowl for the wet ingredients. I use a set of ceramic nesting bowls I got at a thrift store.
- Whisk: For combining the dry ingredients evenly.
- Rubber spatula or wooden spoon: For mixing the dough. A spatula is gentler and helps you scrape the bowl clean.
- Baking sheet: A standard half-sheet pan works perfectly. Line it with parchment paper for easy cleanup and to prevent sticking. If you don’t have parchment, a silicone baking mat is great too.
- Cookie scoop or spoon: A 1.5-tablespoon cookie scoop makes uniform cookies, but two spoons work just fine. I’ve used a regular tablespoon measure in a pinch.
- Small bowl: For the cinnamon-sugar coating.
- Cooling rack: Lets the cookies cool evenly and keeps the bottoms from getting soggy. If you don’t have one, carefully transfer them to a plate after a few minutes on the sheet.
- Plastic wrap: For chilling the dough. You can also just cover the bowl with a plate.
Budget-Friendly Tip: Don’t stress about having a perfect cookie scoop. I honestly use two teaspoons to portion the dough, and it works great. A cooling rack is nice to have, but not essential. Let the cookies cool on the baking sheet for 5 minutes, then transfer them to a dinner plate. The texture will still be perfect.
Preparation Method
Let’s get baking. This recipe moves quickly, so I like to have everything measured and ready before I start. Read through the steps once, then dive in.
- Preheat your oven to 350°F (175°C). Line your baking sheet with parchment paper. This is non-negotiable for easy cleanup and preventing the bottoms from burning.
- Make the cinnamon-sugar coating. In a small bowl, whisk together the 2 tablespoons of granulated sugar and 1 teaspoon of cinnamon. Set this aside. You’ll use it to roll the dough balls right before baking.
- Whisk the dry ingredients. In a medium bowl, whisk together the ½ cup all-purpose flour, ½ teaspoon cream of tartar, ¼ teaspoon baking soda, ½ teaspoon cinnamon, ¼ teaspoon nutmeg, ⅛ teaspoon ginger, and ¼ teaspoon salt. Whisking aerates the flour and ensures the spices are evenly distributed. You don’t want a pocket of baking soda in one cookie!
- Cream the butter and sugar. In a separate small bowl, combine the 2 tablespoons of softened butter and ¼ cup of granulated sugar. Use a rubber spatula or a wooden spoon to cream them together until light and fluffy. This takes about 1-2 minutes. Scrape down the sides of the bowl. It won’t be perfectly smooth, but it should look pale and creamy.
- Add the wet ingredients. Add the 3 tablespoons of pumpkin puree, 1 egg yolk, and ½ teaspoon of vanilla extract to the butter-sugar mixture. Stir until everything is well combined. The mixture might look a little separated at first, but keep stirring. It will come together into a smooth, thick paste.
- Combine wet and dry ingredients. Pour the dry ingredients into the wet ingredients. Stir gently with your spatula until just combined. Do not overmix! Overworking the dough develops the gluten and makes the cookies tough. You want to mix until you see the last streaks of flour disappear. The dough will be soft and slightly sticky. That’s exactly what you want.
- Chill the dough (this is crucial). Cover the bowl with plastic wrap and place it in the refrigerator for at least 30 minutes. I know you’re eager, but don’t skip this. Chilling solidifies the butter, which prevents the cookies from spreading into flat, greasy puddles in the oven. It also allows the flavors to deepen. You can chill the dough for up to 24 hours.
- Shape the cookies. After chilling, use a 1.5-tablespoon cookie scoop or two spoons to portion the dough. It should make about 6 cookies. Roll each portion into a smooth ball between your palms. The dough will be firm but pliable.
- Roll in cinnamon-sugar. Drop each dough ball into the bowl of cinnamon-sugar. Roll it around until it’s completely coated. Place the coated dough balls on the prepared baking sheet, spacing them about 2 inches apart. They will spread a little, but not too much.
- Bake. Bake for 10-12 minutes. At the 10-minute mark, the cookies should look puffed, set around the edges, and the centers will still look slightly soft and underdone. That’s perfect. They will continue to set on the hot baking sheet. For a softer, chewier cookie, bake for 10 minutes. For a slightly crisper edge, go for 12 minutes. My sweet spot is 11 minutes.
- Cool on the baking sheet. Let the cookies cool on the baking sheet for exactly 5 minutes. This is important. It allows them to firm up enough to be moved without falling apart. After 5 minutes, transfer them to a wire rack to cool completely. If you try to move them too early, they will break. Trust the process.
Cooking Tips & Techniques
I’ve made this recipe enough times to know exactly where things can go wrong. Here are my hard-earned tips for perfect small-batch pumpkin snickerdoodle cookies every single time.
Don’t skip the cream of tartar. I made that mistake once, thinking I could just use a little extra lemon juice. The cookies came out flat and tasted one-dimensional. Cream of tartar gives snickerdoodles their signature tangy flavor and that distinct chewy texture. It reacts with the baking soda to create the perfect rise. If you don’t have it, order some or make a different cookie.
Chill the dough, no excuses. I know it’s annoying to wait. But the first time I made these, I was impatient and skipped the chilling step. The cookies spread into huge, flat discs that looked more like lace cookies than snickerdoodles. They were still tasty, but not pretty. Chilling firms the dough, prevents excessive spreading, and deepens the pumpkin spice flavor. Set a timer if you have to.
Measure your flour correctly. This is the most common baking mistake. Scooping your measuring cup directly into the flour bag packs it down, giving you up to 20% more flour than the recipe needs. The result? Dry, crumbly cookies. Use a spoon to fluff the flour in the bag, then spoon it into your measuring cup and level it off with a knife. It takes an extra 10 seconds and makes a world of difference.
Watch the bake time like a hawk. Ovens run differently. My old apartment oven ran hot, and these cookies would burn on the bottom at the 11-minute mark. Start checking at 9 minutes if you have a convection oven or a smaller toaster oven. The cookies are done when the edges are set and lightly golden, and the centers look slightly puffy and soft. They will continue to bake on the hot sheet after you pull them out.
Variations & Adaptations
One of the best things about this recipe is how adaptable it is. Here are some ways I’ve tweaked it depending on my mood or what I have in the pantry.
- Gluten-Free Version: Substitute the all-purpose flour with a 1:1 gluten-free baking flour blend that contains xanthan gum. I’ve used Bob’s Red Mill 1:1 Baking Flour with great results. The texture will be slightly more tender and a little less chewy, but still delicious. Do not use almond flour or coconut flour alone; the structure will be completely different.
- Spice It Up: Feeling adventurous? Add ¼ teaspoon of cardamom or a pinch of cloves to the dry ingredients. I once made a batch with a tablespoon of finely chopped crystallized ginger folded into the dough. It added little bursts of sweet heat that were incredible with the pumpkin. You can also use pumpkin pie spice instead of the individual spices. Use 1 teaspoon of pumpkin pie spice in the dough.
- Add Some Crunch: Fold in ¼ cup of chopped pecans or walnuts after mixing the dough. Toast the nuts first for deeper flavor. I’ve also added white chocolate chips (about 2 tablespoons) for a sweeter, creamier version. The white chocolate pairs beautifully with the pumpkin and cinnamon.
- Dairy-Free Adaptation: Use a high-quality vegan butter stick. Avoid tub margarine, which has too much water and will make the cookies spread. I’ve used Miyoko’s European Style Cultured Vegan Butter and it worked perfectly. The flavor was slightly different, but the texture was spot on.
- Pumpkin Spice Glaze: For an extra indulgent treat, whisk together ½ cup of powdered sugar, 1 tablespoon of milk (or dairy-free milk), and ¼ teaspoon of pumpkin pie spice. Drizzle it over the cooled cookies. It adds a lovely, bakery-style finish.
Serving & Storage Suggestions
These cookies are best enjoyed warm, when the edges are still slightly crisp and the center is soft and tender. The cinnamon-sugar coating is at its most sparkly and aromatic right out of the oven. I love serving them with a hot cup of chai tea or a cold glass of oat milk.
At Room Temperature: Store the cooled cookies in an airtight container at room temperature. They will stay soft and chewy for up to 3 days. Place a piece of bread in the container to help keep them moist. The cookies will absorb the moisture from the bread, keeping them from drying out. Change the bread slice every day if you can.
In the Refrigerator: You can store them in the fridge for up to a week, but they will firm up quite a bit. Let them come to room temperature for about 15 minutes before serving, or pop them in the microwave for 10 seconds to soften them up.
Freezing Instructions: These cookies freeze beautifully. You have two options. First, you can freeze the unbaked dough balls. Roll them into balls, coat them in cinnamon-sugar, and place them on a parchment-lined baking sheet. Freeze until solid, then transfer them to a freezer bag. Bake directly from frozen, adding 2-3 minutes to the baking time. Second, you can freeze the baked, cooled cookies. Place them in a single layer in a freezer-safe container with parchment paper between the layers. They will keep for up to 3 months. Thaw at room temperature for about 20 minutes.
Flavor Development: Honestly, these cookies taste even better the next day. The pumpkin and spice flavors meld together overnight, creating a deeper, more rounded taste. The texture softens slightly, becoming almost cake-like. I sometimes make the dough at night, bake them in the morning, and have the best cookies by lunchtime.
Nutritional Information & Benefits
These small-batch pumpkin snickerdoodle cookies are a treat, but they do offer a few nutritional perks thanks to the star ingredient. Here is an approximate breakdown per cookie (based on 6 cookies):
| Nutrient | Amount Per Cookie |
|---|---|
| Calories | ~145 kcal |
| Fat | ~6g |
| Saturated Fat | ~3.5g |
| Carbohydrates | ~21g |
| Sugar | ~14g |
| Protein | ~2g |
| Fiber | ~1g |
| Vitamin A | ~15% DV |
Pin This Recipe!

Easy Small-Batch Pumpkin Snickerdoodle Cookies Recipe

These soft, chewy pumpkin snickerdoodle cookies are perfectly portioned for one or two people. Made with simple ingredients and ready in about 25 minutes, they deliver all the cozy fall flavor without the commitment of a full batch.
- Prep Time: 15 minutes
- Cook Time: 10-12 minutes
- Total Time: 25 minutes (plus 30 minutes chilling)
- Yield: 6 cookies 1x
- Category: Dessert
- Cuisine: American
Ingredients
- 2 tablespoons (28g) unsalted butter, softened
- ¼ cup (50g) granulated sugar
- 3 tablespoons (45g) pumpkin puree (not pumpkin pie filling)
- 1 large egg yolk
- ½ teaspoon vanilla extract
- ½ cup (60g) all-purpose flour, spooned and leveled
- ½ teaspoon cream of tartar
- ¼ teaspoon baking soda
- ½ teaspoon ground cinnamon
- ¼ teaspoon ground nutmeg
- ⅛ teaspoon ground ginger
- ¼ teaspoon salt
- 2 tablespoons (25g) granulated sugar (for coating)
- 1 teaspoon ground cinnamon (for coating)
Instructions
- Preheat oven to 350°F (175°C). Line a baking sheet with parchment paper.
- In a small bowl, whisk together 2 tablespoons sugar and 1 teaspoon cinnamon for the coating. Set aside.
- In a medium bowl, whisk together flour, cream of tartar, baking soda, ½ teaspoon cinnamon, nutmeg, ginger, and salt.
- In a separate small bowl, cream together softened butter and ¼ cup sugar until light and fluffy, about 1-2 minutes.
- Add pumpkin puree, egg yolk, and vanilla extract to the butter mixture. Stir until well combined and smooth.
- Pour dry ingredients into wet ingredients. Stir gently with a rubber spatula until just combined. Do not overmix. Dough will be soft and slightly sticky.
- Cover the bowl with plastic wrap and refrigerate for at least 30 minutes (up to 24 hours).
- After chilling, use a 1.5-tablespoon cookie scoop or two spoons to portion dough into 6 balls. Roll each ball between your palms until smooth.
- Roll each dough ball in the cinnamon-sugar mixture until fully coated. Place on prepared baking sheet, spacing 2 inches apart.
- Bake for 10-12 minutes. Cookies should look puffed and set around the edges with soft centers. For chewier cookies, bake 10 minutes; for crisper edges, bake 12 minutes.
- Let cookies cool on the baking sheet for exactly 5 minutes, then transfer to a wire rack to cool completely.
Notes
Chilling the dough is crucial to prevent spreading. Use 100% pure pumpkin puree, not pumpkin pie filling. For best results, spoon and level the flour. Cream of tartar gives the signature snickerdoodle tang and chewy texture; do not skip. Cookies taste even better the next day as flavors meld.
Nutrition
- Serving Size: 1 cookie
- Calories: 145
- Sugar: 14
- Sodium: 95
- Fat: 6
- Saturated Fat: 3.5
- Carbohydrates: 21
- Fiber: 1
- Protein: 2
Keywords: small batch pumpkin cookies, pumpkin snickerdoodle, easy pumpkin cookies, fall cookies, small batch cookies, pumpkin dessert


