It was 10:47 PM on a random Tuesday in early December, and I had a very specific craving for a peppermint mocha. You know that feeling—when the house is finally quiet, the Christmas lights are on, and you just want that cozy coffee shop drink without putting on real pants. I didn’t have any fancy syrups from the store, but I did have a half-empty bag of chocolate chips, some peppermint extract I’d bought for cookies, and a stubborn idea that just wouldn’t let me sleep.
Honestly, I figured I’d end up with something mediocre. A sad, watery attempt that would make me wish I’d just gone to bed. But let me tell you—what came out of that saucepan was so good I actually texted my sister a photo at midnight. She thought I was being dramatic, but the next weekend she came over with her own saucepan, and we made a double batch together. That’s the thing about this syrup. It turns a regular morning coffee into something that feels like a holiday hug.
I’ve been making this homemade peppermint mocha syrup every December since that night, and it’s become my little secret weapon for the festive coffee bar I set up whenever we have guests. No more buying those little bottles of flavored syrup that cost way too much and taste like artificial candy. This one is rich, deeply chocolatey, with just the right amount of cool peppermint that doesn’t overpower everything else. It’s the kind of thing that makes people say, “Wait, you made this yourself?” with genuine surprise.
Maybe you’ve been there—standing in the coffee aisle, staring at a tiny bottle of syrup that costs eight bucks and wondering if it’s worth it. Trust me, it’s not. This recipe costs a fraction of that, uses ingredients you probably already have, and tastes a hundred times better. Plus, you get to control exactly how much peppermint goes in. That’s a win in my book.
Why You’ll Love This Recipe
I’ve tested this syrup about six times over the past few years, tweaking the chocolate-to-peppermint ratio until it hit that perfect sweet spot. My family has been my unofficial taste-testing panel, and they’ve been very thorough in their duties. Here is why this recipe earns a permanent spot in your holiday rotation:
- Quick & Easy : Comes together in under 15 minutes, start to finish. No candy thermometers, no complicated steps. Just a saucepan and a whisk.
- Simple Ingredients : You likely have everything in your pantry right now. Cocoa powder, sugar, water, vanilla, and peppermint extract. That’s it.
- Perfect for a Festive Coffee Bar : This syrup is the star of any holiday coffee station. Set it out with some whipped cream, crushed candy canes, and everyone feels like they’re at a fancy café.
- Crowd-Pleaser : Kids love it in hot chocolate, adults love it in coffee, and everyone loves the way it makes the kitchen smell. Seriously, the aroma alone is worth making it.
- Unbelievably Delicious : The texture is silky and smooth, the flavor is deep and rich without being cloying. It’s next-level comfort in a mug.
What makes this recipe different from all the others I’ve tried? It’s the technique. Most recipes just dump everything in a pot and hope for the best. I’ve learned that whisking the cocoa powder with the sugar first, before adding the water, prevents those annoying little lumps that never seem to dissolve. It’s a small thing, but it makes a huge difference. This isn’t just another version—it’s the version I keep coming back to year after year.
This syrup isn’t just good—it’s the kind that makes you close your eyes after the first sip. It’s comfort food reimagined for the holiday season, faster and more affordable than anything you can buy, but with the same soul-soothing satisfaction. Perfect for impressing guests without any stress, or turning a quiet Tuesday morning into something memorable.
What Ingredients You Will Need
This recipe uses simple, everyday ingredients to deliver that bold, festive flavor without any fuss. Most of these are pantry staples, which is exactly what you want when a craving hits at 10 PM.
- Granulated sugar (1 cup / 200 g) : This provides the sweetness and body. Regular white sugar works best here. I’ve tried it with coconut sugar, and it works, but the flavor is noticeably different—less clean and sweet.
- Unsweetened cocoa powder (½ cup / 45 g) : Go for a good quality natural cocoa powder, not Dutch-processed. I personally use Ghirardelli or Hershey’s Special Dark for a richer chocolate flavor. The cocoa powder is what gives this syrup its deep, mocha character.
- Water (1 cup / 240 ml) : Just tap water is fine. The water dissolves the sugar and cocoa, creating the base of the syrup.
- Pure vanilla extract (2 teaspoons / 10 ml) : This rounds out the chocolate flavor and adds warmth. Please use real vanilla extract, not imitation. The difference is noticeable, and since this syrup is so simple, every ingredient matters.
- Peppermint extract (½ to 1 teaspoon / 2.5 to 5 ml) : This is where you get to customize. I use ¾ teaspoon for a balanced peppermint kick that doesn’t taste like toothpaste. Start with ½ teaspoon, taste, and add more if you want a stronger minty punch. Brands vary in strength, so trust your taste buds.
- Pinch of salt (about ⅛ teaspoon) : Don’t skip this. Salt enhances the chocolate flavor and balances the sweetness. It’s the secret to making the syrup taste professional.
Optional add-ins for variation:
- 1 tablespoon of unsalted butter (adds richness and a silky mouthfeel)
- ¼ teaspoon of instant espresso powder (boosts the coffee flavor if you’re using this in drinks)
- A cinnamon stick while simmering (for a spicy twist)
Substitution guidance: If you need a refined sugar-free option, you can use an equal amount of granulated monk fruit sweetener or allulose. The texture will be slightly thinner, but the flavor is still great. For a dairy-free version, skip the optional butter or use a vegan butter substitute. The base recipe is naturally dairy-free and gluten-free as written.
Equipment Needed
You don’t need any fancy gadgets for this recipe, which is part of why I love it. Here is what you’ll need:
- Medium saucepan (2-quart size is perfect) : You want something with a heavy bottom to prevent scorching. I use my old Farberware saucepan that I’ve had for over a decade. It has a few scratches, but it heats evenly and hasn’t let me down.
- Whisk : A balloon whisk works best for getting the cocoa powder fully incorporated. A fork will work in a pinch, but you’ll be whisking longer.
- Measuring cups and spoons : For accuracy. I know some people eyeball it, but with peppermint extract, a little too much can ruin the whole batch.
- Airtight glass jar or bottle (16-ounce size) : For storing the finished syrup. A mason jar works perfectly, or you can use a repurposed syrup bottle. I use a Weck jar because it looks pretty on the counter.
- Fine-mesh strainer (optional but recommended) : If you want an ultra-smooth syrup with no chance of lumps, strain it before storing. I usually don’t bother because my whisking technique is solid, but it’s a good safety net for beginners.
Budget-friendly tip: Don’t go out and buy a special bottle. Just use a clean glass jar you already have. I’ve used an old pasta sauce jar before, and it worked fine. Just make sure it’s thoroughly washed and dried.
Preparation Method
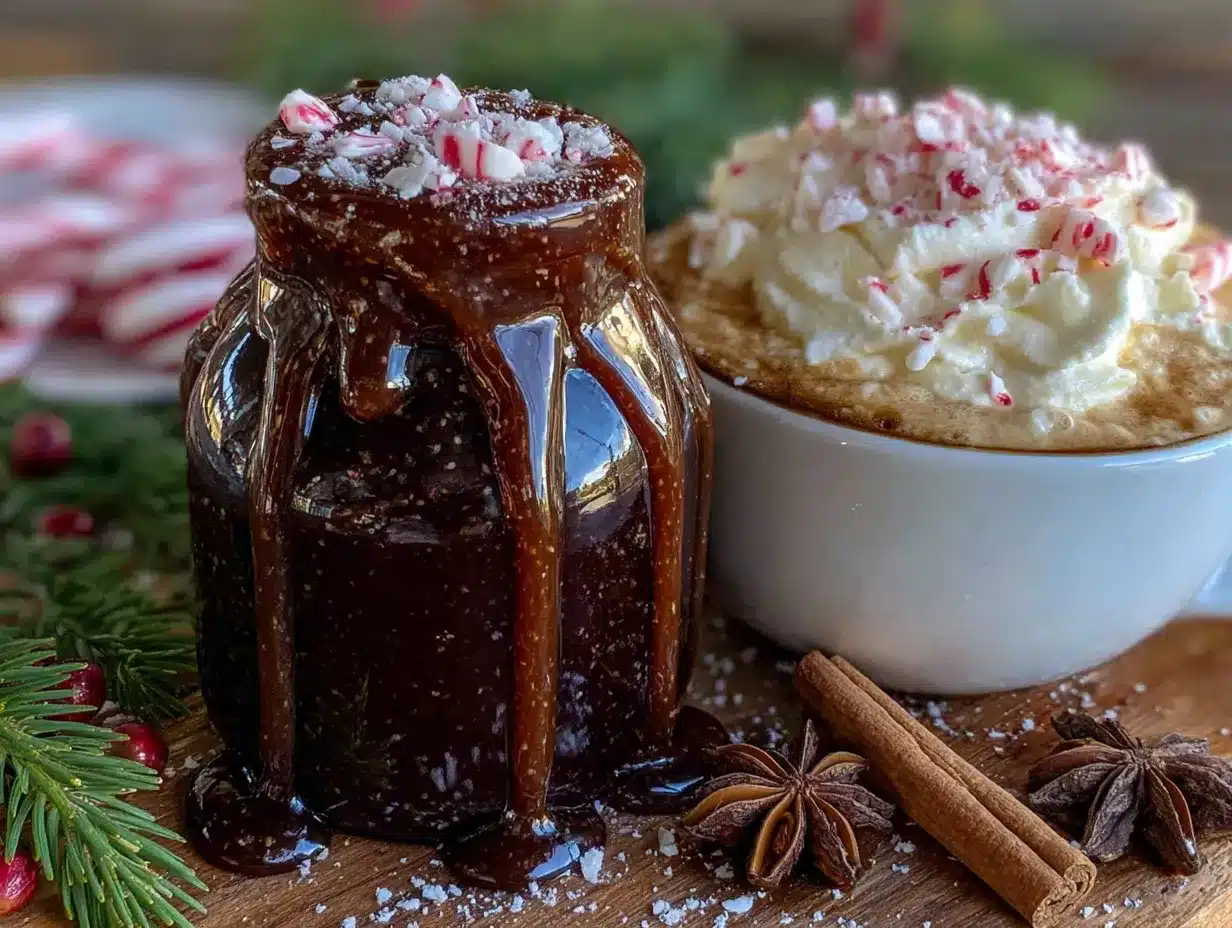
Follow these steps carefully, and you’ll have a perfect batch of syrup every time. I’ve included all the little details I wish someone had told me the first time I made this.
- Combine the dry ingredients first. In your medium saucepan, whisk together the granulated sugar, cocoa powder, and salt until they are thoroughly combined. This step is crucial—if you skip it, you’ll end up with cocoa lumps that are a pain to whisk out later. Take 30 seconds to do it right.
- Add the water. Pour in the water and whisk everything together until the mixture is smooth and there are no visible dry spots. It will look like thin, watery chocolate milk at this point, and that’s exactly right. Don’t worry if it seems too thin—it will thicken as it simmers.
- Bring to a gentle simmer. Place the saucepan over medium heat and bring the mixture to a simmer, not a rolling boil. You’ll see small bubbles forming around the edges of the pan. This should take about 3 to 4 minutes. Stir occasionally with your whisk to prevent anything from sticking to the bottom.
- Simmer for exactly 5 minutes. Once it’s simmering, set a timer for 5 minutes. Let it bubble gently, whisking every minute or so. The syrup will thicken noticeably during this time. You’ll notice it coats the back of a spoon when it’s ready. Don’t walk away—I’ve let it boil over before, and cleaning burnt sugar off the stove is not fun.
- Remove from heat and add vanilla. Take the saucepan off the burner and whisk in the vanilla extract. The mixture will bubble up a little, which is normal. Let it sit for about 2 minutes to cool slightly.
- Add the peppermint extract. This is the moment of truth. Start with ½ teaspoon of peppermint extract and whisk it in thoroughly. Taste the syrup carefully—it’s hot, so use a small spoon and blow on it first. If you want a stronger peppermint flavor, add another ¼ teaspoon and taste again. I usually land at ¾ teaspoon total. Remember, the flavor will mellow slightly as the syrup cools, so don’t go overboard.
- Cool and strain (if using). Let the syrup cool in the saucepan for about 10 minutes. If you’re using a fine-mesh strainer, place it over your storage jar and pour the syrup through. If you’re not straining, just pour directly into the jar. I usually skip the strainer because I’m lazy and it’s never been an issue.
- Cool completely before sealing. Leave the jar open on the counter until the syrup reaches room temperature. This takes about 30 to 45 minutes. Don’t put the lid on while it’s still warm, or condensation will form inside the jar and can cause the syrup to spoil faster. Patience, my friend.
- Store and enjoy. Once cool, screw on the lid and store the syrup in the refrigerator. It will thicken more as it chills, which is perfect for drizzling into coffee or hot chocolate.
Cooking Tips & Techniques
Over the years, I’ve made a few mistakes with this syrup so you don’t have to. Here are the lessons I learned the hard way:
The biggest mistake people make is boiling the syrup too vigorously. A gentle simmer is all you need. A rolling boil will evaporate too much water, leaving you with a thick, almost caramel-like syrup that’s hard to pour. If that happens, don’t panic—just whisk in a tablespoon of hot water at a time until it reaches the right consistency.
Peppermint extract is potent stuff. I once added a full teaspoon without tasting first, and the result was like drinking a candy cane that had been melted down. It was intense. Always start with less and add more. You can always increase the peppermint, but you can’t take it out.
Timing tip: Make this syrup while you’re already doing something else in the kitchen. I often whip it up while waiting for water to boil for pasta or while my kids are eating breakfast. It only requires a few minutes of active attention, and the rest is just simmering.
For consistency: If you want your syrup to be exactly like the coffee shop versions, add a tiny pinch of xanthan gum (about ⅛ teaspoon) while whisking. This gives it a slightly thicker, more luxurious mouthfeel. I don’t always do this because it’s an extra ingredient to buy, but it’s a nice touch for special occasions.
Cleanup hack: Fill your saucepan with warm water and a drop of dish soap right after you pour out the syrup. Let it soak while you clean up everything else. The sugar residue will dissolve easily, and you won’t have to scrub.
Variations & Adaptations
This syrup is incredibly versatile, and I’ve tried several variations over the years. Here are some of my favorites:
Dark Chocolate Peppermint Syrup: Swap half the natural cocoa powder for Dutch-processed cocoa powder. The result is a darker, more intense chocolate flavor that pairs beautifully with the peppermint. This is my husband’s favorite version.
Spiced Peppermint Mocha Syrup: Add a cinnamon stick and two whole cloves to the saucepan while the syrup simmers. Remove them before pouring into the jar. The warm spices add a cozy, almost chai-like complexity. I make this version for Christmas morning.
White Chocolate Peppermint Syrup: For a completely different flavor profile, replace the cocoa powder with ½ cup of white chocolate chips. Add them after removing the pan from heat, whisking until smooth. This makes a creamy, sweet syrup that’s perfect for white chocolate mochas.
Dairy-Free & Vegan: The base recipe is already dairy-free and vegan, so no changes needed. If you’re adding the optional butter, use a plant-based butter substitute.
Low-Sugar Version: Use a granulated monk fruit sweetener or allulose in place of the sugar. The syrup will be slightly thinner, so you might want to simmer it for an extra minute to concentrate the flavor.
Serving & Storage Suggestions
This syrup is best served warm or at room temperature, stirred into your favorite coffee or hot chocolate. For a festive coffee bar, set up a station with:
- A carafe of hot coffee or espresso
- A jar of this peppermint mocha syrup
- Whipped cream (homemade or store-bought)
- Crushed candy canes or peppermint sprinkles
- Chocolate shavings or cocoa powder for dusting
How to use it: For a standard 12-ounce mug of coffee, start with 2 tablespoons of syrup. Stir well, then add your milk or cream. Top with whipped cream and crushed candy canes for the full effect. For hot chocolate, use 3 tablespoons of syrup in a mug of warm milk—it’s rich and decadent.
Storage instructions: Store the syrup in an airtight jar in the refrigerator for up to 3 weeks. I’ve kept it for a full month with no issues, but it rarely lasts that long in my house. The syrup will thicken as it chills, so let it sit at room temperature for 5 minutes before using, or microwave the jar for 10 seconds to loosen it up.
Freezer option: You can freeze this syrup in an ice cube tray. Once frozen, pop the cubes out and store them in a freezer bag. Each cube is about 1 tablespoon. Just thaw a cube or two in the microwave when you need a single serving.
Flavor development: The flavors actually meld and deepen after a day or two in the refrigerator. So if you can plan ahead, make this syrup a day before you want to serve it. The peppermint and chocolate marry together beautifully overnight.
Nutritional Information & Benefits
Here is the approximate nutritional information for 2 tablespoons (1 serving) of this syrup:
| Nutrient | Amount |
|---|---|
| Calories | 110 |
| Total Fat | 0.5 g |
| Sodium | 30 mg |
| Total Carbohydrates | 27 g |
| Sugars | 25 g |
| Protein | 1 g |
Health benefits of key ingredients: Cocoa powder is rich in antioxidants called flavanols, which can support heart health and improve blood flow. Peppermint has been used for centuries to aid digestion and soothe stomach discomfort. While this syrup is definitely a treat, it’s made with real ingredients rather than artificial flavors and preservatives.
Dietary considerations: This recipe is naturally gluten-free, dairy-free, and vegan as written. It contains no nuts or soy, making it safe for most common allergies. The only potential allergen is the peppermint extract itself, which is generally well-tolerated.
My perspective: I believe in enjoying treats in moderation. This syrup is a special-occasion addition to your coffee routine, not an everyday thing. But when you do indulge, it’s better to use real ingredients that you can pronounce. That’s a win in my book.
Frequently Asked Questions
Can I use this syrup in cold drinks?
Absolutely! This syrup dissolves beautifully in cold milk or iced coffee. Just stir it in thoroughly, or shake it in a closed jar with your milk for a quick iced mocha. The syrup is thick, so give it an extra stir.
How long does homemade peppermint mocha syrup last?
Stored in an airtight jar in the refrigerator, this syrup stays fresh for up to 3 weeks. You’ll know it’s still good if it smells and tastes fine. If you see any mold or off odors, toss it and make a fresh batch.
Can I double this recipe?
Yes, you can easily double or even triple this recipe. Just use a larger saucepan and increase the simmering time by 1 to 2 minutes to account for the larger volume. I often make a double batch around the holidays and give jars as gifts.
Why did my syrup turn out too thick?
This usually happens if you simmered it too long or at too high a heat. To fix it, whisk in warm water one tablespoon at a time until it reaches your desired consistency. Next time, keep the heat at a gentle simmer and watch the clock carefully.
Can I use this syrup in baking?
You can! Use it to flavor frostings, drizzle over brownies, or swirl into cake batter. Keep in mind that it will add extra moisture and sweetness, so adjust your recipe accordingly. I love drizzling it over vanilla ice cream for a quick peppermint mocha sundae.
Conclusion
This homemade peppermint mocha syrup is one of those recipes that feels like a small luxury, but it’s so simple to make. It turns an ordinary morning coffee into something special, and it makes you feel like you’ve got your life together—even if you’re still in your pajamas at noon.
I love that I can whip up a batch in less time than it takes to drive to the coffee shop, and I know exactly what’s in it. No weird preservatives, no artificial colors, just real chocolate and real peppermint. Plus, it’s budget-friendly. A batch costs about the same as one fancy coffee drink, and it lasts for weeks.
I’d love to hear how you use this syrup in your own kitchen. Do you add it to your morning latte? Drizzle it over pancakes? Pour it into a mug of warm milk for the kids? Share your creations in the comments below, and don’t forget to tag a friend who needs a little holiday cheer in their coffee cup.
Go ahead, make a batch tonight. You deserve a little peppermint mocha magic in your life.
Pin This Recipe!
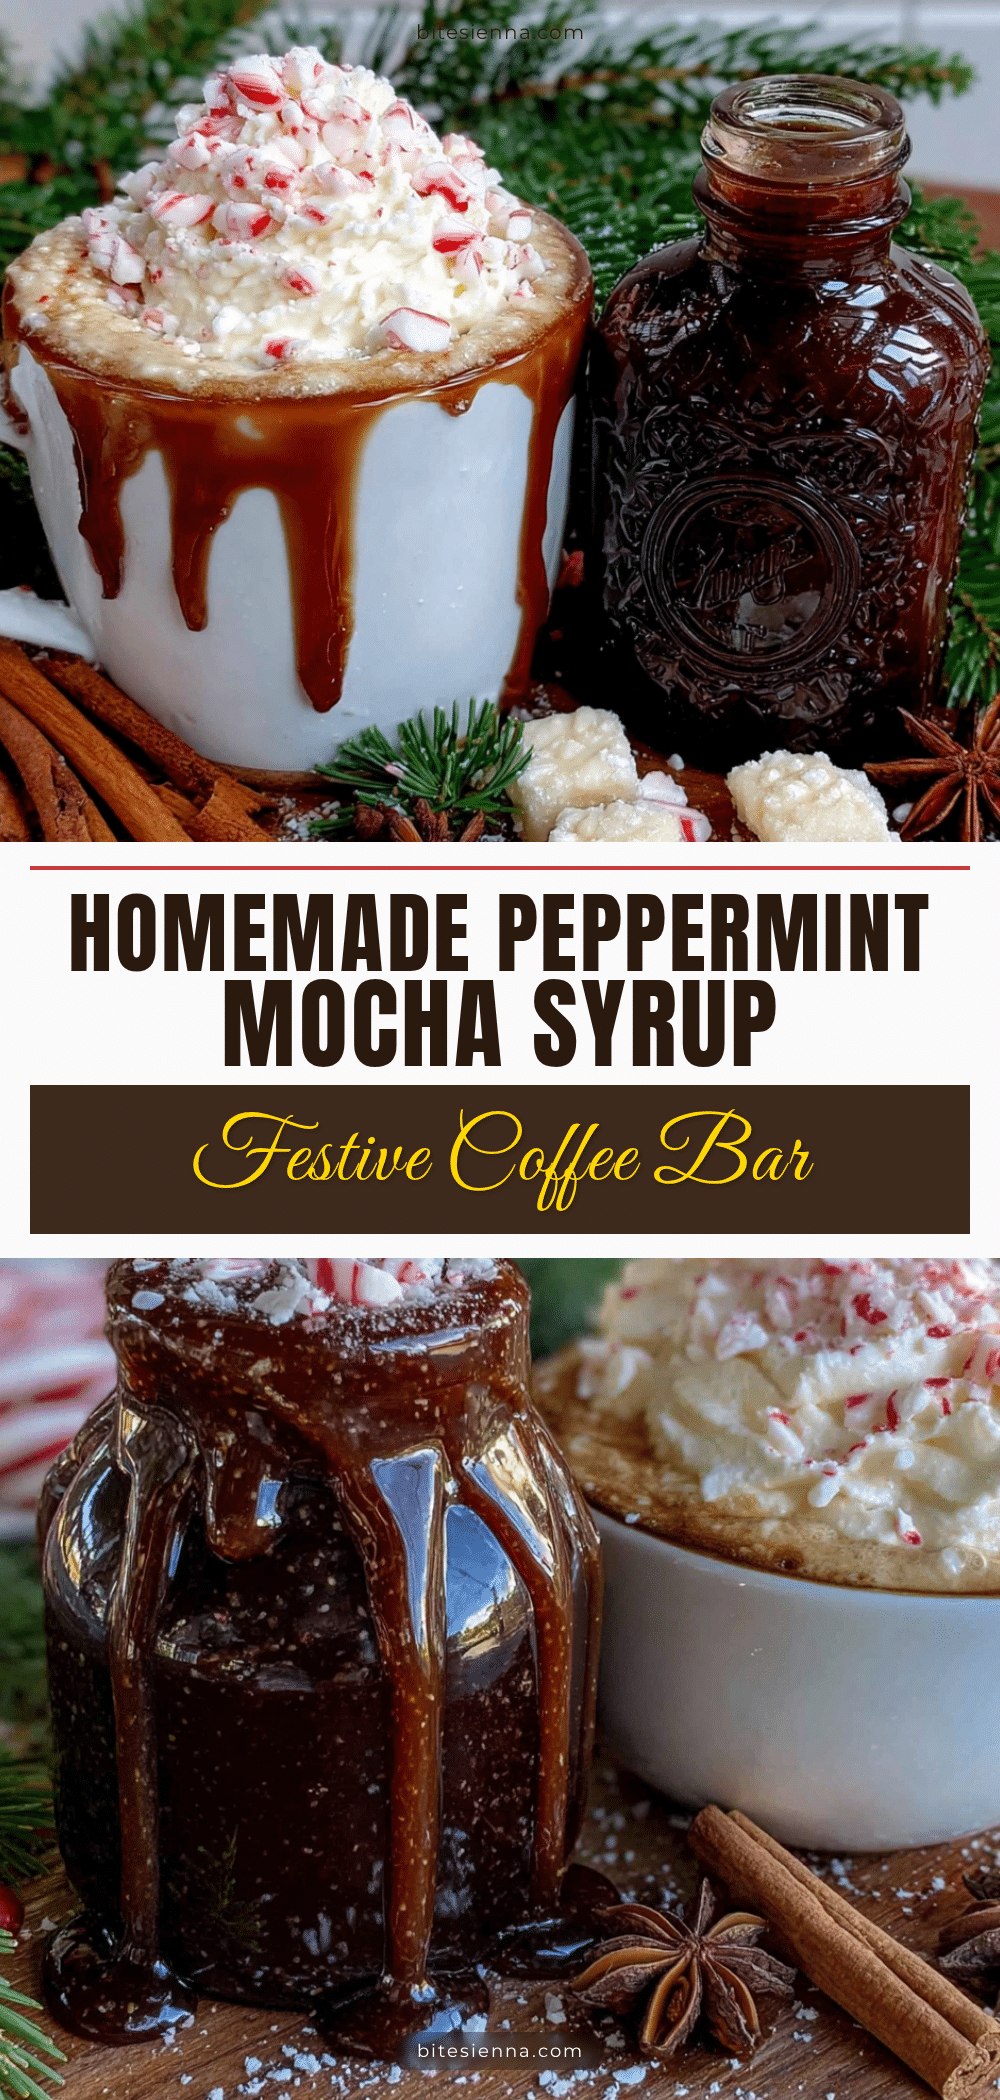
Homemade Peppermint Mocha Syrup
This homemade peppermint mocha syrup is rich, deeply chocolatey, with just the right amount of cool peppermint. It turns a regular morning coffee into something that feels like a holiday hug, and it’s made with simple pantry ingredients in under 15 minutes.
- Prep Time: 5 minutes
- Cook Time: 10 minutes
- Total Time: 15 minutes
- Yield: 16 servings (2 tablespoons per serving) 1x
- Category: Syrup
- Cuisine: American
Ingredients
- 1 cup (200 g) granulated sugar
- ½ cup (45 g) unsweetened cocoa powder
- 1 cup (240 ml) water
- 2 teaspoons (10 ml) pure vanilla extract
- ½ to 1 teaspoon (2.5 to 5 ml) peppermint extract
- ⅛ teaspoon salt
Instructions
- In a medium saucepan, whisk together the granulated sugar, cocoa powder, and salt until thoroughly combined.
- Pour in the water and whisk until smooth and no dry spots remain.
- Place the saucepan over medium heat and bring to a gentle simmer (small bubbles around the edges), about 3-4 minutes, stirring occasionally.
- Once simmering, set a timer for 5 minutes. Let it bubble gently, whisking every minute, until the syrup thickens and coats the back of a spoon.
- Remove from heat and whisk in the vanilla extract. Let sit for 2 minutes to cool slightly.
- Add ½ teaspoon of peppermint extract, whisk, and taste. Add more (up to ¼ teaspoon at a time) if desired. The flavor will mellow as it cools.
- Let the syrup cool in the saucepan for about 10 minutes. If desired, strain through a fine-mesh strainer into a storage jar.
- Leave the jar open on the counter until the syrup reaches room temperature (about 30-45 minutes). Do not seal while warm.
- Once cool, screw on the lid and store in the refrigerator. The syrup will thicken as it chills.
Notes
Start with less peppermint extract and add more to taste, as brands vary in strength. For a thicker syrup, add a pinch of xanthan gum. The syrup will keep in the refrigerator for up to 3 weeks. For a stronger chocolate flavor, use Dutch-processed cocoa powder. To fix if too thick, whisk in warm water 1 tablespoon at a time.
Nutrition
- Serving Size: 2 tablespoons
- Calories: 110
- Sugar: 25
- Sodium: 30
- Fat: 0.5
- Carbohydrates: 27
- Fiber: 1
- Protein: 1
Keywords: peppermint mocha syrup, homemade coffee syrup, holiday syrup, peppermint mocha, chocolate syrup, coffee bar


