This was supposed to be a simple, quiet weeknight dinner. You know the kind—nothing fancy, just a baked chicken breast and some steamed broccoli. I had it all planned out. The chicken was seasoned, the broccoli was washed, and I was feeling pretty good about my meal prep game. Then, my youngest walked into the kitchen, took one look at the cutting board, and said, “Is that all we’re having?” And honestly? That’s when everything fell apart.
I opened the fridge to grab the chicken, and my hand landed on a bag of potatoes instead. I had grabbed the wrong thing. The oven was already preheating to 375°F, and I was in a hurry—the kids were hungry, the dog was barking, and I could hear my phone buzzing with a work email I didn’t want to answer. I stared at that bag of potatoes for a solid minute. What was I supposed to do with these? I didn’t have time for a full roast. I didn’t have the energy for a complicated casserole.
So, I did the only thing that made sense: I boiled them. I mean, you can’t go wrong with boiled potatoes, right? While they cooked, I started pulling random things from the fridge—shredded cheddar, a half-empty container of sour cream, some bacon that was definitely past its prime but still smelled okay. I chopped the bacon, fried it up, and then stood there looking at this pile of fluffy mashed potatoes and a bunch of toppings. It looked like a mess. It felt like a disaster.
But then I set it all out on the counter. I let the kids build their own bowls. And let me tell you, the silence that followed was golden. They were so busy piling on cheese and bacon that they forgot to complain. That first bite—the creamy potatoes, the salty crunch of bacon, the tangy sour cream—it was nothing like the boring dinner I had planned. It was better. Maybe you’ve been there, staring at a kitchen full of ingredients that don’t quite make sense, wondering how you’re going to pull it off. This recipe is proof that sometimes the best meals come from the worst plans.
Why You’ll Love This Recipe
Let’s be real—feeding a family on a budget is no joke. You want something that fills bellies, doesn’t break the bank, and actually tastes good. This loaded mashed potato bar checks every box. I’ve tested this recipe more times than I can count, and it’s become a staple in our house for good reason.
- Budget-Friendly: Potatoes are dirt cheap, and the toppings are mostly pantry staples. You can feed a crowd for under $15.
- Kid-Approved: My kids used to turn up their noses at mashed potatoes. Now they fight over who gets the last scoop of bacon. The build-your-own bar gives them control, and that’s half the battle.
- Quick & Easy: From start to table in about 45 minutes. No fancy techniques, no complicated steps—just good, honest cooking.
- Perfect for Picky Eaters: Everyone can customize their bowl. Don’t like cheese? Skip it. Want extra sour cream? Go for it. No arguments, no tears.
- Leftovers That Reheat Well: I’m serious. The mashed potatoes reheat beautifully in the microwave or oven, and the toppings stay crispy if you store them separately.
What sets this recipe apart is the texture. I use a ricer for the smoothest, fluffiest potatoes you’ve ever had, and I add a little cream cheese for extra richness. It’s not just another mashed potato recipe—it’s the one that’ll have your family asking for seconds. Honestly, it’s the kind of meal that makes you feel like a hero without actually doing much work.
Ingredients You Will Need
This recipe uses simple, everyday ingredients that you probably already have in your kitchen. No fancy grocery trips required. I’ve grouped them by function to make prep easier.
For the Mashed Potatoes
- 5 pounds russet potatoes, peeled and quartered (Yukon Gold also works well)
- 1 cup whole milk, warmed (adds creaminess; use 2% or oat milk if needed)
- ½ cup unsalted butter, softened (I recommend Kerrygold for the best flavor)
- 4 ounces cream cheese, softened (this is my secret for extra richness)
- 1 teaspoon salt, plus more for the boiling water
- ½ teaspoon black pepper
- ¼ teaspoon garlic powder (optional, but my husband swears by it)
For the Toppings Bar

- 1 pound bacon, cooked until crispy and crumbled (use thick-cut for best texture)
- 2 cups shredded cheddar cheese (sharp or mild—both work)
- 1 cup sour cream
- 4 green onions, sliced thin
- ½ cup butter, softened (for extra pats on top)
- Salt and pepper, to taste
Optional Toppings
- ¼ cup chives, fresh or freeze-dried
- ½ cup shredded mozzarella (for extra stretchy cheese pull)
- ¼ cup ranch dressing (my kids love this)
- ¼ cup crispy fried onions (adds a great crunch)
Ingredient Tips: Look for potatoes that are firm and free of green spots. For the bacon, I prefer Wright Brand because it crisps up beautifully without burning. If you’re watching your salt intake, use low-sodium bacon and reduce the added salt in the potatoes. You can also swap the cream cheese for Greek yogurt for a tangier, lighter option.
Equipment Needed
You don’t need a professional kitchen to pull this off. Here’s what I use:
- Large stockpot (at least 6 quarts) for boiling the potatoes
- Potato ricer or masher (I prefer a ricer for the smoothest texture, but a good masher works too)
- Large mixing bowl for combining ingredients
- Skillet or frying pan for cooking the bacon
- Baking sheet lined with paper towels for draining bacon
- Serving bowls and platters for the toppings bar
- Measuring cups and spoons (I use OXO Good Grips—they’re durable and easy to clean)
If you don’t have a ricer, no worries. I’ve made these potatoes with a hand masher plenty of times, and they still turn out great. The texture is just a bit chunkier, which some people actually prefer. For the bacon, you can also bake it on a sheet pan at 400°F for 15-20 minutes—less mess, same crispy result.
Preparation Method
Let’s get cooking. This recipe comes together in about 45 minutes, and most of that is hands-off boiling time.
- Boil the potatoes. Place the peeled and quartered potatoes in a large stockpot. Cover them with cold water by about an inch. Add a generous tablespoon of salt to the water—this seasons the potatoes from the inside out. Bring to a boil over high heat, then reduce to a simmer. Cook for 15-20 minutes, or until a fork slides into the potatoes with no resistance. Don’t overcook them, or they’ll become waterlogged and gluey.
- Cook the bacon. While the potatoes boil, cook the bacon in a skillet over medium heat. I like to cut the bacon into small pieces before cooking—it’s easier to crumble later. Cook for 6-8 minutes, stirring occasionally, until the bacon is crispy and browned. Transfer to a paper towel-lined plate to drain. Set aside.
- Drain and dry the potatoes. Once the potatoes are tender, drain them in a colander. Here’s a trick I learned from a chef friend: return the potatoes to the pot and let them sit over low heat for 1-2 minutes, shaking occasionally. This dries out any excess moisture, which means fluffier potatoes. You’ll see steam rising—that’s a good sign.
- Mash the potatoes. If using a ricer, press the potatoes through in batches directly into a large mixing bowl. If using a masher, mash until smooth but don’t overwork them—you want creamy, not gummy. Add the softened butter, cream cheese, warm milk, salt, pepper, and garlic powder (if using). Stir gently until everything is combined. Taste and adjust seasoning as needed.
- Set up the toppings bar. Transfer the mashed potatoes to a large serving bowl. Arrange the toppings in separate bowls: crumbled bacon, shredded cheddar, sour cream, sliced green onions, and any optional toppings you’re using. Let everyone build their own bowl—it’s half the fun.
- Serve immediately. Mashed potatoes are best eaten fresh. Spoon a generous portion onto each plate, then let everyone pile on their favorites. The combination of creamy potatoes, salty bacon, and tangy sour cream is pure magic.
Cooking Tips & Techniques
I’ve made this recipe more times than I care to count, and I’ve learned a few things along the way. Here are my best tips for success:
- Don’t skip the drying step. I once rushed through this and ended up with watery potatoes. Taking that extra minute to let the steam escape makes a huge difference in texture.
- Warm the milk. Cold milk will cool down your potatoes and make them stiff. I microwave mine for 30 seconds before adding it. Simple, but it works.
- Use room-temperature butter and cream cheese. This helps them incorporate smoothly without lumps. If you forgot to take them out of the fridge, cut them into small cubes and let them sit for 10 minutes.
- Don’t overmix. Overworking the potatoes releases too much starch, and you’ll end up with a gluey mess. Stir just until combined, and stop.
- Cook the bacon until it’s really crispy. Soft bacon gets lost in the potatoes. You want that satisfying crunch to contrast with the creamy texture.
One time, I accidentally added too much milk and ended up with soupy potatoes. I saved it by stirring in a few tablespoons of instant potato flakes. It’s not ideal, but it works in a pinch. Learn from my mistakes and add the milk gradually.
Variations & Adaptations
This recipe is endlessly adaptable. Here are some of my favorite twists:
- Vegetarian Version: Skip the bacon and add roasted mushrooms or caramelized onions for a savory, umami flavor. My vegetarian friend swears by this.
- Loaded Baked Potato Style: Top with broccoli, extra cheese, and a dollop of Greek yogurt. It’s like a loaded baked potato in mashed form.
- Spicy Southwest: Add diced jalapeños, black beans, corn, and a sprinkle of chili powder. Top with salsa and avocado for a Tex-Mex twist.
- Cheesy Garlic: Mix in ½ cup of roasted garlic and an extra cup of shredded Parmesan. It’s rich, indulgent, and perfect for garlic lovers.
- Make It Lighter: Use Greek yogurt instead of sour cream, reduced-fat cheese, and turkey bacon. You’ll save calories without sacrificing flavor.
I once tried a version with truffle oil and fancy mushrooms for a dinner party. It was delicious, but honestly, the classic bacon and cheddar version is still my favorite. Sometimes simple is best.
Serving & Storage Suggestions
These mashed potatoes are best served warm, right after they’re made. Set up the toppings bar on the counter and let everyone dig in. For a complete meal, I like to pair it with a simple green salad or some roasted vegetables. It also goes great with grilled chicken or steak if you’re feeding a crowd.
Storage: Leftover mashed potatoes (without toppings) can be stored in an airtight container in the refrigerator for up to 4 days. Store the toppings separately—bacon in a sealed bag, cheese and sour cream in their original containers. The potatoes will thicken as they cool, but that’s normal.
Reheating: The best way to reheat is on the stovetop over low heat. Add a splash of milk and stir until warmed through. You can also microwave individual portions for 1-2 minutes, but the texture won’t be as creamy. For the bacon, reheat it in a dry skillet for 1-2 minutes to bring back the crunch.
Freezing: Mashed potatoes freeze beautifully. Spoon them into a freezer-safe bag or container, press out the air, and freeze for up to 3 months. Thaw overnight in the fridge, then reheat as directed. The flavor actually deepens after freezing—it’s one of those happy kitchen surprises.
Nutritional Information & Benefits
Per serving (about 1 cup of potatoes with 2 tablespoons each of bacon, cheese, and sour cream):
- Calories: 420
- Fat: 24g
- Carbohydrates: 38g
- Protein: 12g
- Fiber: 3g
- Sodium: 680mg
Potatoes get a bad rap, but they’re actually a great source of potassium, vitamin C, and fiber (especially if you leave the skin on). The bacon and cheese add protein and calcium, while the sour cream provides a dose of probiotics. This isn’t a health food, but it’s a balanced meal that can fit into a sensible diet.
Dietary Considerations: This recipe is naturally gluten-free. For a dairy-free version, use plant-based butter, milk, and cheese, and skip the sour cream. For a lower-carb option, swap half the potatoes for cauliflower—just boil and mash them together.
Conclusion
This loaded mashed potato bar started as a kitchen accident, but it’s become one of my most-requested recipes. It’s the kind of meal that brings people together—everyone gets to customize their bowl, and there’s something for even the pickiest eater. The creamy potatoes, the salty bacon, the tangy sour cream—it’s comfort food at its finest.
I’d love to hear how this recipe turns out for you. Did your kids go crazy for it? Did you add any fun toppings? Leave a comment below and share your creation. And if you’re looking for more family-friendly meals, check out our easy weeknight dinner recipes for more inspiration. Happy cooking!
Frequently Asked Questions
Can I make this recipe ahead of time?
Absolutely. You can boil and mash the potatoes up to 2 days in advance. Store them in the fridge, then reheat on the stovetop with a splash of milk. The toppings can also be prepped ahead—just keep the bacon crispy by storing it in a separate container.
What’s the best potato for mashed potatoes?
Russet potatoes are my go-to because they’re starchy and fluffy. Yukon Golds also work well and add a buttery flavor. Avoid waxy potatoes like red or new potatoes—they’ll turn out gluey.
Can I use instant mashed potatoes?
You can, but the texture won’t be the same. If you’re in a pinch, I recommend doctoring them up with extra butter, cream cheese, and milk to improve the flavor. But honestly, homemade is worth the extra 15 minutes.
How do I keep the mashed potatoes warm for a party?
Transfer them to a slow cooker set on “warm.” Stir occasionally and add a splash of milk if they start to dry out. This is a lifesaver for holiday dinners or potlucks.
Can I freeze the leftovers?
Yes! Mashed potatoes freeze really well. Portion them into freezer-safe bags, press out the air, and freeze for up to 3 months. Thaw in the fridge overnight and reheat on the stovetop. The flavor is just as good as fresh.
Pin This Recipe!
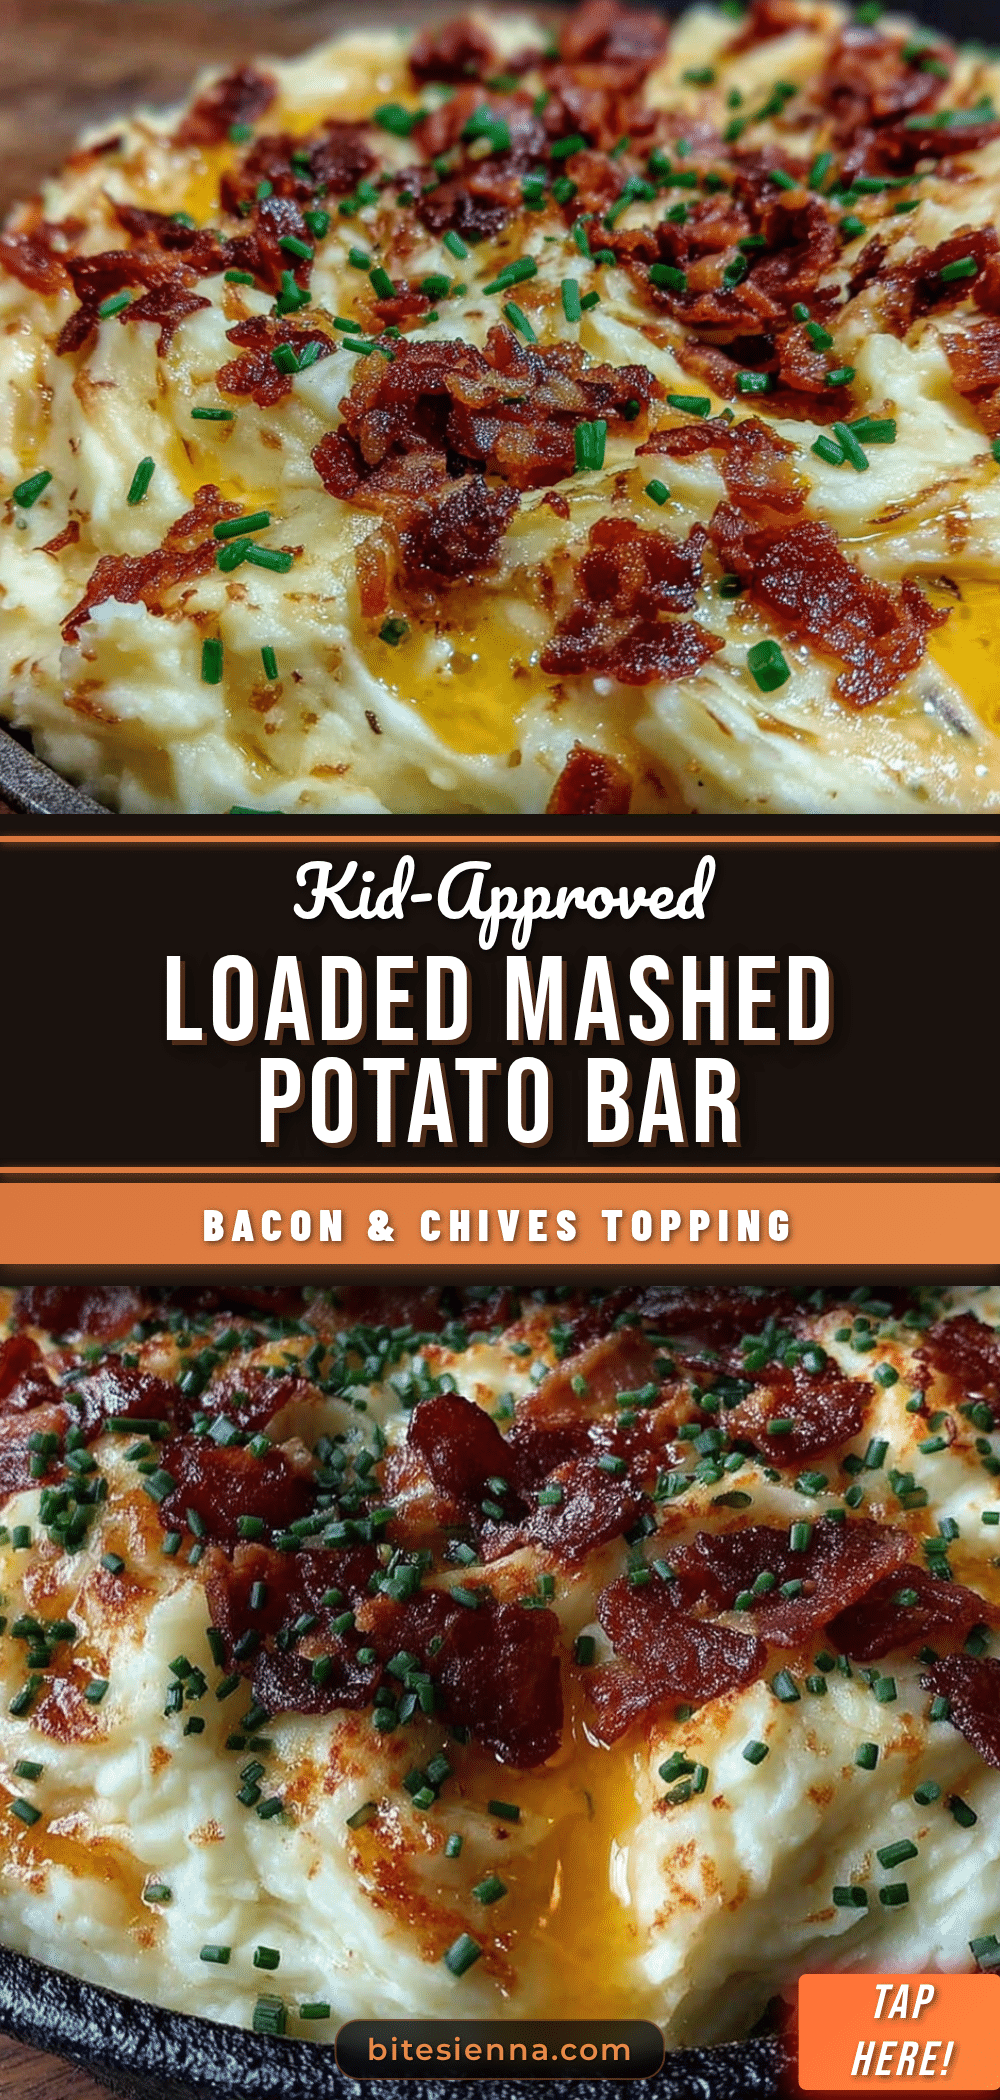
Kid-Approved Loaded Mashed Potato Bar with Bacon

A fun and customizable loaded mashed potato bar with creamy potatoes, crispy bacon, and all your favorite toppings. Perfect for picky eaters and budget-friendly family dinners.
- Prep Time: 15 minutes
- Cook Time: 30 minutes
- Total Time: 45 minutes
- Yield: 8 servings 1x
- Category: Main Course
- Cuisine: American
Ingredients
- 5 pounds russet potatoes, peeled and quartered
- 1 cup whole milk, warmed
- ½ cup unsalted butter, softened
- 4 ounces cream cheese, softened
- 1 teaspoon salt, plus more for boiling water
- ½ teaspoon black pepper
- ¼ teaspoon garlic powder (optional)
- 1 pound bacon, cooked until crispy and crumbled
- 2 cups shredded cheddar cheese
- 1 cup sour cream
- 4 green onions, sliced thin
- ½ cup butter, softened (for extra pats on top)
- Salt and pepper, to taste
- ¼ cup chives (optional)
- ½ cup shredded mozzarella (optional)
- ¼ cup ranch dressing (optional)
- ¼ cup crispy fried onions (optional)
Instructions
- Boil the potatoes: Place peeled and quartered potatoes in a large stockpot. Cover with cold water by about an inch. Add a generous tablespoon of salt. Bring to a boil over high heat, then reduce to a simmer. Cook for 15-20 minutes, or until a fork slides in with no resistance.
- Cook the bacon: While potatoes boil, cook bacon in a skillet over medium heat. Cut bacon into small pieces before cooking. Cook for 6-8 minutes, stirring occasionally, until crispy. Transfer to a paper towel-lined plate to drain.
- Drain and dry the potatoes: Drain potatoes in a colander. Return to the pot and let sit over low heat for 1-2 minutes, shaking occasionally, to dry out excess moisture.
- Mash the potatoes: Press potatoes through a ricer into a large mixing bowl, or mash with a masher until smooth. Add softened butter, cream cheese, warm milk, salt, pepper, and garlic powder (if using). Stir gently until combined. Taste and adjust seasoning.
- Set up the toppings bar: Transfer mashed potatoes to a large serving bowl. Arrange toppings in separate bowls: crumbled bacon, shredded cheddar, sour cream, sliced green onions, and any optional toppings.
- Serve immediately: Spoon a generous portion onto each plate and let everyone add their favorite toppings.
Notes
For fluffier potatoes, don’t skip the drying step after draining. Warm the milk before adding to prevent cooling the potatoes. Use room-temperature butter and cream cheese for smooth incorporation. Don’t overmix to avoid gluey texture. Cook bacon until very crispy for best contrast. Leftover mashed potatoes (without toppings) can be stored in the fridge for up to 4 days or frozen for up to 3 months.
Nutrition
- Serving Size: 1 cup of potatoes wi
- Calories: 420
- Sugar: 3
- Sodium: 680
- Fat: 24
- Saturated Fat: 12
- Carbohydrates: 38
- Fiber: 3
- Protein: 12
Keywords: loaded mashed potatoes, bacon, potato bar, kid-friendly, easy dinner, comfort food, family meal


