I was elbow-deep in a sink full of soapy water, scrubbing at a baking sheet that had seen better days, when my accountant—yes, my accountant—started talking about sugar cookies. It was the Tuesday before Thanksgiving, and I’d called him in a mild panic about quarterly taxes, and somehow, between discussing deductions and depreciation, he mentioned he’d just finished decorating a batch of cookies for his daughter’s classroom party. I froze, dish sponge in hand. This was the same man who once told me to “just use the standard deduction and move on.” But now he was describing royal icing consistency like a pastry chef, and I was genuinely caught off guard.
He told me the trick was using meringue powder instead of egg whites—less fuss, way more forgiving, and the icing dries with that perfect, glossy finish. He also said the cookies themselves had to be light, not dense like a rock you could throw through a window. I’d had plenty of dense sugar cookies in my day, the kind that taste more like flour and regret than butter and vanilla. But his version? It was almost pillowy, with a delicate crumb that held up to icing without crumbling apart. I scribbled his notes on the back of an old envelope, right next to a reminder to file my estimated payments.
Honestly, I wasn’t expecting to get a cookie recipe out of that phone call. I was expecting a lecture about receipts. But that’s the thing about good recipes—they show up when you least expect them, passed along by the most unlikely people. I’ve tweaked his method over the years, swapping in a little almond extract for warmth and cutting the sugar back just enough so the icing can shine without everything tasting like a sugar bomb. These Light & Festive Thanksgiving Sugar Cookies with Royal Icing are the result. They’re the cookie I now bring to every Friendsgiving, the one that gets asked for by name. And I owe it all to a guy who files my taxes. Maybe you’ve had a moment like that—where the last person you’d expect hands you something you didn’t know you were looking for.
Why You’ll Love This Recipe
These aren’t just any sugar cookies. They’re the kind that make you pause after the first bite and think, “Wait, why don’t I make these more often?” I’ve tested this recipe at least a dozen times—through sticky summer humidity, dry winter air, and everything in between—and it holds up every single time. Here’s why it’s earned a permanent spot in my Thanksgiving rotation:
- Quick & Easy: The dough comes together in under 15 minutes, and the chilling time is just an hour. You can easily prep it the night before and bake fresh the day you plan to decorate.
- Simple Ingredients: You probably have butter, sugar, flour, and vanilla in your kitchen right now. No trips to a specialty baking store required.
- Perfect for Thanksgiving: These cookies are light enough to enjoy after a heavy turkey dinner, but festive enough to steal the show on the dessert table. They’re great for classroom parties, Friendsgiving gatherings, or a quiet afternoon decorating with your kids.
- Crowd-Pleaser: I’ve brought these to events where half the room claimed they “don’t like sugar cookies.” Every single person changed their tune after one bite. The texture is soft but sturdy, and the almond-vanilla flavor is subtle enough to win over skeptics.
- Unbelievably Delicious: The secret is in the creaming method—really beating the butter and sugar until it’s light and fluffy, which creates that tender crumb. And the royal icing? It dries hard enough to stack the cookies for gifting, but still cracks nicely when you bite into it.
This recipe isn’t just good—it’s the kind that makes you close your eyes after the first bite. It’s comfort food reimagined: lighter, more balanced, but with the same soul-soothing satisfaction you want from a holiday cookie. Perfect for impressing guests without stress, or turning a simple baking afternoon into something memorable.
What Ingredients You Will Need
This recipe uses simple, wholesome ingredients to deliver a soft, flavorful cookie and a glossy, stable icing. Most of these are pantry staples, but I’ve included a few notes to help you pick the best options for the best results.
For the Sugar Cookies
- Unsalted butter, softened to room temperature (1 cup / 226g) — I prefer using Kerrygold for its rich flavor, but any good-quality unsalted butter works. Make sure it’s truly softened, not melted, or the cookies will spread too much.
- Granulated sugar (1 cup / 200g) — Regular white sugar gives the cookies a clean sweetness without making them heavy. Avoid using superfine or powdered sugar here.
- Large egg, room temperature (1) — Bring it to room temp by setting it in warm water for 5 minutes if you forgot to take it out earlier.
- Pure vanilla extract (1 teaspoon) — Use real vanilla, not imitation. It makes a noticeable difference in the depth of flavor.
- Almond extract (½ teaspoon) — This is my little twist. It adds a warm, nutty note that pairs beautifully with vanilla. Leave it out if you prefer a straight vanilla cookie, but I really recommend trying it.
- All-purpose flour (2 ½ cups / 312g) — Spoon and level your flour for accuracy. Scooping directly from the bag can pack in too much flour and make the cookies dry.
- Baking powder (1 teaspoon) — This gives the cookies a gentle lift, keeping them from being too dense.
- Salt (½ teaspoon) — Fine sea salt is best. It balances the sweetness and enhances the butter flavor.
For the Royal Icing
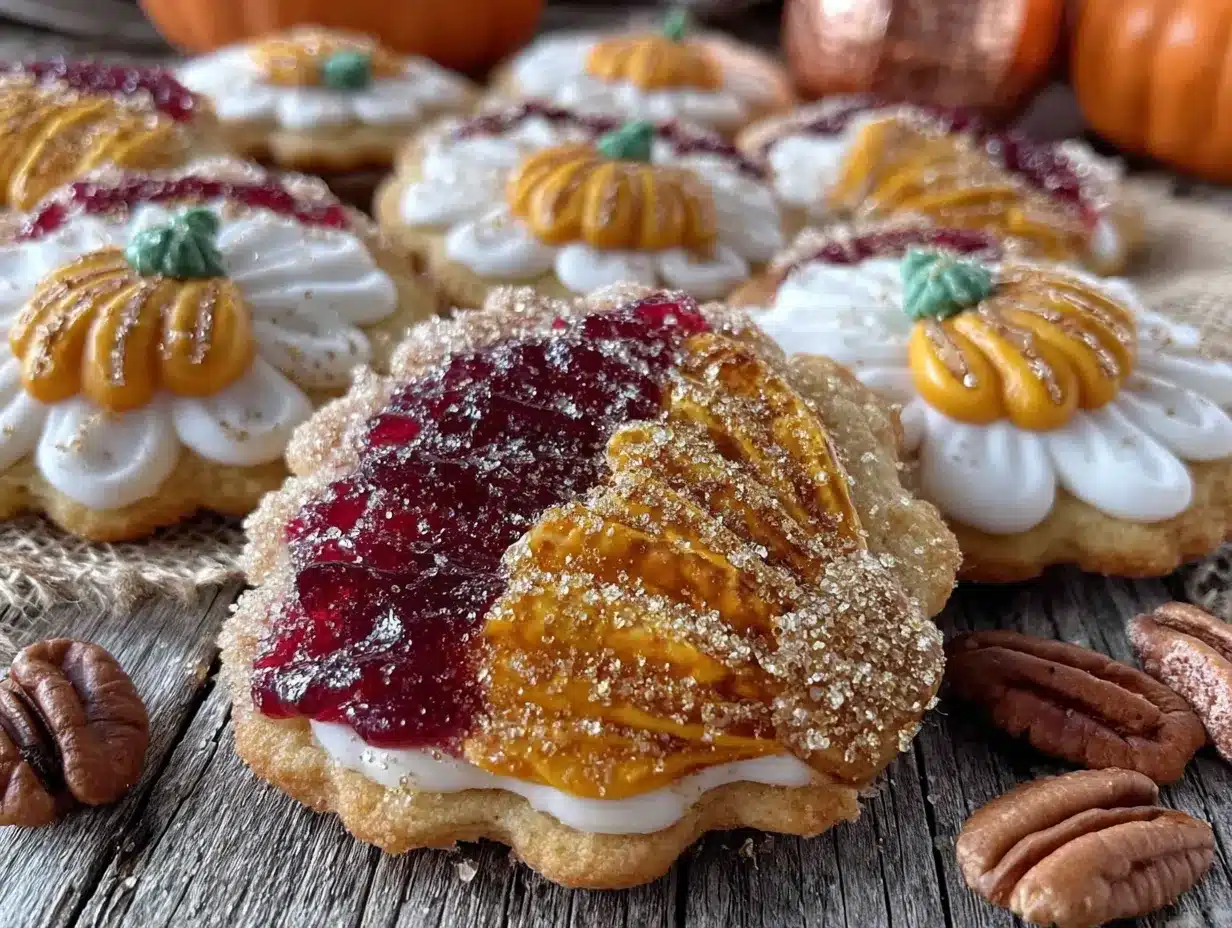
- Meringue powder (3 tablespoons) — I use Wilton’s meringue powder because it’s reliable and widely available. It stabilizes the icing and gives it that smooth, hard finish.
- Powdered sugar (4 cups / 480g) — Sift it before measuring to avoid lumps. Trust me on this one—lumpy icing is a pain to pipe.
- Warm water (about 6 tablespoons, plus more as needed) — Start with less and add slowly. The consistency should be thick but flowy, like glue. You’ll adjust it as you go.
- Clear vanilla extract (½ teaspoon) — Clear vanilla keeps the icing white, which is helpful if you’re making bright colors. Regular vanilla will tint it slightly beige.
- Gel food coloring (optional) — I prefer Americolor or Wilton gel colors. They’re concentrated, so a little goes a long way, and they don’t thin out the icing like liquid coloring does.
Equipment Needed
You don’t need a professional bakery setup to make these cookies, but having the right tools makes the process smoother and more enjoyable. Here’s what I use:
- Stand mixer or hand mixer — A stand mixer with the paddle attachment is ideal for creaming the butter and sugar, but a hand mixer works just fine. You’ll need it for the royal icing too, since whipping by hand takes forever.
- Rolling pin — I use a standard wooden rolling pin, but a French-style tapered pin gives you more control. If you don’t have one, a wine bottle works in a pinch (though it’s not ideal).
- Cookie cutters — Thanksgiving-themed cutters are fun, but simple circles, leaves, or acorn shapes are classic. I got a set of fall leaf cutters from a craft store for under $10.
- Baking sheets — Light-colored, rimmed baking sheets are best. Dark sheets can cause the cookies to brown too quickly on the bottom.
- Parchment paper or silicone baking mats — Silpat mats are non-stick and reusable, but parchment paper is cheaper and works just as well. Avoid wax paper—it will melt in the oven.
- Piping bags or squeeze bottles — For the royal icing, I prefer disposable piping bags with a #2 or #3 round tip. Squeeze bottles are great for flooding larger areas, but they can be harder to control for fine details.
- Cooling rack — A wire rack is essential for cooling the cookies evenly and letting the icing set without sticking to a surface.
I’ve also learned the hard way that a kitchen scale is a game-changer for baking. It’s more accurate than measuring cups, and it means fewer dishes to wash. If you bake often, it’s worth the investment—I picked mine up for about $15, and it’s saved me from countless dry cookie disasters.
Preparation Method
- Cream the butter and sugar. In the bowl of your stand mixer fitted with the paddle attachment, beat the softened butter and granulated sugar on medium speed until light and fluffy, about 3 to 4 minutes. Scrape down the sides of the bowl halfway through. You’re looking for a pale, airy mixture that looks almost like frosting. Don’t rush this step—proper creaming is what gives the cookies their tender texture.
- Add the egg and extracts. Beat in the egg, vanilla extract, and almond extract on medium-low speed until fully combined, about 30 seconds. The mixture might look slightly curdled at this point—that’s normal. Just scrape the bowl once more to make sure everything is evenly mixed.
- Whisk the dry ingredients. In a separate medium bowl, whisk together the all-purpose flour, baking powder, and salt. This ensures the leavening agent is evenly distributed, so you don’t end up with one cookie that rises like a soufflé and another that stays flat.
- Combine wet and dry. With the mixer on low speed, gradually add the flour mixture to the butter mixture, about ½ cup at a time. Mix just until the dough comes together. You’ll know it’s ready when it starts to clump around the paddle but still looks a little shaggy. Overmixing at this stage will make the cookies tough, so stop as soon as you see no more streaks of flour.
- Chill the dough. Turn the dough out onto a lightly floured surface and divide it in half. Flatten each half into a disk about 1 inch thick, wrap tightly in plastic wrap, and refrigerate for at least 1 hour. Chilling is non-negotiable here—it firms up the butter, which prevents the cookies from spreading too much in the oven. If you’re in a hurry, you can pop the disks in the freezer for 30 minutes, but don’t skip it entirely.
- Preheat and prep. When you’re ready to bake, preheat your oven to 350°F (175°C). Line two baking sheets with parchment paper or silicone mats.
- Roll and cut. On a lightly floured surface, roll one disk of dough to about ¼-inch thickness. I like to dust my rolling pin with a little flour too, just to prevent sticking. Use your cookie cutters to cut out shapes, and transfer them to the prepared baking sheets, spacing them about 1 inch apart. Gather the scraps, re-roll them once, and cut more shapes. Try not to re-roll the dough more than twice, or the cookies can get tough.
- Bake. Bake for 8 to 10 minutes, or until the edges are just barely set and the bottoms are lightly golden. The centers should look pale and slightly soft—they’ll continue to set as they cool. Overbaking is the fastest way to dry out sugar cookies, so keep a close eye on them. I usually start checking at the 7-minute mark.
- Cool completely. Let the cookies cool on the baking sheet for 5 minutes, then transfer them to a wire rack to cool completely. Do not attempt to ice them while they’re still warm, or the royal icing will melt into a sticky mess. Patience, my friend.
- Make the royal icing. In the bowl of your stand mixer fitted with the whisk attachment, combine the meringue powder and powdered sugar. Add 6 tablespoons of warm water and the clear vanilla extract. Mix on low speed until the sugar is moistened, then increase to medium-high speed and whip for 5 to 7 minutes, until the icing is thick, glossy, and forms stiff peaks. If it’s too thick, add water 1 teaspoon at a time. If it’s too thin, add a little more powdered sugar. The consistency should be like thick glue—it should hold its shape but still flow slowly when you lift the whisk.
- Color and bag the icing. Divide the icing into separate bowls if you’re using multiple colors. Add gel food coloring a tiny drop at a time and stir until you reach your desired shade. Transfer each color to a piping bag fitted with a #2 or #3 round tip, or use a squeeze bottle for flooding. If you’re outlining and flooding, keep a small portion of thicker icing for the outlines and thin the rest with a few drops of water for flooding.
- Decorate. Outline each cookie with the thicker icing, then fill in the center with the thinner flooding icing. Use a toothpick to spread the icing into the corners and pop any air bubbles. Let the cookies dry at room temperature for at least 4 hours, or overnight for best results. The icing should be completely hard to the touch before you stack or store them.
Cooking Tips & Techniques
I’ve messed up this recipe more times than I’d like to admit, and each mistake taught me something worth passing along. Here are the biggest lessons I’ve learned:
Don’t skip the chill. I once thought I could get away with a 15-minute chill. The cookies spread into flat, greasy blobs that looked more like pancakes than sugar cookies. The butter needs time to firm up again after being creamed, so give it the full hour. Your cookies will hold their shape beautifully.
Rotate your baking sheets halfway through. Most ovens have hot spots, and the back corner tends to bake faster than the front. Halfway through the baking time, swap the sheets between racks and rotate them 180 degrees. This ensures even browning across all the cookies.
Watch your icing consistency like a hawk. Royal icing is finicky. If it’s too thick, it won’t spread smoothly. If it’s too thin, it will run right off the cookie. The perfect consistency for flooding is when a ribbon of icing drizzled back into the bowl disappears in about 10 seconds. Test it on a spare cookie first before committing to the whole batch.
Work in small batches. Keep the dough you’re not using in the fridge. If it warms up, it becomes sticky and hard to roll. I usually roll out one disk at a time and keep the other chilled until I’m ready.
Use a damp paper towel under your rolling surface. Place a damp kitchen towel under your cutting board or pastry mat to keep it from sliding around. It’s a small trick, but it makes rolling so much less frustrating.
One time, I forgot to add the baking powder. The cookies came out dense and flat, and I spent twenty minutes trying to figure out what went wrong. Now I double-check my dry ingredients before I start mixing. It sounds obvious, but when you’re in the middle of baking, it’s easy to overlook the simple stuff.
Variations & Adaptations
This recipe is flexible enough to adapt to different tastes and dietary needs. Here are a few ways I’ve tweaked it over the years:
- Gluten-Free Option: Substitute the all-purpose flour with a 1:1 gluten-free baking flour blend that contains xanthan gum. I’ve had good results with Bob’s Red Mill 1-to-1 Baking Flour. The texture will be slightly more tender, but they still hold up well for decorating.
- Dairy-Free Version: Use a high-quality vegan butter stick (not spreadable margarine) in place of the unsalted butter. Miyoko’s Creamery or Earth Balance Buttery Sticks work best. Make sure it’s fully softened before creaming.
- Citrus Twist: Add 1 teaspoon of lemon or orange zest to the dough along with the extracts. It brightens the flavor and pairs beautifully with the almond extract. I did this for a spring batch once, and it was a hit.
- Spiced Version: Add 1 teaspoon of ground cinnamon and ½ teaspoon of ground nutmeg to the flour mixture for a warm, autumnal flavor. It makes the cookies taste like a softer version of a snickerdoodle.
- No-Icing Option: If you don’t want to deal with royal icing, you can sprinkle the cookies with coarse sanding sugar or turbinado sugar before baking. They’ll still look festive and have a nice crunch on the edges.
I’ve also experimented with adding a tablespoon of cocoa powder to half the dough for a chocolate version. It’s not traditional for Thanksgiving, but it’s a fun twist if you’re baking for a crowd with mixed preferences.
Serving & Storage Suggestions
These cookies are best served at room temperature, once the royal icing has fully set. I usually let them dry on the counter overnight, then arrange them on a platter or tiered stand for serving. They look beautiful alongside a cup of hot apple cider or a warm mug of spiced tea.
If you’re gifting them, layer the cookies between sheets of parchment paper in a decorative tin or box. They stack well without sticking as long as the icing is completely dry. I’ve mailed these cookies to family across the country with no issues—just pack them snugly so they don’t shift during transit.
Storage: Place the decorated cookies in an airtight container at room temperature. They’ll stay fresh for up to 2 weeks. Do not refrigerate them, as the moisture in the fridge can soften the icing and make the cookies sticky. If you live in a humid climate, add a silica gel packet to the container to absorb excess moisture.
Freezing: You can freeze the undecorated baked cookies for up to 3 months. Wrap them tightly in plastic wrap and then foil, or store them in a freezer-safe bag. Thaw at room temperature before decorating. I’ve also frozen the raw dough disks for up to 2 months—just thaw them in the fridge overnight before rolling and cutting.
Reheating: These cookies are meant to be eaten at room temperature, so no reheating is needed. If you prefer a slightly warm cookie, you can pop an undecorated one in a 300°F (150°C) oven for 3 to 4 minutes. But honestly, they’re best as is.
The flavor actually improves after a day or two. The almond and vanilla notes meld together, and the texture becomes even more tender. So don’t stress if you need to bake them a couple of days ahead of your gathering.
Nutritional Information & Benefits
Here’s the thing—sugar cookies aren’t health food, and I’m not going to pretend they are. But these are made with real ingredients, and there’s something to be said for knowing exactly what’s in your treats. No preservatives, no artificial flavors, just butter, sugar, flour, and a little love.
Per cookie (based on a 2-inch leaf shape, with royal icing):
- Calories: ~120
- Total Fat: 5g
- Saturated Fat: 3g
- Carbohydrates: 18g
- Sugar: 12g
- Protein: 1g
These values are estimates and will vary depending on the size of your cookies and how much icing you use. If you’re watching your sugar intake, you can reduce the granulated sugar in the cookie dough to ¾ cup without affecting the texture too much. The royal icing is harder to adjust, since the powdered sugar is what gives it structure.
On the plus side, this recipe is free of nuts (if you omit the almond extract), and it can easily be made gluten-free or dairy-free with the substitutions I mentioned earlier. It’s also a great option for anyone who wants a lighter dessert after a heavy Thanksgiving meal—these cookies are satisfying without being overly rich.
I personally love that I can make a batch of these on a Sunday afternoon and have homemade treats ready for the whole week. It feels like a small act of care, both for myself and for the people I share them with.
Conclusion
These Light & Festive Thanksgiving Sugar Cookies with Royal Icing are more than just a pretty dessert—they’re a reminder that the best recipes often come from the most unexpected places. Whether you’re making them for a holiday party, a quiet afternoon with your kids, or just because you want something beautiful to look at, they deliver on every level. They’re soft, buttery, perfectly sweet, and endlessly customizable.
I hope you give them a try and make them your own. Maybe you’ll add a pinch of cinnamon, or swap the almond extract for orange zest, or decorate them with colors that remind you of your grandmother’s kitchen. That’s the beauty of baking—it leaves room for your own story to unfold.
If you make these cookies, I’d love to hear about it. Drop a comment below and tell me how they turned out, or share a photo of your decorated creations. And if you have an unexpected recipe source of your own, I’d love to hear that story too. Happy baking, and happy Thanksgiving!
Frequently Asked Questions
Can I make the dough ahead of time?
Yes! You can refrigerate the dough disks for up to 3 days, or freeze them for up to 2 months. Just wrap them tightly in plastic wrap and then foil. Thaw frozen dough in the fridge overnight before rolling.
Why did my cookies spread too much?
This usually happens if the dough wasn’t chilled long enough, or if the butter was too soft when you creamed it. Make sure your butter is softened but still cool to the touch, and always chill the dough for at least 1 hour.
Can I use liquid food coloring instead of gel?
You can, but liquid coloring will thin out your royal icing, and you’ll need to add more powdered sugar to compensate. Gel colors are much more concentrated and won’t affect the consistency as much. I really recommend sticking with gel.
How do I get the icing to dry faster?
Royal icing dries best in a cool, dry environment with good airflow. You can set a fan nearby to circulate the air, but avoid placing the cookies in direct sunlight or near a heat source, as that can cause the icing to crack.
Can I skip the almond extract?
Absolutely. If you don’t have it on hand or prefer a straight vanilla flavor, just replace it with an additional ½ teaspoon of vanilla extract. The cookies will still be delicious.
Pin This Recipe!
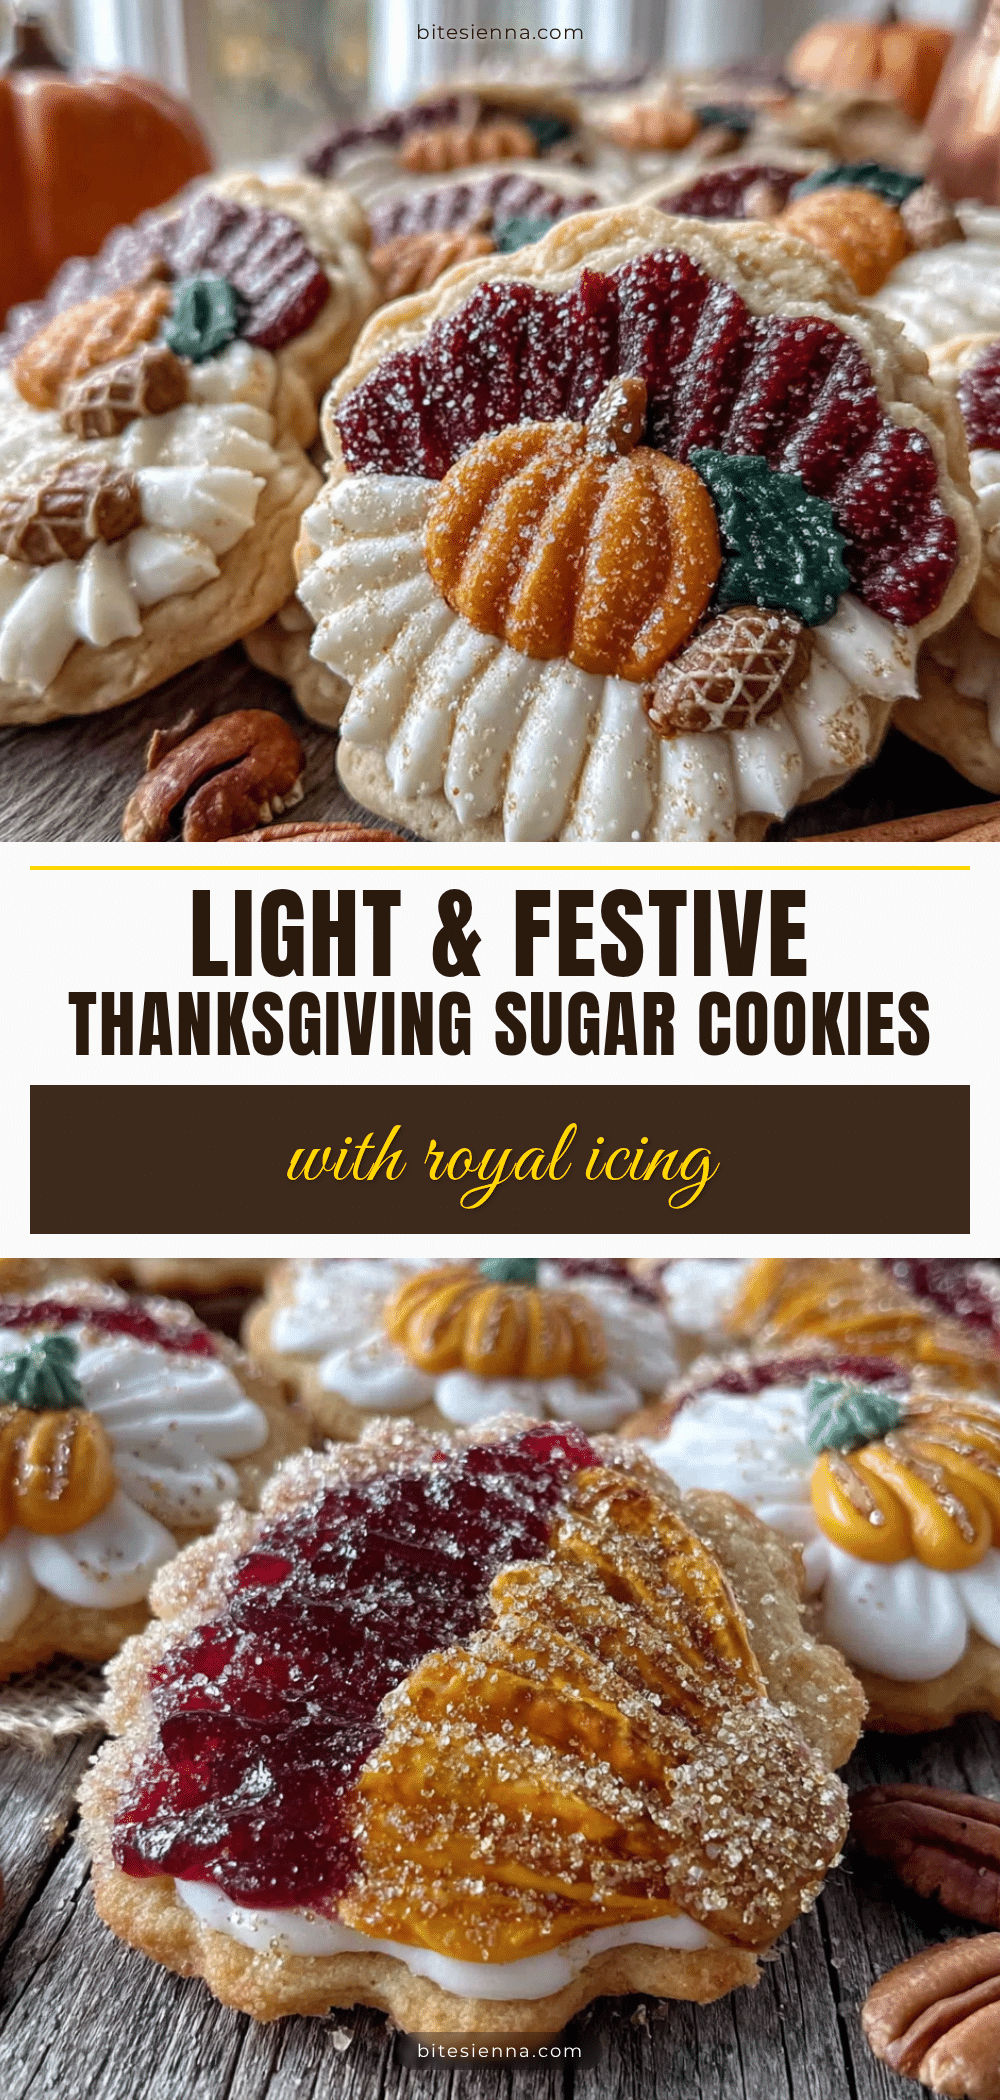
Light & Festive Thanksgiving Sugar Cookies with Royal Icing

These soft, buttery sugar cookies are topped with a glossy royal icing and are perfect for Thanksgiving celebrations. The recipe is quick, easy, and uses simple ingredients for a crowd-pleasing dessert.
- Prep Time: 15 minutes
- Cook Time: 10 minutes
- Total Time: 1 hour 25 minutes (includes 1 hour chilling)
- Yield: 24 servings 1x
- Category: Dessert
- Cuisine: American
Ingredients
- 1 cup (226g) unsalted butter, softened to room temperature
- 1 cup (200g) granulated sugar
- 1 large egg, room temperature
- 1 teaspoon pure vanilla extract
- ½ teaspoon almond extract
- 2 ½ cups (312g) all-purpose flour
- 1 teaspoon baking powder
- ½ teaspoon fine sea salt
- 3 tablespoons meringue powder
- 4 cups (480g) powdered sugar, sifted
- 6 tablespoons warm water (plus more as needed)
- ½ teaspoon clear vanilla extract
- Gel food coloring (optional)
Instructions
- Cream the butter and sugar. In the bowl of a stand mixer fitted with the paddle attachment, beat the softened butter and granulated sugar on medium speed until light and fluffy, about 3 to 4 minutes. Scrape down the sides of the bowl halfway through.
- Add the egg and extracts. Beat in the egg, vanilla extract, and almond extract on medium-low speed until fully combined, about 30 seconds. Scrape the bowl once more.
- Whisk the dry ingredients. In a separate medium bowl, whisk together the all-purpose flour, baking powder, and salt.
- Combine wet and dry. With the mixer on low speed, gradually add the flour mixture to the butter mixture, about ½ cup at a time. Mix just until the dough comes together and no streaks of flour remain.
- Chill the dough. Turn the dough out onto a lightly floured surface and divide it in half. Flatten each half into a disk about 1 inch thick, wrap tightly in plastic wrap, and refrigerate for at least 1 hour.
- Preheat and prep. When ready to bake, preheat oven to 350°F (175°C). Line two baking sheets with parchment paper or silicone mats.
- Roll and cut. On a lightly floured surface, roll one disk of dough to about ¼-inch thickness. Use cookie cutters to cut out shapes and transfer to prepared baking sheets, spacing about 1 inch apart. Gather scraps, re-roll once, and cut more shapes.
- Bake. Bake for 8 to 10 minutes, until edges are just set and bottoms are lightly golden. Centers should look pale and slightly soft. Cool on baking sheet for 5 minutes, then transfer to a wire rack to cool completely.
- Make the royal icing. In the bowl of a stand mixer fitted with the whisk attachment, combine meringue powder and powdered sugar. Add 6 tablespoons warm water and clear vanilla extract. Mix on low until moistened, then increase to medium-high and whip for 5 to 7 minutes until thick, glossy, and forms stiff peaks. Adjust consistency with water or powdered sugar as needed.
- Color and bag the icing. Divide icing into bowls and add gel food coloring a tiny drop at a time. Transfer to piping bags fitted with #2 or #3 round tips, or use squeeze bottles. Keep a portion thicker for outlines and thin the rest with a few drops of water for flooding.
- Decorate. Outline each cookie with thicker icing, then fill in with thinner flooding icing. Use a toothpick to spread and pop air bubbles. Let dry at room temperature for at least 4 hours or overnight.
Notes
Chill the dough for at least 1 hour to prevent spreading. Rotate baking sheets halfway through for even browning. Royal icing should be thick but flowy; test on a spare cookie first. Cookies can be stored in an airtight container at room temperature for up to 2 weeks. Undecorated cookies can be frozen for up to 3 months.
Nutrition
- Serving Size: 1 cookie (2-inch lea
- Calories: 120
- Sugar: 12
- Sodium: 50
- Fat: 5
- Saturated Fat: 3
- Carbohydrates: 18
- Protein: 1
Keywords: Thanksgiving sugar cookies, royal icing, soft sugar cookies, holiday cookies, decorated cookies


