It was 11:47 PM on a random Tuesday, and I had a very specific craving for something sweet, creamy, and spiced. I didn’t have the full block of cream cheese or the heavy cream a normal cheesecake recipe would call for, but I had a new jar of Biscoff spread, a tub of Greek yogurt, and the wild idea that maybe, just maybe, I could make this work without the usual guilt. I stood there in the dim kitchen light, staring at the pantry like it held the answers to the universe—or at least to my late-night snack problem.
The thing is, I’ve made a lot of cheesecake in my day. I’ve done the classic New York style, the no-bake versions, and even a few disastrous attempts at vegan cheesecake that ended up in the trash. But this was different. I wasn’t trying to impress anyone. I wasn’t testing a recipe for the blog. I was just a tired person who wanted a Biscoff fix without blowing her whole week of eating well. So I grabbed the ingredients I had and started throwing things together, fully expecting to be disappointed.
Honestly, I didn’t even measure properly at first. I just dumped Greek yogurt into a bowl, added some cream cheese, and stirred. Then I crushed some Biscoff cookies for the crust because, let’s face it, that’s the best part anyway. The whole thing came together in about fifteen minutes of actual work, and when I pulled it out of the fridge the next morning, I nearly cried. It was creamy, tangy, sweet, and just the right amount of indulgent. I’ve made it at least once a week ever since, and now I’m sharing it with you because maybe you’ve been there—standing in your kitchen at midnight, craving something that feels both naughty and nice.
Why You’ll Love This Recipe
These Lighter Biscoff Cheesecake Bars aren’t just another healthy dessert compromise. They’re genuinely delicious, and I’ve tested them enough times to know they hold up against the full-fat, full-sugar versions. Here’s why they’ve become my go-to:
- Quick & Easy: You only need about 20 minutes of active prep time. The fridge does the rest of the work. Perfect for those last-minute cravings or surprise guests.
- Simple Ingredients: Eight ingredients, most of which you probably already have. No fancy grocery store trips required. I’ve even made this with store-brand cream cheese and it turned out great.
- Perfect for Meal Prep: These bars keep beautifully in the fridge for up to a week. I like to make a batch on Sunday and have a little treat waiting for me after dinner every night.
- Surprisingly Light: Greek yogurt replaces most of the heavy cream and extra sugar, cutting the calories without sacrificing that luscious, creamy texture. You get all the satisfaction with none of the food coma.
- Crowd-Pleaser: I’ve served these at parties, potlucks, and family dinners. Every single time, someone asks for the recipe. They can’t believe it’s a lighter version.
What makes these bars different from every other Biscoff dessert out there is the texture. The Greek yogurt adds a subtle tang that cuts through the sweetness of the Biscoff spread, making each bite feel balanced rather than cloying. It’s not just another version—it’s the version I keep coming back to because it hits that sweet spot between healthy and indulgent without making you feel like you’re missing out.
This is the kind of dessert that makes you close your eyes after the first bite. It’s comfort food reimagined—healthier, faster, but with the same soul-soothing satisfaction. Perfect for impressing guests without stress, or turning a simple Tuesday night into something special.
What Ingredients You Will Need
This recipe uses simple, wholesome ingredients to deliver bold flavor and satisfying texture without the fuss. Most of these are pantry staples or easy to find at any grocery store.
- Biscoff Cookies (200g / about 2 cups crushed) – These form the base of your crust. I prefer the original flavor, but the crunchy version works too. You’ll need about one full package.
- Unsalted Butter (4 tablespoons / 56g, melted) – Binds the crust together. I use salted butter in a pinch and just skip adding any extra salt. For a dairy-free option, coconut oil works beautifully here.
- Reduced-Fat Cream Cheese (16 oz / 450g, softened) – The backbone of the filling. Make sure it’s at room temperature for a smooth, lump-free texture. I’ve used the Philadelphia brand for years and it never fails.
- Plain Greek Yogurt (1 cup / 245g) – This is the magic ingredient that lightens everything up. Use full-fat Greek yogurt for the creamiest results, or go with 2% if you’re watching calories. Do not use nonfat—it gets too watery.
- Granulated Sugar (½ cup / 100g) – Just enough to sweeten the filling without overpowering the Biscoff flavor. You can reduce this to ⅓ cup if you prefer a less sweet dessert.
- Large Eggs (2, room temperature) – Help set the cheesecake and give it structure. Let them sit on the counter for 30 minutes before using.
- Vanilla Extract (1 teaspoon) – Enhances the overall flavor. Pure vanilla extract is best, but imitation works in a pinch.
- Biscoff Spread (⅓ cup / 80g, melted) – Swirled into the filling for that signature spiced cookie flavor. I use the smooth version for easier swirling. Look for it in the peanut butter aisle or near the cookies.
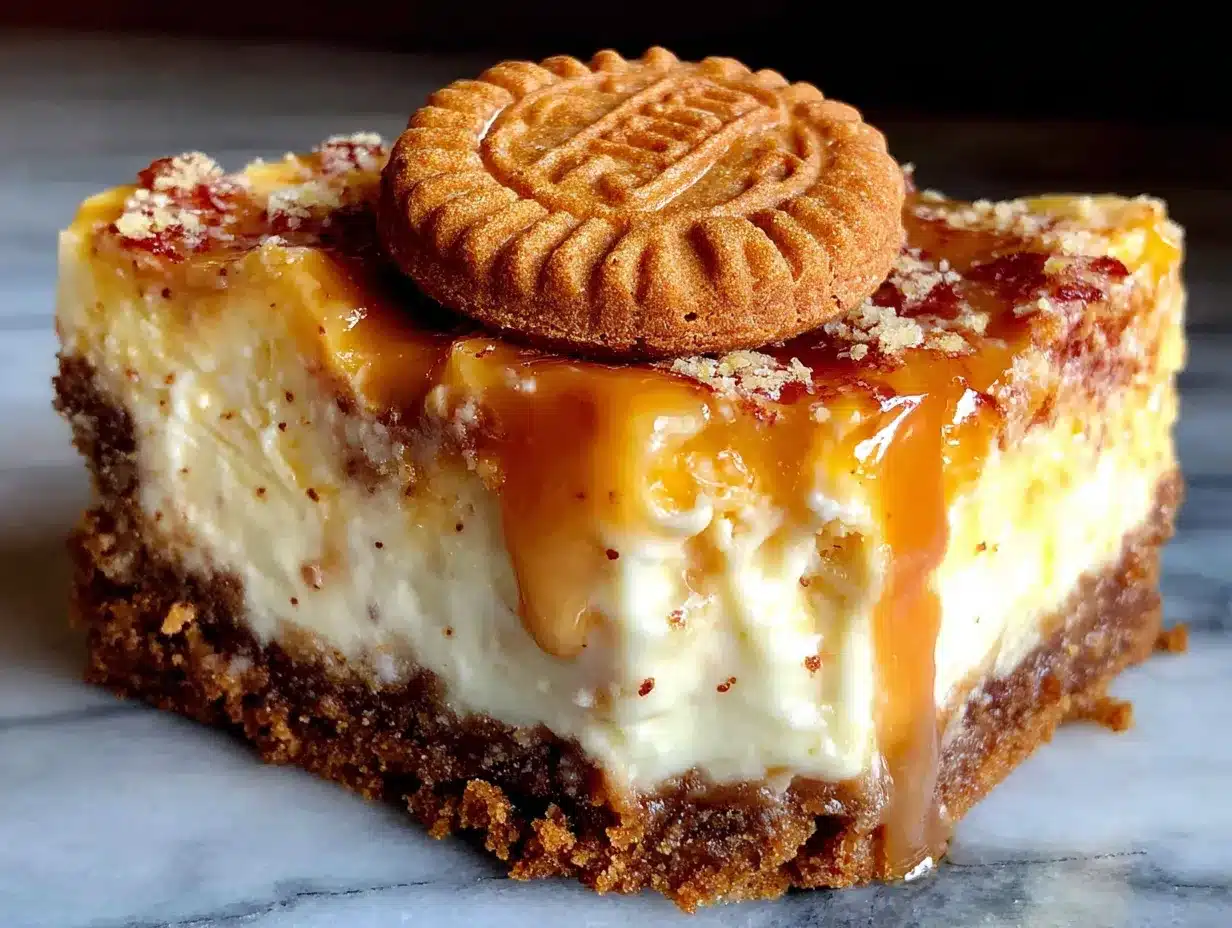
For the topping, you can add a few extra Biscoff cookies crumbled on top or a drizzle of melted Biscoff spread. Totally optional, but highly recommended for presentation.
Equipment Needed
You don’t need a fancy kitchen to pull these off. Here’s what I use:
- 8×8-inch Baking Pan – The perfect size for these bars. Glass or metal both work, but if you use glass, reduce the oven temperature by 25°F to prevent over-browning.
- Parchment Paper – A total lifesaver for easy removal. Cut two strips that overlap in the pan, creating a sling you can lift out later.
- Food Processor – For crushing the Biscoff cookies into fine crumbs. You can also use a rolling pin and a zip-top bag if you want to work out some aggression.
- Electric Mixer – Hand mixer or stand mixer both work. A whisk and some elbow grease will do the job, but your arm will thank you for using a mixer.
- Mixing Bowls – One for the crust, one for the filling. Nothing fancy needed.
- Spatula – For spreading the filling evenly and scraping every last bit of cheesecake goodness out of the bowl.
- Measuring Cups and Spoons – Accuracy matters in baking, even for a forgiving recipe like this one.
I’ve made these bars with just a bowl and a fork before, and they still turned out great. The food processor just makes the crust easier. If you don’t have one, crush the cookies in a bag and melt the butter in the microwave. Simple as that.
Preparation Method
- Preheat and Prep: Preheat your oven to 325°F (163°C). Line your 8×8-inch baking pan with parchment paper, leaving some overhang on two opposite sides. This creates handles for lifting the bars out later. Lightly spray the parchment with non-stick spray for extra insurance.
- Make the Crust: Place the Biscoff cookies in your food processor and pulse until you have fine crumbs. You should have about 2 cups. Pour the crumbs into a medium bowl, add the melted butter, and stir until every crumb is coated. The mixture should look like wet sand and hold together when squeezed. Press this mixture firmly into the bottom of your prepared pan. I use the bottom of a measuring cup to get it really even. Bake for 10 minutes, then set aside to cool slightly while you make the filling.
- Beat the Cream Cheese: In a large mixing bowl, beat the softened cream cheese with an electric mixer on medium speed until smooth and creamy, about 2 minutes. Scrape down the sides and bottom of the bowl with a spatula. This step is crucial—lumpy cream cheese means a lumpy cheesecake.
- Add the Yogurt and Sugar: Add the Greek yogurt and granulated sugar to the cream cheese. Beat on medium speed until combined, about 1 minute. The mixture should be smooth and slightly thicker than pancake batter. Scrape the bowl again.
- Incorporate the Eggs: Add the eggs one at a time, beating on low speed after each addition just until combined. Overmixing at this stage can incorporate too much air, which leads to cracks. Add the vanilla extract and give it one final gentle stir.
- Assemble and Swirl: Pour the cheesecake filling over the pre-baked crust and spread it evenly with a spatula. Melt the Biscoff spread in the microwave for about 20 seconds, then drizzle it over the filling in small dollops. Use a knife or toothpick to swirl the Biscoff spread into the filling, creating a marbled pattern. Don’t over-swirl or you’ll lose the distinct pockets of cookie butter.
- Bake: Place the pan in the preheated oven and bake for 35-40 minutes. The edges should be set and slightly puffed, but the center should still jiggle slightly when you gently shake the pan. This is the sweet spot—overbaking leads to dry, cracked cheesecake. Turn off the oven, crack the door open, and let the cheesecake cool inside for 30 minutes. This gradual cooling prevents sudden temperature changes that cause cracking.
- Chill: Remove the pan from the oven and let it cool completely on a wire rack, about 1 hour. Then transfer to the refrigerator and chill for at least 4 hours, but overnight is better. The bars need this time to set properly. I know it’s hard to wait, but trust me on this one.
- Slice and Serve: Once fully chilled, lift the bars out of the pan using the parchment sling. Place on a cutting board and slice into 16 squares using a sharp knife. Wipe the knife clean between cuts for neat edges. Serve cold or let them sit at room temperature for 10 minutes for a softer texture.
Cooking Tips & Techniques
I’ve made these bars more times than I can count, and I’ve definitely learned a few things the hard way. Here’s what I wish someone had told me:
- Room Temperature Ingredients Matter: Cold cream cheese and cold eggs create a lumpy, uneven filling. I’ve been there, and it’s frustrating. Let everything sit on the counter for at least 30 minutes before you start. If you’re in a hurry, you can microwave the cream cheese in 10-second bursts, but be careful not to melt it.
- Don’t Overmix the Filling: I know it’s tempting to keep beating until everything is perfectly smooth, but overmixing incorporates too much air. Those air bubbles expand in the oven and then collapse, leaving you with cracks. Mix just until combined, and you’ll have a silky, crack-free top every time.
- The Water Bath Shortcut: Traditional cheesecake recipes call for a water bath to prevent cracking. I’ve found that with these bars, you don’t need one. The Greek yogurt keeps the filling moist enough. But if you’re nervous, place a shallow pan of hot water on the lower rack of your oven while the cheesecake bakes. The steam helps keep things gentle.
- Patience is a Virtue: The hardest part of this recipe is waiting for the bars to chill. I once tried to cut them after only two hours in the fridge, and it was a disaster. The filling was still soft, and the slices looked more like a mess than a dessert. Give them the full time—your future self will thank you.
- Clean Cuts Every Time: Run your knife under hot water and dry it off before each slice. This gives you those beautiful, clean edges that look like they came from a bakery. It’s a small step that makes a big difference in presentation.
Variations & Adaptations
One of the best things about this recipe is how flexible it is. I’ve experimented with several variations, and here are my favorites:
- Gluten-Free Version: Swap the Biscoff cookies for a gluten-free speculoos cookie. The texture is nearly identical, and the flavor is just as spiced and delicious. I’ve done this for friends with celiac disease, and they couldn’t tell the difference.
- Dairy-Free Adaptation: Use dairy-free cream cheese and a plant-based Greek-style yogurt. I’ve tried this with a coconut-based cream cheese, and while the texture is slightly different, it’s still creamy and satisfying. Use coconut oil instead of butter for the crust.
- Chocolate Biscoff Twist: Add 2 tablespoons of cocoa powder to the crust mixture for a chocolatey base. You can also drizzle melted dark chocolate over the top after chilling. The combination of Biscoff and chocolate is absolutely divine.
- Pumpkin Spice Version: For fall, replace ¼ cup of the Greek yogurt with pumpkin puree and add 1 teaspoon of pumpkin pie spice to the filling. The pumpkin pairs beautifully with the Biscoff flavor. I made this for Thanksgiving last year, and it was gone in minutes.
- Mini Cheesecake Bites: Use a mini muffin tin lined with paper liners. Press the crust into each cup, fill with cheesecake mixture, and bake for 15-18 minutes. These are perfect for parties or portion control. Just reduce the chilling time to 2 hours.
I personally love the pumpkin spice version. It feels like fall in every bite, and the spices complement the Biscoff without overwhelming it.
Serving & Storage Suggestions
These bars are versatile enough for any occasion. Here’s how I like to serve and store them:
- Serving Temperature: I prefer these bars cold, straight from the fridge. The texture is firmer and the flavors are more pronounced. If you like a softer, creamier bite, let them sit at room temperature for 10-15 minutes before serving.
- Presentation Ideas: Dust the tops with a light sprinkle of cinnamon or crushed Biscoff cookies for a beautiful finish. A dollop of whipped cream and a drizzle of warmed Biscoff spread takes these from everyday to company-ready. I’ve also served them with fresh berries on the side for a pop of color and acidity.
- Pairing Suggestions: A cup of strong coffee or espresso is the perfect companion to these bars. The bitterness balances the sweetness beautifully. For a dessert spread, serve alongside my crispy garlic chicken for a sweet and savory combo that always impresses.
- Storage Instructions: Store the bars in an airtight container in the refrigerator for up to 7 days. Layer them with parchment paper between each row to prevent sticking. I’ve never had them last that long, but theoretically, they’re good for a week.
- Freezing Tips: These bars freeze beautifully. Wrap individual slices tightly in plastic wrap, then place them in a freezer-safe bag. They’ll keep for up to 3 months. When you’re ready to enjoy one, let it thaw in the fridge overnight. The texture remains creamy and delicious.
- Flavor Development: Honestly, these bars taste even better on day two. The flavors meld together as they chill, and the texture becomes even more uniform. If you can plan ahead, make them a day before you need them.
Nutritional Information & Benefits
Here’s the approximate nutritional breakdown for one bar (based on 16 servings):
- Calories: 195
- Fat: 11g
- Carbohydrates: 20g
- Protein: 5g
- Sugar: 14g
Compared to a traditional Biscoff cheesecake, these bars save you about 100 calories and 8 grams of fat per serving. The Greek yogurt is the hero here—it adds protein and creaminess without the extra saturated fat. Cream cheese, in moderation, provides calcium and vitamin A. And let’s be real, a little Biscoff spread in your life is good for the soul.
These bars are also lower in sugar than most cheesecake recipes, thanks to the natural sweetness of the Biscoff cookies and spread. If you’re watching your sugar intake, you can reduce the granulated sugar to ⅓ cup without sacrificing texture. The Biscoff flavor will shine through even more.
From a wellness perspective, I love that I can enjoy a dessert that feels indulgent without derailing my week. It’s about balance, not deprivation. These bars fit perfectly into a lifestyle that prioritizes both health and happiness.
Conclusion
These Lighter Biscoff Cheesecake Bars are proof that you don’t have to choose between eating well and eating something truly delicious. They’re creamy, spiced, and just the right amount of sweet—everything you want in a dessert, without the heavy feeling that usually follows. I’ve made them for myself on quiet Tuesday nights, for friends at dinner parties, and for family gatherings where no one believed they were a lighter version.
I hope you’ll give them a try and make them your own. Maybe you’ll add a chocolate swirl, or top them with fresh fruit, or just enjoy them exactly as written. Whatever you do, I’d love to hear about it. Drop a comment below and let me know how they turned out, or share your own twist on the recipe. And if you’re looking for more sweet treats that won’t derail your goals, check out my healthy dessert recipes for more inspiration.
Happy baking, and remember—the best recipes are the ones you actually make. So go ahead, preheat that oven, and treat yourself. You deserve it.
Frequently Asked Questions
Can I use regular cream cheese instead of reduced-fat?
Absolutely. The texture will be slightly richer and creamier, but the recipe works perfectly with full-fat cream cheese. Just note that the calorie count will be higher.
Can I make these bars without eggs?
Yes, you can substitute each egg with ¼ cup of unsweetened applesauce or a flax egg (1 tablespoon ground flaxseed mixed with 3 tablespoons water). The texture will be slightly denser but still delicious.
How do I know when the cheesecake is done baking?
The edges should be set and slightly puffed, but the center should still jiggle when you gently shake the pan. It will continue to set as it cools. Overbaking is the most common mistake, so err on the side of underdone.
Can I use a different cookie for the crust?
Yes! Graham crackers, vanilla wafers, or even shortbread cookies work well. The flavor will change, but the texture will be similar. If using a less sweet cookie, you may want to add a tablespoon of sugar to the crust mixture.
How long do these bars last in the freezer?
Properly wrapped, they’ll keep for up to 3 months. I recommend wrapping individual slices in plastic wrap and then placing them in a freezer-safe bag. Thaw overnight in the refrigerator for best results.
Pin This Recipe!
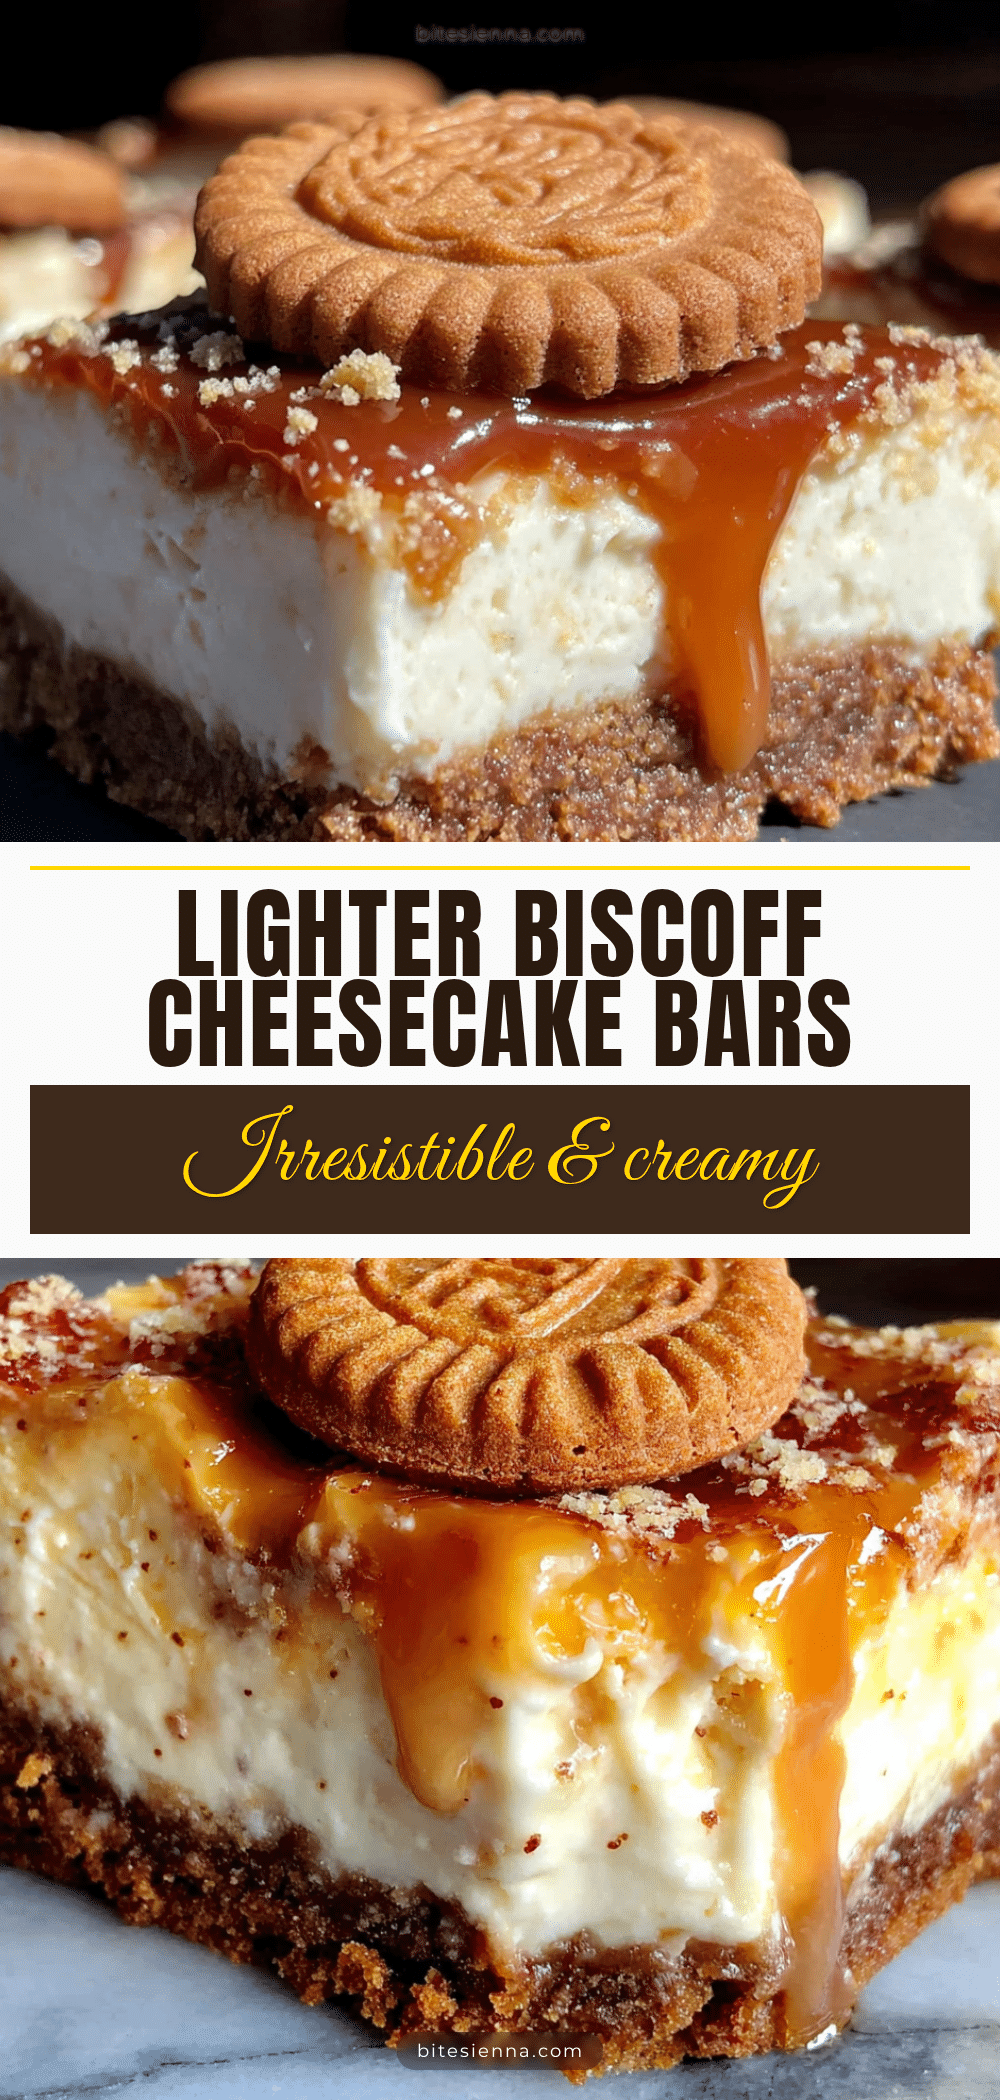
Lighter Biscoff Cheesecake Bars
These Lighter Biscoff Cheesecake Bars are creamy, spiced, and just the right amount of sweet—everything you want in a dessert, without the heavy feeling. Made with Greek yogurt and reduced-fat cream cheese, they’re a healthier twist on a classic treat that comes together in just 20 minutes of active prep time.
- Prep Time: 20 minutes
- Cook Time: 35-40 minutes
- Total Time: 4 hours 55 minutes (including chilling)
- Yield: 16 servings 1x
- Category: Dessert
- Cuisine: American
Ingredients
- 200g (about 2 cups) Biscoff cookies, crushed
- 4 tablespoons (56g) unsalted butter, melted
- 16 oz (450g) reduced-fat cream cheese, softened
- 1 cup (245g) plain Greek yogurt
- ½ cup (100g) granulated sugar
- 2 large eggs, room temperature
- 1 teaspoon vanilla extract
- ⅓ cup (80g) Biscoff spread, melted
Instructions
- Preheat your oven to 325°F (163°C). Line an 8×8-inch baking pan with parchment paper, leaving overhang on two opposite sides. Lightly spray with non-stick spray.
- Make the crust: Place Biscoff cookies in a food processor and pulse until fine crumbs. Pour into a bowl, add melted butter, and stir until coated. Press firmly into the bottom of the prepared pan. Bake for 10 minutes, then set aside to cool slightly.
- Beat the cream cheese: In a large bowl, beat softened cream cheese with an electric mixer on medium speed until smooth and creamy, about 2 minutes. Scrape down the sides.
- Add yogurt and sugar: Add Greek yogurt and granulated sugar. Beat on medium speed until combined, about 1 minute. Scrape the bowl again.
- Incorporate eggs: Add eggs one at a time, beating on low speed after each addition just until combined. Add vanilla extract and stir gently.
- Assemble and swirl: Pour cheesecake filling over the pre-baked crust and spread evenly. Melt Biscoff spread in the microwave for about 20 seconds, then drizzle over the filling. Use a knife or toothpick to swirl into a marbled pattern.
- Bake: Place pan in the oven and bake for 35-40 minutes. Edges should be set, center should jiggle slightly. Turn off oven, crack the door, and let cool inside for 30 minutes.
- Chill: Remove from oven and cool completely on a wire rack, about 1 hour. Transfer to refrigerator and chill for at least 4 hours, preferably overnight.
- Slice and serve: Lift bars out using parchment sling. Place on a cutting board and slice into 16 squares using a sharp knife. Serve cold or let sit at room temperature for 10 minutes for a softer texture.
Notes
Room temperature ingredients are crucial for a smooth filling. Don’t overmix the filling to avoid cracks. The bars taste even better on day two. For clean cuts, run your knife under hot water and dry it before each slice. These bars freeze well for up to 3 months.
Nutrition
- Serving Size: 1 bar
- Calories: 195
- Sugar: 14
- Sodium: 180
- Fat: 11
- Saturated Fat: 6
- Carbohydrates: 20
- Protein: 5
Keywords: Biscoff cheesecake bars, lighter cheesecake, healthy dessert, Greek yogurt cheesecake, easy cheesecake recipe, no-bake cheesecake bars, Biscoff dessert


