This was supposed to be my famous loaded nacho platter. The one with the seasoned ground beef, the mountain of shredded cheese, the jalapeños scattered like little green landmines. I had it all planned out for the big game—chips laid out, oven preheating, my lucky jersey on. But somewhere between the grocery store and my kitchen counter, I grabbed a package of sweet Hawaiian rolls instead of tortilla chips. I didn’t even realize it until I was unpacking the bags, and there they were, these soft, golden little squares staring back at me like, “What now?”
Honestly, I just stood there for a solid minute. The game was about to start in two hours. My friends were already texting me about what time to show up. And I had a pound of ground beef thawing on the counter with absolutely no chips to pile it on. I almost laughed. I mean, you know that feeling when you’re already running behind and your brain just short-circuits? That was me, holding a pack of rolls like they were going to magically turn into tortillas.
So I did what any reasonable person would do when faced with a kitchen crisis. I panicked for a bit, then I got creative. I thought about making little sandwiches—sliders, basically—but I wanted that same game-day energy, that messy, juicy, can’t-put-it-down feeling. I browned the beef, mixed up a sauce from things I found in my fridge door (mayo, ketchup, pickle juice, a few shakes of this and that), and assembled these tiny burgers on those sweet rolls. I slid them into the oven, crossed my fingers, and prayed my friends wouldn’t judge me for serving slider-burgers when they expected nachos.
The first bite? Let me tell you, I actually stopped chewing for a second. The sweetness of the rolls against the savory beef, the tangy kick of the sauce, the way the cheese melted into every crevice—it was better than my nachos had ever been. My friends devoured them in about four minutes flat. Someone asked for the recipe before the halftime show even started. These perfect cheeseburger sliders with special sauce for game day weren’t a backup plan anymore. They were the new tradition.
And that’s why I keep making them. Not because they saved me that one time, but because they’re genuinely the best thing I’ve accidentally ever made. Maybe you’ve been there—a kitchen mishap that turned into something magical. If not, trust me on this one. You’re about to have your own moment.
Why You’ll Love This Recipe
I’ve tested this recipe more times than I care to admit. I’ve made them for Super Bowl parties, casual Sunday dinners, and even a backyard barbecue where someone asked if they catered. The answer is always no, but the question tells you everything. These sliders hit different.
- Quick & Easy: From start to finish, you’re looking at about 30 minutes. That’s it. No marinating, no complicated techniques, no standing over a hot stove for hours. Perfect for when the game is about to start and you realize you forgot to plan anything.
- Simple Ingredients: You probably have most of this stuff already. Ground beef, cheese, rolls, and a few pantry staples for the sauce. No fancy grocery trips required. I mean it—I’ve made these with whatever cheese I had left in the drawer and it still worked.
- Perfect for Game Day: These are the ultimate finger food. Easy to grab, no plates needed, and they hold up well even when people are standing around yelling at the TV. Plus, they’re small enough that everyone can have two or three without feeling guilty.
- Crowd-Pleaser: I’ve served these to picky eaters, cheese snobs, and people who “don’t really like sliders.” Every single one of them asked for seconds. Kids love them. Adults love them. Your uncle who never compliments anything will probably ask for the recipe.
- Unbelievably Delicious: The secret is in the sauce and the rolls. The sweet Hawaiian rolls give this unexpected hint of sweetness that balances the savory beef perfectly. And the special sauce? It’s tangy, creamy, and just a little bit addictive. You’ll want to put it on everything.
What makes this recipe different from the thousand other slider recipes out there? It’s the combination of the sauce and the method. I don’t just slap the beef on the rolls and call it a day. I toast them, I layer them right, and I let the cheese get all melty and gooey in the oven. It’s not complicated, but it’s intentional. Every bite has that perfect ratio of meat, cheese, sauce, and bread. No dry bites. No soggy bottoms. Just slider perfection.
This isn’t just good food. It’s the kind that makes you close your eyes after the first bite. It’s comfort food reimagined—faster, simpler, but with the same soul-soothing satisfaction. Perfect for impressing guests without stress, or turning a simple game day into something memorable.
What Ingredients You Will Need
This recipe uses simple, wholesome ingredients to deliver bold flavor and satisfying texture without the fuss. Most of these are pantry staples or easy to find at any grocery store. Let’s break down what you need and why each one matters.
For the Sliders
- 1 pound ground beef (80/20): The 80/20 ratio gives you enough fat for flavor without being greasy. I’ve tried leaner blends and they just don’t have the same juiciness. (Pro tip: let the meat sit at room temperature for 10 minutes before cooking for even browning.)
- 12 sweet Hawaiian rolls: This is non-negotiable for me. The sweetness is what makes these sliders special. I’ve tried regular dinner rolls and it’s just not the same. King’s Hawaiian is my go-to brand, but any brand works as long as they’re soft and slightly sweet.
- 8 slices American cheese: I know, I know—some people look down on American cheese. But for sliders, it’s perfect. It melts smoothly, it’s creamy, and it doesn’t get greasy. If you want to get fancy, you can use cheddar or provolone, but American gives you that classic diner-style melt. (Look for individually wrapped slices for easy layering.)
- 1 tablespoon butter, melted: For brushing the tops of the rolls before baking. It gives them that golden, slightly crispy finish. I use salted butter for extra flavor.
- 1 teaspoon sesame seeds: Optional, but I love the little crunch and the classic burger look. Toasted sesame seeds work best.
For the Special Sauce
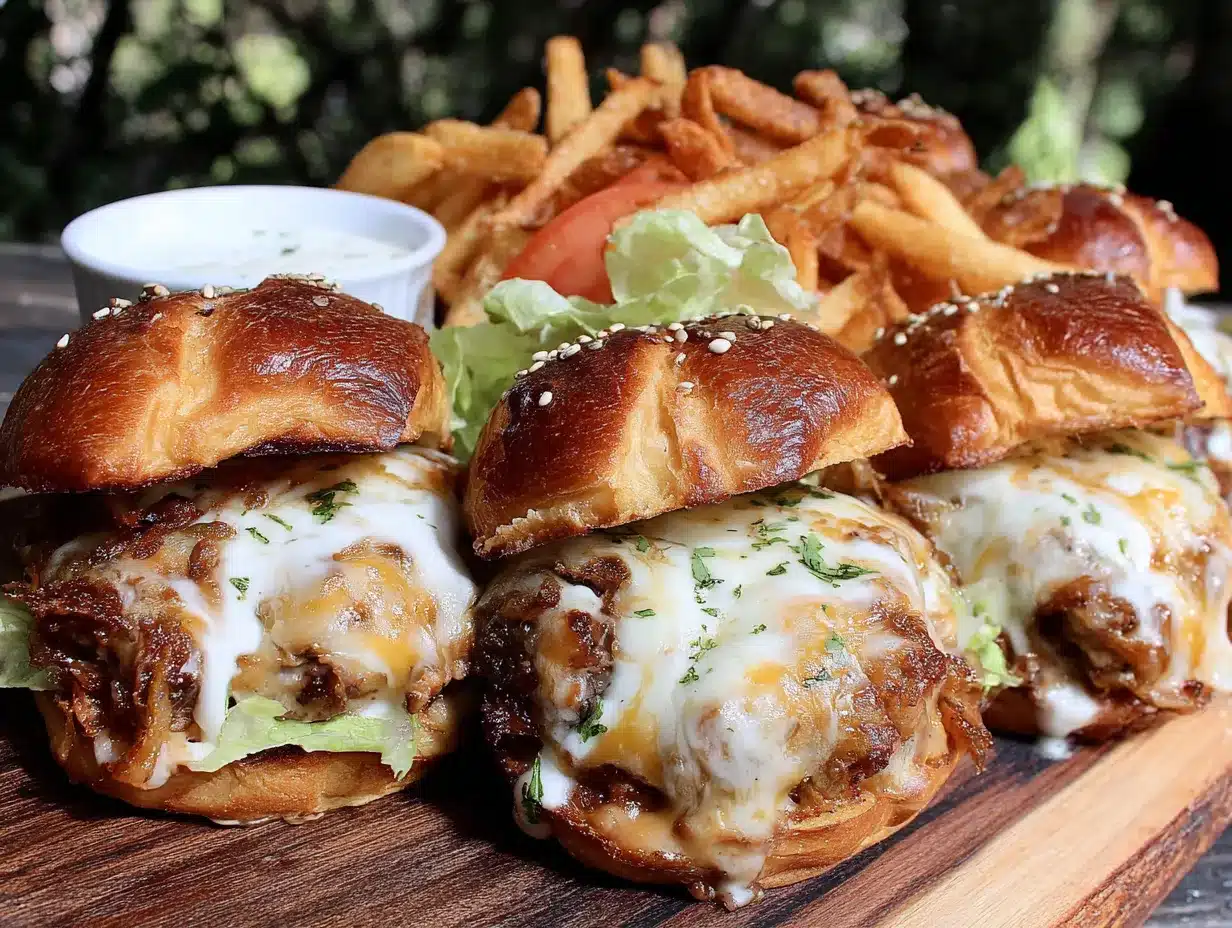
- ½ cup mayonnaise: Full-fat is best here. It’s the base of the sauce and gives it that creamy richness. I prefer Hellmann’s or Duke’s for their tanginess.
- 2 tablespoons ketchup: Adds sweetness and color. Heinz is my go-to, but any brand works.
- 1 tablespoon yellow mustard: For that classic burger joint tang. Don’t skip it—it balances the sweetness of the ketchup and the richness of the mayo.
- 1 tablespoon sweet pickle relish: This is the secret ingredient. It adds sweetness, tang, and little bits of pickle texture. If you don’t have relish, you can finely chop some dill pickles and add a pinch of sugar.
- 1 teaspoon white vinegar: A tiny splash brightens everything up. Apple cider vinegar works too if that’s what you have.
- ½ teaspoon garlic powder: Not fresh garlic—powdered blends more smoothly into the sauce. Fresh garlic would be too sharp here.
- ½ teaspoon onion powder: Adds a subtle savory depth. Again, powdered works better than fresh for this sauce.
- ¼ teaspoon smoked paprika: This is optional, but I love the smoky hint it adds. Regular paprika works too, but smoked gives it a little something extra.
- Pinch of salt and black pepper: To taste. Go easy on the salt since the pickles and cheese add saltiness.
For the Beef Seasoning
- 1 teaspoon salt: I use kosher salt for even seasoning. Table salt works too, just use slightly less.
- ½ teaspoon black pepper: Freshly ground is always better, but pre-ground works in a pinch.
- ½ teaspoon garlic powder: Double duty—same as the sauce, but we’re seasoning the meat directly too.
- ½ teaspoon onion powder: Again, for the meat. Layers of flavor, you know?
That’s it. Twelve ingredients total, and most of them are probably in your kitchen right now. The beauty of this recipe is that it doesn’t require anything fancy. Just good, honest ingredients that come together to make something greater than the sum of their parts.
Equipment Needed
You don’t need a lot of fancy equipment for these sliders, which is part of why I love them. Here’s what you’ll need:
- Large skillet or frying pan: For browning the beef. I use a 12-inch cast iron skillet because it gives great even heat and a nice sear. Any non-stick or stainless steel pan works fine too.
- 9×13-inch baking dish: This is the perfect size for 12 sliders. You want a dish that’s big enough to hold all the rolls without crowding them. If you don’t have this size, a 9×9-inch dish works if you cut the rolls to fit, or you can use a baking sheet with sides.
- Small mixing bowl: For the special sauce. Any bowl works—I use a ceramic one because it feels nice, but glass or plastic is fine.
- Spatula or wooden spoon: For breaking up the beef as it cooks. I prefer a wooden spoon because it doesn’t scratch my pan, but a metal spatula works too.
- Pastry brush: For brushing the melted butter on the rolls. If you don’t have one, you can use a spoon or even your fingers (just wash your hands first!).
- Sharp knife: For cutting the rolls in half. A serrated bread knife works best because it won’t squish the soft rolls.
- Cutting board: To protect your counter when cutting the rolls. Any board works.
- Aluminum foil: For covering the sliders while they bake. This traps steam and helps the cheese melt evenly. I’ve used parchment paper in a pinch, but foil works better.
That’s really all you need. No stand mixer, no food processor, no special gadgets. Just basic kitchen tools that you probably already own. If you’re on a budget, don’t worry about buying anything fancy. A cheap non-stick pan and a baking dish from the dollar store will work just fine. I’ve made these in a friend’s apartment with the most basic equipment imaginable, and they came out amazing.
Preparation Method
Alright, let’s get cooking. This whole process takes about 30 minutes from start to finish, so plan accordingly. Here’s exactly how I do it.
- Preheat your oven to 350°F (175°C). This gives it time to come to temperature while you prep everything. I always do this first so I don’t forget.
- Make the special sauce. In your small mixing bowl, combine ½ cup mayonnaise, 2 tablespoons ketchup, 1 tablespoon yellow mustard, 1 tablespoon sweet pickle relish, 1 teaspoon white vinegar, ½ teaspoon garlic powder, ½ teaspoon onion powder, ¼ teaspoon smoked paprika, and a pinch of salt and pepper. Stir until everything is well combined. Taste it—it should be tangy, creamy, and just a little sweet. Adjust the seasoning if needed. Set it aside. (This sauce gets better as it sits, so making it first is a good move.)
- Season and cook the beef. Place your 1 pound of ground beef in a large skillet over medium-high heat. Break it up with your spatula or wooden spoon. Sprinkle 1 teaspoon salt, ½ teaspoon black pepper, ½ teaspoon garlic powder, and ½ teaspoon onion powder over the meat. Cook for about 6-8 minutes, stirring occasionally, until the beef is browned and cooked through. There should be no pink left. Drain off any excess grease if there’s a lot, but leave a little bit for flavor. (I usually tilt the pan and spoon out the extra fat, leaving about a tablespoon behind.)
- Prepare the rolls. While the beef is cooking, take your 12 sweet Hawaiian rolls and slice them in half horizontally. Don’t separate them into individual rolls yet—keep them connected as a whole sheet. Place the bottom half of the rolls in your 9×13-inch baking dish. (If your rolls came in a smaller package, you can fit 8 sliders in a 9×9 dish. Adjust the beef amount if needed.)
- Toast the bottom rolls (optional but recommended). Pop the baking dish with the bottom rolls into the oven for about 3-4 minutes, just until they’re lightly toasted. This prevents them from getting soggy from the beef and sauce. I started doing this after my first batch came out a little mushy on the bottom. It makes a big difference.
- Assemble the sliders. Spread about half of the special sauce evenly over the toasted bottom rolls. You don’t need to drown them—just a nice even layer. Next, spoon the cooked ground beef over the sauce and spread it out so it covers all the rolls evenly. Then, place your 8 slices of American cheese on top of the beef. I tear the slices in half and overlap them to cover the surface. Don’t worry if it’s not perfect—the cheese will melt and spread in the oven.
- Top the sliders. Place the top half of the rolls over the cheese. In your small bowl, melt 1 tablespoon of butter (about 15-20 seconds in the microwave). Brush the melted butter over the tops of the rolls. Sprinkle 1 teaspoon of sesame seeds on top if you’re using them.
- Bake the sliders. Cover the baking dish loosely with aluminum foil. Bake for 10 minutes. Then, remove the foil and bake for another 5 minutes, until the tops are golden brown and the cheese is fully melted and bubbly. The smell at this point is absolutely ridiculous—in the best way.
- Rest and serve. Remove the dish from the oven and let it sit for about 2-3 minutes. This helps the cheese set slightly so the sliders hold together better when you cut them. Use a sharp knife to cut along the seams of the rolls to separate them into individual sliders. Serve immediately with the remaining special sauce on the side for dipping.
A few notes from experience: If your rolls are browning too quickly in the oven, tent them with foil earlier. Every oven runs a little differently. Also, don’t skip the resting time. I know it’s hard to wait when they smell that good, but trust me—those 2 minutes make a difference. The sliders will be easier to handle and less likely to fall apart.
Cooking Tips & Techniques
I’ve made these sliders probably twenty times by now, and I’ve learned a few things along the way. Here are my best tips for getting them perfect every time.
Don’t overwork the beef. When you’re browning the ground beef, let it sit in the pan for a minute or two before you start breaking it up. This gives it a chance to develop a nice sear, which adds flavor. If you’re constantly stirring, you’re steaming the meat instead of browning it. Let it get some color—that’s where the flavor lives.
Drain the grease, but not all of it. Ground beef releases fat as it cooks. You want to drain most of it, but leaving about a tablespoon behind adds moisture and flavor to the sliders. If you drain it completely, the beef can end up dry. I use a spoon to scoop out the excess, leaving just a little bit in the pan.
Toast the rolls. I mentioned this in the method, but it’s worth repeating. Toasting the bottom rolls for a few minutes before adding the beef and sauce prevents sogginess. The first time I made these, I skipped this step and the bottoms were a little sad. Now I never skip it. It takes two extra minutes and makes a huge difference.
Use room temperature cheese. If you have time, let your cheese slices sit out for 10-15 minutes before using them. Cold cheese takes longer to melt, and you might end up with uneven melting. Room temperature cheese melts more evenly and faster. (I learned this the hard way when I pulled a batch out of the oven and found cold spots.)
Don’t overbake. The sliders are done when the cheese is melted and the tops are golden. Overbaking dries out the rolls and makes the beef tough. Keep an eye on them after you remove the foil. Every oven is different, so check at the 5-minute mark after removing the foil.
Let them rest. I know I’ve said this twice now, but it’s important. Letting the sliders rest for 2-3 minutes after baking allows the cheese to set and the structure to firm up. If you cut into them immediately, they’ll fall apart. Patience pays off.
Double the recipe if you’re feeding a crowd. These sliders disappear fast. I’ve made two batches for a party of eight people and they were gone in minutes. If you’re hosting a game day gathering, I’d recommend making at least 24 sliders. They reheat well too, so leftovers (if there are any) are a bonus.
Variations & Adaptations
One of the best things about this recipe is how adaptable it is. I’ve tried several variations over the years, and they’ve all been delicious in their own way. Here are some ideas to make these sliders your own.
Bacon Cheeseburger Sliders: Cook 4-5 strips of bacon until crispy, crumble them, and sprinkle over the beef before adding the cheese. The smoky, salty bacon takes these to another level. I did this for a Super Bowl party and someone actually asked me if I was a professional chef. (I’m not, but I took the compliment.)
Spicy Jalapeño Sliders: Add 2-3 tablespoons of pickled jalapeños on top of the beef before the cheese. The acidity and heat cut through the richness beautifully. If you want even more heat, add a few dashes of hot sauce to the special sauce. My friend Dave loves these—he says they have “the perfect kick.”
Turkey or Chicken Sliders: Swap the ground beef for ground turkey or chicken. Use 93/7 lean turkey to keep it moist. Add a tablespoon of olive oil to the pan since leaner meats need a little help. The seasoning stays the same. My sister makes these for her family and swears they’re just as good as the beef version.
Vegetarian Sliders: Use plant-based ground meat or crumbled black bean burgers. Cook them the same way as the beef, adding a little extra oil if needed. The special sauce works perfectly with plant-based options. I tried this with a friend who’s vegetarian and she said it was the best slider she’d ever had.
Cheese Variations: While American cheese is my go-to, you can experiment with other cheeses. Cheddar adds sharpness, provolone gives a mild nutty flavor, and pepper jack brings heat. I’ve even used a mix of cheddar and mozzarella for a stretchy, melty combo. Just make sure whatever cheese you use melts well—some cheeses get greasy instead of creamy.
Gluten-Free Option: Use gluten-free sweet rolls or gluten-free dinner rolls. The rest of the ingredients are naturally gluten-free (just check your mustard and relish labels). I’ve made these for a friend with celiac disease and they turned out great. The texture is slightly different, but the flavor is still amazing.
Serving & Storage Suggestions
These sliders are best served warm, right out of the oven. The cheese is melty, the rolls are soft, and the sauce is at its peak. But they’re also pretty forgiving if you need to make them ahead or store leftovers.
Serving: I like to serve these on a large platter with the extra special sauce in a small bowl for dipping. A side of crispy fries, potato chips, or a simple green salad rounds out the meal. For game day, I arrange them on a tray with little cocktail napkins and let everyone grab their own. They’re perfect for self-serve situations—no plates needed.
Temperature: Serve them hot, but not scalding. Let them rest for those 2-3 minutes after baking, then dig in. If you’re serving them at a party where people will be grazing, you can keep them warm in a low oven (200°F) for up to 30 minutes. Just cover them loosely with foil so the tops don’t dry out.
Storage: Leftover sliders (if you have any) can be stored in an airtight container in the refrigerator for up to 3 days. The rolls will soften a bit, but the flavor is still great. I’ve eaten them cold straight from the fridge and they’re surprisingly good—like a weirdly satisfying cold slider sandwich.
Reheating: The best way to reheat these is in the oven. Preheat to 350°F, place the sliders on a baking sheet, and heat for about 8-10 minutes, until warmed through and the cheese is melty again. You can also use an air fryer at 350°F for 3-4 minutes. The microwave works in a pinch, but the rolls will get soft and the cheese might get rubbery. I don’t recommend it unless you’re really in a hurry.
Freezing: You can freeze assembled but unbaked sliders. Assemble them in the baking dish, cover tightly with plastic wrap and foil, and freeze for up to 2 months. To bake, thaw in the refrigerator overnight, then bake as directed, adding 5-10 minutes to the baking time. I’ve done this for a few parties and it’s a lifesaver when you want to prep ahead.
Nutritional Information & Benefits
Let’s be real—these are indulgent sliders. They’re not health food, and that’s okay. But if you’re curious about what’s in them, here’s a rough estimate per slider (based on 12 sliders):
- Calories: Approximately 280-320
- Protein: 15-18 grams
- Fat: 18-22 grams
- Carbohydrates: 18-22 grams
- Fiber: 1-2 grams
- Sugar: 6-8 grams (mostly from the sweet rolls and ketchup)
- Sodium: 500-600 mg
These numbers will vary depending on the exact brands and ingredients you use. The sweet Hawaiian rolls are the main source of sugar and carbs, so if you’re watching those, you could use lower-carb rolls. The beef provides a good amount of protein, and the cheese adds calcium. The special sauce is mostly fat from the mayo, but it’s also what makes these sliders so satisfying.
From a wellness perspective, I think it’s all about balance. These sliders are perfect for a special occasion like game day, a party, or a weekend treat. They’re not an everyday meal, and that’s fine. When you do eat them, enjoy every bite. Food is about pleasure as much as nutrition. I’ve learned to stop feeling guilty about indulgent meals and just appreciate them for what they are—delicious, memorable, and worth every calorie.
Conclusion
These perfect cheeseburger sliders with special sauce for game day started as a happy accident, but they’ve become one of my most requested recipes. There’s something about the combination of sweet rolls, savory beef, melty cheese, and that tangy special sauce that just works. It’s simple, it’s fast, and it’s absolutely delicious.
I love that this recipe is forgiving enough for beginners but impressive enough for experienced cooks. You can customize it a hundred different ways and it still comes out great. Whether you’re hosting a Super Bowl party, feeding a crowd at a backyard barbecue, or just craving something comforting on a Sunday afternoon, these sliders deliver.
My biggest piece of advice? Don’t be afraid to make them your own. Add bacon if you want. Swap the cheese. Double the sauce. The recipe is a starting point, not a rulebook. Cooking should be fun, and these sliders are the perfect canvas for experimentation.
If you make these, I’d love to hear how they turned out. Drop a comment below and let me know if you tried any variations, or just tell me how fast they disappeared at your party. And if you’re looking for more game day inspiration, check out my crispy buffalo chicken dip or these loaded nachos that started this whole slider adventure. Happy cooking, and enjoy every bite!
Frequently Asked Questions
Can I make these sliders ahead of time?
Yes! You can assemble the sliders completely (without baking) up to 24 hours in advance. Cover and refrigerate, then bake when you’re ready. You might need to add 5 extra minutes to the baking time since they’ll be cold from the fridge.
Can I use a different type of roll?
Absolutely. While sweet Hawaiian rolls are my favorite for their flavor, you can use any soft dinner roll or slider bun. Just keep in mind that the sweetness of the Hawaiian rolls is part of what makes these special. If you use plain rolls, consider adding a pinch of sugar to the beef seasoning to compensate.
How do I keep the sliders from getting soggy?
Toasting the bottom rolls before adding the beef and sauce is the key. This creates a barrier that prevents the moisture from soaking into the bread. Also, make sure you drain most of the grease from the beef. A little bit is fine, but too much will make everything soggy.
Can I make these in a slow cooker or Instant Pot?
I don’t recommend it for this recipe. The sliders rely on the oven to melt the cheese evenly and toast the tops. A slow cooker would make the rolls too soft and the texture wouldn’t be right. Stick with the oven for best results.
What can I serve with these sliders?
These sliders pair well with classic game day sides like crispy fries, onion rings, coleslaw, or a simple green salad. For dipping, the extra special sauce is perfect, but you can also serve them with ketchup, ranch dressing, or barbecue sauce. They’re versatile enough to go with almost anything.
Pin This Recipe!
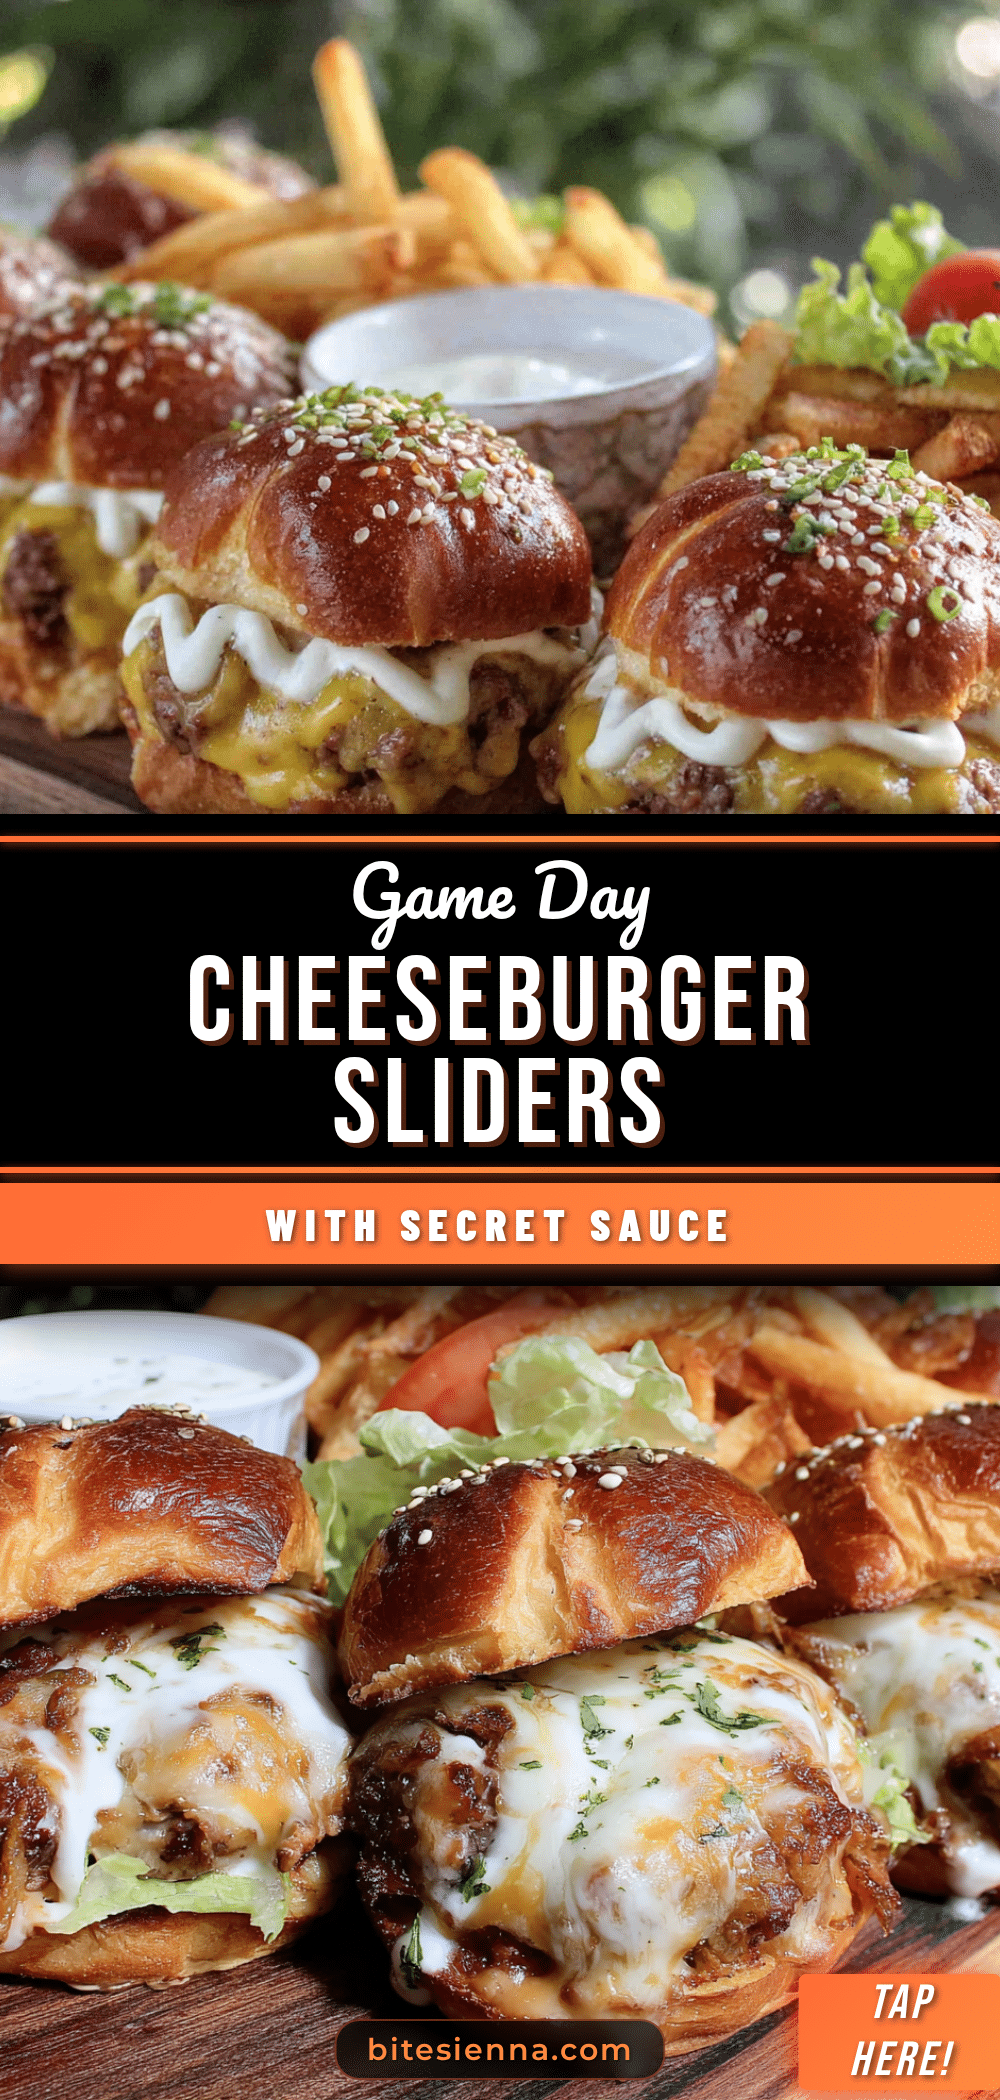
Perfect Cheeseburger Sliders: Best Game Day Recipe

These perfect cheeseburger sliders with special sauce for game day started as a happy accident, but they’ve become one of my most requested recipes. There’s something about the combination of sweet rolls, savory beef, melty cheese, and that tangy special sauce that just works.
- Prep Time: 10 minutes
- Cook Time: 20 minutes
- Total Time: 30 minutes
- Yield: 12 sliders 1x
- Category: Main Course
- Cuisine: American
Ingredients
- 1 pound ground beef (80/20)
- 12 sweet Hawaiian rolls
- 8 slices American cheese
- 1 tablespoon butter, melted
- 1 teaspoon sesame seeds (optional)
- ½ cup mayonnaise
- 2 tablespoons ketchup
- 1 tablespoon yellow mustard
- 1 tablespoon sweet pickle relish
- 1 teaspoon white vinegar
- ½ teaspoon garlic powder
- ½ teaspoon onion powder
- ¼ teaspoon smoked paprika
- Pinch of salt and black pepper
- 1 teaspoon salt
- ½ teaspoon black pepper
- ½ teaspoon garlic powder
- ½ teaspoon onion powder
Instructions
- Preheat your oven to 350°F (175°C).
- Make the special sauce: In a small mixing bowl, combine ½ cup mayonnaise, 2 tablespoons ketchup, 1 tablespoon yellow mustard, 1 tablespoon sweet pickle relish, 1 teaspoon white vinegar, ½ teaspoon garlic powder, ½ teaspoon onion powder, ¼ teaspoon smoked paprika, and a pinch of salt and pepper. Stir until well combined. Set aside.
- Season and cook the beef: Place 1 pound of ground beef in a large skillet over medium-high heat. Break it up with a spatula. Sprinkle 1 teaspoon salt, ½ teaspoon black pepper, ½ teaspoon garlic powder, and ½ teaspoon onion powder over the meat. Cook for about 6-8 minutes, stirring occasionally, until browned and cooked through. Drain off excess grease, leaving about 1 tablespoon for flavor.
- Prepare the rolls: Slice 12 sweet Hawaiian rolls in half horizontally, keeping them connected as a whole sheet. Place the bottom half in a 9×13-inch baking dish.
- Toast the bottom rolls (optional but recommended): Pop the baking dish with the bottom rolls into the oven for about 3-4 minutes, until lightly toasted.
- Assemble the sliders: Spread about half of the special sauce evenly over the toasted bottom rolls. Spoon the cooked ground beef over the sauce and spread evenly. Place 8 slices of American cheese on top of the beef, tearing slices in half and overlapping to cover the surface.
- Top the sliders: Place the top half of the rolls over the cheese. Melt 1 tablespoon of butter and brush over the tops. Sprinkle 1 teaspoon of sesame seeds on top if using.
- Bake the sliders: Cover the baking dish loosely with aluminum foil. Bake for 10 minutes. Remove the foil and bake for another 5 minutes, until tops are golden brown and cheese is melted and bubbly.
- Rest and serve: Remove from the oven and let sit for 2-3 minutes. Cut along the seams of the rolls to separate into individual sliders. Serve immediately with remaining special sauce on the side for dipping.
Notes
Don’t overwork the beef; let it sear for flavor. Toast the bottom rolls to prevent sogginess. Use room temperature cheese for even melting. Don’t overbake; check after removing foil. Let sliders rest for 2-3 minutes before cutting. Double the recipe for a crowd.
Nutrition
- Serving Size: 1 slider
- Calories: 300
- Sugar: 7
- Sodium: 550
- Fat: 20
- Saturated Fat: 8
- Carbohydrates: 20
- Fiber: 1
- Protein: 16
Keywords: cheeseburger sliders, game day recipe, slider recipe, easy sliders, party food, ground beef recipe, Hawaiian roll sliders


