My accountant, Mr. Henderson, is the last person on earth I ever expected to give me cooking advice. The man wears suspenders and talks about tax brackets the way some people talk about wine. But there I was, stuck in his office during a particularly dreary March afternoon, listening to him describe, with surprising passion, how he makes a small turkey for just him and his wife every Thanksgiving. I was supposed to be discussing quarterly estimates, but he was drawing diagrams on a napkin—a sad, beige diner napkin—explaining how to get the skin crisp without drying out the breast. Honestly, I thought I knew everything about roasting a bird. I mean, I’d been making big ones for crowds for years. But a whole turkey for two people? That felt almost sad, like a single balloon at a birthday party. He laughed at that. “It’s not sad,” he said, “it’s practical. And it’s the juiciest bird you’ll ever eat.” He was right. That napkin, now framed in my memory, held the secret to the perfect herb butter roasted turkey for two. Maybe you’ve been there—wanting the whole Thanksgiving experience without the mountain of leftovers that go bad before you can even think about turkey soup. This recipe is the answer to that very specific, very wonderful problem. It’s the one that made me close my tax folder and open my oven.
Why You’ll Love This Recipe
Let’s be real for a second. Cooking a massive turkey for a holiday can feel like a high-stakes science experiment. You’re terrified of drying it out, you have to deal with a giant bird taking up your whole fridge, and then you’re eating turkey sandwiches for two straight weeks. This recipe throws all that stress out the window. It’s designed for the pure, unadulterated joy of a perfect roast without the pressure or the leftovers.
- Perfectly Sized for Two: No more mountains of leftovers. You get a beautiful, impressive meal with just enough for a second day of sandwiches—not a week’s worth.
- Foolproof Juicy Meat: The secret is in the compound butter. It self-bastes the bird, ensuring white meat stays incredibly moist and dark meat is fall-apart tender.
- Simple Ingredients, Big Flavor: You likely have most of the herbs in your garden or spice rack. No exotic ingredients needed, just classic, comforting flavors.
- Shorter Roasting Time: A small turkey cooks in a fraction of the time. You can have a stunning, golden-brown centerpiece on the table in under two hours.
- Unbelievably Crispy Skin: The butter and dry-brining technique work together to create skin that shatters when you cut into it. It’s the kind of texture that makes you close your eyes after the first bite.
This isn’t just a smaller version of a big turkey recipe. It’s been carefully calibrated for a smaller bird. The ratio of herb butter to meat is higher, the cooking time is more forgiving, and the result is a more concentrated, luxurious flavor. It’s comfort food reimagined—faster, easier, but with the same soul-soothing satisfaction that a perfect roast dinner brings.
What Ingredients You Will Need
This recipe relies on a handful of high-quality ingredients to create a symphony of flavor. The beauty is in the simplicity—each component has a job to do, and together, they create something truly special. You’ll find most of these are pantry or fridge staples.
- For the Turkey:
- 1 (5-7 lb) whole turkey, thawed if frozen: Look for a small, fresh bird if possible. A fryer or roaster chicken size is perfect. Make sure it’s completely thawed in the refrigerator for 3-4 days.
- Kosher salt (1 tablespoon per 5 lbs of turkey): I prefer Diamond Crystal kosher salt for its clean flavor and easy pinchability. This is crucial for dry-brining.
- Black pepper (1 teaspoon, freshly ground): Freshly ground pepper makes a world of difference in aroma and flavor.
- For the Herb Butter:
- 1/2 cup (1 stick) unsalted butter, softened: Let it sit on the counter for an hour. You want it to be spreadable like mayonnaise, not melted. I use Kerrygold for its rich, grassy flavor.
- 2 tablespoons fresh rosemary, finely chopped: The woody, pine-like aroma is essential. Strip the leaves from the stem before chopping.
- 2 tablespoons fresh thyme leaves: These little leaves pack a punch of earthy, lemony flavor. No need to chop them too fine.
- 1 tablespoon fresh sage, finely chopped: Sage has a slightly peppery, almost minty flavor that is a classic pairing with poultry. (Adds a lovely savory depth).
- 4 cloves garlic, minced: Fresh garlic is non-negotiable here. It infuses the butter and the meat with a warm, pungent aroma.
- 1 teaspoon lemon zest: From one small lemon. The bright citrus cuts through the richness of the butter and herbs beautifully.
- For the Aromatics (Inside the Cavity):
- 1 lemon, halved: This steams from the inside, keeping the meat moist and adding a subtle citrus note.
- 1 small onion, quartered: Adds a sweet, savory base to the steam.
- 3 cloves garlic, smashed: Just give them a whack with the side of your knife to release their oils.
- A few sprigs of fresh rosemary and thyme: Use the leftover stems from your herb bunch.
- For the Pan (Optional but Recommended):
- 1/2 cup low-sodium chicken broth or dry white wine: This deglazes the pan drippings, preventing them from burning and creating a flavorful base for a quick gravy.
Equipment Needed
You don’t need a professional kitchen to pull this off, but having the right tools makes the process smoother and more enjoyable. Here’s what you’ll want on hand.
- Small Roasting Pan & V-Rack: A standard large roasting pan will dwarf a 6-lb bird. A small 9×13-inch baking dish or a small roasting pan works best. A V-rack is ideal for lifting the bird off the pan bottom, allowing hot air to circulate for even cooking and crispy skin. If you don’t have one, you can place the turkey on a bed of thickly sliced carrots and celery.
- Instant-Read Meat Thermometer: This is your best friend. I’ve ruined more turkeys by guessing than I care to admit. A simple digital thermometer is inexpensive and guarantees perfect doneness every single time.
- Kitchen Twine: For trussing the legs. It’s not strictly necessary, but it helps the bird cook more evenly and look prettier on the platter.
- Chef’s Knife & Cutting Board: For chopping herbs and carving the finished bird. A sharp knife makes all the difference.
- Small Bowl & Rubber Spatula: For mixing the herb butter. A spatula helps you get every last bit of that delicious butter.
- Basting Brush (Optional): If you want to baste with the pan juices, a silicone brush is handy. You can also use a large spoon.
- Aluminum Foil: For tenting the bird if the skin is browning too quickly.
Preparation Method
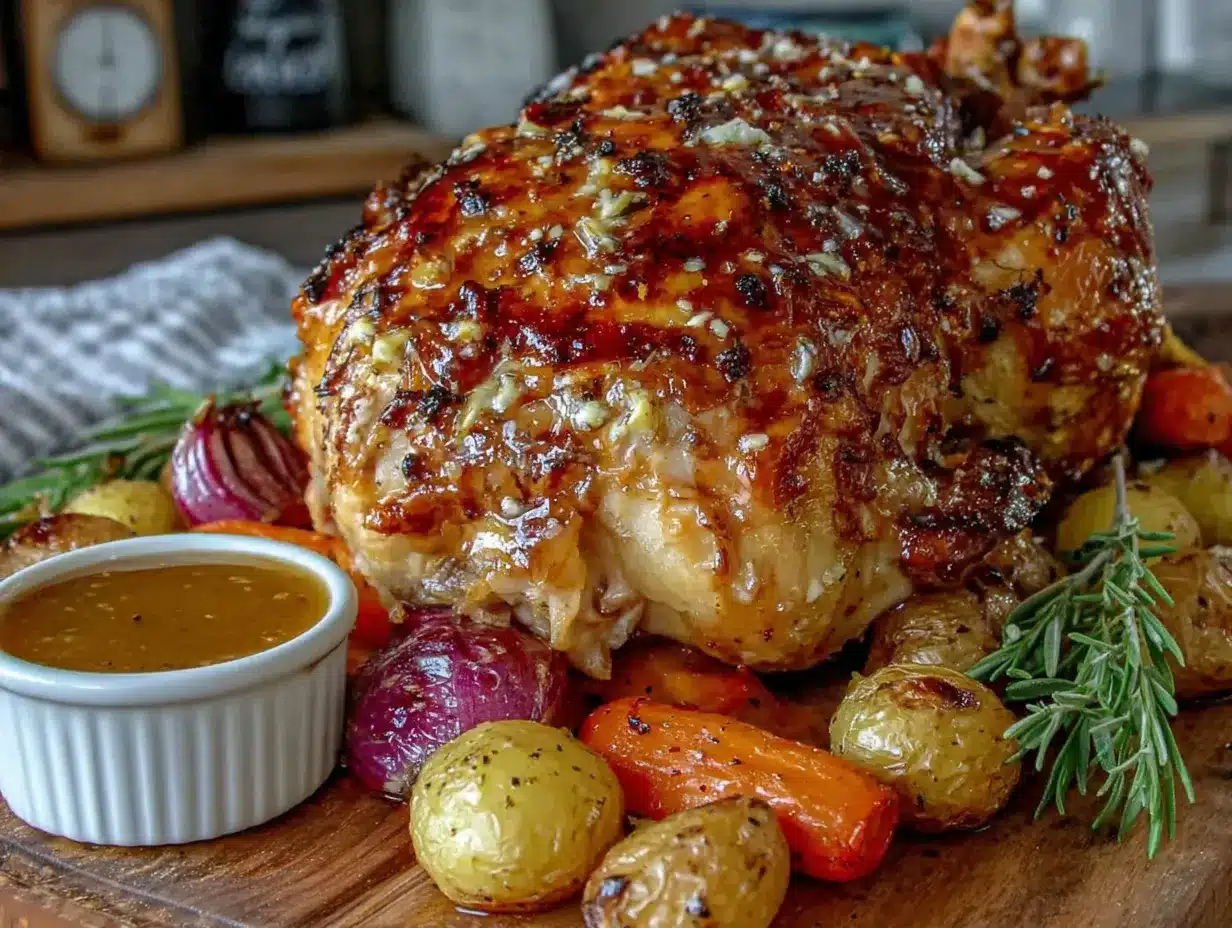
This is where the magic happens. Follow these steps, and you’ll have a turkey that looks like it came out of a magazine but tastes like it came from your heart. Trust the process, especially the resting time—it’s the hardest part!
- Dry-Brine the Bird (24 Hours Before): This is non-negotiable for the best skin and juiciest meat. Pat the turkey completely dry with paper towels—inside and out. Place it on a plate or small baking sheet. Season generously all over and inside the cavity with kosher salt. Don’t be shy. Place it, uncovered, in the refrigerator for at least 8 hours, or up to 24 hours. The salt will penetrate the meat, seasoning it deeply, and the air will dry out the skin, which is the secret to crispy perfection.
- Bring to Room Temp (1 Hour Before): About an hour before you plan to roast, take the turkey out of the fridge. This takes the chill off, promoting even cooking. Don’t skip this—a cold turkey will cook unevenly and the breast will dry out before the thighs are done.
- Preheat and Prep: Preheat your oven to 425°F (220°C). Move a rack to the lower third of the oven. In your small bowl, combine the softened butter, rosemary, thyme, sage, minced garlic, lemon zest, and a generous pinch of black pepper. Mix it until it’s a uniform, fragrant paste. It should look like a beautiful, green-flecked spread.
- Apply the Herb Butter: This is the fun part. Using your fingers, gently loosen the skin over the turkey breast. Be careful not to tear it. Slide about half of the herb butter under the skin, directly onto the breast meat. Use your fingers to spread it evenly. Then, rub the remaining butter all over the outside of the bird—the legs, thighs, and back. Get it everywhere. It feels a little like giving the turkey a spa treatment.
- Stuff and Truss: Stuff the cavity with the lemon halves, quartered onion, smashed garlic cloves, and remaining herb sprigs. This isn’t for stuffing to eat; it’s an aromatic steam bath for the inside of the bird. Tie the legs together with kitchen twine. Tuck the wing tips under the body of the bird so they don’t burn.
- Into the Oven: Place the turkey breast-side up on the V-rack in your small roasting pan. Pour the chicken broth or wine into the bottom of the pan—not over the bird. This will create steam and prevent the drippings from scorching. Roast at 425°F for 20 minutes. This high heat blast will kick-start the browning process.
- Lower the Heat and Roast: After 20 minutes, reduce the oven temperature to 350°F (175°C). Continue roasting. The total roasting time for a 5-7 lb turkey will be about 1 hour and 15 minutes to 1 hour and 45 minutes. Start checking for doneness at the 1-hour mark. The skin should be a deep, gorgeous golden brown.
- Check for Doneness (The Most Important Step!): Insert your instant-read thermometer into the thickest part of the thigh, avoiding the bone. You’re looking for 165°F (74°C). Also, check the thickest part of the breast—it should be around 160°F (71°C), as it will continue to rise while resting. If the skin is browning too quickly but the meat isn’t done yet, loosely tent the bird with a piece of aluminum foil.
- Rest, Rest, Rest: Once the turkey is perfectly cooked, transfer it to a cutting board. Do not skip this step. Tent it loosely with foil and let it rest for at least 20-30 minutes. This allows the juices to redistribute throughout the meat. If you cut into it too early, all those beautiful juices will run out onto the cutting board, leaving you with a dry turkey. I know it’s hard to wait, but this is where the patience pays off.
- Carve and Serve: After resting, remove the twine. The meat should be incredibly tender. Carve the breast off the bone in one piece, then slice it against the grain. Separate the legs and thighs. Spoon the pan juices over the top or use them to make a quick gravy. Serve immediately.
Cooking Tips & Techniques
I’ve made this turkey more times than I can count, and let me tell you, I’ve had my share of failures. One time, I forgot to take the giblets out of the cavity (the smell was… educational). Another time, I skipped the dry-brining step because I was in a hurry, and the skin was pale and rubbery. Learn from my mistakes!
- The Dry-Brine is Your Secret Weapon: Don’t skip it. It’s not just about saltiness. The salt breaks down proteins, allowing the meat to retain more moisture. The uncovered rest in the fridge is what dries out the skin. This is the single most important technique for a restaurant-quality result.
- Butter Temperature is Critical: Your butter needs to be soft but not melted. If it’s too cold, you’ll tear the skin trying to spread it. If it’s melted, it will just run off the bird and into the pan. Leave it out for at least an hour before you start.
- Don’t Over-Stuff the Cavity: You want the aromatics to steam, not to create a dense, wet mass that prevents heat from circulating. A few halved lemons and herbs are plenty. If you want stuffing, cook it in a separate dish.
- Why the High Heat Start? That initial blast of 425°F is what gives you the beautiful, crackly golden skin. It’s a common chef’s trick. If you keep the temp low the whole time, the skin will be pale and leathery. The lower temp afterwards ensures the inside cooks gently without burning the outside.
- Trust the Thermometer, Not the Timer: Ovens vary wildly. A pop-up timer is unreliable. The only way to know your turkey is perfectly cooked is with a good instant-read thermometer. It’s a tiny investment for a huge payoff in confidence.
Variations & Adaptations
One of the best things about this recipe is how easily it adapts to your taste or what you have on hand. Don’t be afraid to make it your own. Here are a few of my favorite twists.
- Citrus & Herb: Swap the rosemary and sage for a mix of fresh tarragon, parsley, and dill. Add the zest of an orange and a grapefruit to the butter. The result is a brighter, more spring-like flavor profile that’s fantastic with a simple green salad.
- Spicy Maple Glaze: For a sweet and savory kick, mix 2 tablespoons of maple syrup with 1 teaspoon of Dijon mustard and a pinch of cayenne pepper. About 30 minutes before the turkey is done, brush this glaze over the skin. It will caramelize into a beautiful, sticky, and slightly spicy coating.
- Garlic & Herb Butter for the Grill: You can absolutely make this on a charcoal or gas grill. Set it up for indirect grilling at 350°F (175°C). Place the turkey on the cooler side of the grill, away from the direct heat. Follow the same butter and resting steps. The smoke from the grill adds an incredible layer of flavor.
- Make it Dairy-Free: This is easier than you think. Simply substitute the butter with a high-quality vegan butter or a generous amount of olive oil. I’ve used a good extra-virgin olive oil infused with the same herbs and garlic, and it was surprisingly fantastic. The skin was slightly less crisp but still delicious.
Serving & Storage Suggestions
This turkey is a star on its own, but the right accompaniments can turn a great meal into an unforgettable one. Here’s how I like to serve and save my perfect herb butter roasted turkey for two.
Serving: Serve the turkey hot, right after its rest. I like to arrange the carved slices on a warm platter and spoon a little of the pan juices over the top to keep everything moist. It’s beautiful alongside simple roasted vegetables like carrots and parsnips. A fluffy mound of mashed potatoes is mandatory for soaking up the juices. For a drink, a dry Pinot Noir or a crisp Chardonnay pairs beautifully with the herb butter. Honestly, even a good hard cider works wonders.
Storage: Leftover turkey is a gift. Let it cool completely, then store it in an airtight container in the refrigerator. It will stay good for 3-4 days. The flavors actually meld and deepen overnight, making the leftover meat even more flavorful. I find the meat is still incredibly moist the next day.
Reheating: The key to reheating is to not dry it out. The best method is to place the slices in a baking dish with a splash of chicken broth or turkey gravy, cover with foil, and warm in a 300°F (150°C) oven for about 10-15 minutes. You can also reheat it gently in a skillet over low heat with a little butter. Avoid the microwave if you can—it tends to make the meat tough and rubbery.
Freezing: You can freeze cooked turkey for up to 2 months. Slice or shred the meat and pack it in freezer-safe bags or containers, removing as much air as possible. Thaw it overnight in the fridge before reheating. It’s perfect for quick soups, casseroles, or pot pies later on.
Nutritional Information & Benefits
While this is a celebratory dish, it’s also surprisingly wholesome. Turkey is a fantastic source of lean protein, which is great for muscle health and keeping you feeling full. The herbs—rosemary, thyme, and sage—are packed with antioxidants and have anti-inflammatory properties. Garlic is known for its immune-boosting benefits. And while butter is a fat, using a moderate amount in this recipe is part of what makes the meal so satisfying and flavorful without being overly heavy.
Estimated Nutritional Information (per serving, based on 4 oz of meat with skin):
- Calories: 350-400
- Protein: 30-35g
- Fat: 25-30g
- Carbohydrates: 1-2g
Note: These are estimates and will vary based on the specific ingredients and portion sizes. This recipe is naturally gluten-free and low-carb. For a lower-fat option, you can reduce the amount of herb butter or remove the skin before eating.
Conclusion
So there you have it. A perfect, golden, juicy herb butter roasted turkey that’s made just for two. It’s proof that you don’t need a crowd or a massive bird to have a memorable, special meal. This recipe has become a staple in my house, not just for holidays, but for any night we want to feel a little extra fancy without a ton of work. I love how it turns a simple Tuesday into something that feels like an occasion. It’s a reminder that the best meals are often the most personal ones. Now, I want to hear from you! Have you ever made a small turkey before? What’s your favorite side dish to serve with it? Drop a comment below and tell me all about it. And if you try this recipe, please share your photos—I absolutely love seeing your creations. Happy roasting!
Frequently Asked Questions
Can I use a frozen turkey?
Yes, but you must thaw it completely in the refrigerator before dry-brining. A 5-7 lb turkey will take about 2-3 days to thaw in the fridge. Never thaw a turkey on the counter, as it can lead to bacterial growth.
What if I don’t have fresh herbs?
You can use dried herbs, but the flavor will be less vibrant. Use about 1/3 of the amount called for fresh (e.g., 2 teaspoons dried rosemary instead of 2 tablespoons fresh). Be sure to crumble the dried herbs between your fingers to release their oils before mixing them into the butter.
My turkey is browning too fast. What should I do?
If the skin is getting too dark before the internal temperature reaches 160°F, loosely tent the entire bird with a piece of aluminum foil. This will slow down the browning while allowing the inside to continue cooking.
Can I make the herb butter ahead of time?
Absolutely! You can make the herb butter up to 3 days in advance. Shape it into a log using plastic wrap and store it in the refrigerator. Let it soften at room temperature for about 20 minutes before applying it to the turkey.
How do I make a quick gravy from the pan drippings?
After removing the turkey, place the roasting pan on the stovetop over medium heat. Add 1 cup of chicken broth and whisk, scraping up all the browned bits from the bottom of the pan. In a small bowl, whisk 2 tablespoons of cornstarch with 2 tablespoons of cold water to make a slurry. Whisk the slurry into the simmering pan juices and cook for 1-2 minutes until thickened. Season with salt and pepper to taste.
Pin This Recipe!
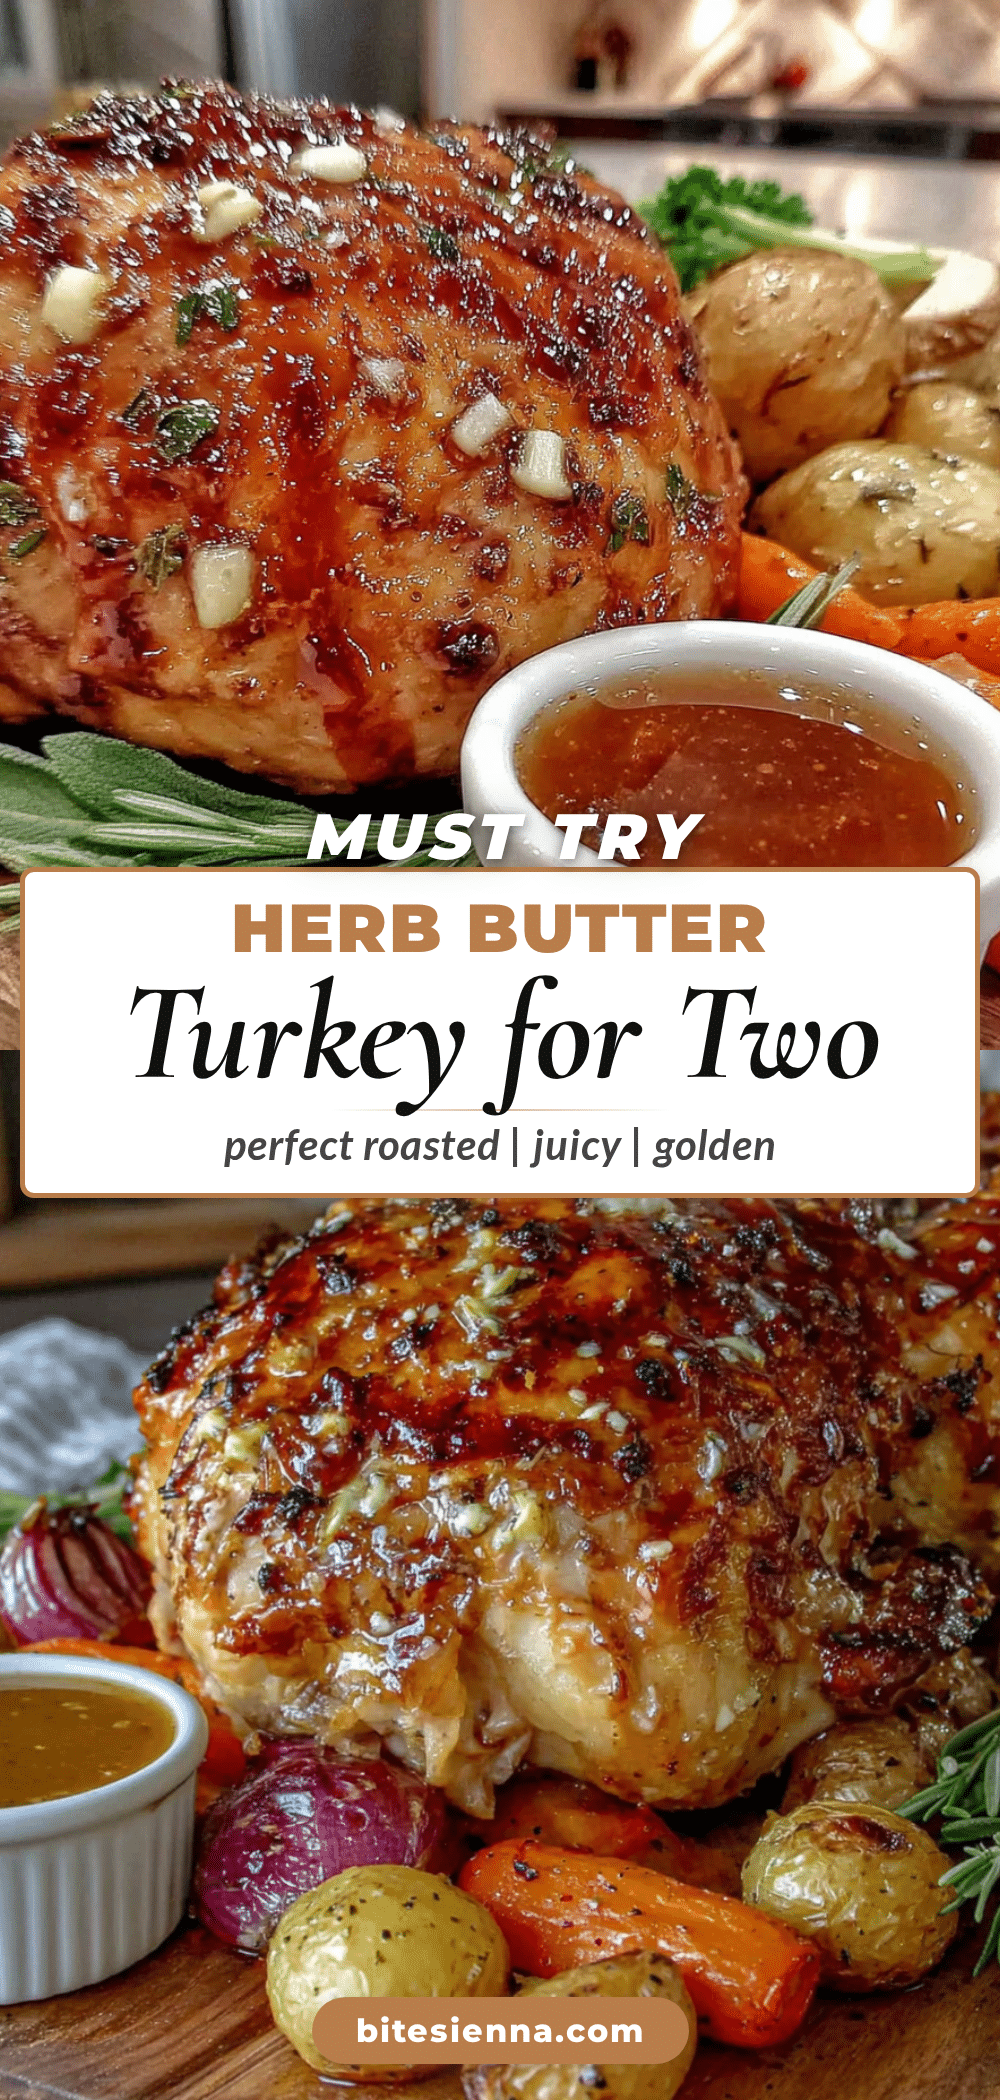
Perfect Herb Butter Roasted Turkey for Two
A perfectly sized, juicy, and golden-brown roasted turkey for two, featuring a flavorful herb butter that self-bastes the bird for incredibly moist meat and crispy skin. This recipe is designed for a small turkey, offering all the joy of a holiday roast without the stress or mountains of leftovers.
- Prep Time: 20 minutes
- Cook Time: 1 hour 35 minutes
- Total Time: 2 hours 15 minutes (plus 24 hours dry-brining)
- Yield: 4 servings 1x
- Category: Main Course
- Cuisine: American
Ingredients
- 1 (5-7 lb) whole turkey, thawed if frozen
- Kosher salt (1 tablespoon per 5 lbs of turkey)
- 1 teaspoon black pepper, freshly ground
- 1/2 cup (1 stick) unsalted butter, softened
- 2 tablespoons fresh rosemary, finely chopped
- 2 tablespoons fresh thyme leaves
- 1 tablespoon fresh sage, finely chopped
- 4 cloves garlic, minced
- 1 teaspoon lemon zest
- 1 lemon, halved
- 1 small onion, quartered
- 3 cloves garlic, smashed
- A few sprigs of fresh rosemary and thyme
- 1/2 cup low-sodium chicken broth or dry white wine
Instructions
- Dry-brine the turkey 24 hours before: Pat the turkey completely dry with paper towels. Season generously all over and inside the cavity with kosher salt. Place it, uncovered, in the refrigerator for at least 8 hours, or up to 24 hours.
- About 1 hour before roasting, take the turkey out of the fridge to bring it to room temperature.
- Preheat oven to 425°F (220°C). Move a rack to the lower third of the oven.
- In a small bowl, combine softened butter, rosemary, thyme, sage, minced garlic, lemon zest, and a generous pinch of black pepper. Mix until uniform.
- Gently loosen the skin over the turkey breast. Slide about half of the herb butter under the skin. Rub the remaining butter all over the outside of the bird.
- Stuff the cavity with lemon halves, quartered onion, smashed garlic cloves, and remaining herb sprigs. Tie the legs together with kitchen twine. Tuck the wing tips under the body.
- Place the turkey breast-side up on a V-rack in a small roasting pan. Pour chicken broth or wine into the bottom of the pan. Roast at 425°F for 20 minutes.
- Reduce oven temperature to 350°F (175°C). Continue roasting for about 1 hour 15 minutes to 1 hour 45 minutes total, until the thickest part of the thigh reaches 165°F (74°C) and the breast reaches 160°F (71°C). Tent with foil if browning too quickly.
- Transfer turkey to a cutting board, tent loosely with foil, and let rest for at least 20-30 minutes.
- Remove twine, carve, and serve with pan juices.
Notes
Dry-brining is essential for the best skin and juiciest meat. Butter must be soft but not melted. Do not over-stuff the cavity. Trust the thermometer, not the timer. Resting is crucial for juicy meat.
Nutrition
- Serving Size: 4 oz of meat with sk
- Calories: 375
- Sodium: 800
- Fat: 27.5
- Saturated Fat: 12
- Carbohydrates: 1.5
- Protein: 32.5
Keywords: herb butter roasted turkey, small turkey, turkey for two, roasted turkey, Thanksgiving turkey, easy turkey recipe, juicy turkey, crispy skin turkey