The school Halloween party was in twelve hours and I’d completely forgotten. My daughter, Lily, had reminded me every single day for two weeks, and somehow—honestly, I still don’t know how—it slipped right out of my brain. It was 9 PM on a Tuesday, the grocery stores were closing, and all I had in the pantry was a box of vanilla cake mix, a can of frosting, and some white chocolate chips I’d bought for a cookie recipe I never got around to making. Every other parent was probably bringing those elaborate Pinterest-perfect treats that took three days to assemble. I stood there staring at my sad little ingredients, feeling that familiar knot of panic in my stomach. You know that feeling when you’ve really dropped the ball and there’s no graceful way out?
I grabbed my phone and started frantically searching for something, anything, that didn’t require a trip to the store or an oven preheat. That’s when I stumbled on the concept of cake pops—specifically, no-bake ones. I’d always thought cake pops required baking a cake, crumbling it, rolling it, the whole production. But it turns out, you can skip the baking entirely. I mean, who knew? I had everything I needed right there on my counter. By 9:45 PM, I was rolling little eyeball-shaped balls and dipping them in white chocolate. I’ll be honest, I was not expecting much. I was just trying to survive the mom-guilt.
The next day, I walked into that classroom with a platter of these spooky little eyeball cake pops, feeling sheepish next to the elaborate graveyard cakes and pumpkin-shaped cookies. And then it happened—the kids went absolutely nuts for them. They were the first thing to disappear. Lily came home with three friends begging for the recipe. I just laughed and said, “I’ll send it to your moms.” These spooky no-bake Halloween eyeball cake pops saved me that night, and they’ve been my go-to Halloween trick ever since. Honestly, they’re so much easier than anything else I’ve ever made for a party, and they look way more impressive than they have any right to be.
Why You’ll Love This Recipe
Let me tell you why these Spooky No-Bake Halloween Eyeball Cake Pops have become my secret weapon for every Halloween gathering. I’ve tested this recipe more times than I can count, tweaking the chocolate-to-cake ratio and the chilling time until it was absolutely foolproof. This isn’t just another recipe you’ll bookmark and forget—this is the one you’ll actually make, probably more than once this season.
- Quick & Easy: These come together in about 20 minutes of active time. No oven, no complicated steps, no stress. Perfect for that 10 PM panic moment we all know too well.
- Simple Ingredients: You probably have most of this stuff in your pantry right now. No hunting down specialty candy melts or weird food coloring at three different stores.
- Perfect for Halloween Parties: Whether it’s a school event, a neighborhood potluck, or just a spooky movie night at home, these little eyeballs are always the star of the show.
- Crowd-Pleaser: Kids love them because they’re fun and spooky. Adults love them because they taste like a giant, indulgent truffle. It’s a win-win.
- Unbelievably Delicious: The texture is this perfect combination of creamy and slightly dense, like the best cake truffle you’ve ever had. The white chocolate shell gives it that satisfying snap, and the little candy eyeball on top just seals the deal.
What makes these different from every other cake pop recipe out there is the no-bake approach. Most recipes have you bake an entire cake first, then crumble it up. That’s just extra work for no reason. By using leftover cake or even just mixing frosting with crushed cookies or cake crumbs, you skip the whole baking step and get straight to the fun part: rolling and decorating. Plus, the texture is actually better—moister, more fudge-like, and less crumbly. It’s comfort food reimagined for maximum efficiency. These are the kind of treats that make you close your eyes after the first bite, and then immediately reach for another one.
What Ingredients You Will Need
This recipe uses simple, humble ingredients to create something that looks like it came from a fancy bakery. The magic is all in the assembly, I promise. Here’s what you’ll need to gather:
- For the Cake Pop Base:
- 2 cups leftover vanilla or chocolate cake crumbs (or 1 box vanilla cake mix, prepared and crumbled) — I usually just bake a box mix and crumble it, but leftover homemade cake works beautifully too.
- 1/2 cup cream cheese frosting (store-bought or homemade) — I prefer store-bought for consistency, but a simple buttercream works great. Start with less and add more as needed.
- 1/4 teaspoon vanilla extract (optional, but adds a nice depth)
- For the Outer Coating:
- 12 ounces white chocolate melting wafers or white chocolate chips — I’ve tried a few brands, and Ghirardelli white chocolate chips melt the smoothest. Wilton candy melts are also a solid choice.
- 1 tablespoon coconut oil or vegetable shortening (helps the chocolate thin out for dipping)
- For the Decorations:
- 24-30 candy eyeballs (the little edible ones you find in the baking aisle) — you can also use white chocolate chips with a dot of black icing if you can’t find the real thing.
- Red gel food coloring (for the bloodshot veins) — Americolor or Wilton brand works best; liquid food coloring is too runny.
- Black gel food coloring (for the pupils, if using white chocolate chips instead of candy eyeballs)
- For the Sticks:
- 24-30 lollipop sticks or paper straws — I like the paper straws for a more eco-friendly option, but the classic white lollipop sticks look cleaner.
A few notes on ingredient selection: Look for cake that’s not too dry. If your cake is on the drier side, you might need a little extra frosting to get the right consistency. For the white chocolate, avoid using cheap white chocolate chips that have a waxy texture—they won’t melt as smoothly and the coating will be grainy. I learned that one the hard way. The coconut oil is a game-changer for thinning the chocolate without making it greasy. If you’re dairy-free, use a good quality dairy-free white chocolate and a plant-based shortening.
For substitutions, you can absolutely use a gluten-free cake mix if needed. Just make sure it’s fully cooled and crumbled before mixing. You can also swap the cream cheese frosting for a dairy-free version, or even use a simple powdered sugar glaze mixed with a little milk. The key is getting that Play-Doh-like consistency where the mixture holds together when you squeeze it.
Equipment Needed
You don’t need a fancy kitchen setup for these spooky no-bake Halloween eyeball cake pops. Here’s what you’ll want to have on hand:
- Large mixing bowl — for combining the cake crumbs and frosting.
- Baking sheet or tray — lined with parchment paper or a silicone mat for the cake pops to set on.
- Small microwave-safe bowl — for melting the white chocolate. Glass works best.
- Fork or dipping tool — a regular dinner fork works surprisingly well for dipping and draining excess chocolate.
- Lollipop sticks or paper straws — 24 to 30 of them.
- Styrofoam block or cardboard box — to hold the cake pops upright while they set. I’ve used a shoebox with holes poked in it in a pinch.
- Measuring cups and spoons — for the frosting and coconut oil.
- Small piping bag or zip-top bag — for applying the red gel food coloring veins.
If you don’t have lollipop sticks, you can absolutely skip them and just make cake balls instead—they’re just as delicious, just less “pop-like.” For the Styrofoam block, I’ve used a cardboard egg carton flipped upside down with holes poked in it. It’s not pretty, but it works. Also, a silicone spatula is your best friend for scraping every last bit of chocolate out of the bowl.
Preparation Method
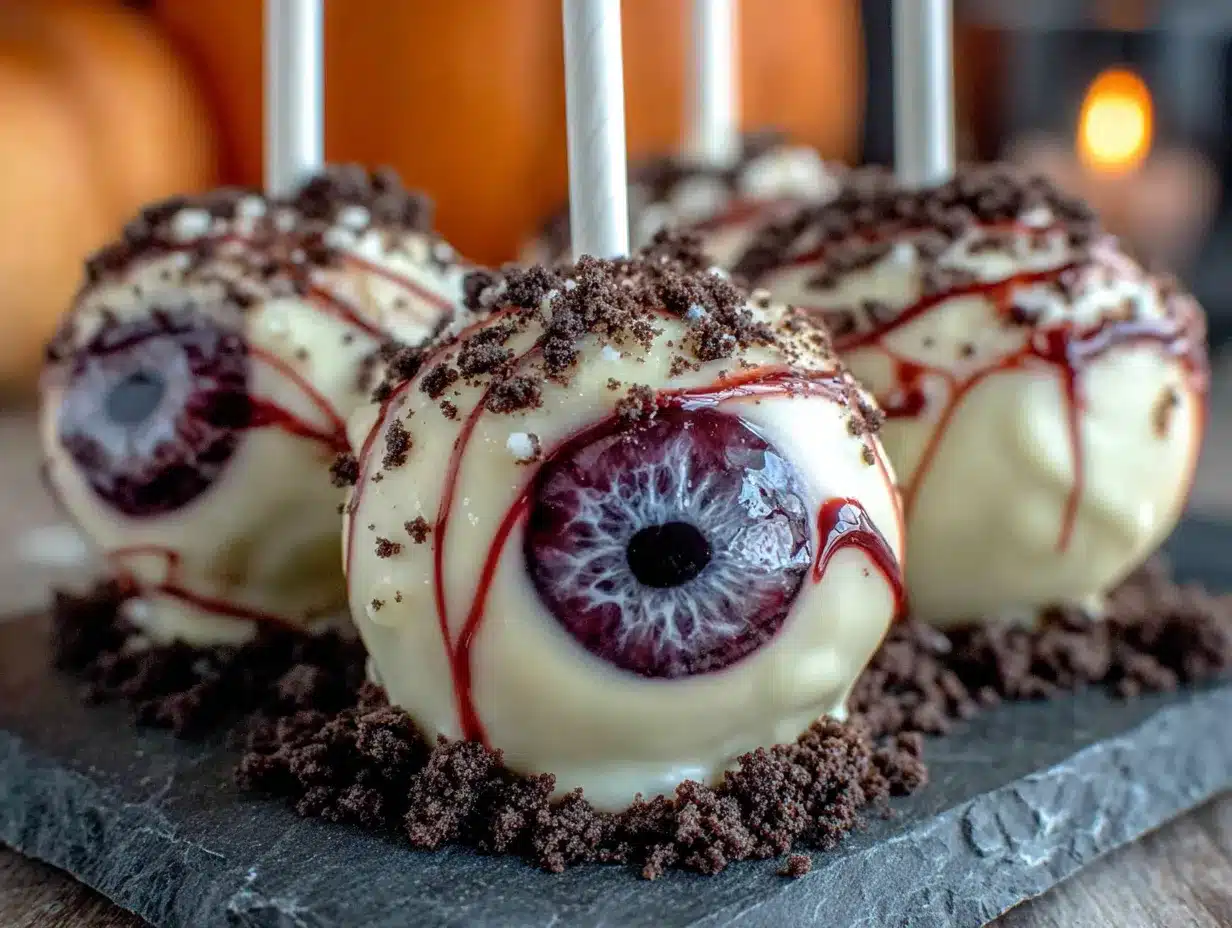
Alright, let’s get into the actual making of these spooky little guys. I promise it’s easier than it looks.
- Prepare your cake crumbs. If you’re using leftover cake, crumble it into a large bowl using your hands or a fork. You want fine, even crumbs—no large chunks. If you’re starting from a box mix, bake the cake according to package directions in a 9×13 pan, let it cool completely, and then crumble it. This takes about 30 minutes of cooling time, so plan ahead. You should have about 2 cups of crumbs.
- Make the cake pop dough. Add the cream cheese frosting to the cake crumbs, starting with 1/3 cup. Mix it together with a spatula or your hands (I find hands work best—it’s messy but you can really feel the texture). You’re looking for a consistency similar to Play-Doh—it should hold together when you squeeze it in your fist, but not be sticky or greasy. If it’s too dry, add more frosting a tablespoon at a time. If it’s too wet, add a few more cake crumbs. Add the vanilla extract now if you’re using it.
- Roll the eyeball shapes. Scoop out about 1 tablespoon of the mixture and roll it into a ball between your palms. Then, gently shape it into an oval or slightly elongated eyeball shape. Don’t stress about perfection—eyeballs are naturally a little irregular. Place each shaped eyeball on the parchment-lined baking sheet. You should get about 24 to 30, depending on size.
- Chill the eyeballs. Pop the baking sheet into the refrigerator for at least 30 minutes, or up to an hour. This step is crucial—if the balls aren’t cold enough, they’ll fall apart when you dip them in the warm chocolate. I’ve made that mistake, and it’s a mess. Trust me on this one.
- Melt the white chocolate. About 10 minutes before you’re ready to dip, place the white chocolate wafers and coconut oil in a microwave-safe bowl. Microwave in 30-second bursts, stirring well after each, until the chocolate is completely smooth and melted. Be careful not to overheat it—white chocolate burns easily and gets grainy. If it seizes up, you can try adding a little more coconut oil, but it’s often a lost cause. Low and slow is the way to go.
- Dip the cake pops. Remove the chilled eyeballs from the fridge. Take one cake ball and gently insert a lollipop stick about halfway through. Dip the entire ball into the melted white chocolate, making sure it’s fully submerged. Use a fork to lift it out, gently tapping the fork on the edge of the bowl to let the excess chocolate drip off. You want a thin, even coating—not a thick, gloppy one.
- Set the pops upright. Immediately stick the lollipop stick into your Styrofoam block or cardboard box. Work quickly—the chocolate will start to set as it cools. If you see any bare spots, you can use a small spoon to dab a little extra chocolate on them before they set.
- Add the candy eyeballs. While the white chocolate is still wet, gently press a candy eyeball onto the center of each cake pop. Don’t push too hard or you’ll crack the coating. The chocolate will act as glue.
- Create the bloodshot veins. Once all the pops have their eyeballs and the white chocolate has set (about 10 minutes), it’s time for the spooky details. Dip a toothpick into the red gel food coloring and carefully draw thin, wiggly lines radiating outward from the candy eyeball. Think bloodshot veins. A little imperfection looks more realistic—you want them to look a bit chaotic. Let the gel dry for about 5 minutes.
- Finish and serve. Once everything is set, your spooky no-bake Halloween eyeball cake pops are ready to serve. Arrange them on a platter with the sticks pointing up, or place them in a vase or jar for a dramatic display.
Cooking Tips & Techniques
I’ve made these spooky no-bake Halloween eyeball cake pops more times than I care to count, and I’ve definitely learned a few things along the way. Let me save you some trouble.
The chilling step is non-negotiable. I know it’s tempting to skip it when you’re in a hurry, but cold cake balls are the difference between a beautiful cake pop and a chocolate-covered disaster. If they’re even slightly warm, they’ll crumble and fall apart in the chocolate, leaving you with a bowl of speckled goo. I learned this the hard way when I tried to rush through it for a last-minute party. Never again.
Thin your chocolate properly. White chocolate is naturally thick, so adding that tablespoon of coconut oil or shortening makes a huge difference. It thins the chocolate out so it coats the cake pops evenly and doesn’t clump up. If your chocolate starts to thicken as you work, pop it back in the microwave for 10 seconds and stir. Just don’t overheat it.
Work in small batches. Don’t take all the cake balls out of the fridge at once. They’ll warm up quickly, and you’ll be fighting to keep them from falling apart. Take out 5 or 6 at a time, dip them, and then grab the next batch. It takes a little longer, but the results are worth it.
Use a fork for dipping. I’ve tried special cake pop dipping tools, and honestly, a regular dinner fork works better. Slide the fork under the cake pop, lower it into the chocolate, and then lift it out, letting the excess drip through the tines. Tap the fork gently on the edge of the bowl to encourage the chocolate to drip off. It’s a simple trick, but it makes a huge difference in the final look.
Don’t overmix the dough. When you’re combining the cake crumbs and frosting, mix just until it comes together. Overmixing can make the texture dense and pasty, which isn’t as pleasant to eat. You want it to be cohesive but still light.
Variations & Adaptations
One of the best things about this recipe is how easy it is to customize. Here are a few variations I’ve tried and loved:
- Gluten-Free Version: Use a gluten-free vanilla or chocolate cake mix for the base. Everything else in the recipe is naturally gluten-free, so it’s an easy swap. Just make sure your candy eyeballs and white chocolate are certified gluten-free if that’s a concern.
- Dairy-Free Version: Swap the cream cheese frosting for a dairy-free version (there are some great store-bought options now) and use dairy-free white chocolate. The coconut oil is already dairy-free, so that’s one less thing to worry about.
- Chocolate Eyeballs: Instead of white chocolate, use dark or milk chocolate for the coating. They won’t look like traditional eyeballs, but they’ll taste amazing—like chocolate truffles with a spooky surprise inside.
- Monster Eyeballs: Instead of just one candy eyeball, add two or three on each pop to create a multi-eyed monster look. Kids absolutely love this variation.
- Glow-in-the-Dark Eyeballs: Use a small amount of edible glow powder (available at baking supply stores) mixed into the white chocolate. The pops will have a faint, spooky glow when the lights are off. It’s a fun party trick.
- Blood Drip Effect: Instead of just veins, let some of the red gel drip down the sides of the white chocolate coating for a more gruesome, bloody look. Perfect for a haunted house party.
I once made a batch with a chocolate cake base and dark chocolate coating, and called them “zombie eyeballs.” They were a hit at a friend’s Halloween party. The dark chocolate paired beautifully with the sweet cream cheese frosting, and the candy eyeballs looked extra eerie against the dark background. Don’t be afraid to experiment—the worst that happens is you end up with a delicious mistake.
Serving & Storage Suggestions
These spooky no-bake Halloween eyeball cake pops are best served chilled or at room temperature. If you’re serving them at a party, I recommend keeping them in the refrigerator until just before you set them out. They’ll hold their shape better and the chocolate will stay firm.
For presentation, I like to arrange them in a small vase or mason jar with the sticks pointing up. You can also stick them into a carved pumpkin or a block of floral foam covered in black tissue paper for a more dramatic display. For a classroom party, a simple platter works fine—just make sure they’re not touching each other or the chocolate might stick.
These cake pops pair wonderfully with a warm cup of apple cider or a hot chocolate. For an adult gathering, they’re fantastic with a pumpkin spice latte or even a glass of red wine—the sweetness of the white chocolate balances nicely with a dry red. If you’re serving them alongside other Halloween treats, they look amazing next to a plate of pumpkin-shaped cookies or a bowl of candy corn.
Storage: Store any leftover cake pops in an airtight container in the refrigerator for up to 5 days. They actually taste better the next day—the flavors meld together and the texture becomes even more fudge-like. To freeze them, place the finished pops on a baking sheet in the freezer for an hour, then transfer them to a freezer-safe bag or container. They’ll keep for up to 3 months. To thaw, just move them to the refrigerator overnight. The chocolate might develop a slight bloom (white spots) after freezing, but it’s purely cosmetic and doesn’t affect the taste.
Reheating: Honestly, these are best eaten cold or at room temperature. I wouldn’t recommend reheating them, as the chocolate will melt and the texture will become messy. If you want a warm treat, try dipping them in hot coffee or hot chocolate—it’s a fun, indulgent way to enjoy them.
Nutritional Information & Benefits
Let’s be real—these spooky no-bake Halloween eyeball cake pops are a treat, not a health food. But that doesn’t mean they can’t fit into a balanced lifestyle, especially during the Halloween season when a little indulgence is part of the fun.
Here are the estimated nutritional values per cake pop (based on 24 pops):
- Calories: 180
- Total Fat: 9g
- Saturated Fat: 5g
- Carbohydrates: 24g
- Sugar: 18g
- Protein: 2g
- Sodium: 95mg
These values will vary depending on the specific brands and ingredients you use. If you’re looking to lighten them up, you can use a sugar-free cake mix and a low-fat cream cheese frosting. The white chocolate is the hardest thing to substitute, but there are sugar-free white chocolate chips available if you search for them.
From a wellness perspective, I like to think of these as a “sometimes food.” They’re perfect for a special occasion like Halloween, and because they’re so rich and satisfying, most people are happy with just one or two. Plus, making them at home means you know exactly what’s in them—no weird preservatives or artificial flavors. And honestly, the joy on a kid’s face when they see these spooky eyeballs? That’s a health benefit for the soul, if you ask me.
Conclusion
These spooky no-bake Halloween eyeball cake pops have become a staple in my Halloween rotation, and I honestly don’t see that changing anytime soon. They’re the perfect combination of easy, impressive, and delicious—three things that rarely show up in the same recipe. Whether you’re a seasoned baker or someone who’s never made a cake pop in your life, I promise you can pull these off.
What I love most about this recipe is how forgiving it is. You can mess up the shape, the chocolate can get a little lumpy, the veins can look like a toddler drew them—and somehow, they still look spooky and fun. There’s no pressure for perfection here. That’s the whole point of Halloween, right? A little chaos, a little mischief, and a whole lot of sugar.
I’d love to hear how yours turn out! Did you try any fun variations? Did your kids love them? Drop a comment below and let me know—I read every single one, and I always get a kick out of seeing your creations. And if you’re looking for more easy Halloween treats, be sure to check out my crispy rice pumpkin patches and ghost meringue cookies—they’re just as simple and just as fun. Happy Halloween, and happy snacking!
Frequently Asked Questions
Can I use a different flavor of cake mix?
Absolutely! Red velvet, chocolate, lemon, or even spice cake would work beautifully. Just keep in mind that the color of the cake will show through the white chocolate if the coating is thin. For a more traditional eyeball look, vanilla or white cake is your best bet, but don’t let that stop you from experimenting.
My cake pop mixture is too dry. What should I do?
Add more frosting, one tablespoon at a time, until the mixture holds together when squeezed. The exact amount will depend on how moist your cake is. If you accidentally add too much and the mixture becomes sticky, just add a few more cake crumbs to balance it out.
Why did my white chocolate seize up?
White chocolate is notoriously finicky. It seizes when it comes into contact with even a tiny amount of water, or if it’s overheated. Make sure all your bowls and utensils are completely dry, and always microwave in short bursts, stirring between each. If it does seize, you can sometimes rescue it by adding a tablespoon of coconut oil and stirring vigorously, but it’s often a lost cause. Better to start fresh.
Can I make these ahead of time?
Yes! These cake pops actually keep very well. You can make them up to 3 days in advance and store them in an airtight container in the refrigerator. They also freeze beautifully for up to 3 months. Just make sure they’re fully set before you pack them away.
How do I get the red veins to look realistic?
Less is more. Use a toothpick or a very fine paintbrush dipped in red gel food coloring. Draw thin, slightly wiggly lines radiating out from the center of the eyeball. Don’t try to make them perfectly straight—real veins are chaotic. A few uneven lines look more natural (and spookier) than a perfect pattern.
Pin This Recipe!
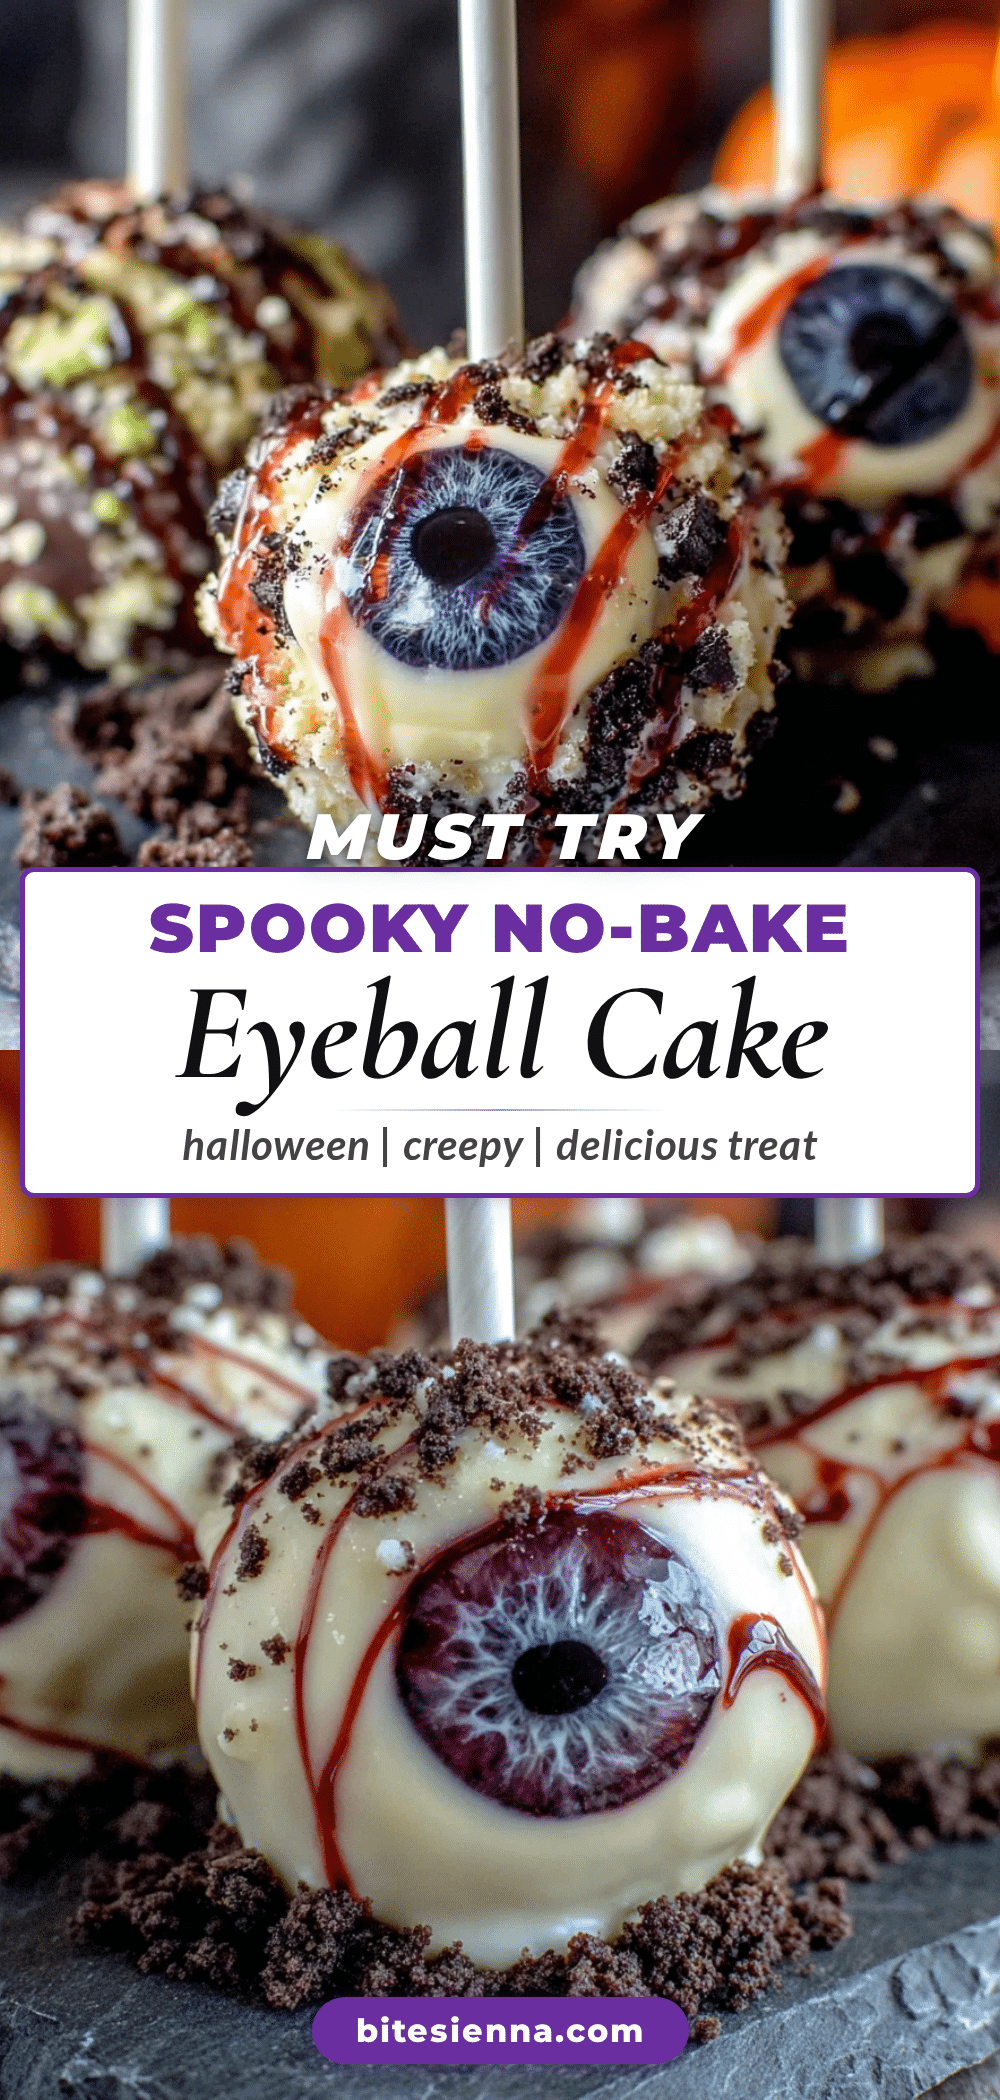
Spooky No-Bake Halloween Eyeball Cake Pops
These spooky no-bake Halloween eyeball cake pops are quick, easy, and perfect for last-minute Halloween parties. Made with simple ingredients and no oven required, they’re a crowd-pleasing treat that looks impressively spooky.
- Prep Time: 20 minutes
- Cook Time: 0 minutes
- Total Time: 1 hour (including chilling time)
- Yield: 24-30 servings 1x
- Category: Dessert
- Cuisine: American
Ingredients
- 2 cups leftover vanilla or chocolate cake crumbs (or 1 box vanilla cake mix, prepared and crumbled)
- 1/2 cup cream cheese frosting (store-bought or homemade)
- 1/4 teaspoon vanilla extract (optional)
- 12 ounces white chocolate melting wafers or white chocolate chips
- 1 tablespoon coconut oil or vegetable shortening
- 24–30 candy eyeballs
- Red gel food coloring
- Black gel food coloring (optional, for pupils)
- 24–30 lollipop sticks or paper straws
Instructions
- Prepare your cake crumbs. If using leftover cake, crumble it into a large bowl using your hands or a fork until you have fine, even crumbs. If starting from a box mix, bake the cake according to package directions in a 9×13 pan, let it cool completely, then crumble it. You should have about 2 cups of crumbs.
- Make the cake pop dough. Add the cream cheese frosting to the cake crumbs, starting with 1/3 cup. Mix together with a spatula or your hands until the consistency is similar to Play-Doh—it should hold together when squeezed but not be sticky or greasy. Add more frosting if too dry, or more cake crumbs if too wet. Add vanilla extract if using.
- Roll the eyeball shapes. Scoop out about 1 tablespoon of the mixture and roll it into a ball between your palms, then gently shape it into an oval or slightly elongated eyeball shape. Place each shaped eyeball on a parchment-lined baking sheet. You should get about 24 to 30.
- Chill the eyeballs. Place the baking sheet in the refrigerator for at least 30 minutes, or up to 1 hour. This step is crucial to prevent them from falling apart when dipped.
- Melt the white chocolate. About 10 minutes before dipping, place the white chocolate wafers and coconut oil in a microwave-safe bowl. Microwave in 30-second bursts, stirring well after each, until completely smooth and melted. Be careful not to overheat.
- Dip the cake pops. Remove the chilled eyeballs from the fridge. Gently insert a lollipop stick about halfway through each cake ball. Dip the entire ball into the melted white chocolate, ensuring it’s fully submerged. Use a fork to lift it out, tapping gently to let excess chocolate drip off.
- Set the pops upright. Immediately stick the lollipop stick into a Styrofoam block or cardboard box. Work quickly as the chocolate will start to set.
- Add the candy eyeballs. While the white chocolate is still wet, gently press a candy eyeball onto the center of each cake pop.
- Create the bloodshot veins. Once the white chocolate has set (about 10 minutes), dip a toothpick into red gel food coloring and carefully draw thin, wiggly lines radiating outward from the candy eyeball. Let the gel dry for about 5 minutes.
- Finish and serve. Once everything is set, arrange the cake pops on a platter or in a vase for display.
Notes
The chilling step is non-negotiable to prevent cake pops from falling apart. Thin the white chocolate with coconut oil for a smooth coating. Work in small batches to keep cake balls cold. Use a fork for dipping to remove excess chocolate. Don’t overmix the dough to keep it light.
Nutrition
- Serving Size: 1 cake pop
- Calories: 180
- Sugar: 18
- Sodium: 95
- Fat: 9
- Saturated Fat: 5
- Carbohydrates: 24
- Protein: 2
Keywords: Halloween cake pops, no-bake cake pops, eyeball cake pops, spooky treats, easy Halloween dessert, no-bake dessert, cake pop recipe


