There used to be a tiny, wood-paneled diner off Route 9 in Massachusetts called “The Campfire.” It had a neon sign of a marshmallow on a stick that flickered on and off, and they made these ridiculously decadent cookie bars that were basically a s’more in bar form. When they closed for good back in 2019—the building got bought out for a chain pharmacy—I honestly felt a little pang of loss. It sounds dramatic, I know, but those bars were the stuff of legend. After maybe seven or eight tries—some were too dry, some collapsed into a sugary mess—I finally cracked the code. This is that recipe.
These Ultimate Gooey S’mores Stuffed Chocolate Chip Cookie Bars are the real deal. They have a thick, chewy chocolate chip cookie base, a layer of gooey toasted marshmallow, and a rich chocolate-honey graham cracker middle that just melts in your mouth. I mean, the first time I pulled a pan of these out of the oven, I nearly burned my tongue because I couldn’t wait. The smell alone—warm chocolate, toasted marshmallow, and buttery graham cracker—takes me right back to that sticky vinyl booth. You know that feeling when a recipe just *works*? This is that recipe. It’s the kind of dessert you make when you want to impress someone without spending all day in the kitchen.
Let me tell you, the first batch I made was a disaster. I used mini marshmallows, which just melted into a puddle, and the cookie base turned into a rock-hard disc. But I learned from every failure. The key is using full-size marshmallows, pressing them in just right, and not overbaking. Honestly, it took a few burnt fingertips and one very sad, flat bar to get here. But now? These bars are my go-to for potlucks, movie nights, and those days when only a truly gooey, chocolatey, nostalgic dessert will do. Let’s get baking.
Why You’ll Love This Recipe
These aren’t just any cookie bars. They are a full-on, three-layer experience that hits every single note of a classic campfire s’more but in an easy, shareable format. I’ve tested this recipe about a dozen times, tweaking the butter-to-flour ratio and the marshmallow placement, and this version is absolutely foolproof. Here is why you are going to love it:
- Quick & Easy: From start to finish, these bars are ready in about 30 minutes. No chilling the dough, no complicated steps. Perfect for a last-minute dessert craving or a sudden guest situation.
- Simple Ingredients: You probably already have butter, sugar, flour, and chocolate chips in your pantry. The only special items are graham crackers and marshmallows, which are easy to find at any grocery store.
- Perfect for Gatherings: These bars are a guaranteed hit at parties, barbecues, or family dinners. They slice up beautifully and everyone loves the familiar s’mores flavor in a new form.
- Crowd-Pleaser: Kids go wild for them, and adults secretly love them just as much. There is no such thing as a leftover bar when I bring these to a gathering.
- Unbelievably Delicious: The combination of a soft, chewy cookie base, a layer of gooey toasted marshmallow, and a crunchy graham cracker middle is pure comfort food magic. It’s the kind of dessert that makes you close your eyes after the first bite.
What makes this recipe different from the dozens of other s’mores bars out there is the layering technique. Instead of mixing everything together, we build it like a structured dessert. The graham cracker layer stays crunchy, the marshmallow gets perfectly golden and stretchy, and the chocolate chips create little pockets of melted goodness throughout the cookie base. It is not just another version—it is the best version. It is comfort food reimagined: faster, easier, but with the same soul-soothing satisfaction of a real campfire s’more. Perfect for impressing guests without any stress, or turning a simple Tuesday night into something memorable.
What Ingredients You Will Need
This recipe uses simple, wholesome ingredients to deliver that big, bold s’mores flavor. Most of these are pantry staples, which makes this a great go-to recipe when you need a dessert fast. I have tested a few different brands and types, so I will share my honest recommendations below.
- Unsalted Butter, melted and slightly cooled (1 cup / 2 sticks / 226g): Butter is the backbone of flavor here. I always use unsalted so I can control the salt level. Melted butter gives these bars a chewier, denser texture compared to creamed butter, which makes them perfect for holding up the marshmallow layer.
- Light Brown Sugar, packed (1 cup / 200g): Brown sugar adds moisture and that deep, caramel-like sweetness that pairs so well with chocolate and marshmallow. Do not skip this for granulated sugar—the bars will be less chewy and flavorful. I recommend Domino or Wholesome Sweeteners for consistent results.
- Granulated Sugar (1/2 cup / 100g): A little white sugar helps with spread and gives the bars a slightly crisp edge. It balances the molasses notes of the brown sugar.
- Large Eggs, room temperature (2): Eggs bind everything together and add structure. Room temperature eggs mix more evenly into the melted butter, creating a smoother dough. If you forgot to take them out of the fridge, just place them in a bowl of warm water for 5 minutes.
- Vanilla Extract (2 teaspoons): Pure vanilla extract adds warmth and depth. Imitation vanilla works in a pinch, but pure is always better for baked goods.
- All-Purpose Flour (2 cups / 250g): Standard all-purpose flour gives these bars the perfect structure—not too cakey, not too dense. Spoon and level your flour for accuracy. Scooping directly from the bag can pack in too much flour, making the bars dry.
- Baking Soda (1 teaspoon): This helps the bars rise just a little and gives them a tender crumb. Make sure your baking soda is fresh (less than 6 months old) for the best lift.
- Salt (1/2 teaspoon): Salt is crucial in sweet baking. It balances the sweetness and enhances the chocolate and caramel flavors. I use fine sea salt for even distribution.
- Semi-Sweet Chocolate Chips (1 1/2 cups / 270g): Semi-sweet chips are the gold standard for cookie bars. They are not too sweet and they hold their shape well during baking. I love Ghirardelli or Guittard chips for their rich flavor. You can use milk chocolate if you prefer a sweeter bar.
- Graham Crackers (about 8 full sheets / 120g): These provide that classic s’mores crunch. Crush them into coarse crumbs—you want some larger pieces for texture. I use Honey Maid brand. For a gluten-free option, use gluten-free graham crackers.
- Large Marshmallows (about 20-24): Full-size marshmallows are non-negotiable here. Mini marshmallows melt too quickly and disappear into the dough. Large marshmallows create those beautiful, gooey pockets of toasted goodness. Jet-Puffed is my go-to brand.
Equipment Needed
You do not need any fancy gadgets for this recipe. A few basic kitchen tools will get the job done perfectly. Here is what you will need:
- 9×13-inch Baking Pan: This is the ideal size for these bars. A metal pan will give you a crisper edge, while a glass pan will yield a softer bar. I prefer metal for that slight crunch on the bottom. Line it with parchment paper for easy removal.
- Mixing Bowls: One large bowl for the wet ingredients and the dough, and a small bowl for the graham cracker crumbs.
- Whisk and Wooden Spoon or Spatula: A whisk for combining the wet ingredients and a sturdy spatula for folding in the flour and chocolate chips.
- Measuring Cups and Spoons: For accuracy. A kitchen scale is even better for the flour, but measuring cups work fine if you spoon and level.
- Sharp Knife or Pizza Cutter: For cutting the cooled bars cleanly. A pizza cutter is surprisingly the best tool for this job—it glides through the marshmallow without sticking too much.
- Parchment Paper: Absolutely essential for easy removal. If you skip this, you will be fighting to get the first bar out of the pan.
I have made these bars in a 9×9-inch pan as well, but they come out much thicker and need an extra 5-7 minutes of baking time. The 9×13 is the sweet spot for that perfect bar-to-marshmallow ratio. A silicone spatula is also a lifesaver for scraping every last bit of dough into the pan.
Preparation Method
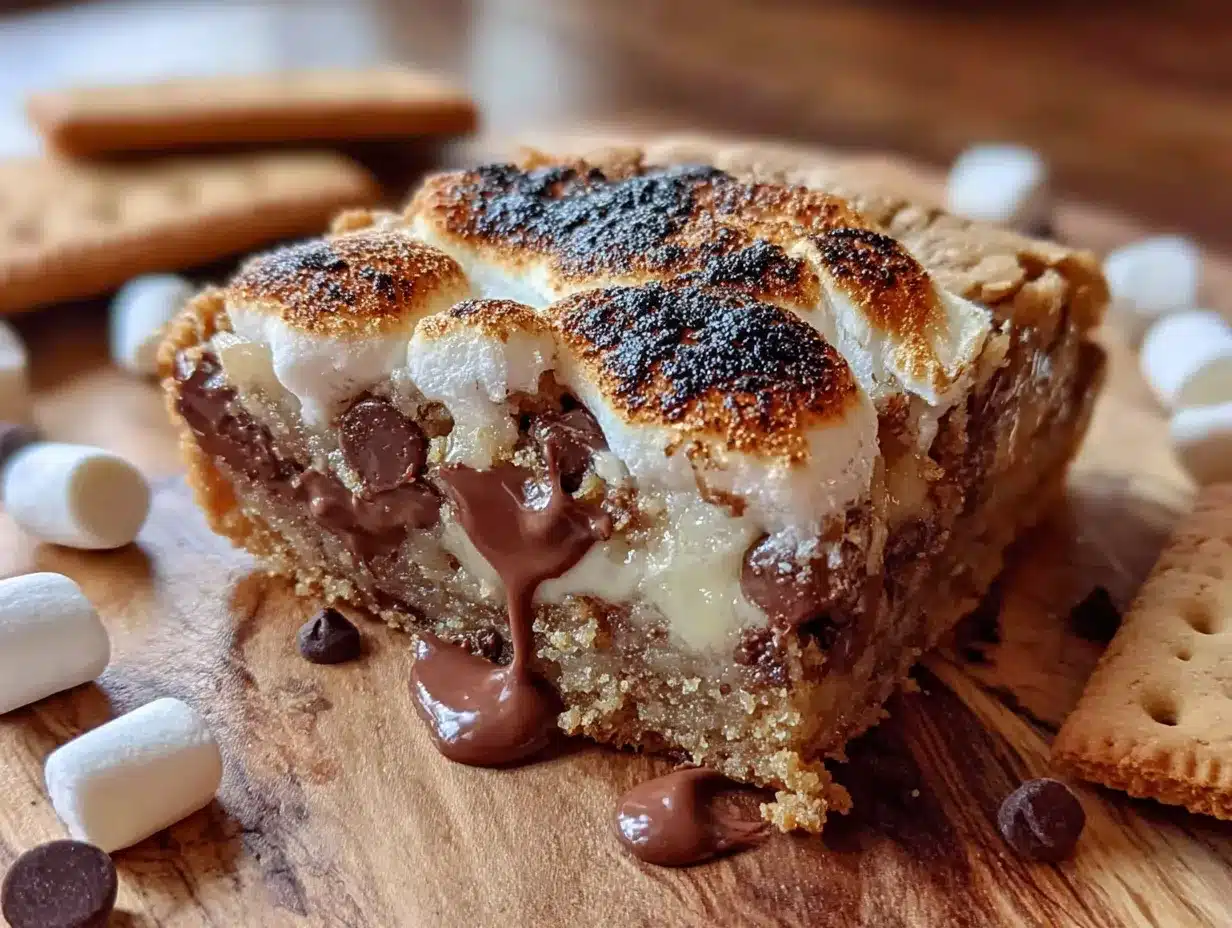
Alright, let’s get to the fun part. This recipe moves fast, so have all your ingredients measured and ready before you start. The oven does most of the work, and you will have a pan of gooey, golden bars in about 30 minutes. Let’s break it down step by step.
- Preheat and Prep: Preheat your oven to 350°F (175°C). Line your 9×13-inch baking pan with parchment paper, leaving a little overhang on the two long sides. This will be your “handle” to lift the bars out later. Lightly grease the parchment with non-stick spray or butter.
- Make the Cookie Dough Base: In a large mixing bowl, whisk together the melted butter and both sugars (brown and granulated) until smooth and well combined. It should look like wet sand. Add the eggs and vanilla extract, and whisk vigorously for about 30 seconds until the mixture is pale and slightly thickened. This is where the magic starts.
- Add the Dry Ingredients: Sprinkle the flour, baking soda, and salt over the wet mixture. Fold everything together with a spatula or wooden spoon until just combined. Do not overmix—a few streaks of flour are fine. Overworking the dough will make the bars tough. Fold in the semi-sweet chocolate chips until they are evenly distributed.
- Assemble the First Layer: Spread about two-thirds of the cookie dough evenly into the bottom of the prepared pan. This will be the thick, chewy base. It is a sticky dough, so use a spatula or lightly greased fingers to press it into an even layer. Take your time here to make sure the corners are filled.
- Add the Graham Cracker Layer: Sprinkle the crushed graham crackers evenly over the cookie dough base. Press them down lightly so they stick. This layer adds that signature crunch and prevents the marshmallows from sinking completely into the dough.
- Top with Marshmallows: Arrange the large marshmallows in neat rows over the graham cracker layer. I usually do 4 rows of 6 marshmallows, pressing them down gently so they are nestled into the crumbs. They will puff up and spread as they bake, so do not worry about gaps.
- Add the Dough Topping: Take the remaining one-third of the cookie dough and drop small spoonfuls over the marshmallows. It will not cover them completely—that is fine. You want some marshmallow peeking through so they can get golden and toasted. Gently press the dough pieces down to flatten them slightly.
- Bake to Perfection: Place the pan in the preheated oven and bake for 22-25 minutes. The edges should be golden brown, and the marshmallows should be puffed up and lightly toasted. The center will look a little soft—that is good. For a deeper golden top, switch the oven to broil for the last 30-60 seconds. Watch it like a hawk so the marshmallows do not burn.
- Cool and Slice: Remove the pan from the oven and let it cool on a wire rack for at least 20 minutes. This is the hardest part! The bars need time to set, or they will fall apart when you cut them. After 20 minutes, use the parchment overhang to lift the entire block out of the pan. Transfer to a cutting board and slice into 12-16 bars using a sharp knife or pizza cutter.
Sensory Cue: When you pull the pan out of the oven, the marshmallows should be soft and pillowy, with golden brown spots. The edges of the cookie base will be a deep amber color. The smell is intoxicating—warm butter, caramelized sugar, and toasted marshmallow. If the marshmallows collapse slightly as they cool, that is totally normal. They will firm up into that perfect gooey texture.
Cooking Tips & Techniques
I have made these bars more times than I care to admit, and I have learned a few tricks along the way. Here are my best tips to ensure perfect results every single time.
Do not overbake. This is the most common mistake. The bars will continue to set as they cool, so pull them out when the edges are golden and the center still looks a little soft. If you wait until the center is fully firm, you will end up with dry, hard bars. Trust the 22-25 minute mark and the visual cues.
Use room temperature eggs. I learned this the hard way. Cold eggs will seize the melted butter, creating a lumpy dough. Warm eggs emulsify beautifully, giving you a smooth, cohesive batter. Just set them on the counter for 15 minutes before you start, or place them in a bowl of warm water for 5 minutes.
Press the graham crackers down firmly. If you leave them loose, they will shift around when you place the marshmallows. Pressing them into the dough creates a stable foundation and ensures every bite has that classic graham cracker crunch.
Watch the broiler like a hawk. If you decide to broil the top for extra color, do not walk away. Marshmallows go from golden to black in about 10 seconds. I usually leave the oven door slightly ajar and keep my eyes glued to them. It is worth it for that perfect toasted look, but it requires total focus.
Let them cool completely before slicing. I know it is tempting to dig in while they are warm, but the marshmallows are essentially molten sugar at that point. Cutting too early will result in a sticky mess. The 20-minute cool time is non-negotiable. For cleaner slices, chill the bars in the refrigerator for 10 minutes before cutting.
Variations & Adaptations
One of the best things about this recipe is how versatile it is. You can tweak it to fit different dietary needs, flavor preferences, or what you have on hand. Here are some variations I have tried and loved.
- Peanut Butter S’mores Bars: Swirl 1/2 cup of creamy peanut butter into the cookie dough before spreading it in the pan. The peanut butter adds a savory richness that pairs beautifully with the chocolate and marshmallow. I made this version for a Super Bowl party and it disappeared in minutes.
- Gluten-Free Version: Substitute the all-purpose flour with a 1:1 gluten-free baking flour blend (I like Bob’s Red Mill). Use gluten-free graham crackers as well. The texture will be slightly more tender, but the flavor is just as good. My gluten-sensitive friend gave these a thumbs up.
- Dark Chocolate Lover’s Bars: Swap the semi-sweet chocolate chips for dark chocolate chips (60-70% cacao). The bitterness of the dark chocolate cuts through the sweetness of the marshmallows beautifully. I also like to sprinkle a little flaky sea salt on top before baking for a sweet-salty finish.
- Mint Chocolate S’mores Bars: Add 1/2 teaspoon of peppermint extract to the cookie dough along with the vanilla. Use mint-flavored chocolate chips if you can find them, or just add a few chopped Andes mints to the dough. This is a fantastic holiday variation.
- Vegan Option: Use vegan butter (like Miyoko’s), a flax egg (1 tablespoon ground flaxseed + 3 tablespoons water per egg), and vegan marshmallows (Dandies brand works great). The texture will be slightly different—a bit more cakey—but the gooey factor is still there. I tested this for a friend’s birthday and it was a hit.
Serving & Storage Suggestions
These bars are best served warm, when the marshmallows are still soft and stretchy. I like to let them cool for about 10 minutes after baking, then serve them with a glass of cold milk or a scoop of vanilla ice cream. The contrast between the warm, gooey bar and the cold ice cream is absolutely divine. For a fun presentation, drizzle a little melted chocolate or caramel sauce over the top before serving.
If you have leftovers (which is rare in my house), store them in an airtight container at room temperature for up to 3 days. Place a sheet of parchment paper between layers to prevent sticking. The marshmallows will lose some of their puffiness, but the bars will still be delicious. You can also store them in the refrigerator for up to a week, but let them come to room temperature before serving for the best texture.
For longer storage, these bars freeze beautifully. Wrap the entire block (or individual bars) tightly in plastic wrap, then in aluminum foil, and freeze for up to 3 months. To reheat, unwrap and place on a baking sheet in a 300°F (150°C) oven for 5-7 minutes, or microwave individual bars for 15-20 seconds. The marshmallows will become gooey again, just like fresh from the oven. I actually think the flavors meld together even more after a day in the fridge—the chocolate and marshmallow kind of marry together into a deeper, more unified taste.
Nutritional Information & Benefits
Let’s be real—these are a treat, not a health food. But knowing what is in them helps you enjoy them mindfully. Here is an approximate nutritional breakdown per bar (based on 16 servings):
| Nutrient | Amount per Bar |
|---|---|
| Calories | 320 |
| Total Fat | 16g |
| Saturated Fat | 9g |
| Cholesterol | 45mg |
| Sodium | 180mg |
| Total Carbohydrates | 45g |
| Dietary Fiber | 1g |
| Sugars | 30g |
| Protein | 3g |
On the bright side, the dark chocolate chips provide a small amount of antioxidants, and the eggs offer a bit of protein. If you use dark chocolate, you will also get some magnesium and iron. The graham crackers add a little whole grain fiber, especially if you choose a whole wheat variety. But honestly, I make these bars because they make me happy, not because they are a superfood. It is all about balance—enjoy one bar with a glass of milk, and you have got yourself a perfect little moment of joy.
This recipe contains gluten, dairy, and eggs. For allergen-friendly options, check out the variations section above for vegan and gluten-free adaptations.
Conclusion
These Ultimate Gooey S’mores Stuffed Chocolate Chip Cookie Bars are everything you want in a dessert: nostalgic, indulgent, and surprisingly easy to make. They bring the magic of a campfire s’more into your kitchen without the smoke, the bugs, or the need for a perfectly toasted marshmallow stick. Whether you are making them for a family movie night, a summer barbecue, or just because you need a little sweetness in your day, these bars deliver every single time.
I love this recipe because it feels like a hug in food form. It reminds me of that little diner on Route 9, but honestly, it has become its own thing now. My version is better, I think—more chocolate, more gooey, and way less fuss. I hope you make these bars your own, too. Maybe you will add a sprinkle of cinnamon, or swap in white chocolate chips, or serve them with a giant scoop of ice cream. Whatever you do, I would love to hear about it.
So go ahead—preheat that oven, grab your ingredients, and make a batch of these bars. Then come back and tell me how they turned out. Did you try a variation? Did your family devour them in five minutes? Drop a comment below and share the love. And if you really loved them, share this recipe with a friend who needs a little gooey goodness in their life. Happy baking!
Frequently Asked Questions
Can I use mini marshmallows instead of large ones?
I do not recommend it. Mini marshmallows melt very quickly and will dissolve into the cookie dough, leaving you without those signature gooey pockets. Large marshmallows hold their shape better and create that perfect stretchy texture. Stick with the big ones for the best results.
Can I make these bars ahead of time?
Absolutely. You can prepare the entire pan, cover it with foil, and refrigerate it for up to 24 hours before baking. Just add 2-3 minutes to the baking time since the dough will be cold. You can also bake them fully, cool them, and store them in an airtight container for up to 3 days.
Why did my marshmallows sink into the dough?
This usually happens if the graham cracker layer is too thin or if you pressed the marshmallows down too hard. Make sure you have a generous, even layer of graham cracker crumbs, and just gently nestle the marshmallows into them. Also, make sure your dough is not too warm—if it is very soft, chill it for 10 minutes before adding the marshmallows.
Can I use a different type of chocolate?
Yes! Milk chocolate chips will make the bars sweeter, while dark chocolate chips will add a nice bitterness that balances the sugar. White chocolate chips are also fun for a twist. You can even use chopped chocolate bars for bigger chocolate puddles throughout the bars.
How do I get clean cuts without the marshmallow sticking to the knife?
This is the age-old problem with sticky desserts! The best trick is to chill the bars in the refrigerator for 15-20 minutes before slicing. Use a sharp knife and wipe it clean with a damp paper towel between each cut. A pizza cutter also works surprisingly well and tends to stick less than a knife.
Pin This Recipe!
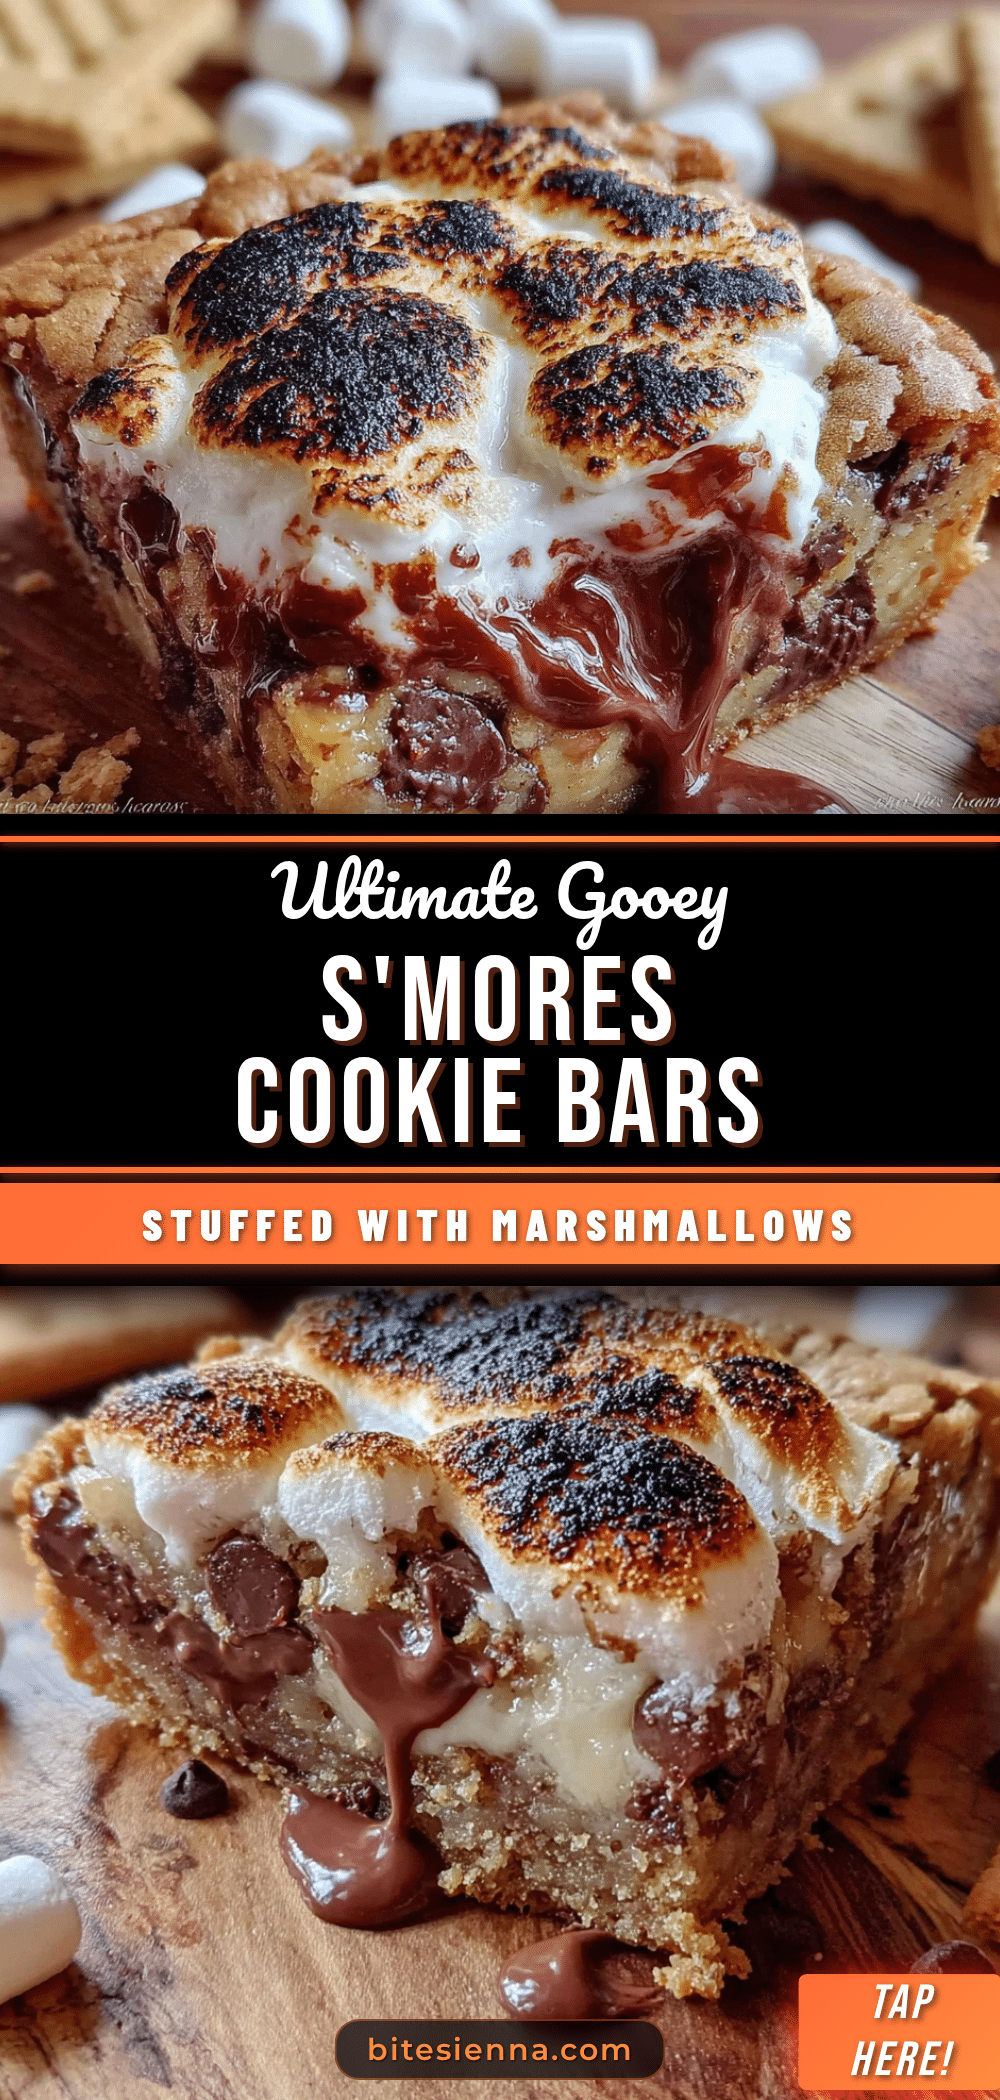
Ultimate Gooey S’mores Stuffed Cookie Bars: Easy 30-Min Recipe
These Ultimate Gooey S’mores Stuffed Chocolate Chip Cookie Bars are the real deal. They have a thick, chewy chocolate chip cookie base, a layer of gooey toasted marshmallow, and a rich chocolate-honey graham cracker middle that just melts in your mouth.
- Prep Time: 10 minutes
- Cook Time: 22-25 minutes
- Total Time: 30 minutes
- Yield: 12-16 bars 1x
- Category: Dessert
- Cuisine: American
Ingredients
- 1 cup (2 sticks / 226g) unsalted butter, melted and slightly cooled
- 1 cup (200g) light brown sugar, packed
- 1/2 cup (100g) granulated sugar
- 2 large eggs, room temperature
- 2 teaspoons vanilla extract
- 2 cups (250g) all-purpose flour
- 1 teaspoon baking soda
- 1/2 teaspoon salt
- 1 1/2 cups (270g) semi-sweet chocolate chips
- 8 full sheets (120g) graham crackers, crushed into coarse crumbs
- 20–24 large marshmallows
Instructions
- Preheat your oven to 350°F (175°C). Line a 9×13-inch baking pan with parchment paper, leaving overhang on the two long sides. Lightly grease the parchment.
- In a large mixing bowl, whisk together the melted butter, brown sugar, and granulated sugar until smooth and well combined.
- Add the eggs and vanilla extract, whisk vigorously for about 30 seconds until pale and slightly thickened.
- Sprinkle the flour, baking soda, and salt over the wet mixture. Fold together with a spatula until just combined. Do not overmix.
- Fold in the semi-sweet chocolate chips until evenly distributed.
- Spread about two-thirds of the cookie dough evenly into the bottom of the prepared pan.
- Sprinkle the crushed graham crackers evenly over the cookie dough base and press down lightly.
- Arrange the large marshmallows in neat rows over the graham cracker layer, pressing down gently.
- Drop the remaining one-third of the cookie dough in small spoonfuls over the marshmallows. Gently press down to flatten slightly.
- Bake for 22-25 minutes, until edges are golden brown and marshmallows are puffed and lightly toasted. Optionally, broil for the last 30-60 seconds for deeper color.
- Remove from oven and cool on a wire rack for at least 20 minutes. Use parchment overhang to lift the block out of the pan. Slice into 12-16 bars.
Notes
Do not overbake; bars continue to set as they cool. Use room temperature eggs for best results. Press graham crackers down firmly to create a stable base. Watch the broiler closely to avoid burning marshmallows. Let bars cool completely before slicing for clean cuts.
Nutrition
- Serving Size: 1 bar
- Calories: 320
- Sugar: 30
- Sodium: 180
- Fat: 16
- Saturated Fat: 9
- Carbohydrates: 45
- Fiber: 1
- Protein: 3
Keywords: s'mores, cookie bars, chocolate chip, marshmallow, graham cracker, easy dessert, 30-minute recipe


