The Wednesday night before Halloween, I was standing in the grocery store aisle, completely blanking on what to bring to the neighborhood potluck. My phone buzzed with a text from my friend Maria—”Don’t forget the creepy snacks!”—and I just stood there, holding a tube of crescent rolls and a pack of mini hot dogs, feeling completely uninspired. An older woman next to me, reaching for the same brand of crescent dough, caught my eye and laughed. “Halloween party?” she asked. I nodded, probably looking as stressed as I felt. “Just wrap ’em up like little bandages,” she said with a shrug. “Kids love ’em. Adults too, honestly.” She tossed the dough into her cart and was gone before I could even thank her. That five-second exchange in the refrigerated aisle changed my entire Halloween game plan. I grabbed my ingredients, rushed home, and made the first batch of what I now call my Easy Mummy Pigs in a Blanket. Let me tell you—they disappeared faster than any other dish at that party. I’ve been making them every Halloween since, and I still think about that kind stranger every time I unroll a tube of crescent dough. Maybe you’ve been there too, standing in a store aisle with no clue what to make, hoping for a little culinary miracle. Well, this is it.
Why You’ll Love This Recipe
Look, I’ve tested a lot of Halloween recipes over the years. Some are too fussy, some need special equipment, and some just don’t taste good enough to justify the effort. These Easy Mummy Pigs in a Blanket hit that perfect sweet spot where fun meets actually delicious.
- Quick & Easy: From fridge to table in under 25 minutes. I’m not kidding. You can make these while the kids are still arguing over costumes.
- Simple Ingredients: Two main ingredients. That’s it. Crescent dough and mini hot dogs. You probably already have both in your kitchen right now.
- Perfect for Halloween Parties: These little guys look like mini mummies, which means they fit right in at any spooky gathering. Potlucks, classroom parties, game day—they work everywhere.
- Crowd-Pleaser: I’ve brought these to five different Halloween events now, and every single time, people hover around the tray. Kids grab them by the handful, and adults pretend they’re only eating one before going back for more.
- Unbelievably Delicious: There’s something about that flaky, buttery crescent dough wrapped around a salty, savory mini hot dog that just works. Add a tiny dab of mustard for eyes, and you’ve got a mummy that tastes as good as it looks.
What makes this recipe different from other Halloween appetizers? It’s not trying to be fancy. It’s not pretending to be healthy. It’s just honest, good food that happens to look like tiny mummies. The first time I made these, I actually closed my eyes after the first bite—partly because they were that good, and partly because I couldn’t believe how easy they were. This is comfort food reimagined for Halloween: faster, funnier, and guaranteed to make people smile.
What Ingredients You Will Need
This recipe keeps things beautifully simple. You only need a handful of ingredients to make these adorable mummies come to life. Here’s what you’ll need and why each one matters:
- 1 can (8 oz) refrigerated crescent roll dough — This is your mummy wrapping. The flaky, buttery layers are perfect for creating that bandaged look. I personally prefer Pillsbury for consistent texture, but any brand works fine. Look for the sheets version if you want to avoid perforations, though the regular rolls work perfectly well too.
- 12 mini hot dogs or cocktail sausages — These are your mummy bodies. Mini hot dogs are the classic choice, but you can also use cocktail sausages, little smokies, or even vegetarian cocktail sausages. I usually go with Hebrew National or Applegate for a cleaner ingredient list, but honestly, any brand works great here.
- Mustard (yellow or Dijon) for eyes — This is where the mummy face comes to life. Yellow mustard gives that classic Halloween look, but Dijon works if you want a more sophisticated flavor. You’ll only need a tiny amount—a small dab per mummy.
- Optional: Cooking spray or melted butter — A light spray on the baking sheet helps prevent sticking. If you want extra golden mummies, brush them with a little melted butter before baking. Totally optional, but worth it for that bakery-style finish.
- Optional: Everything bagel seasoning, sesame seeds, or poppy seeds — If you want to get fancy, sprinkle a little something on top before baking. It adds texture and makes the mummies look even more interesting. I tried everything bagel seasoning once, and honestly, it was amazing.
Ingredient Selection Tips: When choosing crescent dough, check the expiration date and make sure the can isn’t dented or bulging. For the mini hot dogs, look for ones that are roughly the same size so your mummies bake evenly. If you’re using cocktail sausages, you might need to adjust the dough strip length slightly—they tend to be a bit thicker than mini hot dogs.
Substitution Guidance: Need a gluten-free option? Use gluten-free crescent dough or puff pastry sheets. Want to make these dairy-free? Most crescent doughs are already dairy-free, but check the label to be sure. You can also swap the mini hot dogs for vegetarian sausages or even cheese sticks for a completely different take. I’ve tried it with mozzarella sticks, and while they’re not technically “pigs in a blanket” anymore, they’re absolutely delicious.
Equipment Needed
You don’t need much for this recipe, which is honestly one of the best things about it. Here’s what you’ll need:
- Baking sheet — A standard half-sheet pan works perfectly. Line it with parchment paper or a silicone baking mat for easy cleanup. I’ve used both, and silicone mats give slightly more even browning.
- Sharp knife or pizza cutter — You’ll need this to cut the crescent dough into strips. A pizza cutter makes quick work of it, but a regular knife works fine too. I once used kitchen scissors in a pinch, and honestly, it worked better than expected.
- Small bowl for mustard — Just something to put a tiny amount of mustard in for dotting the eyes. A ramekin or small dish works great.
- Toothpick or small skewer — This helps you apply the mustard dots precisely. You could also use a squeeze bottle if you have one, but a toothpick is simpler and creates smaller, cuter eyes.
- Pastry brush (optional) — If you’re brushing the mummies with melted butter before baking, a pastry brush makes it easy. A silicone brush is my favorite because it doesn’t shed bristles.
- Cooling rack — Not strictly necessary, but it helps the mummies cool evenly and keeps them from getting soggy on the bottom. If you don’t have one, just transfer them to a plate after a couple minutes.
Budget-Friendly Options: You really don’t need fancy equipment here. A baking sheet from the dollar store works just as well as an expensive one. Use a butter knife if you don’t have a sharp one. Skip the pastry brush and just drizzle melted butter with a spoon. This recipe is forgiving, and your equipment doesn’t need to be perfect.
Preparation Method
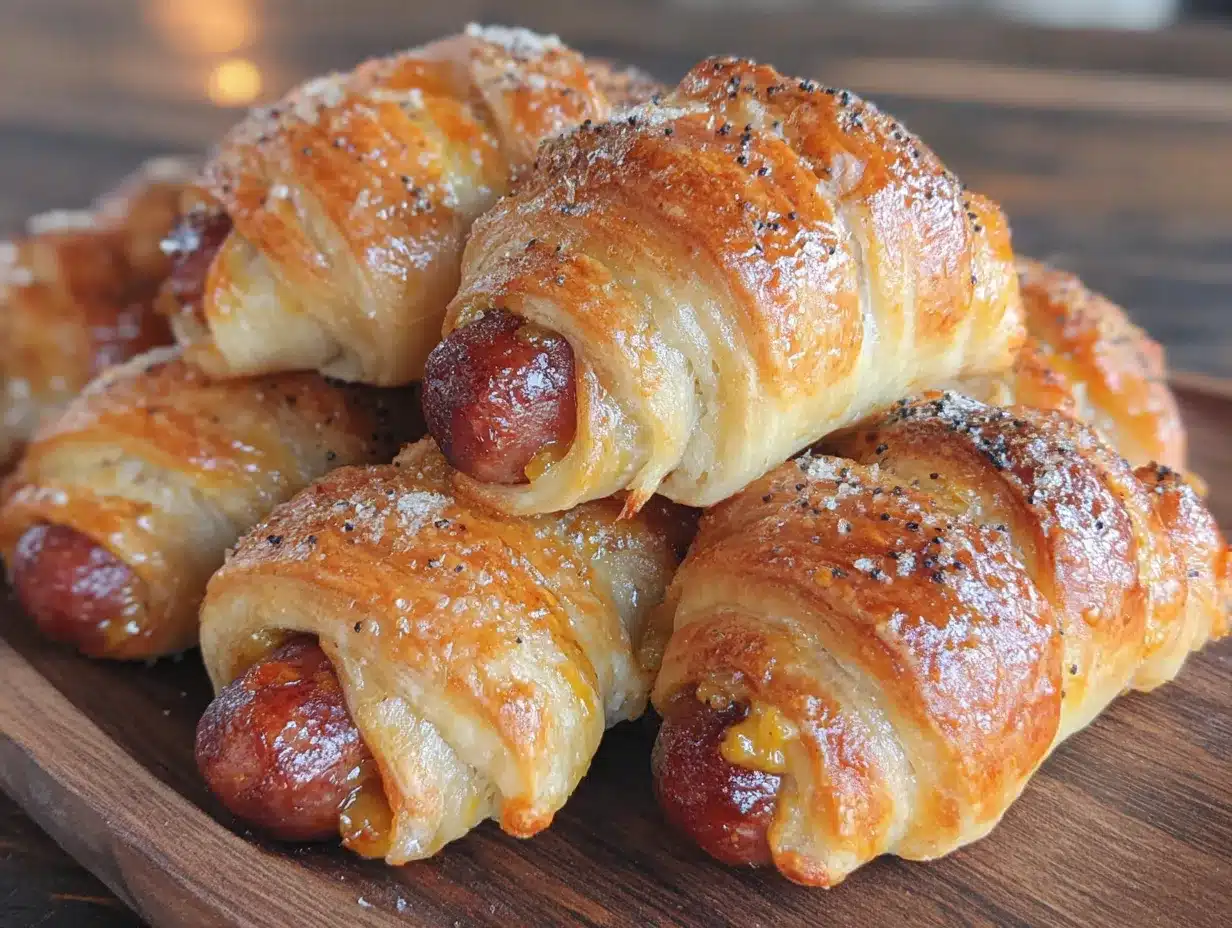
Let me walk you through this step by step. Trust me, it’s easier than it sounds, and you’ll be amazed at how quickly these come together.
- Preheat your oven to 375°F (190°C). This is important—you want the oven fully hot when the mummies go in. While it’s heating up, line your baking sheet with parchment paper or a silicone mat. I learned the hard way that skipping this step means scrubbing baked-on dough later. Not fun.
- Open the can of crescent dough. Pop that can open—you know the sound—and unroll the dough onto a clean cutting board. If you’re using the perforated kind, press the seams together gently to create one solid sheet. If you’re using the sheet version, you’re already ahead of the game. Pat the dough into a rough rectangle shape if it’s a bit uneven.
- Cut the dough into strips. Using your sharp knife or pizza cutter, slice the dough lengthwise into thin strips. Aim for about 12 to 14 strips total—each strip should be about 1/2 inch (1.25 cm) wide. Don’t worry if they’re not perfectly even; mummies look better when they’re a little wonky anyway. I’ve made these so many times, and my strips are never perfectly uniform. It honestly adds to the charm.
- Wrap the mini hot dogs. Take one mini hot dog and start wrapping a dough strip around it. Leave a small gap near the top for the mummy’s face—about 1/4 inch (0.6 cm) of exposed hot dog. Wrap the strip around the hot dog at a slight angle, overlapping slightly as you go, like you’re wrapping a real bandage. The dough should cover most of the hot dog but leave the face area bare. Don’t wrap too tightly—the dough will expand as it bakes, and you want it to look loose and bandage-like.
- Place the mummies on the baking sheet. Arrange your wrapped mummies on the prepared baking sheet, spacing them about 1 inch (2.5 cm) apart. They’ll puff up a bit as they bake, so give them room to breathe. I usually fit 12 mummies comfortably on a standard half-sheet pan.
- Optional: Brush with melted butter. If you want extra golden, shiny mummies, melt 1 to 2 tablespoons of butter and brush it lightly over the dough. This step is optional, but it gives the mummies a beautiful golden-brown finish that looks amazing in photos. I skip this when I’m in a hurry, but I always do it when I’m making these for a party.
- Bake for 10 to 13 minutes. Pop the baking sheet into the preheated oven and bake until the dough is golden brown and puffed. The exact time depends on your oven and how thick your strips are. Start checking at 10 minutes—the dough should be golden and the hot dogs should be heated through. The kitchen will smell incredible at this point.
- Cool slightly before adding eyes. Remove the baking sheet from the oven and let the mummies cool on the pan for 2 to 3 minutes. This is crucial—if you add the mustard eyes while the mummies are too hot, the mustard will melt and run, and you’ll end up with sad, blurry-faced mummies. I learned this the hard way during my second batch ever. Let them cool just enough so you can handle them comfortably.
- Add the mustard eyes. Dip a toothpick into the mustard and dab two tiny dots onto the exposed hot dog area of each mummy. You want the eyes to be small and close together—think of how a cartoon mummy looks. Don’t overthink this part. Some will be perfect, some will be a little crooked, and that’s exactly how mummies should look. I’ve made mummies with one eye bigger than the other, and they somehow look even cuter.
- Serve warm or at room temperature. These are best served warm, but they’re still delicious at room temperature. Arrange them on a platter with extra mustard for dipping, and watch them disappear. If you’re bringing them to a party, you can make them ahead and reheat them briefly in the oven.
Cooking Tips & Techniques
After making these mummies more times than I can count, I’ve picked up a few tricks that make the process even smoother. Let me share what I’ve learned—including the mistakes I’ve made so you don’t have to repeat them.
Don’t overwork the dough. Crescent dough is delicate, and the more you handle it, the tougher it gets. When you’re cutting strips and wrapping the hot dogs, work quickly and gently. If the dough starts to feel sticky or warm, pop it in the fridge for a few minutes. I once tried to rush through this step, and my dough turned into a sticky mess that was impossible to work with.
Leave that face gap. I cannot stress this enough—leave a small section of the hot dog exposed for the face. The first time I made these, I wrapped the dough all the way to the top, and my mummies ended up looking like weird dough tubes with no personality. The exposed hot dog gives you a canvas for those cute mustard eyes, and it also helps the hot dog brown nicely.
Mind the spacing. These mummies puff up as they bake, so give them room. If you crowd them on the baking sheet, they’ll stick together, and you’ll end up with mummy clumps instead of individual mummies. I usually fit 12 on a standard sheet pan, arranged in three rows of four.
Check early and often. Ovens vary wildly. My friend’s oven runs hot and bakes these in 10 minutes flat, while mine takes a full 13 minutes. Start checking at the 10-minute mark, and look for that beautiful golden-brown color. If the dough is still pale, give it another minute or two.
Let them rest. That cooling period after baking isn’t just for the mustard eyes—it also helps the dough set properly. If you try to move them right out of the oven, they might fall apart or lose their shape. Give them those 2 to 3 minutes on the baking sheet, and they’ll hold together beautifully.
Make-ahead strategy. You can assemble these mummies up to a day in advance. Just wrap the hot dogs, place them on the baking sheet, cover with plastic wrap, and refrigerate. When you’re ready to bake, add a couple extra minutes to the baking time since they’re starting from cold. I’ve done this for several parties, and it’s a lifesaver when you’re juggling a million things.
Variations & Adaptations
One of the best things about this recipe is how easy it is to customize. Here are some variations I’ve tried and loved:
Spicy Mummies: Use spicy jalapeño mini hot dogs or add a tiny smear of sriracha under the dough before wrapping. The heat pairs surprisingly well with the buttery crescent dough. I made these for a game day party, and they were gone before the regular ones.
Cheesy Mummies: Cut small mozzarella cheese sticks into thirds and wrap them in dough instead of hot dogs. These aren’t technically “pigs in a blanket” anymore, but they’re absolutely delicious. The cheese melts and gets stretchy, and they look just as cute with mustard eyes. My vegetarian friends love this version.
Breakfast Mummies: Swap the mini hot dogs for breakfast sausage links. These are perfect for a Halloween morning breakfast or brunch. Serve them with maple syrup for dipping, and you’ve got a sweet-and-savory treat that everyone will love. I made these for a Halloween sleepover, and the kids went crazy for them.
Gluten-Free Mummies: Use gluten-free crescent dough or puff pastry sheets. Most brands work well, though the texture might be slightly different. I’ve tested this with two different gluten-free doughs, and both turned out great. Just be gentle with the dough—gluten-free pastry can be a bit more fragile.
Air Fryer Mummies: You can absolutely make these in an air fryer. Preheat the air fryer to 350°F (175°C), place the mummies in the basket in a single layer (you might need to work in batches), and cook for 6 to 8 minutes until golden. The air fryer version is even crispier, and it’s perfect for small batches. I use this method when I’m just making a few for myself.
Pumpkin Spice Mummies: Okay, this one sounds weird, but hear me out. Brush the dough with melted butter and sprinkle with pumpkin pie spice before baking. The warm spices complement the savory hot dog in a surprisingly pleasant way. I tried this on a whim last fall, and it was weirdly good. Not for everyone, but worth trying if you’re feeling adventurous.
Serving & Storage Suggestions
These mummies are best served warm, straight from the oven, when the dough is flaky and the hot dogs are perfectly heated through. Arrange them on a platter with a small bowl of mustard for dipping—yellow mustard is classic, but honey mustard or spicy brown mustard work beautifully too.
If you’re serving these at a party, they hold up well at room temperature for about an hour. I like to arrange them in a circle on a large platter, with the mustard dip in the center. It looks festive and makes it easy for guests to grab them. For a Halloween touch, serve them on a black or orange platter, or scatter some candy corn around the edges.
For storage, let any leftover mummies cool completely, then place them in an airtight container. They’ll keep in the refrigerator for up to 3 days. The texture won’t be quite as good as fresh, but they’re still tasty. I’ve been known to eat them cold straight from the fridge, and I’m not ashamed to admit it.
To reheat, pop them in a 350°F (175°C) oven for 5 to 7 minutes, or until warmed through. The air fryer also works great—just 3 to 4 minutes at 350°F (175°C). Avoid the microwave if you can; it makes the dough soggy and sad. I’ve made that mistake, and the mummies came out limp and unappetizing.
One thing I love about these mummies is that the flavors actually develop a bit overnight. The mustard eyes seep into the hot dog slightly, creating a subtle tanginess that’s really nice. So if you have leftovers, don’t toss them—they make a great next-day snack.
Nutritional Information & Benefits
Let’s be real—these are a treat, not a health food. But here’s the nutritional breakdown for one mummy (based on using regular crescent dough and mini hot dogs):
| Nutrient | Amount per Mummy |
|---|---|
| Calories | 110 |
| Total Fat | 7g |
| Saturated Fat | 2.5g |
| Cholesterol | 15mg |
| Sodium | 320mg |
| Total Carbohydrates | 9g |
| Protein | 4g |
While these aren’t exactly a health food, they do offer a small amount of protein from the hot dogs, and the crescent dough provides quick energy. If you’re looking to lighten them up, you can use turkey mini hot dogs or vegetarian options, which reduce the fat and calories slightly.
The hot dogs also contain some B vitamins and iron, though the amounts are modest. Honestly, these are about fun and flavor, not nutritional optimization. I serve them as a special Halloween treat, and I don’t stress about the numbers. Life is about balance, and these mummies bring so much joy that the calories are worth it.
Allergen Note: This recipe contains wheat/gluten (crescent dough) and may contain dairy (check your dough label). Hot dogs may contain soy or other additives. If you’re serving a crowd with allergies, consider the gluten-free or vegetarian variations above.
Conclusion
These Easy Mummy Pigs in a Blanket have become my go-to Halloween recipe for a reason. They’re quick, they’re fun, and they taste genuinely good. Every time I make them, I think about that woman in the grocery store who shared this simple idea with a complete stranger. That’s what I love about cooking—the way small moments can turn into traditions.
I hope you’ll try these for your next Halloween gathering. Don’t worry about making them perfect—the wonky ones are always the most charming. Experiment with different variations, find what your family loves, and make this recipe your own. Maybe you’ll add a different spice, or try a new dipping sauce, or discover that your kids prefer them with cheese instead of hot dogs. That’s the beauty of a simple recipe like this—it leaves room for your own creativity.
I’d love to hear how your mummies turn out! Drop a comment below and let me know what variations you tried, or share a photo of your mummy platter. And if you’re looking for more Halloween inspiration, don’t forget to check out my other spooky snacks. Happy Halloween, and happy cooking!
Frequently Asked Questions
Can I make these mummies ahead of time?
Absolutely! You can assemble the mummies up to 24 hours in advance. Just wrap the hot dogs, place them on the baking sheet, cover with plastic wrap, and refrigerate. When you’re ready to bake, add 2 to 3 extra minutes to the baking time since they’re starting from cold.
Can I use puff pastry instead of crescent dough?
Yes, puff pastry works great! Thaw the pastry sheets according to package directions, then cut them into strips and wrap the hot dogs the same way. Puff pastry creates a flakier, more buttery result. Just note that puff pastry might need an extra minute or two in the oven.
What can I use instead of mustard for the eyes?
If you’re not a mustard fan, you can use ketchup, sriracha, or even small dots of cream cheese. For a sweeter option, use melted chocolate or frosting. I’ve even seen people use tiny candy eyes, though they might melt in the oven if added before baking.
Can I freeze these mummies?
Yes, but with a caveat. You can freeze the unbaked mummies on a baking sheet, then transfer them to a freezer bag. Bake from frozen, adding 3 to 5 minutes to the baking time. Baked mummies can also be frozen, but the texture won’t be quite as good when reheated. I prefer freezing them unbaked for the best results.
How many mummies does this recipe make?
One standard can of crescent dough (8 oz) makes about 12 mummies, depending on how thick you cut your strips. If you’re feeding a crowd, double or triple the recipe easily. Just use multiple baking sheets or bake in batches.
PrintEasy Mummy Pigs in a Blanket: Best Halloween Appetizer

Quick and easy Halloween appetizer made with crescent dough and mini hot dogs, wrapped to look like adorable mummies. Perfect for parties and guaranteed to be a crowd-pleaser.
- Prep Time: 10 minutes
- Cook Time: 13 minutes
- Total Time: 23 minutes
- Yield: 12 servings 1x
- Category: Appetizer
- Cuisine: American
Ingredients
- 1 can (8 oz) refrigerated crescent roll dough
- 12 mini hot dogs or cocktail sausages
- Mustard (yellow or Dijon) for eyes
- Optional: Cooking spray or melted butter
- Optional: Everything bagel seasoning, sesame seeds, or poppy seeds
Instructions
- Preheat your oven to 375°F (190°C). Line a baking sheet with parchment paper or a silicone mat.
- Open the can of crescent dough and unroll it onto a clean cutting board. If using perforated dough, press the seams together to create one solid sheet.
- Cut the dough lengthwise into thin strips, about 1/2 inch (1.25 cm) wide, aiming for 12 to 14 strips total.
- Take one mini hot dog and wrap a dough strip around it, leaving a small gap near the top (about 1/4 inch or 0.6 cm) for the mummy’s face. Wrap at a slight angle, overlapping slightly, without pulling too tight.
- Place the wrapped mummies on the prepared baking sheet, spacing them about 1 inch (2.5 cm) apart.
- Optional: Brush the dough with melted butter for a golden finish.
- Bake for 10 to 13 minutes, until the dough is golden brown and puffed. Start checking at 10 minutes.
- Remove from the oven and let cool on the pan for 2 to 3 minutes before adding eyes.
- Dip a toothpick into mustard and dab two tiny dots onto the exposed hot dog area of each mummy for eyes.
- Serve warm or at room temperature.
Notes
Don’t overwork the dough. Leave a small gap at the top for the face. Space mummies apart on the baking sheet. Let them rest after baking before adding eyes. Can be assembled up to a day in advance and refrigerated. For gluten-free, use gluten-free crescent dough. For dairy-free, check dough label.
Nutrition
- Serving Size: 1 mummy
- Calories: 110
- Sugar: 2
- Sodium: 320
- Fat: 7
- Saturated Fat: 2.5
- Carbohydrates: 9
- Protein: 4
Keywords: Halloween appetizer, mummy pigs in a blanket, easy Halloween recipe, crescent roll appetizer, mini hot dogs, party snack


