My mother-in-law, Linda, had claimed to hate Halloween cookies for three decades. She called them “sugar bombs” and “unnecessary calories.” Then I brought these over last Tuesday. She took one bite. Then another. I caught her trying to sneak a third one while I was washing dishes. She swore she was just “checking for freshness.”
Honestly, let me tell you, there is something magical about turning a simple sugar cookie into a playful, spooky treat. These cookies are not just for kids. They are for anyone who loves a good laugh and a crispy texture. The visual impact is immediate. People stop talking when they see them. The almond fingernails are surprisingly realistic. The icing blood is a nice touch.
I remember the first time I made these, I was nervous. What if they looked too scary? What if the kids cried? But the reaction was pure joy. Laughter filled the kitchen. Even the skeptics admitted they were delicious. It is a great way to bring people together. You know that feeling when you want to impress but keep it simple? This is it.
The key is the crispiness. Most sugar cookies are soft. These are different. They hold their shape. They crunch. It is a satisfying sound. I mean, who doesn’t love a good crunch? It adds a layer of interest. The flavor is classic vanilla and butter. Nothing fancy. Just good, honest baking.
I keep making them because they work. They work for school parties. They work for office Halloween parties. They work for just because. You can make them ahead of time. They travel well. They are sturdy. You can stack them in a tin without worry.
Maybe you have been there, staring at a recipe card wondering if you have the skills. You do. You really do. This recipe is forgiving. It is hard to mess up. The dough is easy to handle. The shaping is intuitive. You just roll it and press. That is it.
The conversion moment is real. People who say they “don’t like Halloween food” usually love these. They are too cute to resist. The fear factor is low. The fun factor is high. It is a win-win. I love seeing the smiles. I love the comments. I love the empty plate.
This recipe stayed with me because it changed our holiday tradition. Before, we bought store-bought cookies. Now, we make these. It takes a little extra time. But the memories are worth it. It is about creating moments. It is about sharing joy. And yes, eating a lot of sugar. Let’s face it, that is part of the fun too.
Why You’ll Love This Recipe
Let’s be honest, most sugar cookies are dry. They crumble. They taste like cardboard. These witch fingers are different. They are crisp on the outside and tender on the inside. The texture is perfect. It is not too hard. It is not too soft. It is just right. I have tested this recipe dozens of times. I want to share my best version with you. It is reliable. It is consistent.
Here is why this recipe stands out:
- Quick & Easy: These come together in under 30 minutes of prep time. You can have them in the oven by dinner time. Perfect for busy weeknights or last-minute party planning.
- Simple Ingredients: You likely already have everything in your kitchen. Flour, sugar, butter, eggs, vanilla. No fancy grocery trips needed. No hard-to-find items.
- Perfect for Halloween: Great for school parties, haunted houses, or cozy dinners with friends. They fit any spooky occasion.
- Crowd-Pleaser: Always gets rave reviews from kids and adults alike. The novelty factor is huge. Everyone wants one.
- Unbelievably Delicious: The texture and flavor combo is next-level comfort food. The almond nail adds a nice nutty contrast.
What makes this recipe different from the rest? It is the technique. We cream the butter and sugar properly. We chill the dough. This prevents spreading. It keeps the finger shape. Many recipes skip this step. That is why they fail. I learned this the hard way. I had flat cookies once. It was a disaster. Now, I never skip the chill.
This recipe isn’t just good—it is the kind that makes you close your eyes after the first bite. It is comfort food reimagined with a spooky twist. Healthier? Maybe not. But more fun? Absolutely. It is perfect for impressing guests without stress. Or turning a simple meal into something memorable. You can make them in advance. They store well. You can bake them the day before. This reduces stress. You can enjoy the party. You don’t have to be in the kitchen all night.
I love that you can customize them. Add food coloring. Use different nuts for nails. Change the icing flavor. It is your canvas. The base recipe is solid. It supports any variation. You can be creative. You can be spooky. You can be silly. That is the beauty of baking. It is an art. It is also a science. But for this, it feels like play.
What Ingredients You Will Need
This recipe uses simple, wholesome ingredients to deliver bold flavor and satisfying texture without the fuss. The magic is in the ratio. The balance of wet and dry ingredients is crucial. You want a dough that is firm enough to hold shape but soft enough to roll. Here is what you need.
For the Dough:
- Unsalted Butter: 1 cup (2 sticks), softened to room temperature. This is the base. Use high-quality butter. I recommend Land O’Lakes for best texture. It has a nice creaminess.
- Granulated Sugar: 1 cup. This adds sweetness and crispness. It helps create the crunchy exterior.
- Powdered Sugar: 1/2 cup. This adds tenderness. It helps with the smooth texture. It dissolves easily.
- Egg: 1 large egg, room temperature. This binds the dough. It adds structure. Don’t use cold eggs.
- Vanilla Extract: 1 teaspoon. Pure vanilla is best. It adds depth. Avoid imitation vanilla. It tastes artificial.
- All-Purpose Flour: 3 cups. This is the main structure. Do not use cake flour. It will be too soft. Spoon and level your flour. Do not pack it.
- Baking Powder: 1/2 teaspoon. This gives a slight lift. It prevents density. It keeps them light.
- Salt: 1/2 teaspoon. This balances the sweetness. It enhances the flavor. Do not skip it.
For the Decorations:
- Almonds: Whole, blanched almonds. For the fingernails. Use slivered almonds for smaller fingers. They add a nice crunch.
- Icing Sugar: 1 cup. For the base icing. It dissolves easily. It creates a smooth finish.
- Milk: 1-2 tablespoons. To thin the icing. Adjust for consistency.
- Red Food Coloring: Gel color is best. It is more vibrant. It doesn’t water down the icing. Liquid works too but can be thin.
Substitution guidance:
- Use almond flour for a gluten-free option. Note that the texture will be slightly different.
- Swap butter with dairy-free margarine if needed. The flavor might be slightly less rich.
- Use egg replacer for vegan options. The texture might be less crisp.
Keep this section scannable. You don’t need long paragraphs. Just the facts. Get to the baking. The prep is fast. The baking is faster. It is a quick win.
Equipment Needed
You don’t need fancy tools. Basic kitchen gear is fine. But having the right tools helps. Here is what you need.
- Mixing Bowls: Two large bowls. One for wet ingredients. One for dry. A medium bowl for the icing.
- Electric Mixer: Handheld or stand mixer. Creaming butter and sugar by hand is tough. It takes effort. A mixer saves time. It ensures a smooth mix.
- Measuring Cups and Spoons: For accuracy. Baking is chemistry. Precise measurements matter. Use metal cups for dry ingredients. Use glass cups for liquids.
- Baking Sheets: Two large sheets. Light-colored metal is best. Dark sheets can burn cookies. Line them with parchment paper. This prevents sticking. It makes cleanup easy.
- Piping Bag or Ziploc Bag: For the icing. A small Ziploc bag with a corner cut off works well. It is budget-friendly. No need to buy special tools.
- Pastry Brush: Optional. For cleaning edges. It helps with presentation.
Alternatives for specialized equipment:
- If you don’t have a mixer, use a wooden spoon. It will take longer. But it works.
- If you don’t have parchment, use silicone mats. They are reusable. They work great.
- If you don’t have a piping bag, use a small spoon. It is messier. But it is fine.
Maintenance tips for specialty equipment:
- Clean your mixer beaters immediately. Sugar hardens. It is hard to remove later.
- Store baking sheets in a cool, dry place. Humidity can warp them.
Budget-friendly options:
- Use a fork to cream butter and sugar. It is free. It works.
- Use a knife to cut the Ziploc bag corner. It is sharp. Be careful.
The right tools make the process smoother. But passion matters more. You can bake with anything. Just be careful. Heat is hot. Knives are sharp. Stay safe.
Preparation Method
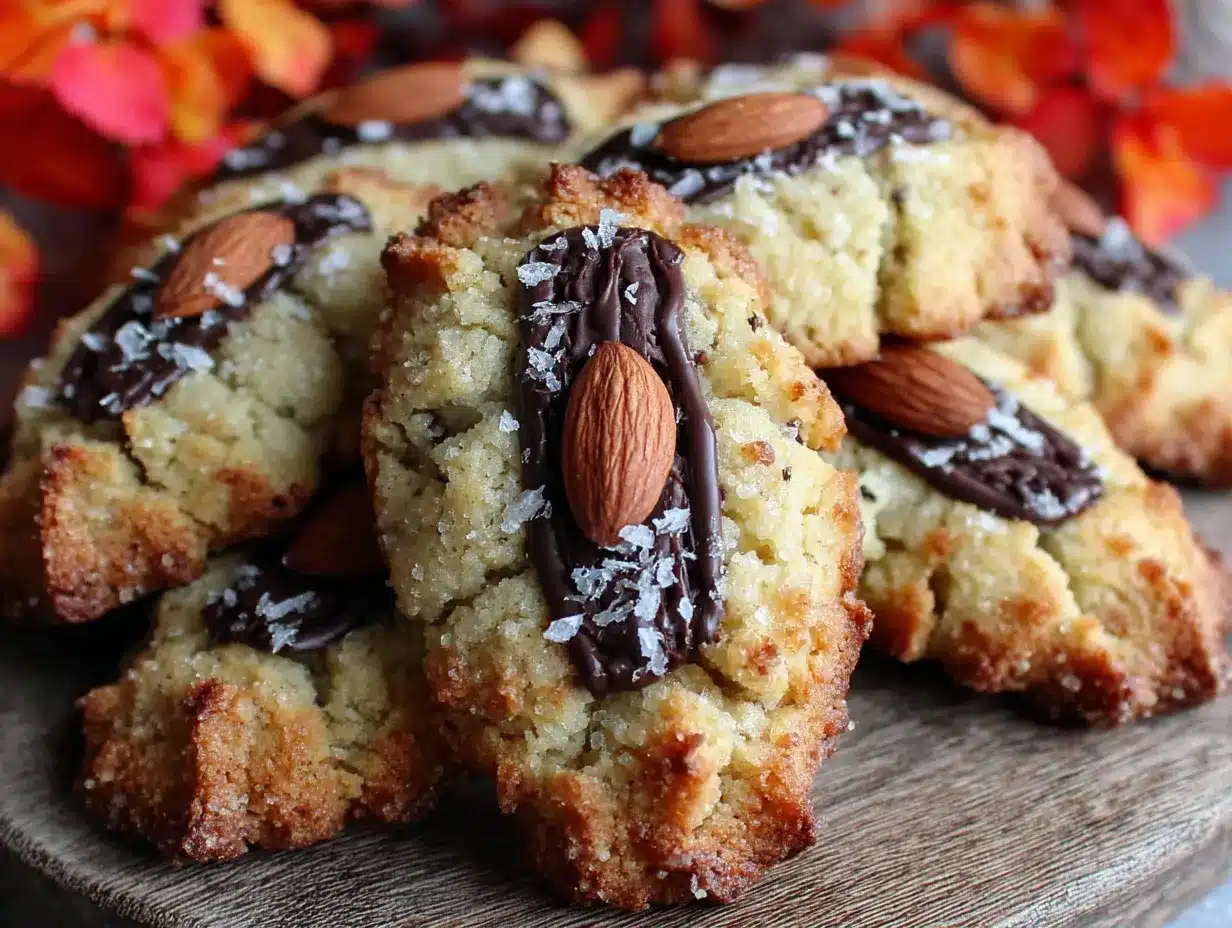
Let’s get started. This part is straightforward. Follow these steps. They are numbered for clarity. You can’t go wrong if you pay attention.
- Cream the Butter and Sugars: In a large bowl, beat the softened butter, granulated sugar, and powdered sugar. Use your electric mixer on medium speed. Beat for 2-3 minutes. The mixture should be light and fluffy. This step is crucial. It adds air. It creates texture. Do not rush this. Take your time. You want it pale yellow. It should look creamy. This usually takes about 3 minutes. (Time estimate: 3 minutes)
- Add Wet Ingredients: Add the egg and vanilla extract. Mix on low speed until combined. Then increase to medium. Beat for another minute. Scrape down the sides of the bowl. Make sure everything is mixed. You don’t want pockets of egg. The mixture should be smooth. It might look slightly curdled. That is okay. It will come together. (Time estimate: 2 minutes)
- Combine Dry Ingredients: In a separate bowl, whisk together the flour, baking powder, and salt. Whisking ensures even distribution. It prevents lumps. It mixes the leavening agent. Pour the dry ingredients into the wet mixture. Turn the mixer to low speed. Mix until just combined. Do not overmix. Overmixing develops gluten. It makes cookies tough. Stop when you see no more flour streaks. The dough will be stiff. It will hold its shape. (Time estimate: 2 minutes)
- Chill the Dough: Cover the bowl with plastic wrap. Refrigerate for at least 1 hour. This is non-negotiable. Warm dough spreads. It loses shape. Cold dough holds form. It makes shaping easier. If you skip this, your fingers will be blobs. Not cute. Put them in the fridge. While they chill, you can preheat the oven. Preheat to 350°F (175°C). Line your baking sheets with parchment paper. (Time estimate: 60 minutes chilling)
- Shape the Fingers: Take a small portion of dough. About 1 tablespoon. Roll it into a cylinder. It should be about 3 inches long. Taper one end. This is the fingertip. Press an almond into the other end. This is the nail. Repeat with all dough. Place them on the baking sheet. Leave 2 inches between them. They won’t spread much. But give them space. (Time estimate: 15 minutes)
- Bake: Place sheets in the oven. Bake for 10-12 minutes. Watch them closely. They should be pale gold. Not brown. They firm up as they cool. If you bake them too long, they will be hard. Remove from oven. Let them cool on the sheet for 5 minutes. Then transfer to a wire rack. Let them cool completely. This is important. Warm cookies melt icing. (Time estimate: 12 minutes baking + 5 minutes cooling)
- Make the Icing: In a small bowl, mix powdered sugar and milk. Start with 1 tablespoon. Add more if needed. You want a thick but pipeable consistency. It should hold its shape. Divide the icing. Leave half white. Add red food coloring to the other half. Mix well. Put each in a Ziploc bag. Cut a tiny corner. (Time estimate: 5 minutes)
- Decorate: Pipe white icing along the “knuckle” lines. Create small lines. This mimics skin wrinkles. Let it set for a minute. Then, use the red icing to add “blood” drips. Let them run down slightly. You can add more white for highlights. Let the icing dry completely. This takes about 30 minutes. (Time estimate: 15 minutes decorating + 30 minutes drying)
Troubleshooting tips:
- If dough is too sticky, add more flour. 1 tablespoon at a time.
- If dough is too dry, add more milk. 1 teaspoon at a time.
- If cookies spread too much, your oven might be too hot. Check with an oven thermometer.
Personal tips for efficiency:
- Shape all fingers before baking. It is faster than baking in batches.
- Make icing while cookies cool. It saves time.
- Use gel food coloring. It is stronger. You need less.
Sensory cues:
- The dough should smell like vanilla and butter.
- The cookies should smell sweet when baking.
- The icing should be smooth and glossy.
Cooking Tips & Techniques
Professional bakers know that temperature control is key. Room temperature ingredients mix better. Cold ingredients hold shape. This recipe uses both. It balances them. Here are some pro tips.
- Don’t Overmix: This is the biggest mistake. Overmixing makes cookies tough. Mix until just combined. The dough should look shaggy. It will come together in the chill.
- Chill the Dough: I cannot stress this enough. Chilling solidifies the fat. It prevents spreading. It enhances flavor. The flavors meld together. It tastes better after chilling. Do not skip this step.
- Use Parchment Paper: It prevents sticking. It ensures even baking. It makes cleanup easy. It is worth the small cost. Do not use foil. It can cause burning.
- Rotate the Sheets: Ovens have hot spots. Rotate the sheets halfway through baking. This ensures even browning. It prevents burnt edges. It gives consistent results.
- Cool Completely: Warm cookies are fragile. They break easily. Let them cool on the rack. This allows air circulation. It prevents sogginess. It makes decorating easier.
Common mistakes and how to avoid them:
- Making fingers too thin. They will break. Make them thick enough to handle.
- Using too much icing. It overwhelms the cookie. Use it sparingly. Less is more.
- Decorating too soon. The icing will slide off. Wait until they are cool.
Personal cooking failures and lessons learned:
- I once baked them at 400°F. They burned. I learned to trust the recipe temperature.
- I used liquid food coloring. The icing was runny. I learned to use gel.
- I didn’t chill the dough. The fingers were flat. I learned to chill.
Timing and multitasking strategies:
- Prep ingredients first. Mise en place. It reduces stress.
- Chill dough while you preheat oven. It uses time efficiently.
- Make icing while cookies bake. It saves waiting time.
Tips for consistency and recipe success:
- Use a kitchen scale for accuracy. Cups can vary. Grams are precise.
- Check your baking powder freshness. Old powder doesn’t work. It makes dense cookies.
- Test one cookie first. Check the bake time. Adjust if needed.
These tips come from experience. They save time. They save ingredients. They save sanity. Use them. They work.
Variations & Adaptations
You can change this recipe. It is flexible. Here are some ideas.
- Dietary Variations: Use gluten-free flour blend. It works well. Use dairy-free butter. It is similar. Use egg replacer. It changes texture slightly. But it is okay.
- Seasonal Variations: Add pumpkin spice for fall. Add peppermint for winter. Add lemon zest for spring. It changes the flavor profile. It keeps it fresh.
- Flavor Variations: Add cocoa powder for chocolate fingers. Add matcha for green fingers. Add orange extract for citrus. It adds complexity.
- Cooking Methods: You can make them as bars. Press dough in pan. Cut into strips. Bake. It is easier. But less detailed.
- Customize for Taste: Add white chocolate chips. Add sprinkles. Add nuts. It is your cookie. Make it yours.
- Allergen Substitutions: Use sunflower seeds for nails. They are nut-free. Use seed butter. It is safe for allergies.
Personal variation:
- I once added red velvet crumbs. It looked like blood. It was fun. But messy. Use sparingly.
These variations keep the recipe interesting. You can rotate them. You can try new ones. It is fun. It is creative. Don’t be afraid to experiment. You might find a new favorite.
Serving & Storage Suggestions
Serve these at room temperature. They are best fresh. But they store well. Here is how to keep them good.
- Serving Temperature: Room temperature is best. Cold cookies are hard. Warm cookies are soft. Room temp is the sweet spot.
- Presentation: Use a spooky plate. Use a black tray. Add fake cobwebs. It looks great. Take photos. People love them.
- Complementary Dishes: Serve with milk. Serve with coffee. Serve with hot cocoa. It balances the sweetness. It is a complete snack.
- Storage Instructions: Store in an airtight container. Layer with parchment. Keep at room temperature. They last 5 days. Keep away from heat. Humidity makes them soft.
- Reheating Methods: You don’t need to reheat them. They are good cold. If you want them warm, microwave for 10 seconds. It softens them slightly.
- Flavors Over Time: The flavors meld. They get better after 24 hours. The vanilla tastes deeper. The almond tastes richer. Let them sit. It helps.
Notes on how flavors develop:
- The sugar crystallizes. It adds crunch. The butter firms up. It adds richness. The vanilla infuses. It adds depth.
Serving suggestions:
- Give them as gifts. Wrap them in cellophane. Tie with ribbon. It is a nice gift. It is homemade. It is thoughtful.
- Serve at parties. Put them on a display. They are a conversation starter. They are fun. They are delicious.
Storage tips:
- Freeze the dough. Roll and shape. Freeze on sheet. Transfer to bag. Bake from frozen. Add 2 minutes to bake time. It is convenient.
- Freeze baked cookies. They last 3 months. Thaw at room temp. It works well.
These tips help you plan. You can make ahead. You can save time. You can enjoy the process. It is flexible. It is forgiving. It is easy.
Nutritional Information & Benefits
These cookies are a treat. They are not health food. But they have some benefits.
- Nutritional Values: Approx. 150 calories per cookie. 6g fat. 22g carbs. 2g protein. 12g sugar. These are estimates. They vary by size.
- Health Benefits: Almonds provide protein. They provide healthy fats. They provide fiber. They are a good snack ingredient. Eggs provide protein. They provide vitamins. Butter provides flavor. It provides energy.
- Dietary Considerations: Not gluten-free. Not vegan. Not low-carb. But can be adapted. Use GF flour. Use vegan butter. Use erythritol. It is possible. But taste may vary.
- Potential Allergens: Contains gluten. Contains eggs. Contains dairy. Contains nuts. Check labels. Be aware. Inform guests. It is important.
- Personal Wellness Perspective: I enjoy these in moderation. They are a treat. They are fun. They bring joy. Balance is key. Enjoy life. Enjoy food. Don’t stress. Just eat mindfully.
This section is for information. It is not medical advice. Consult a professional. This is for general guidance. Use it wisely. It helps you make choices. It helps you plan. It helps you enjoy.
Conclusion
These Spooky Crispy Witch Finger Sugar Cookies are a fun, easy, and delicious treat. They are perfect for Halloween. They are perfect for any time. You should try them. They are worth the effort. The result is worth it. The smiles are worth it.
Customize them. Make them yours. Add your twist. Make it special. It is your kitchen. It is your creation. Be creative. Be bold. Be spooky.
I love this recipe because it brings joy. It brings laughter. It brings people together. It is more than food. It is a memory. It is a moment. It is a connection. It is love.
Please share your results. Comment below. Share photos. Let me know how they turned out. I love hearing from you. I love seeing your creations. It inspires me. It inspires others. It builds community.
Thank you for reading. Thank you for baking. Thank you for sharing. Happy Halloween. Happy baking. Enjoy every bite.
FAQs
Can I make the dough ahead of time?
Yes, you can. Shape the fingers and freeze them. Bake from frozen. Add 2 minutes to bake time. It is convenient. It saves time. It works well.
Why did my cookies spread?
The dough was too warm. You didn’t chill it enough. Or your oven was too hot. Chill the dough. Check your oven temp. It helps. It prevents spreading.
Can I use liquid food coloring?
You can. But it makes the icing runny. Gel color is better. It is thicker. It is more vibrant. It works better. Use gel if you can.
How long do these cookies last?
They last 5 days at room temperature. Store in an airtight container. Keep them dry. They stay crisp. They stay fresh. Enjoy them while they last.
Can I make them gluten-free?
Yes, use a gluten-free flour blend. It works. The texture might be slightly different. It might be more crumbly. But it is tasty. It is safe. It is a good option.
Pin This Recipe!
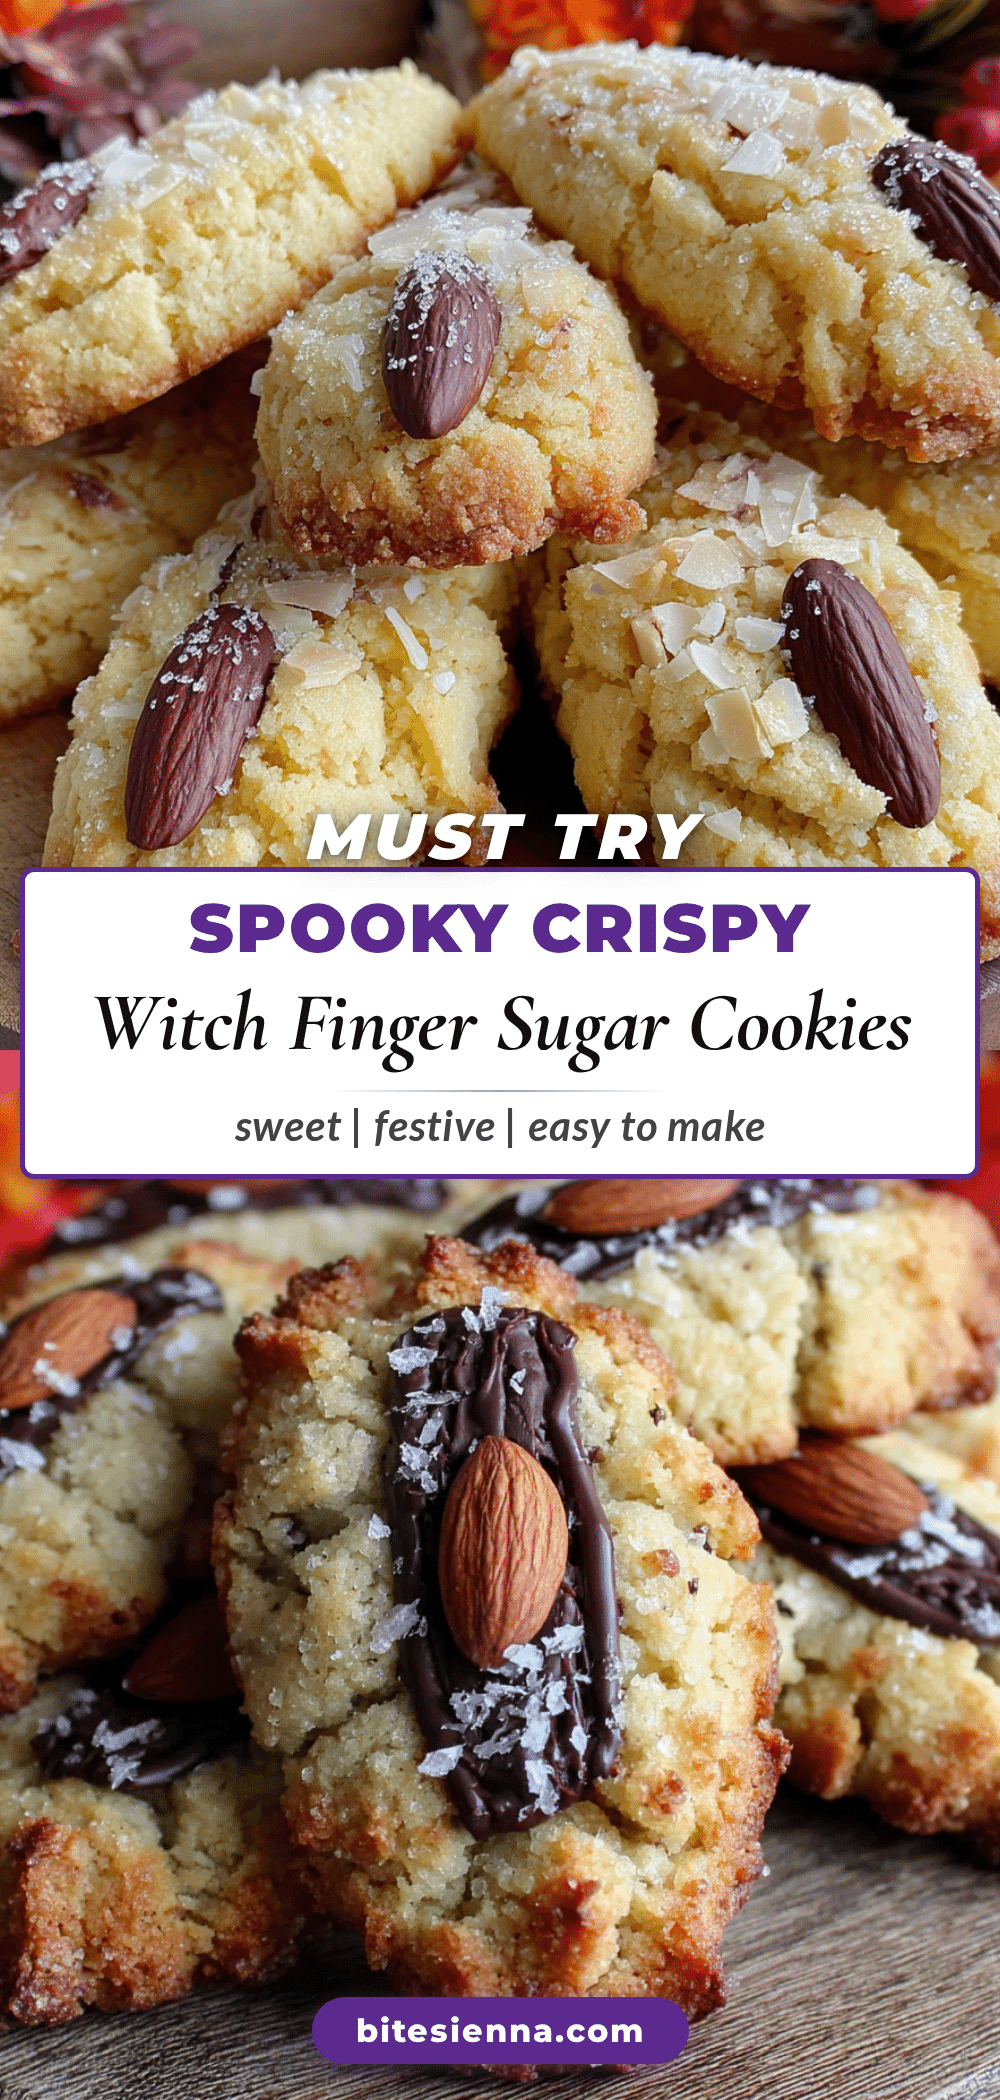
Spooky Crispy Witch Finger Sugar Cookies

A playful and spooky Halloween treat featuring crisp sugar cookies shaped like witch fingers with almond fingernails and icing blood. These cookies are easy to make, travel well, and are a crowd-pleaser for parties.
- Prep Time: 30 minutes
- Cook Time: 12 minutes
- Total Time: 45 minutes
- Yield: Approximately 24 cookies 1x
- Category: Dessert
- Cuisine: American
Ingredients
- 1 cup (2 sticks) unsalted butter, softened to room temperature
- 1 cup granulated sugar
- 1/2 cup powdered sugar
- 1 large egg, room temperature
- 1 teaspoon vanilla extract
- 3 cups all-purpose flour
- 1/2 teaspoon baking powder
- 1/2 teaspoon salt
- Whole blanched almonds (for fingernails)
- 1 cup icing sugar (powdered sugar)
- 1–2 tablespoons milk
- Red gel food coloring
Instructions
- Cream the softened butter, granulated sugar, and powdered sugar in a large bowl using an electric mixer on medium speed for 2-3 minutes until light and fluffy.
- Add the egg and vanilla extract. Mix on low speed until combined, then increase to medium and beat for another minute. Scrape down the sides of the bowl.
- In a separate bowl, whisk together the flour, baking powder, and salt. Pour dry ingredients into the wet mixture and mix on low speed until just combined. Do not overmix.
- Cover the dough with plastic wrap and refrigerate for at least 1 hour. Preheat oven to 350°F (175°C) and line baking sheets with parchment paper during this time.
- Roll portions of dough (about 1 tablespoon) into 3-inch cylinders, tapering one end. Press an almond into the wider end to create a fingernail. Place on baking sheets, leaving 2 inches between them.
- Bake for 10-12 minutes until pale gold. Let cool on the sheet for 5 minutes, then transfer to a wire rack to cool completely.
- Mix powdered sugar and milk to create a thick but pipeable icing. Divide icing; leave half white and add red food coloring to the other half.
- Pipe white icing along knuckle lines to mimic wrinkles. Let set briefly, then use red icing to add blood drips. Allow icing to dry completely.
Notes
Chilling the dough is crucial to prevent spreading and maintain the finger shape. Use gel food coloring for vibrant icing that doesn’t thin out the mixture. Cookies can be made ahead and frozen; bake from frozen adding 2 minutes to bake time.
Nutrition
- Serving Size: 1 cookie
- Calories: 150
- Sugar: 12
- Sodium: 100
- Fat: 6
- Saturated Fat: 3
- Carbohydrates: 22
- Protein: 2
Keywords: Halloween cookies, witch fingers, sugar cookies, spooky treats, easy baking, holiday desserts, almond cookies


