My neighbor, Carol, watched me wrestling with a batch of puff pastry that was stubbornly refusing to cooperate. It was a hot September afternoon, and my kitchen looked like a flour bomb had gone off. She didn’t say anything at first. Then, she just reached over, gently took the rolling pin from my hand, and said, “You’re fighting it. Let the dough rest for ten minutes, and have a glass of iced tea. I’ll show you a trick my grandmother used to do for Halloween parties.”
That afternoon, over sweet tea and the sound of a fan humming, she told me about her grandmother’s “severed finger” cheese straws. It wasn’t a formal recipe, just something she did to scare the neighborhood kids. Carol laughed, remembering how her own father would pretend to bite one off. The recipe itself was simple—a sharp cheddar pastry, rolled into thin logs, with a sliced almond for the fingernail. But the story, the shared laughter, and the memory of that spooky snack stuck with me. I’ve tweaked the dough over the years, adding a pinch of cayenne for warmth and a bit of paprika for that unnerving “bloody” color. Honestly, this version is the one that makes people at my Halloween party stop, stare, and then grab three. I mean, there’s just something about a cheese straw that looks like a finger that gets people talking. Maybe you’ve been there, looking for an appetizer that’s more conversation starter than canapé. This is it.
Why You’ll Love This Recipe
These aren’t just your average cheese straws. They are a full-on performance piece for your spooky spread. I’ve tested this dough more times than I care to admit—too dry, too sticky, not scary enough—until I landed on this foolproof version. It’s a crowd-pleaser that’s surprisingly easy to pull off, even when you’re juggling a dozen other party prep tasks.
- Quick & Easy : Comes together in under 45 minutes, with only 15 minutes of active prep. Perfect for last-minute Halloween party planning.
- Simple Ingredients : No fancy grocery trips needed. You likely have butter, flour, and cheese in your kitchen right now.
- Perfect for Halloween Parties : They look gruesome but taste amazing. The ultimate conversation starter that guests will actually eat.
- Crowd-Pleaser : Always gets rave reviews from both kids and adults. The savory, cheesy flavor is universally loved.
- Unbelievably Delicious : The texture is perfectly crisp and flaky, with a rich, sharp cheddar flavor that has a subtle kick from cayenne. It’s next-level comfort food disguised as a horror prop.
What makes these different from every other cheese straw recipe is the “severed finger” illusion. The key is using a sliced almond for the fingernail and a bit of paprika and ketchup for the “blood.” It’s a creative twist that turns a simple snack into a spooky spectacle. This isn’t just another version—it’s the one that will have your guests snapping photos before they take a bite. It’s the kind of appetizer that makes you feel like a rockstar host without the stress.
What Ingredients You Will Need
This recipe uses simple, pantry-friendly ingredients to deliver a bold, savory flavor and a crisp, flaky texture. The magic is in the combination of sharp cheddar and a touch of heat, which makes these straws so addictive.
- All-purpose flour (1 ½ cups, spooned and leveled): Provides the structure for the pastry. I prefer Gold Medal for its consistent results.
- Unsalted butter (½ cup, very cold and cut into small cubes): The key to flakiness. The cold butter creates steam pockets in the oven. Keep it as cold as possible.
- Sharp cheddar cheese (1 ½ cups, freshly grated): Use block cheese and grate it yourself. Pre-shredded cheese has anti-caking agents that prevent melting and make the dough greasy. I like Tillamook or Cabot for their sharp flavor.
- Ice water (3-4 tablespoons): Helps bind the dough without melting the butter. Add it one tablespoon at a time.
- Salt (½ teaspoon): Enhances all the flavors.
- Cayenne pepper (¼ teaspoon, or to taste): Adds a subtle warmth that cuts through the richness of the cheese. Don’t skip it—it’s the secret to the addictive quality.
- Paprika (½ teaspoon): Adds color and a smoky depth. I use smoked paprika for an extra layer of flavor.
- Sliced almonds (for the fingernails): You’ll need one per straw. Look for raw or blanched slices.
- Ketchup (for the “blood”): A small squib at the base of the almond creates the gruesome effect.
For the best texture, make sure your butter and cheese are very cold. If your kitchen is warm, pop the grated cheese in the freezer for 10 minutes before mixing. This is a non-negotiable tip I learned the hard way after making a sticky, unworkable mess on a hot day.
Equipment Needed
You don’t need a ton of fancy gear for this. Most of it is standard kitchen equipment.
- Food processor (or a pastry blender): A food processor makes the dough in seconds. If you don’t have one, a pastry blender or even two forks will work, but work quickly to keep the butter cold.
- Baking sheet (1 large, rimmed): Line it with parchment paper for easy cleanup.
- Parchment paper: Essential for preventing sticking and ensuring even baking.
- Sharp knife (or a bench scraper): For cutting the dough into finger-length pieces.
- Ruler (optional): For perfectly uniform straws, but I usually just eyeball it. The uneven lengths add to the creepy, realistic look.
- Small bowl: For the egg wash (one egg beaten with a tablespoon of water).
- Pastry brush: For applying the egg wash.
If you don’t have a food processor, you can make the dough by hand. Just make sure your butter is very cold and work it into the flour quickly until the mixture looks like coarse meal. Don’t overwork it, or the straws will be tough.
Preparation Method
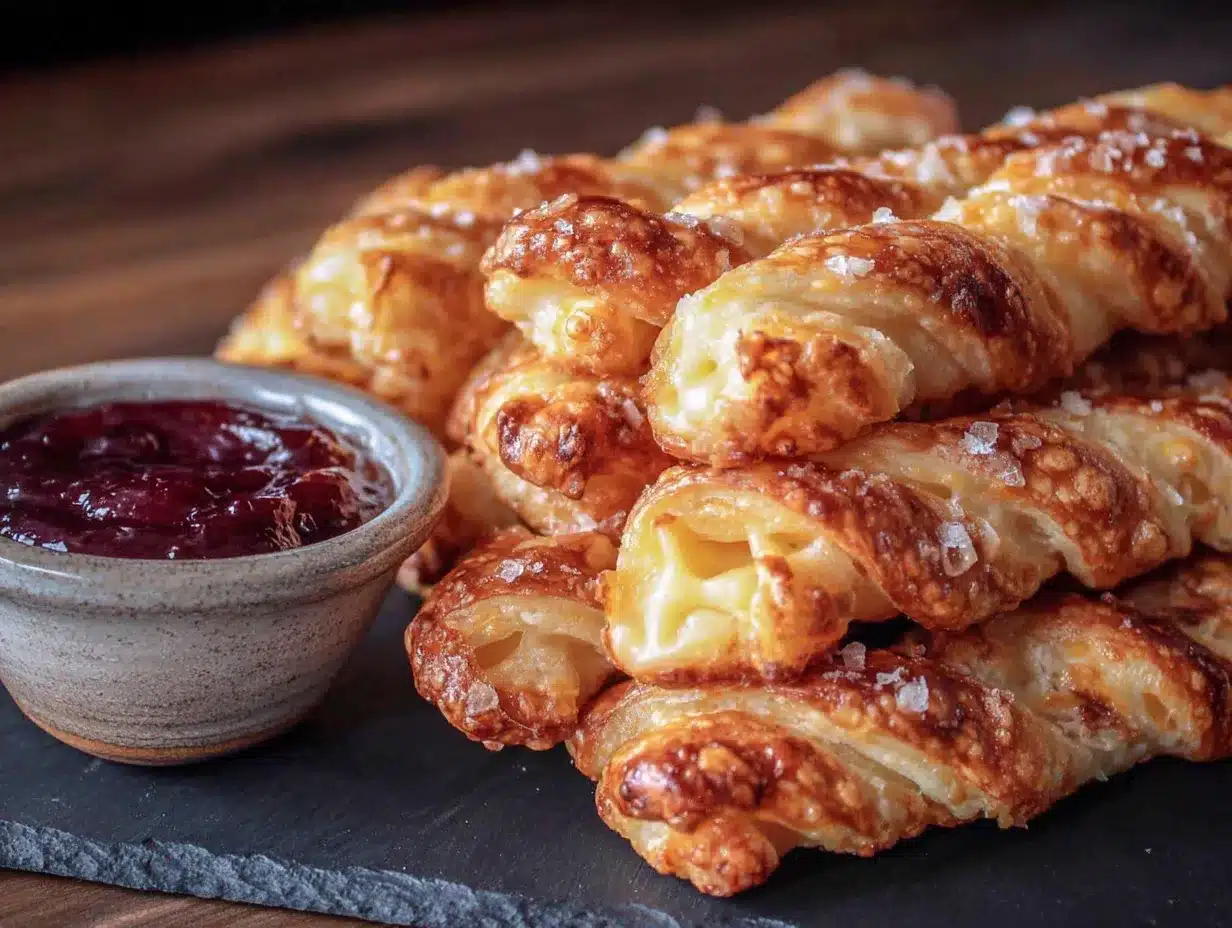
Let’s make some fingers. The process is straightforward, but there are a few tricks to make them look convincingly creepy.
- Make the dough: In a food processor, pulse together the flour, salt, cayenne, and paprika. Add the cold butter cubes and pulse until the mixture looks like coarse sand, about 10-12 pulses. Add the grated cheddar cheese and pulse 3-4 more times to combine. With the processor running, drizzle in the ice water, one tablespoon at a time, until the dough just holds together when pinched. It should not be sticky. (Time: 5 minutes)
- Chill the dough: Turn the dough out onto a lightly floured surface. Shape it into a disc, wrap it tightly in plastic wrap, and refrigerate for at least 30 minutes. This is crucial—it relaxes the gluten and re-chills the butter, ensuring flaky straws. (Time: 30 minutes)
- Preheat and prep: Preheat your oven to 375°F (190°C). Line a baking sheet with parchment paper.
- Roll and cut: On a lightly floured surface, roll the dough out into a rectangle about ¼-inch thick. Use a sharp knife or bench scraper to cut the dough into strips that are about ½-inch wide and 3-4 inches long. These are your “fingers.” Don’t worry if they aren’t perfectly straight—slight curves make them look more realistic. (Time: 5 minutes)
- Shape the fingers: Gently roll each strip between your palms to smooth out the edges and create a more finger-like shape. Pinch one end slightly to create a “knuckle” shape. Place the straws on the prepared baking sheet, leaving about 1 inch of space between them.
- Add the fingernails: Press a sliced almond onto the pinched end of each straw to create the fingernail. Press gently so it sticks. (Time: 5 minutes)
- Egg wash and score: In a small bowl, whisk the egg with a tablespoon of water. Brush the egg wash over each straw. Use the back of a knife to gently score 2-3 lines across the straw to create “knuckle” wrinkles. This is what sells the illusion.
- Bake: Bake for 12-15 minutes, or until the straws are golden brown and puffed. The cheese will be bubbly and the edges will be crisp. (Time: 12-15 minutes)
- Add the “blood”: Let the straws cool on the baking sheet for 5 minutes. While they are still warm, use a toothpick or the tip of a knife to dab a tiny bit of ketchup at the base of the almond “fingernail.” It will look like a bloody cuticle. (Time: 2 minutes)
- Cool completely: Transfer the straws to a wire rack to cool completely. They will crisp up as they cool. Serve at room temperature or warm.
Troubleshooting tip: If your dough is too sticky after adding water, don’t add more flour. Just wrap it and chill it longer—the cold will firm it up. If the straws spread too much during baking, your dough was likely too warm. Next time, chill the shaped straws on the baking sheet for 10 minutes before baking.
Cooking Tips & Techniques
I’ve made these a dozen times, and I’ve learned a few things the hard way. Here are my best tips for perfect, spooky cheese straws every time.
- Cold is your friend: The most important rule for flaky pastry is keeping everything cold. If at any point the dough feels sticky or soft, pop it back in the fridge for 10 minutes. I once tried to rush this step and ended up with flat, greasy straws. Not a good look for a severed finger.
- Don’t overwork the dough: Over-mixing develops gluten, which makes the straws tough. Pulse the food processor just until the ingredients come together. It’s better to have a few small butter chunks visible than a smooth, over-mixed dough.
- Freshly grate your cheese: I cannot stress this enough. Pre-shredded cheese is coated with cellulose and starch to prevent clumping. This interferes with melting, leading to a greasy, dense dough. Grating your own block cheese takes two minutes and makes a world of difference.
- Timing and multitasking: Make the dough the day before. It can chill in the fridge for up to 48 hours. Then, on party day, you just roll, cut, and bake. This makes hosting so much less stressful.
- The “blood” trick: Don’t add the ketchup before baking—it will just burn and look like a dark scab. Adding it after baking gives it that fresh, gruesome look. A tiny dab goes a long way.
Variations & Adaptations
These cheese straws are incredibly versatile. Here are a few ways to make them your own.
- Dietary: Gluten-Free Version: Substitute the all-purpose flour with a 1:1 gluten-free baking flour blend. I’ve used Bob’s Red Mill 1:1 with great success. The texture will be slightly more crumbly, but the flavor is still amazing.
- Flavor: Spicy Bloody Mary Straws: Add 1 teaspoon of horseradish, ½ teaspoon of celery salt, and a dash of hot sauce to the dough. The “blood” can be a mix of ketchup and a drop of hot sauce for an extra kick.
- Seasonal: Thanksgiving Leftover Straws: Swap the cheddar for a mix of sharp white cheddar and leftover turkey or ham, finely chopped. Use a pecan half instead of an almond for the fingernail. It’s a fun way to use up leftovers.
- Customization: “Witch’s Fingers”: Instead of almonds, use a small sliver of a green olive for the fingernail to give them a green, witchy hue. You can also add a drop of green food coloring to the dough.
Serving & Storage Suggestions
These are best served at room temperature or slightly warm. They are the star of any Halloween charcuterie board.
- Presentation: Arrange the “fingers” on a platter as if they are reaching up from the grave. You can use a small bowl of ranch or blue cheese dressing in the center as a “bloody” dipping sauce. I like to scatter a few extra sliced almonds around to look like broken fingernails.
- What to serve alongside: These pair perfectly with a bowl of spicy pumpkin soup, a platter of deviled eggs, or a bloody mary bar. For a full Halloween spread, serve them with my spiderweb dip and some mummy hot dogs.
- Storage: Store leftover cheese straws in an airtight container at room temperature for up to 3 days. Do not refrigerate them, as they will become soft and lose their crispness. The ketchup “blood” might bleed a bit, but that just adds to the creepy effect.
- Reheating: To re-crisp them, place them on a baking sheet in a 300°F (150°C) oven for 5 minutes. Do not microwave them—they will become chewy and sad.
- Flavor development: These actually taste better the next day. The flavors meld together, and the texture stays crisp if stored properly. It’s a great make-ahead appetizer.
Nutritional Information & Benefits
Let’s be honest—these are a treat, not a health food. But they are made with real ingredients, which is always a win.
- Estimated per serving (1 straw): Calories: 95, Fat: 7g, Carbs: 5g, Protein: 3g. (This is an estimate and will vary based on exact ingredients used.)
- Health benefits of key ingredients: Cheese is a good source of calcium and protein. Butter provides fat-soluble vitamins like A and D. Cayenne pepper contains capsaicin, which can boost metabolism.
- Dietary considerations: This recipe is naturally vegetarian. For a gluten-free version, see the variations section above. To make it lower in fat, you could try using a low-fat cheddar, but the texture will be less flaky.
- Potential allergens: Contains dairy (butter, cheese) and gluten (flour). The almond fingernails are a tree nut. You can omit the almond for a nut-free version, or use a small piece of bell pepper instead.
Conclusion
These Guest-Favorite Severed Finger Cheese Straws are more than just a spooky snack—they are a memory maker. They are the appetizer that gets people laughing, taking photos, and talking. The combination of a perfectly flaky, cheesy pastry with that gruesome, playful presentation is pure Halloween magic. I love making these because they remind me of Carol and that afternoon in my messy kitchen. It’s a recipe that came from a shared moment, and now it’s one I share with everyone.
I encourage you to make these your own. Add more cayenne for heat, use a different cheese, or get creative with the “blood.” The most important thing is to have fun with it. Your guests will absolutely love them. So go ahead, get a little weird, and make some fingers. When you do, come back and leave a comment below! Tell me how they turned out, or share your own spooky twist. I can’t wait to hear about it. Happy haunting, and happy snacking!
Frequently Asked Questions
Can I make these cheese straws ahead of time?
Absolutely! You can make the dough up to 48 hours in advance and keep it wrapped in the fridge. You can also bake them a day ahead and store them in an airtight container at room temperature. They actually taste better the next day.
Why did my cheese straws spread out and become flat?
This usually happens when the dough is too warm. Make sure your butter and cheese are very cold, and don’t skip the chilling step. If your kitchen is warm, chill the shaped straws on the baking sheet for 10 minutes before baking.
Can I freeze these severed finger cheese straws?
Yes! Freeze the unbaked, shaped straws on a baking sheet until solid, then transfer them to a freezer bag. Bake them directly from frozen, adding 2-3 minutes to the baking time. You can also freeze the baked straws for up to a month.
What else can I use for the fingernails besides almonds?
You can use a small sliver of a green olive, a piece of bell pepper, a sunflower seed, or even a tiny piece of a pretzel stick. For a truly gruesome look, you can use a small, blanched peanut.
Can I use a different type of cheese?
Yes! Sharp cheddar is classic, but you can use a mix of cheeses. Monterey Jack, Gruyère, or even a smoked gouda would work well. Just avoid using very soft cheeses like mozzarella, as they will make the dough greasy.
Pin This Recipe!
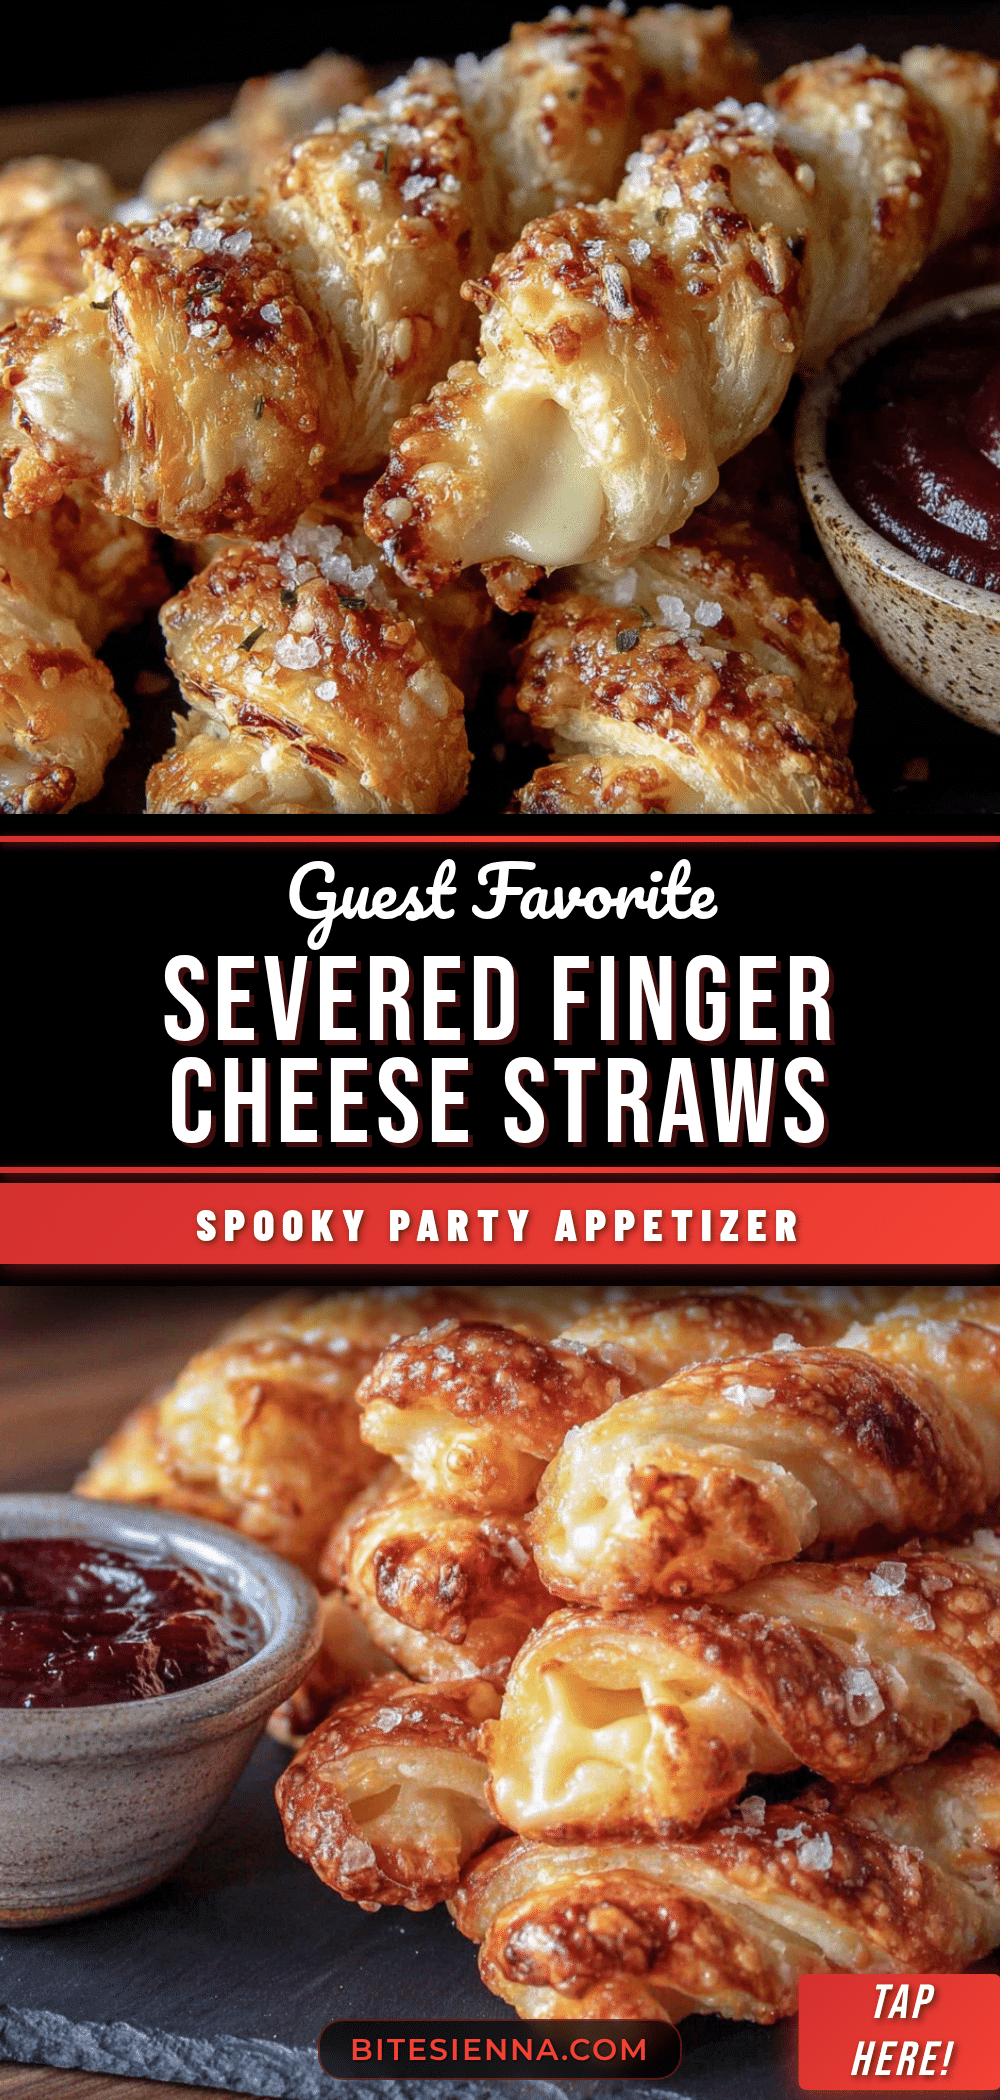
Spooky Severed Finger Cheese Straws: Best Halloween Appetizer
These aren’t just your average cheese straws. They are a full-on performance piece for your spooky spread. A crowd-pleaser that’s surprisingly easy to pull off, even when you’re juggling a dozen other party prep tasks.
- Prep Time: 15 minutes
- Cook Time: 15 minutes
- Total Time: 45 minutes
- Yield: 24 servings 1x
- Category: Appetizer
- Cuisine: American
Ingredients
- 1 ½ cups all-purpose flour, spooned and leveled
- ½ cup unsalted butter, very cold and cut into small cubes
- 1 ½ cups sharp cheddar cheese, freshly grated
- 3–4 tablespoons ice water
- ½ teaspoon salt
- ¼ teaspoon cayenne pepper (or to taste)
- ½ teaspoon paprika
- Sliced almonds (for the fingernails)
- Ketchup (for the ‘blood’)
Instructions
- Make the dough: In a food processor, pulse together the flour, salt, cayenne, and paprika. Add the cold butter cubes and pulse until the mixture looks like coarse sand, about 10-12 pulses. Add the grated cheddar cheese and pulse 3-4 more times to combine. With the processor running, drizzle in the ice water, one tablespoon at a time, until the dough just holds together when pinched. It should not be sticky. (Time: 5 minutes)
- Chill the dough: Turn the dough out onto a lightly floured surface. Shape it into a disc, wrap it tightly in plastic wrap, and refrigerate for at least 30 minutes. This is crucial—it relaxes the gluten and re-chills the butter, ensuring flaky straws. (Time: 30 minutes)
- Preheat and prep: Preheat your oven to 375°F (190°C). Line a baking sheet with parchment paper.
- Roll and cut: On a lightly floured surface, roll the dough out into a rectangle about ¼-inch thick. Use a sharp knife or bench scraper to cut the dough into strips that are about ½-inch wide and 3-4 inches long. These are your ‘fingers.’ Don’t worry if they aren’t perfectly straight—slight curves make them look more realistic. (Time: 5 minutes)
- Shape the fingers: Gently roll each strip between your palms to smooth out the edges and create a more finger-like shape. Pinch one end slightly to create a ‘knuckle’ shape. Place the straws on the prepared baking sheet, leaving about 1 inch of space between them.
- Add the fingernails: Press a sliced almond onto the pinched end of each straw to create the fingernail. Press gently so it sticks. (Time: 5 minutes)
- Egg wash and score: In a small bowl, whisk the egg with a tablespoon of water. Brush the egg wash over each straw. Use the back of a knife to gently score 2-3 lines across the straw to create ‘knuckle’ wrinkles. This is what sells the illusion.
- Bake: Bake for 12-15 minutes, or until the straws are golden brown and puffed. The cheese will be bubbly and the edges will be crisp. (Time: 12-15 minutes)
- Add the ‘blood’: Let the straws cool on the baking sheet for 5 minutes. While they are still warm, use a toothpick or the tip of a knife to dab a tiny bit of ketchup at the base of the almond ‘fingernail.’ It will look like a bloody cuticle. (Time: 2 minutes)
- Cool completely: Transfer the straws to a wire rack to cool completely. They will crisp up as they cool. Serve at room temperature or warm.
Notes
For the best texture, make sure your butter and cheese are very cold. If your kitchen is warm, pop the grated cheese in the freezer for 10 minutes before mixing. Don’t add the ketchup before baking—it will just burn and look like a dark scab. Adding it after baking gives it that fresh, gruesome look. A tiny dab goes a long way.
Nutrition
- Serving Size: 1 straw
- Calories: 95
- Sodium: 120
- Fat: 7
- Saturated Fat: 4
- Carbohydrates: 5
- Protein: 3
Keywords: Halloween appetizer, cheese straws, severed finger, spooky snack, party food, cheddar cheese straws, Halloween party


