The woman at the community garden plot next to mine watched me for a good ten minutes before she said anything. I was trying to wrestle a massive butternut squash off the vine, and honestly, I was losing. She just shook her head, walked over, and with one quick twist, snapped it right off. “You fight the food,” she said, laughing. “The food should not fight you.” Her name was Rosa, and she was in her seventies, growing more produce in her tiny patch than I thought possible. We got to talking, and I mentioned I had a bunch of overripe bananas at home that I was trying to use up. She nodded, wiped her hands on her apron, and said, “Bananas. Pumpkin. Chocolate. You mix them. Trust me.” That was it. No formal recipe, no measurements—just a wink and a wave as she headed back to her tomatoes.
I went home that afternoon, slightly muddy and very curious, and started experimenting. Rosa’s suggestion was simple, but the combination felt a little risky. Pumpkin and banana together? And chocolate chips? I mean, it sounded good, but would it actually work? I mashed the bananas, scooped out some pumpkin puree from a can I had stashed away, and started mixing. The batter looked promising—thick, speckled with dark chocolate, and smelling like fall in a bowl. I slid it into the oven and crossed my fingers. When I pulled it out, the kitchen smelled incredible. The first slice was warm, tender, and exactly what I didn’t know I needed. The banana kept it moist, the pumpkin added a gentle earthiness, and the chocolate chips melted into little pockets of sweetness. It was a happy accident that became a staple.
This Wholesome Chocolate Chip Pumpkin Banana Bread is that recipe. It’s the one I make when I have sad bananas on the counter and a can of pumpkin in the pantry. It’s the bread that makes you feel like you’re eating something indulgent, but you’re also getting a serving of fruit and veggie in there. Maybe you’ve been there—standing in your kitchen, wondering what to do with odds and ends, hoping for something that actually tastes good. This is that recipe. It’s forgiving, it’s flexible, and it’s genuinely delicious. I keep making it because it reminds me that the best recipes come from a shared moment and a little bit of faith.
Why You’ll Love This Recipe
This isn’t just another quick bread recipe. This is the one that solves the eternal question of what to bake when you want something that feels special but doesn’t require a trip to the store. I’ve tested this more times than I can count, tweaking the flour ratio, adjusting the sweetness, and playing with the spice blend until it was just right. Here’s why this version stands out and why I think you’ll come back to it again and again.
- Quick & Easy : Comes together in about 15 minutes of active prep time. No stand mixer needed, no complicated techniques. Just a bowl, a whisk, and a spatula.
- Simple Ingredients : You probably have most of these in your kitchen right now. Bananas, pumpkin puree, flour, eggs, chocolate chips—nothing fancy or hard to find.
- Perfect for Fall Mornings : This bread is ideal for a cozy breakfast, an afternoon snack with tea, or even a slightly healthier dessert option. It fits into everyday life without fuss.
- Crowd-Pleaser : I’ve brought this to brunches, potlucks, and family gatherings. It disappears fast. Kids love the chocolate chips, and adults appreciate the wholesome ingredients.
- Unbelievably Delicious : The texture is incredibly moist thanks to the bananas and pumpkin working together. The chocolate chips add just the right amount of sweetness without making it cloying. It’s comfort food that you can feel good about eating.
What makes this recipe different from the dozens of pumpkin banana breads out there? It’s the balance. The banana flavor is present but not overpowering, the pumpkin adds moisture and a subtle warmth, and the chocolate chips are distributed evenly so every bite gets a little something. I also use a mix of whole wheat and all-purpose flour to add a bit of fiber and nuttiness without making the bread dense. It’s a small tweak that makes a big difference. This isn’t just another version—it’s the one that hits the sweet spot between wholesome and indulgent.
Honestly, this recipe is the kind that makes you close your eyes after the first bite. It’s that moment where you realize you’ve made something that tastes like a hug. It’s comfort food reimagined—healthier, faster, but with the same soul-soothing satisfaction. Perfect for impressing guests without stress, or turning a simple Tuesday morning into something memorable. You deserve a slice of this.
What Ingredients You Will Need
This recipe uses simple, wholesome ingredients to deliver bold flavor and satisfying texture without the fuss. Most of these are pantry staples, which makes this bread an easy go-to when you need something quick. Here’s what you’ll need and a few notes on how to pick the best ones.
- Ripe Bananas (about 3 medium) : The riper, the better. Look for bananas with lots of brown spots—they’re sweeter and easier to mash. If your bananas aren’t quite ready, you can pop them in a 300°F oven for 10-15 minutes until the skins turn black. Let them cool before using.
- Pumpkin Puree (1 cup, 240g) : Use plain pumpkin puree, not pumpkin pie filling. I prefer Libby’s for its consistent texture, but any brand works. If you have fresh pumpkin, roast and puree it—just make sure to drain off any excess liquid.
- Eggs (2 large) : Room temperature eggs blend more smoothly into the batter. If you’re in a hurry, place them in a bowl of warm water for 5 minutes.
- Coconut Oil or Unsalted Butter (1/3 cup, 75g) : Melted and slightly cooled. Coconut oil adds a subtle flavor that pairs nicely with the pumpkin and banana. Butter gives a richer taste. Both work great.
- Brown Sugar (1/2 cup, 100g) : Packed. Brown sugar adds moisture and a deeper flavor than white sugar. You can use coconut sugar for a less refined option.
- Honey or Maple Syrup (1/4 cup, 60ml) : Adds natural sweetness and keeps the bread tender. Maple syrup gives a lovely fall flavor.
- Vanilla Extract (1 teaspoon) : Pure vanilla extract is best. It enhances all the other flavors.
- Whole Wheat Flour (1 cup, 120g) : Adds fiber and a slightly nutty taste. You can substitute with all-purpose flour if you prefer a lighter texture.
- All-Purpose Flour (1 cup, 120g) : Provides structure and ensures the bread isn’t too dense. The combination of whole wheat and all-purpose is the sweet spot.
- Baking Soda (1 teaspoon) : Helps the bread rise and stay fluffy.
- Baking Powder (1/2 teaspoon) : Adds extra lift.
- Salt (1/2 teaspoon) : Balances the sweetness and enhances flavors.
- Ground Cinnamon (1 teaspoon) : Warm and aromatic, cinnamon is a classic pairing with both pumpkin and banana.
- Ground Nutmeg (1/2 teaspoon) : Adds a subtle, spicy note. Freshly grated nutmeg is amazing if you have it.
- Ground Ginger (1/4 teaspoon) : A pinch of ginger adds a little warmth and complexity. Optional but recommended.
- Chocolate Chips (3/4 cup, 130g) : Use semi-sweet or dark chocolate chips for a balanced sweetness. I like Enjoy Life brand for dairy-free options. Reserve a tablespoon to sprinkle on top before baking.
For substitutions, you can use almond flour for a gluten-free option, but the texture will be denser. Swap Greek yogurt with dairy-free coconut yogurt if needed. If you’re avoiding refined sugar, use all coconut sugar and omit the brown sugar. The bread will be slightly less sweet but still delicious.
Equipment Needed
You don’t need a fancy kitchen to make this bread. Here’s what you’ll need and a few alternatives if you’re working with limited tools.
- 9×5-inch Loaf Pan : This is the standard size. If you only have an 8×4-inch pan, the bread will take a few minutes longer to bake. You can also use a 9-inch round cake pan and adjust the baking time.
- Mixing Bowls : One large bowl for the wet ingredients and one medium bowl for the dry ingredients. Any bowl will do.
- Whisk and Spatula : A whisk for the wet ingredients and a rubber spatula for folding everything together. A wooden spoon works too.
- Measuring Cups and Spoons : For accuracy. I prefer metal measuring cups for dry ingredients and glass ones for liquids.
- Parchment Paper : Lining the loaf pan makes removing the bread a breeze. If you don’t have parchment, grease the pan well with butter or oil.
- Cooling Rack : Essential for even cooling. If you don’t have one, let the bread cool in the pan for 10 minutes, then transfer it to a plate.
I’ve made this bread with a cheap hand-me-down loaf pan and a whisk that was slightly bent. It still turned out great. Don’t let the lack of fancy equipment stop you.
Preparation Method
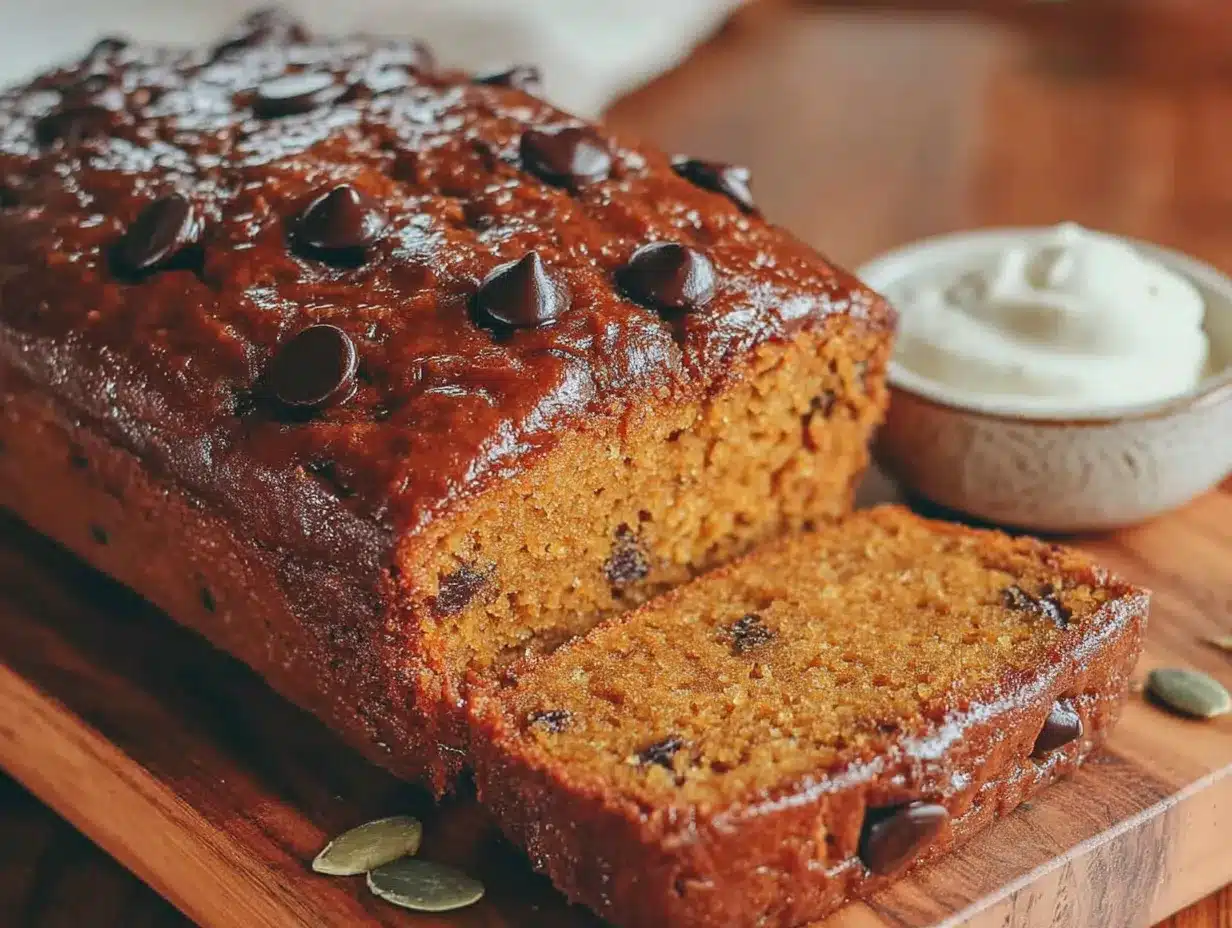
Let’s get baking. This method is straightforward, but I’ve included some tips and sensory cues to help you nail it every time.
- Preheat and Prep : Preheat your oven to 350°F (175°C). Line a 9×5-inch loaf pan with parchment paper, leaving some overhang on the long sides. This will help you lift the bread out later. Lightly grease the parchment with a little oil or butter.
- Mash the Bananas : In a large bowl, mash the ripe bananas with a fork until smooth. You want a few small lumps for texture, but mostly a puree. It should look like a thick, chunky paste. Measure out 1 cup (240g) of mashed banana. If you have extra, save it for smoothies.
- Mix the Wet Ingredients : To the mashed bananas, add the pumpkin puree, eggs, melted coconut oil (or butter), brown sugar, honey (or maple syrup), and vanilla extract. Whisk everything together until smooth and well combined. The batter will be a beautiful orange-brown color and smell amazing already.
- Combine the Dry Ingredients : In a separate medium bowl, whisk together the whole wheat flour, all-purpose flour, baking soda, baking powder, salt, cinnamon, nutmeg, and ginger. Whisking ensures the spices and leavening agents are evenly distributed. No one wants a pocket of baking soda in their slice.
- Fold the Batter : Pour the dry ingredients into the wet ingredients. Use a rubber spatula to fold gently until just combined. A few streaks of flour are okay. Do not overmix, or the bread will be tough. Overmixing develops gluten, which makes the bread dense and chewy instead of tender.
- Add the Chocolate Chips : Reserve about 1 tablespoon of chocolate chips for topping. Fold the remaining chocolate chips into the batter with a few quick strokes. The batter will be thick and slightly sticky.
- Bake : Pour the batter into the prepared loaf pan and spread it evenly. Sprinkle the reserved chocolate chips on top for a pretty finish. Bake for 55-65 minutes, or until a toothpick inserted into the center comes out clean or with a few moist crumbs. If the top is browning too quickly (after about 40 minutes), tent the pan loosely with aluminum foil.
- Cool : Let the bread cool in the pan on a wire rack for 15 minutes. Then, using the parchment overhang, lift the bread out and transfer it to the rack to cool completely. This step is important—cutting it while warm will result in crumbly slices. Patience, my friend.
A few troubleshooting tips: If your bread sinks in the middle, it might have been underbaked or the oven temperature was too low. Check your oven with a thermometer. If the edges are overdone but the center is still raw, your oven runs hot or the pan was too full. Adjust accordingly next time.
Cooking Tips & Techniques
I’ve made this bread more times than I can count, and I’ve learned a few things along the way. Here are some tips to ensure your loaf turns out perfect every time.
Don’t Overmix the Batter : This is the number one mistake. Mix until the flour is just incorporated. A few lumps are fine. Overmixing develops gluten, which leads to a tough, rubbery bread. You want tender, not tough.
Use Room Temperature Ingredients : Cold eggs or cold bananas can cause the batter to seize up, especially if you’re using coconut oil. Let everything sit out for 30 minutes before you start. It makes a noticeable difference in how smoothly the batter comes together.
Check for Doneness with a Thermometer : If you have an instant-read thermometer, the internal temperature of the bread should be around 200-205°F (93-96°C) when it’s done. This is more reliable than the toothpick test, especially for dense quick breads.
Toast the Spices : For a deeper flavor, toast the cinnamon, nutmeg, and ginger in a dry pan over medium heat for about 30 seconds until fragrant. Let them cool before adding to the flour. This is a small step that adds a lot of warmth.
Let It Rest Overnight : If you can resist, let the bread sit overnight wrapped in plastic wrap. The flavors meld together, and the texture becomes even more moist. I know it’s hard, but it’s worth it.
My Biggest Failure : I once forgot the baking soda. The bread came out flat and dense, like a sad brick. It was still edible, but not the fluffy loaf I wanted. Double-check your leavening agents before you start.
Variations & Adaptations
This recipe is a great base for experimentation. Here are some variations I’ve tried and loved.
- Gluten-Free Version : Substitute both flours with a 1:1 gluten-free baking blend that contains xanthan gum. I’ve used Bob’s Red Mill with good results. The texture will be slightly more crumbly, but still delicious.
- Vegan Version : Replace the eggs with flax eggs (2 tablespoons ground flaxseed mixed with 6 tablespoons water, let sit for 5 minutes). Use dairy-free chocolate chips and maple syrup instead of honey. The bread will be a bit denser but still moist.
- Nutty Twist : Fold in 1/2 cup of chopped walnuts or pecans along with the chocolate chips. The crunch adds a lovely contrast to the soft crumb.
- Spice It Up : Add 1/4 teaspoon of ground cloves or allspice for a more complex spice profile. It’s like a pumpkin pie in bread form.
- Lower Sugar Option : Reduce the brown sugar to 1/4 cup and omit the honey. The bananas and chocolate chips provide enough sweetness for a lightly sweet bread. Perfect for breakfast.
My personal favorite variation is adding a handful of dried cranberries along with the chocolate chips. The tartness cuts through the sweetness beautifully. It’s a little unexpected but works so well.
Serving & Storage Suggestions
This bread is versatile and can be enjoyed in many ways. Here’s how to serve and store it for the best experience.
Serving : Slice the bread when it’s completely cool. Serve at room temperature or lightly toasted. Toasting brings out the flavors and gives the edges a slight crunch. Spread a little butter, cream cheese, or almond butter on top for extra richness. It’s also wonderful with a dollop of Greek yogurt and a drizzle of honey.
Storage : Wrap the bread tightly in plastic wrap or aluminum foil and store at room temperature for up to 4 days. For longer storage, place it in an airtight container in the refrigerator for up to a week. The bread actually gets more moist after a day or two as the flavors meld.
Freezing : This bread freezes beautifully. Wrap the cooled loaf (or individual slices) tightly in plastic wrap, then in foil, and place in a freezer bag. Freeze for up to 3 months. To thaw, leave it at room temperature for a few hours or pop a slice in the toaster.
Reheating : For a warm slice, microwave for 15-20 seconds or toast in a toaster oven at 350°F for 5 minutes. The chocolate chips get melty again, and it’s pure comfort.
The flavors develop over time, so if you can wait a day, you’ll be rewarded with an even better loaf. I like to make two at once—one to eat now and one to freeze for later.
Nutritional Information & Benefits
This bread is a more wholesome take on traditional quick breads. Here’s a rough estimate per slice (based on 12 slices).
- Calories : 245
- Fat : 10g
- Carbohydrates : 36g
- Fiber : 3g
- Sugar : 18g
- Protein : 5g
These values will vary based on your specific ingredients and substitutions. The whole wheat flour adds fiber, which helps with digestion and keeps you full longer. Pumpkin is packed with vitamin A and antioxidants, while bananas provide potassium and natural sweetness. The chocolate chips, in moderation, offer a little mood-boosting treat.
This bread is a good option for those looking for a slightly healthier treat. It’s not sugar-free, but it’s lower in refined sugar than many store-bought options. If you’re watching your sugar intake, try the lower sugar variation. It’s also easily adaptable for gluten-free or vegan diets.
Conclusion
This Wholesome Chocolate Chip Pumpkin Banana Bread is more than just a recipe—it’s a solution to the “what do I bake with what I have” dilemma. It’s forgiving, adaptable, and genuinely delicious. Whether you’re a seasoned baker or someone who’s just starting out, this bread is hard to mess up. It’s the kind of recipe that makes you look good in the kitchen without any stress.
I encourage you to make it your own. Add more spices, swap the chocolate for nuts, or double the batch. The beauty of this bread is that it welcomes tweaks. And honestly, that’s what cooking is all about—making something that fits your taste and your pantry.
I love this recipe because it reminds me of Rosa and that moment in the garden. It’s a reminder that the best things come from simple suggestions and a willingness to try. So go ahead, mash those bananas, open that can of pumpkin, and bake yourself a loaf. You won’t regret it.
I’d love to hear how yours turns out. Did you add something unexpected? Did you make it for a special occasion? Drop a comment below and share your version. Happy baking!
Frequently Asked Questions
Can I use frozen bananas?
Yes! Thaw them completely and drain off any excess liquid before mashing. Frozen bananas can be more watery, so you might need to reduce the honey slightly.
Can I make this without chocolate chips?
Absolutely. You can omit the chocolate chips or substitute with dried fruit like raisins, cranberries, or chopped dates. The bread will be less sweet, so consider adding a tablespoon more honey if you like it sweeter.
Why did my bread sink in the middle?
This usually happens if the bread is underbaked or if the oven temperature is too low. Make sure your oven is properly preheated and use a thermometer to check the internal temperature. Also, don’t open the oven door too often during baking.
Can I use all whole wheat flour?
You can, but the bread will be denser and drier. I recommend using half whole wheat and half all-purpose for the best texture. If you use all whole wheat, add an extra 2 tablespoons of milk or yogurt to keep it moist.
How do I know when the bread is done?
Insert a toothpick into the center. If it comes out clean or with a few moist crumbs, it’s done. You can also use an instant-read thermometer—the internal temperature should be 200-205°F (93-96°C). The top should be golden brown and spring back when lightly pressed.
PrintWholesome Chocolate Chip Pumpkin Banana Bread
This moist and tender quick bread combines ripe bananas, pumpkin puree, and chocolate chips for a wholesome treat that feels indulgent but includes fruit and veggies. Perfect for fall mornings, snacks, or a healthier dessert.
- Prep Time: 15 minutes
- Cook Time: 55-65 minutes
- Total Time: 1 hour 10 minutes
- Yield: 12 servings 1x
- Category: Quick Bread
- Cuisine: American
Ingredients
- 3 medium ripe bananas (about 1 cup mashed)
- 1 cup (240g) pumpkin puree
- 2 large eggs, room temperature
- 1/3 cup (75g) coconut oil or unsalted butter, melted and slightly cooled
- 1/2 cup (100g) brown sugar, packed
- 1/4 cup (60ml) honey or maple syrup
- 1 teaspoon vanilla extract
- 1 cup (120g) whole wheat flour
- 1 cup (120g) all-purpose flour
- 1 teaspoon baking soda
- 1/2 teaspoon baking powder
- 1/2 teaspoon salt
- 1 teaspoon ground cinnamon
- 1/2 teaspoon ground nutmeg
- 1/4 teaspoon ground ginger (optional)
- 3/4 cup (130g) semi-sweet or dark chocolate chips, plus 1 tablespoon for topping
Instructions
- Preheat oven to 350°F (175°C). Line a 9×5-inch loaf pan with parchment paper, leaving overhang on the long sides. Lightly grease the parchment.
- In a large bowl, mash the ripe bananas with a fork until smooth with a few small lumps. Measure out 1 cup (240g) of mashed banana.
- To the mashed bananas, add pumpkin puree, eggs, melted coconut oil (or butter), brown sugar, honey (or maple syrup), and vanilla extract. Whisk until smooth and well combined.
- In a separate medium bowl, whisk together whole wheat flour, all-purpose flour, baking soda, baking powder, salt, cinnamon, nutmeg, and ginger.
- Pour the dry ingredients into the wet ingredients. Use a rubber spatula to fold gently until just combined. Do not overmix; a few streaks of flour are okay.
- Reserve 1 tablespoon of chocolate chips for topping. Fold the remaining chocolate chips into the batter with a few quick strokes.
- Pour the batter into the prepared loaf pan and spread evenly. Sprinkle the reserved chocolate chips on top.
- Bake for 55-65 minutes, or until a toothpick inserted into the center comes out clean or with a few moist crumbs. If the top browns too quickly (after about 40 minutes), tent loosely with aluminum foil.
- Let the bread cool in the pan on a wire rack for 15 minutes. Then, using the parchment overhang, lift the bread out and transfer to the rack to cool completely before slicing.
Notes
For best flavor, let the bread rest overnight wrapped in plastic wrap. To check doneness, internal temperature should be 200-205°F (93-96°C). If using frozen bananas, thaw completely and drain excess liquid. For a vegan version, replace eggs with flax eggs and use dairy-free chocolate chips.
Nutrition
- Serving Size: 1 slice
- Calories: 245
- Sugar: 18
- Sodium: 220
- Fat: 10
- Saturated Fat: 6
- Carbohydrates: 36
- Fiber: 3
- Protein: 5
Keywords: pumpkin banana bread, chocolate chip banana bread, healthy banana bread, fall baking, quick bread, easy bread recipe