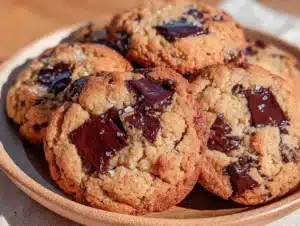
It wasn’t just about the cookie. It was about that specific corner table near the back, the one with the wobbly leg. I used to go there every Sunday morning with my laptop, trying to finish a project, while the owner, a man named Elias with flour always under his fingernails, would slide a warm skillet across the counter. He didn’t use a recipe. He used intuition. And that intuition created something I’ve never found anywhere else.
When the “For Lease” sign went up, I tried to buy the recipe. Elias just smiled and handed me a napkin with a few scribbled notes. “The secret isn’t the chocolate,” he said. “It’s the rest time.” I thought he was being cryptic. He wasn’t. I spent the next year testing dough hydration, pan sizes, and oven temperatures. I burned more butter than I care to admit. I even tried using a cast iron skillet, but it just got too heavy and hot.
Honestly, let me tell you, the breakthrough came on a rainy Tuesday. I was tired, frustrated, and almost gave up. I let the dough rest in the fridge for 24 hours instead of the recommended 4. When I baked it, the edges were crisp, but the center? It was impossibly gooey. Like, you-need-a-spoon-to-get-it-out-of-the-pan gooey. That’s when I realized Elias was right. The rest time changes the flour’s behavior. It absorbs the moisture differently. It creates that signature texture that makes you close your eyes.
I mean, you know that feeling when you’re chasing a memory that feels like it’s slipping away? That’s what this was. But now, I have it. I can make it in my own kitchen, on my own Tuesday nights. It’s not exactly Elias’s, but it’s close enough to make me smile. And if you’ve ever lost a favorite spot, you know how much that matters. This recipe stayed with me because it proved that some things are worth fighting for. Even if it’s just a cookie.
Why You’ll Love This Gooey Small-Batch Chocolate Chip Skillet Cookie
I’ve tested this recipe more times than I can count, and I’m confident it’s the best version you’ll ever make. This isn’t just another cookie; it’s a culinary experiment that paid off. Here is why this recipe stands out from the crowd:
- Quick & Easy: Yes, the dough needs rest time, but the actual prep and bake time is under 30 minutes. It’s perfect for those nights when you want something special but don’t want to spend hours in the kitchen.
- Simple Ingredients: You likely have everything in your pantry. Flour, sugar, butter, eggs, and chocolate chips. No fancy flours or obscure spices. Just good, honest ingredients.
- Perfect for Date Night: This is intimate food. Share it with one person, or enjoy it alone with a glass of milk. It’s cozy, warm, and satisfying.
- Crowd-Pleaser: Kids love the gooey center. Adults love the crisp edges. Everyone wins. It’s the ultimate compromise dessert.
- Unbelievably Delicious: The texture is next-level. It’s chewy, crunchy, and melty all at once. It’s comfort food reimagined for one or two people.
What makes this different? It’s the small-batch nature. Most recipes make a dozen cookies. This makes one giant, shareable cookie. It’s efficient. It’s less waste. And the single skillet format means you get that perfect contrast of textures in every bite. It’s not just good; it’s the kind of dessert that makes you forget what you were doing five minutes ago. It’s pure joy.
What Ingredients You Will Need
This recipe relies on simple, wholesome ingredients to deliver bold flavor and satisfying texture. You don’t need anything fancy, but quality matters. Here is what you need to get started:
- Unsalted Butter: 1/2 cup (113g), softened. I recommend using high-quality European-style butter for richer flavor. It adds a nutty depth that regular butter can’t match.
- Granulated Sugar: 1/4 cup (50g). This helps create the crisp edges. Don’t skip it.
- Brown Sugar: 1/4 cup (50g), packed. This is the key to the gooey center. Use dark brown sugar for a deeper molasses flavor.
- Egg Yolk: 1 large egg yolk. We use just the yolk for extra richness and chewiness. The white can make it cakey.
- Vanilla Extract: 1 teaspoon. Use real vanilla, not imitation. It makes a huge difference in the aroma.
- All-Purpose Flour: 3/4 cup (95g). Don’t use cake flour; you need structure.
- Baking Soda: 1/4 teaspoon. Just a pinch to help it spread slightly.
- Salt: 1/4 teaspoon. Flaky sea salt for topping is optional but recommended for that gourmet touch.
- Chocolate Chips: 1/2 cup (85g). I use semi-sweet chocolate chunks, but chips work too. Chunks give you better distribution.
For the best results, let your butter soften at room temperature for about an hour. If you’re in a hurry, you can microwave it in 5-second bursts, but be careful not to melt it. Also, if you can’t find flaky sea salt, regular kosher salt works fine. The key is to have your ingredients measured accurately. Baking is science, after all.
How do I substitute the egg yolk?
If you’re allergic to eggs or just don’t have a yolk, you can use a flax egg (1 tablespoon ground flaxseed mixed with 3 tablespoons water). However, the texture will be slightly less chewy. It’s still delicious, just different.
Can I use dark chocolate instead of chips?
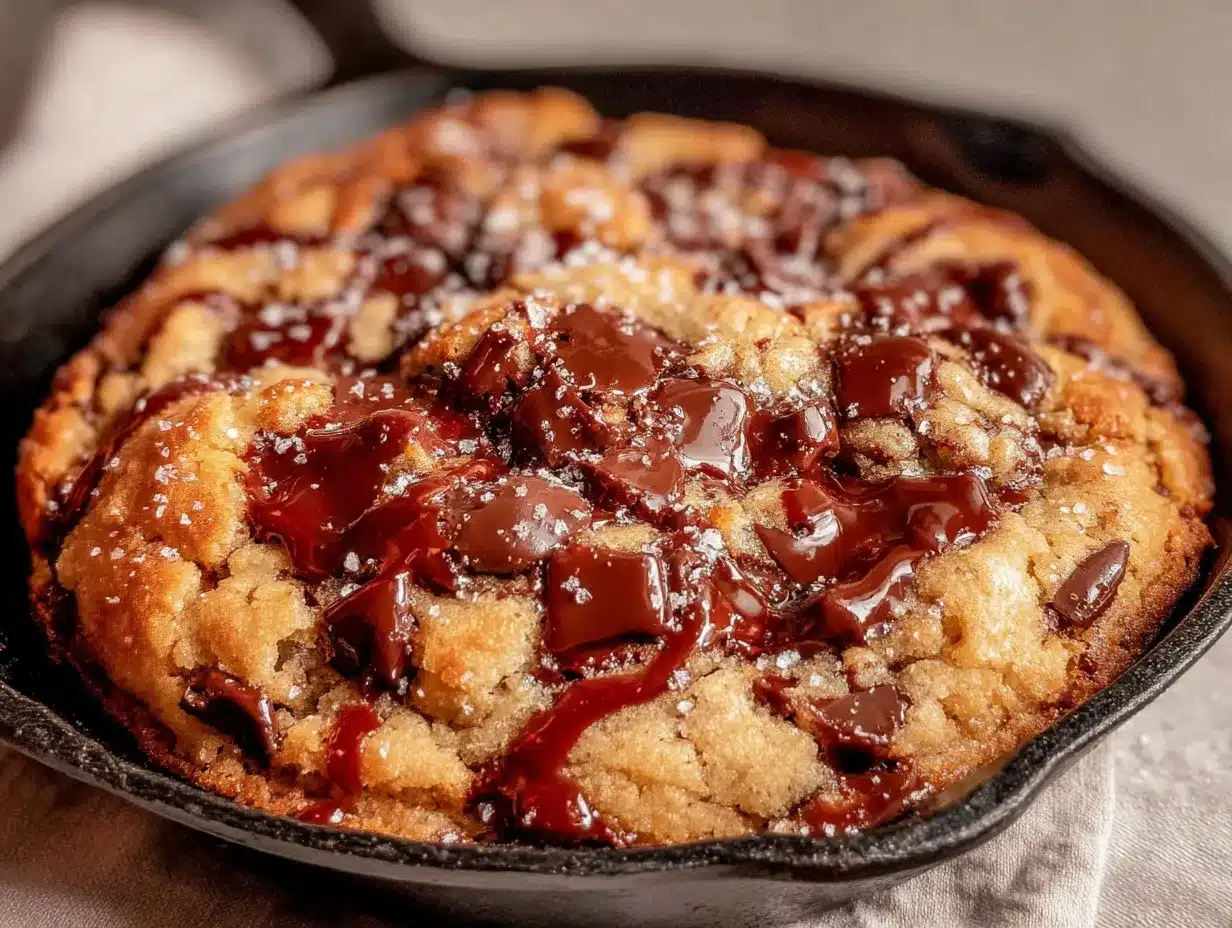
Absolutely. Chopped dark chocolate bars give you a more intense chocolate flavor and a more rustic look. I prefer chopped chocolate because you get pools of melted chocolate in every bite.
Equipment Needed
You don’t need a lot of fancy gear for this recipe. In fact, simplicity is key. Here is what you’ll need:
- 6-8 Inch Skillet: A small cast iron skillet is ideal, but a ceramic or stainless steel skillet works too. Cast iron holds heat well, giving you those crispy edges. If you don’t have a skillet, a small oven-safe bowl works.
- Mixing Bowl: A medium-sized bowl for creaming the butter and sugars.
- Fork or Hand Mixer: For mixing the dough. A fork is fine, but a hand mixer makes it easier.
- Measuring Cups and Spoons: Accuracy is important in baking.
- Parchment Paper: Optional, but helpful for easy cleanup if you’re using a non-stick skillet.
I’ve used both cast iron and ceramic skillets. Cast iron gives a better sear, but ceramic is easier to clean. If you’re using a non-stick skillet, be careful not to overheat it, as the coating can degrade. Also, make sure your skillet is oven-safe. Some handles have plastic covers that will melt.
Preparation Method
- Preheat the Oven: Preheat your oven to 350°F (175°C). If you’re using a cast iron skillet, you can put it in the oven while it preheats to get it hot. This helps with the crisp edges. (Time: 5 minutes)
- Cream the Butter and Sugars: In a mixing bowl, combine the softened butter, granulated sugar, and brown sugar. Mix until light and fluffy. This takes about 2-3 minutes. If using a hand mixer, use medium speed. If using a fork, just mix vigorously. The mixture should look pale and creamy. (Time: 3 minutes)
- Add the Egg Yolk and Vanilla: Add the egg yolk and vanilla extract to the butter mixture. Mix until combined. The mixture might look slightly curdled; that’s okay. It will come together when you add the flour. (Time: 1 minute)
- Combine Dry Ingredients: In a separate small bowl, whisk together the flour, baking soda, and salt. Then, gently fold the dry ingredients into the wet mixture. Mix until just combined. Do not overmix, or the cookie will be tough. It should come together in a shaggy dough. (Time: 2 minutes)
- Fold in Chocolate: Add the chocolate chips or chunks to the dough. Fold them in until evenly distributed. If the dough feels too sticky, chill it in the fridge for 10 minutes. (Time: 1 minute)
- Press into Skillet: If you preheated your skillet, remove it carefully from the oven (use oven mitts!). Place the dough into the skillet and press it down evenly with your hands or a spatula. It should cover the bottom completely. (Time: 1 minute)
- Bake: Place the skillet back in the oven. Bake for 12-15 minutes, or until the edges are golden brown and the center is still soft and puffy. The center will look slightly underbaked; this is intentional. It will continue to cook from residual heat. (Time: 12-15 minutes)
- Cool and Serve: Remove the skillet from the oven and let it cool for 5 minutes. Sprinkle with flaky sea salt if desired. Serve warm with a scoop of vanilla ice cream or just a spoon. (Time: 5 minutes)
Personal tip: Don’t be afraid to underbake it slightly. The residual heat in the skillet will finish cooking the center. If you bake it until the center is firm, it won’t be gooey. Trust the process.
Why does my dough stick to my hands?
If the dough is too sticky, it might be because your butter was too soft or your flour measurement was off. Try chilling the dough for 10 minutes before pressing it into the skillet. This firms up the butter and makes it easier to handle.
How do I know when it’s done?
The edges should be set and golden brown. The center should still look soft and slightly jiggly. It will firm up as it cools. If you’re unsure, check it at 12 minutes. It’s better to underbake than overbake for this recipe.
Cooking Tips & Techniques
Here are some pro tips to ensure your gooey small-batch chocolate chip skillet cookie turns out perfectly every time:
- Room Temperature Ingredients: Make sure your butter is softened but not melted. If it’s melted, the cookie will spread too much. If it’s too cold, it won’t cream properly.
- Don’t Overmix: Once you add the flour, mix until just combined. Overmixing develops gluten, which makes the cookie tough. You want a tender, chewy texture.
- Use a Heavy Skillet: A heavy skillet distributes heat evenly, preventing hot spots that can burn the cookie. Cast iron is great, but a thick stainless steel skillet works too.
- Let It Rest: If you have time, let the dough rest in the fridge for 24 hours. This develops the flavor and improves the texture. It’s worth the wait.
- Watch the Oven: Ovens vary. Check your cookie a few minutes before the recommended time. If the edges are browning too fast, cover the top with foil.
I learned these tips the hard way. My first few attempts were either too cakey or too burnt. It took some trial and error to get it just right. But now, I’m confident in this method. It’s simple, but it requires attention to detail.
Can I use a different type of sugar?
You can use coconut sugar or maple syrup, but the texture will be different. Granulated and brown sugar create the right balance of crisp and chewy. If you substitute, keep an eye on the baking time, as liquid sweeteners can change the moisture content.
What if I don’t have a skillet?
You can bake this in a small oven-safe bowl or even a muffin tin (make one large muffin). The baking time might be slightly shorter, so check it early.
Variations & Adaptations
While the classic chocolate chip version is my favorite, here are some fun variations to try:
- Peanut Butter Chocolate: Swirl 2 tablespoons of peanut butter into the dough before baking. Add a drizzle of chocolate on top after baking.
- Matcha White Chocolate: Add 1 teaspoon of matcha powder to the flour. Use white chocolate chips instead of semi-sweet. It’s a beautiful green and white contrast.
- Churro Skillet Cookie: Add 1 teaspoon of cinnamon to the dough. After baking, roll the edges in cinnamon sugar. Serve with a side of dulce de leche for dipping.
- Vegan Version: Use vegan butter and a flax egg. Use dairy-free chocolate chips. The texture will be slightly less chewy, but still delicious.
I’ve tried the peanut butter version, and it’s amazing. The saltiness of the peanut butter complements the sweetness of the chocolate perfectly. It’s a new favorite for me. Try it and let me know what you think.
Can I make this gluten-free?
Yes, use a 1:1 gluten-free flour blend. Make sure it contains xanthan gum, or add 1/4 teaspoon to help with structure. The texture might be slightly more crumbly, but it’s still great.
How do I make it nut-free?
Simply avoid adding nuts. The base recipe is naturally nut-free. Just ensure your chocolate chips are made in a nut-free facility if you have severe allergies.
Serving & Storage Suggestions
This cookie is best served warm, straight from the skillet. It’s messy, but that’s part of the fun. Here are some serving ideas:
- With Ice Cream: A scoop of vanilla bean ice cream is classic. The cold ice cream contrasts with the warm cookie.
- With Coffee: Pair it with a strong cup of coffee or hot chocolate. It’s a perfect afternoon treat.
- With Whipped Cream: Top it with a dollop of homemade whipped cream for a lighter touch.
Storage: Store leftovers in an airtight container at room temperature for up to 2 days. You can also refrigerate it for up to 5 days. To reheat, microwave a slice for 10-15 seconds to warm it up. The cookie will firm up in the fridge, so reheating is essential.
Freezing: You can freeze the unbaked dough in the skillet. Wrap it tightly in plastic wrap and foil. Bake from frozen, adding 2-3 minutes to the baking time. This is great for meal prep.
Does the cookie stay gooey in the fridge?
It firms up a bit in the fridge, but reheating it restores the gooey texture. If you don’t reheat it, it will be more like a bar cookie. I recommend reheating for the best experience.
Can I double the recipe?
This recipe is designed for one or two people. If you want to double it, use a 9-inch skillet. The baking time will be slightly longer, so check it at 15 minutes.
Nutritional Information & Benefits
Here is the estimated nutritional information for one serving (half the cookie):
- Calories: 450 kcal
- Carbohydrates: 60g
- Protein: 5g
- Fat: 22g
- Fiber: 2g
- Sugar: 40g
This cookie is high in sugar and fat, so enjoy it in moderation. However, it’s a treat worth having. The chocolate provides some antioxidants, and the butter adds flavor. It’s a balance of indulgence and enjoyment. For those with dietary restrictions, the vegan and gluten-free options are available, but the nutritional profile will vary.
I always try to balance my treats with a healthy meal before or after. This cookie is a special occasion dessert, not a daily snack. Enjoy it mindfully.
Is this recipe healthy?
It’s not a health food, but it’s a balanced treat. It has some protein from the egg and butter. The key is portion control. One or two slices is plenty.
Can I use honey instead of sugar?
You can, but it will change the texture. Honey adds moisture, so you might need to reduce the butter slightly. It’s a good option for a slightly less refined sugar version.
Conclusion
This gooey small-batch chocolate chip skillet cookie is more than just a dessert. It’s a memory, a project, and a joy. It’s perfect for those moments when you want something special but don’t want to make a whole batch of cookies. It’s easy, delicious, and deeply satisfying.
I hope you try this recipe and enjoy it as much as I do. Feel free to customize it with your favorite add-ins. Make it your own. And if you do, I’d love to hear about it. Leave a comment below with your variations or just tell me how much you loved it. Share it with your friends, or enjoy it all to yourself. Either way, it’s a win.
Happy baking!
Frequently Asked Questions
Can I use a microwave to soften the butter quickly?
Yes, but be very careful. Microwave in 5-second bursts and check after each one. You want it softened, not melted. Melted butter will make the cookie spread too much and lose its chewy texture.
Why is my cookie too cakey?
This usually happens if you overmix the dough or use too much flour. Make sure you’re measuring the flour correctly (spoon and level, don’t scoop). Also, ensure you’re not overbaking it. The center should look slightly underbaked.
Can I make this ahead of time?
Yes, you can mix the dough and store it in the fridge for up to 24 hours. This actually improves the flavor. Just let it come to room temperature before baking for even cooking.
What size skillet should I use?
A 6-8 inch skillet is ideal. If you use a larger skillet, the cookie will be thinner and might burn. If you use a smaller skillet, it might overflow. Adjust the baking time if your skillet size varies.
Is there a way to make this recipe lower in sugar?
You can reduce the sugar by 10-15%, but it will affect the texture and browning. The sugar helps create the crisp edges and gooey center. If you reduce it, the cookie will be softer and less flavorful. Use a sugar substitute designed for baking, but note that it may change the texture.
Pin This Recipe!
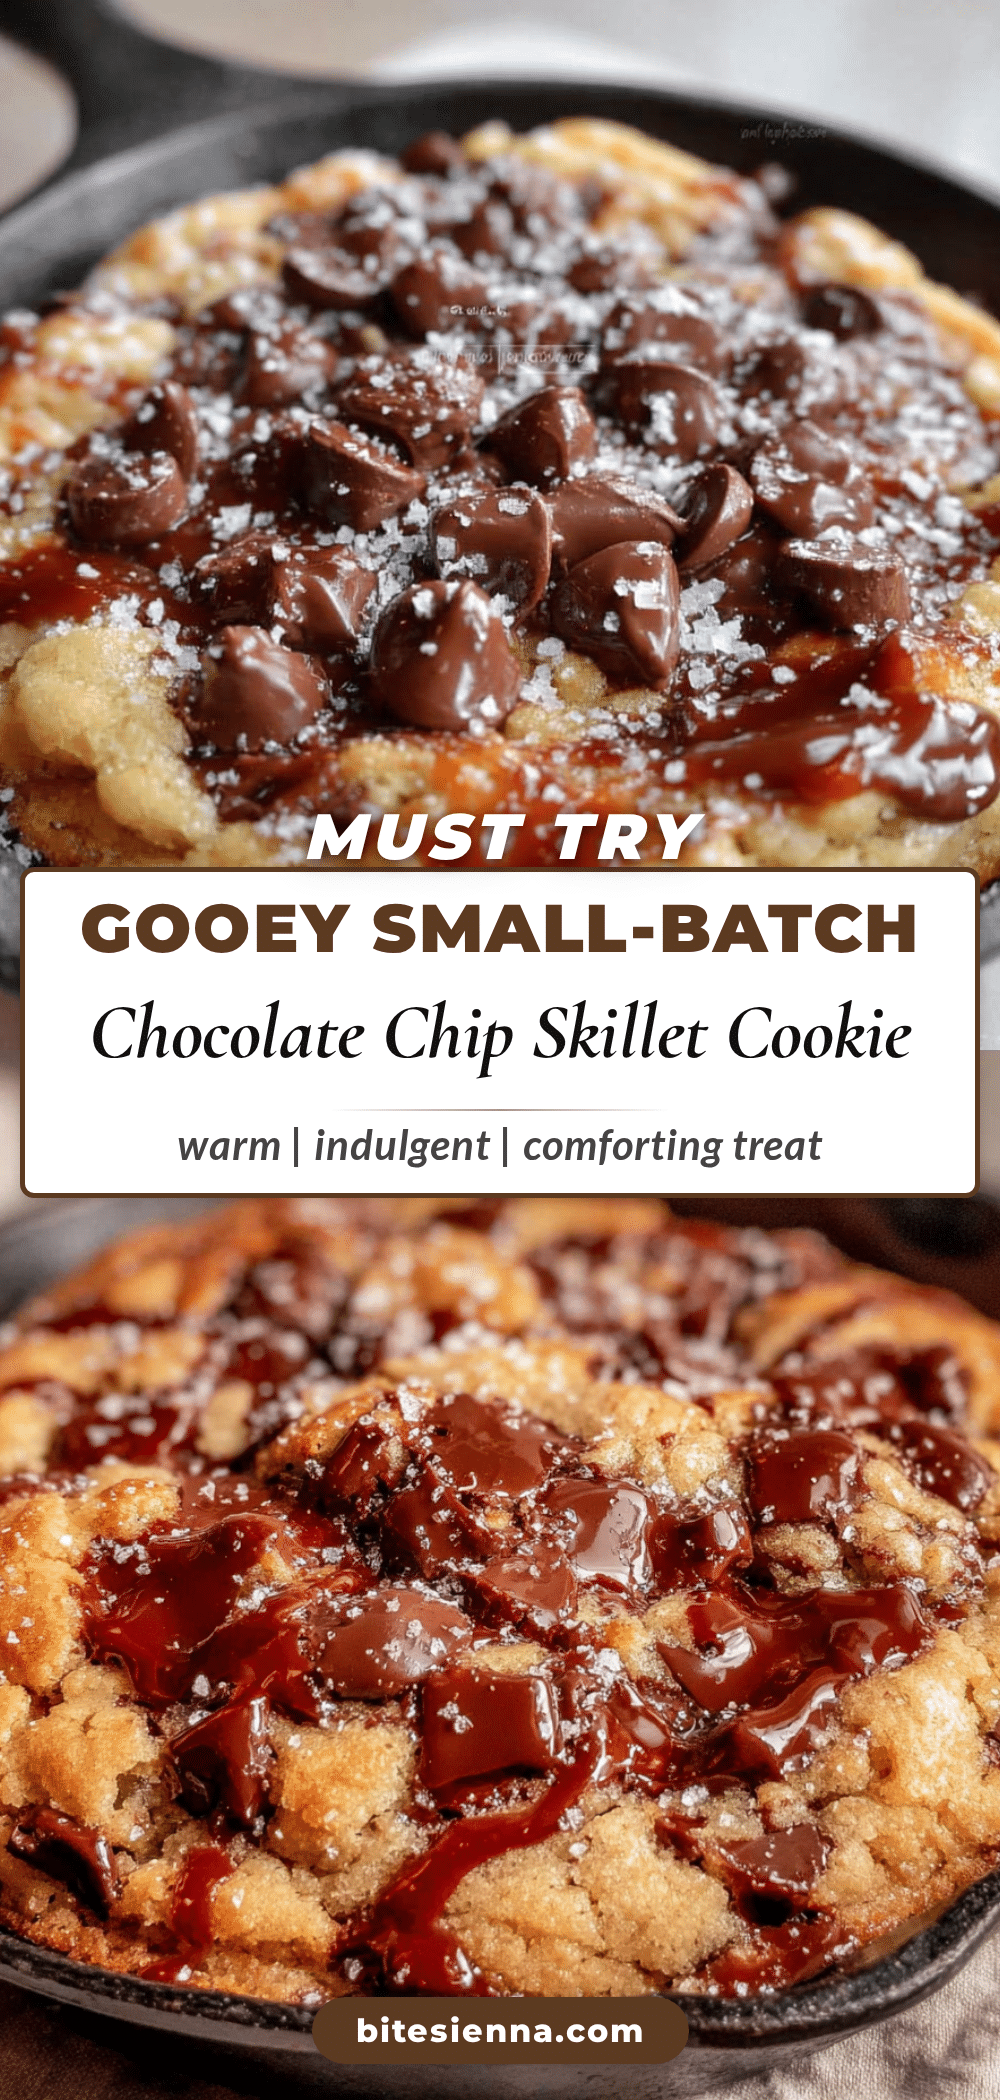
Gooey Small-Batch Chocolate Chip Skillet Cookie

A rich, gooey, single-serving chocolate chip cookie baked in a skillet with crisp edges and a soft, melty center. This small-batch recipe is perfect for date night or a cozy night in.
- Prep Time: 15 minutes
- Cook Time: 15 minutes
- Total Time: 30 minutes
- Yield: 2 servings 1x
- Category: Dessert
- Cuisine: American
Ingredients
- 1/2 cup (113g) unsalted butter, softened
- 1/4 cup (50g) granulated sugar
- 1/4 cup (50g) packed brown sugar (dark recommended)
- 1 large egg yolk
- 1 teaspoon vanilla extract
- 3/4 cup (95g) all-purpose flour
- 1/4 teaspoon baking soda
- 1/4 teaspoon salt
- 1/2 cup (85g) semi-sweet chocolate chips or chunks
- Flaky sea salt for topping (optional)
Instructions
- Preheat oven to 350°F (175°C). If using cast iron, place skillet in oven to preheat.
- In a mixing bowl, cream softened butter, granulated sugar, and brown sugar until light and fluffy (2-3 minutes).
- Mix in egg yolk and vanilla extract until combined.
- In a separate bowl, whisk flour, baking soda, and salt. Gently fold dry ingredients into wet mixture until just combined.
- Fold in chocolate chips. If dough is sticky, chill for 10 minutes.
- Press dough evenly into the skillet (remove from oven if preheated).
- Bake for 12-15 minutes until edges are golden brown and center is still soft.
- Cool for 5 minutes. Sprinkle with flaky sea salt if desired. Serve warm.
Notes
The secret to the gooey texture is the rest time; letting the dough rest in the fridge for up to 24 hours improves flavor and texture. Do not overbake; the center should look slightly underbaked as it will firm up while cooling. For gluten-free, use a 1:1 gluten-free flour blend. For vegan, use vegan butter and a flax egg.
Nutrition
- Serving Size: Half the cookie
- Calories: 450
- Sugar: 40
- Sodium: 200
- Fat: 22
- Saturated Fat: 13
- Carbohydrates: 60
- Fiber: 2
- Protein: 5
Keywords: chocolate chip cookie, skillet cookie, small batch dessert, gooey cookie, easy dessert, date night dessert, single serving cookie